The first time I baked these heart-shaped red velvet crinkle cookies, the kitchen was filled with this warm, chocolaty aroma that instantly reminded me of cozy Valentine’s days past. Honestly, there’s something magical about the way these cookies crackle on the surface, revealing a soft, fudgy center that practically melts in your mouth. I stumbled upon this recipe during a Valentine’s baking marathon, and it quickly became my go-to treat when I want to impress without stressing out.
What makes these red velvet crinkle cookies stand out is not just the vibrant color or the cute shape — it’s the perfect balance between a tender, rich crumb and that irresistible powdered sugar coating that gives them a festive, snowy look. I’ve made these dozens of times now, tweaking the recipe here and there, and every batch turns out wonderfully. If you’re looking for a Valentine’s dessert that’s both charming and delicious, this recipe is right up your alley.
Whether you’re baking for a loved one, a classroom party, or just treating yourself because, well, you deserve it — these heart-shaped red velvet crinkle cookies are a winner. They bring that classic red velvet flavor with a fun twist, and the crinkle effect makes them look like you spent hours in the kitchen (even if you didn’t). Plus, they’re simple enough for bakers of all levels. Let’s get to making your next favorite Valentine’s treat!
Why You’ll Love This Recipe
- Quick & Easy: Ready in under 30 minutes of active prep — perfect for those last-minute baking urges.
- Simple Ingredients: No fancy or hard-to-find items here. Most are pantry staples you probably have on hand.
- Perfect for Valentine’s Day: The heart shape and vibrant red color scream love and celebration, making it ideal for gift-giving or parties.
- Crowd-Pleaser: Kids, adults, picky eaters — everyone asks for seconds.
- Unbelievably Delicious: The tender, fudgy texture combined with a slight crisp on the edges is straight-up comfort food.
What makes this recipe different is the way the dough is chilled before baking, which helps the cookies keep their heart shape while still cracking beautifully. I also love using a bit of cream cheese in the batter — it adds a subtle tang that makes the flavor pop without overpowering the classic red velvet taste. Plus, coating the dough balls in powdered sugar before baking creates that iconic crinkle look that makes these cookies so irresistible.
Honestly, this isn’t just another cookie recipe. It’s the kind you want to bake on repeat because it’s both festive and fuss-free. I often bake these right before Valentine’s Day and share them with neighbors and friends — they’re a small but meaningful way to spread a little joy.
What Ingredients You Will Need
This recipe uses straightforward ingredients to create a cookie that’s rich, tender, and visually stunning. Many are pantry staples, so you likely have most on hand already.
- All-purpose flour – 2 ½ cups (315g), for structure and that perfect cookie crumb.
- Cocoa powder – 2 tablespoons unsweetened (about 15g), to bring out the classic red velvet chocolate note.
- Baking powder – 1 teaspoon, for a gentle lift.
- Salt – ½ teaspoon, to balance sweetness and enhance flavor.
- Unsalted butter – ¾ cup (170g), softened (room temperature is best for easy mixing).
- Sugar – 1 ½ cups (300g) granulated, for sweetness and that slight crisp edge.
- Large eggs – 2, room temperature helps with smooth blending.
- Vanilla extract – 1 teaspoon, because vanilla just makes everything better.
- Red food coloring – 2 tablespoons (gel works best for vibrant color without thinning dough).
- Cream cheese – 2 tablespoons, softened (adds moisture and a subtle tang that’s pure magic).
- Powdered sugar – about 1 cup (120g), for rolling to get that signature crinkle effect.
If you want to make this gluten-free, I recommend using a 1:1 gluten-free baking flour blend with xanthan gum included. For a dairy-free twist, swap butter with a plant-based alternative and use coconut yogurt instead of cream cheese — I’ve tried this and it works surprisingly well!
Equipment Needed
- Mixing bowls: One large for dry ingredients, another for wet — makes the process smoother.
- Electric mixer or stand mixer: Helpful to cream butter and sugar thoroughly, but you can also do it by hand if you’re up for an arm workout.
- Measuring cups and spoons: Accuracy here is key for cookie success.
- Baking sheet: A rimmed cookie sheet works best to catch any drips or spreading.
- Parchment paper or silicone baking mat: Prevents sticking and makes cleanup a breeze.
- Cooling rack: For letting cookies rest without getting soggy on the bottom.
- Heart-shaped cookie cutter (optional): If you want perfectly shaped hearts instead of free-formed ones.
I’ve used basic kitchen tools for this recipe with great results, but if you want to get fancy, a silicone spatula and a cookie scoop speed things up. Also, I recommend investing in a good-quality baking sheet — it makes a surprising difference in how evenly your cookies bake.
Detailed Preparation Method
- Preheat your oven to 350°F (175°C). Line your baking sheet with parchment paper or a silicone baking mat. This step prevents sticking and helps your cookies bake evenly.
- Mix dry ingredients: In a large bowl, sift together 2 ½ cups all-purpose flour, 2 tablespoons cocoa powder, 1 teaspoon baking powder, and ½ teaspoon salt. Set aside. Sifting helps avoid lumps and keeps the batter light.
- Cream butter and sugar: In another bowl, beat ¾ cup softened unsalted butter and 1 ½ cups granulated sugar with an electric mixer on medium speed until light and fluffy, about 3-4 minutes. This step is crucial for a tender cookie — don’t rush it.
- Add eggs, vanilla, cream cheese, and food coloring: Beat in 2 large eggs, 1 teaspoon vanilla extract, 2 tablespoons softened cream cheese, and 2 tablespoons red gel food coloring until the mixture is smooth and evenly colored. The cream cheese adds moisture and a gentle tang, balancing the sweetness.
- Combine wet and dry: Gradually add the dry ingredients to the wet mixture, mixing on low speed just until combined. Over-mixing can make the cookies tough, so be gentle and stop as soon as you see no flour streaks.
- Chill the dough: Cover the dough tightly with plastic wrap and refrigerate for at least 1 hour. This step is important — it firms up the dough, making it easier to shape and helps the cookies hold their heart shape while baking.
- Shape the cookies: Once chilled, scoop tablespoon-sized portions of dough and roll them into balls. Roll each ball generously in powdered sugar until fully coated. For heart shapes, gently press each dough ball into a heart cookie cutter or shape by hand (a little rustic charm never hurts!).
- Bake: Place the shaped cookies on the prepared baking sheet about 2 inches apart. Bake in the preheated oven for 10–12 minutes. You’ll notice the tops crackling and the edges set while the centers stay soft — that’s exactly what you want!
- Cool: Let the cookies cool on the baking sheet for 5 minutes before transferring them to a wire rack to cool completely. This prevents them from breaking apart and keeps the bottoms from getting soggy.
If your cookies spread too much, chilling the dough longer helps. Also, make sure your oven temperature is accurate — an oven thermometer is a handy tool for consistent results.
Cooking Tips & Techniques
One of the trickiest parts of red velvet crinkle cookies is getting that perfect crackle without losing the heart shape. Here’s what I’ve learned after several batches:
- Chilling is key: Don’t skip the chilling step. It firms the dough, so the cookies don’t spread too thin and lose their shape in the oven.
- Use gel food coloring: It gives you that vibrant red without adding extra liquid to the dough, which could mess with texture.
- Don’t overmix: When combining wet and dry ingredients, mix just until combined. Overworking the dough can make the cookies dense.
- Powdered sugar coating: Roll the dough balls well in powdered sugar. This creates the signature crinkle and adds a sweet contrast to the rich dough.
- Watch the baking time: Bake until edges are set but centers still look soft — they firm up while cooling and stay delightfully chewy.
- Multitasking tip: While the dough chills, prep your baking sheets and clean up. It makes the baking process smoother and more enjoyable.
Once, I baked a batch without chilling the dough — the cookies spread too much and lost their heart shape, so trust me, the wait is worth it! Also, if you want extra crisp edges, add a few more minutes to baking, but keep an eye to avoid burning.
Variations & Adaptations
This recipe is flexible and easy to personalize. Here are some fun ways to mix it up:
- Chocolate Lovers’ Twist: Add ½ cup mini chocolate chips to the dough for extra melty pockets of chocolate.
- Spiced Version: Stir in ½ teaspoon cinnamon and a pinch of nutmeg for a warm, cozy flavor perfect for winter.
- Gluten-Free Option: Use a 1:1 gluten-free baking blend (make sure it contains xanthan gum) for a safe and tasty swap.
- Dairy-Free Adaptation: Swap butter for vegan margarine and use dairy-free cream cheese or coconut yogurt. The texture is slightly different but still delicious.
- Nutty Surprise: Fold in ¼ cup finely chopped pecans or walnuts for crunch.
Personally, I’ve tried making these as mini cookies for bite-sized treats — just reduce baking time to 8-9 minutes and watch carefully. They’re adorable and perfect for cookie platters!
Serving & Storage Suggestions
Serve these heart-shaped red velvet crinkle cookies at room temperature to enjoy their full flavor and tender texture. They pair beautifully with a glass of cold milk or a warm cup of coffee or tea — perfect for cozy Valentine’s mornings or afternoon treats.
If you want to get fancy, dust a little extra powdered sugar on top right before serving for a fresh “snowy” look. You can also drizzle melted white chocolate for a decadent touch.
Store leftover cookies in an airtight container at room temperature for up to 4 days. They stay soft and chewy, but if you notice them drying out, placing a slice of bread in the container helps maintain moisture.
For longer storage, freeze the baked cookies in a sealed container for up to 2 months. Thaw them at room temperature or warm gently in the oven at 300°F (150°C) for 5 minutes to bring back that fresh-baked softness.
Fun fact: these cookies actually taste better the next day once the flavors have had time to mingle — so feel free to bake ahead for your Valentine’s celebration!
Nutritional Information & Benefits
Each heart-shaped red velvet crinkle cookie contains approximately 150 calories, 7 grams of fat, 22 grams of carbohydrates, and 2 grams of protein. These numbers can vary slightly depending on ingredient brands and portion sizes.
Thanks to the cocoa powder, these cookies bring a small boost of antioxidants, and the cream cheese adds a bit of calcium and protein. While they’re definitely a treat, using quality ingredients like real butter and fresh eggs means you’re enjoying a homemade dessert with wholesome components.
This recipe is naturally gluten-friendly when using all-purpose flour but can be adapted for gluten-free diets as noted. It does contain dairy and eggs, so be mindful if you have allergies.
From my experience as both a baker and someone who watches their diet, these cookies strike a nice balance — indulgent yet made with simple, real ingredients. It’s a little celebration in every bite!
Conclusion
These heart-shaped red velvet crinkle cookies are a delicious way to share love through baking. They’re easy enough for beginners but impressive enough to wow your Valentine’s guests. What I love most is how the recipe blends classic red velvet flavor with a fun, crinkly texture and a festive look that’s perfect for the season.
Feel free to tailor the recipe to your taste — whether you add nuts, spices, or go dairy-free, these cookies will still charm your friends and family. I bake these every year around Valentine’s Day, and they never fail to bring smiles and requests for “just one more.”
Give this recipe a try, and don’t hesitate to share how you made it your own. I’d love to hear your variations and see your cookie creations! Happy baking and happy Valentine’s Day!
FAQs About Heart-Shaped Red Velvet Crinkle Cookies
Can I make these cookies without cream cheese?
Yes, you can omit the cream cheese, but the cookies might be a bit less tender and moist. Adding a tablespoon of sour cream or yogurt can help keep them soft.
How do I prevent the red color from fading?
Use gel or paste food coloring instead of liquid for a more vibrant, lasting red. Also, avoid overbaking, which can dull the color.
Can I freeze the cookie dough?
Absolutely! Chill the dough, then freeze in balls on a baking sheet. Transfer to a bag once frozen. Bake from frozen, adding a couple extra minutes to the baking time.
What’s the best way to get the perfect crinkle effect?
Make sure to roll the dough balls generously in powdered sugar and chill the dough. The contrast between the powdered sugar and dough cracking creates the classic crinkle look.
Can I make these cookies without the heart shape?
Yes! You can roll them into regular balls and bake as round cookies. The shape doesn’t affect flavor or texture, just the presentation.
Pin This Recipe!

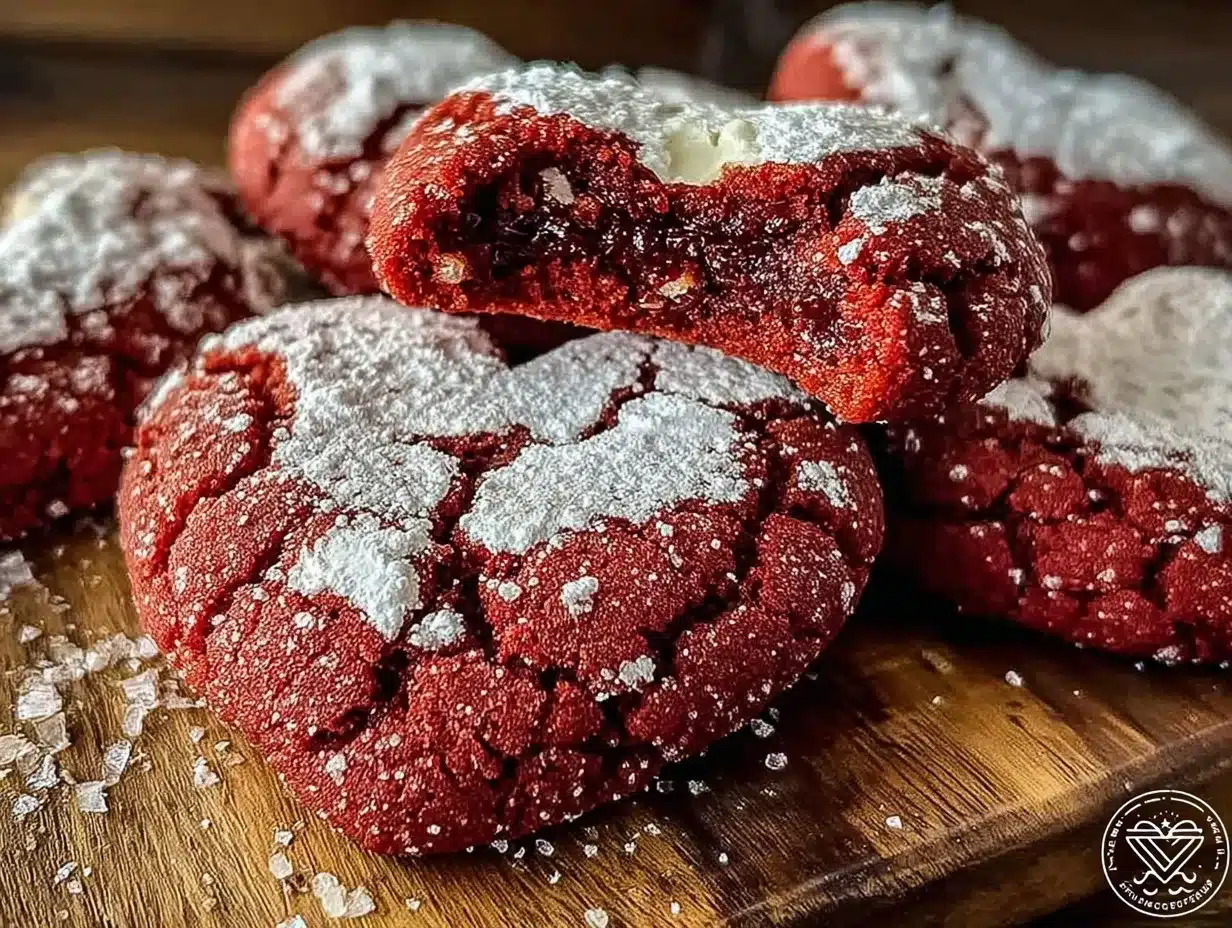
Irresistible Heart-Shaped Red Velvet Crinkle Cookies

These heart-shaped red velvet crinkle cookies feature a tender, fudgy center with a festive powdered sugar coating, perfect for Valentine’s Day treats that are quick, easy, and delicious.
- Prep Time: 15 minutes
- Cook Time: 12 minutes
- Total Time: 1 hour 27 minutes
- Yield: 24 cookies 1x
- Category: Dessert
- Cuisine: American
Ingredients
- 2 ½ cups (315g) all-purpose flour
- 2 tablespoons (about 15g) unsweetened cocoa powder
- 1 teaspoon baking powder
- ½ teaspoon salt
- ¾ cup (170g) unsalted butter, softened
- 1 ½ cups (300g) granulated sugar
- 2 large eggs, room temperature
- 1 teaspoon vanilla extract
- 2 tablespoons red gel food coloring
- 2 tablespoons cream cheese, softened
- About 1 cup (120g) powdered sugar for rolling
Instructions
- Preheat your oven to 350°F (175°C). Line your baking sheet with parchment paper or a silicone baking mat.
- In a large bowl, sift together the all-purpose flour, cocoa powder, baking powder, and salt. Set aside.
- In another bowl, beat the softened unsalted butter and granulated sugar with an electric mixer on medium speed until light and fluffy, about 3-4 minutes.
- Beat in the eggs, vanilla extract, softened cream cheese, and red gel food coloring until the mixture is smooth and evenly colored.
- Gradually add the dry ingredients to the wet mixture, mixing on low speed just until combined. Avoid over-mixing.
- Cover the dough tightly with plastic wrap and refrigerate for at least 1 hour.
- Once chilled, scoop tablespoon-sized portions of dough and roll them into balls. Roll each ball generously in powdered sugar until fully coated. For heart shapes, gently press each dough ball into a heart cookie cutter or shape by hand.
- Place the shaped cookies on the prepared baking sheet about 2 inches apart. Bake for 10–12 minutes until the tops crackle and edges set but centers remain soft.
- Let the cookies cool on the baking sheet for 5 minutes before transferring them to a wire rack to cool completely.
Notes
Chilling the dough is essential to maintain the heart shape and achieve the perfect crinkle effect. Use gel food coloring for vibrant red color without thinning the dough. Avoid over-mixing to keep cookies tender. If cookies spread too much, chill dough longer. For extra crisp edges, bake a few minutes longer but watch carefully to avoid burning.
Nutrition
- Serving Size: 1 cookie
- Calories: 150
- Fat: 7
- Carbohydrates: 22
- Protein: 2
Keywords: red velvet cookies, crinkle cookies, heart-shaped cookies, Valentine's Day treats, easy cookies, homemade cookies, festive cookies