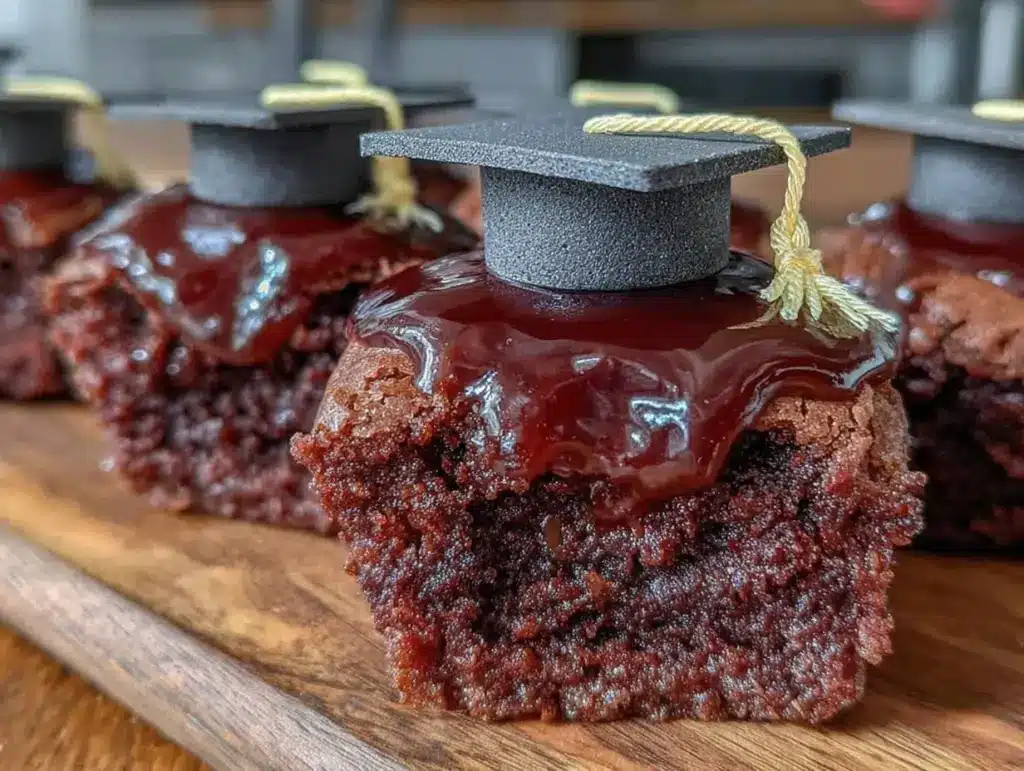
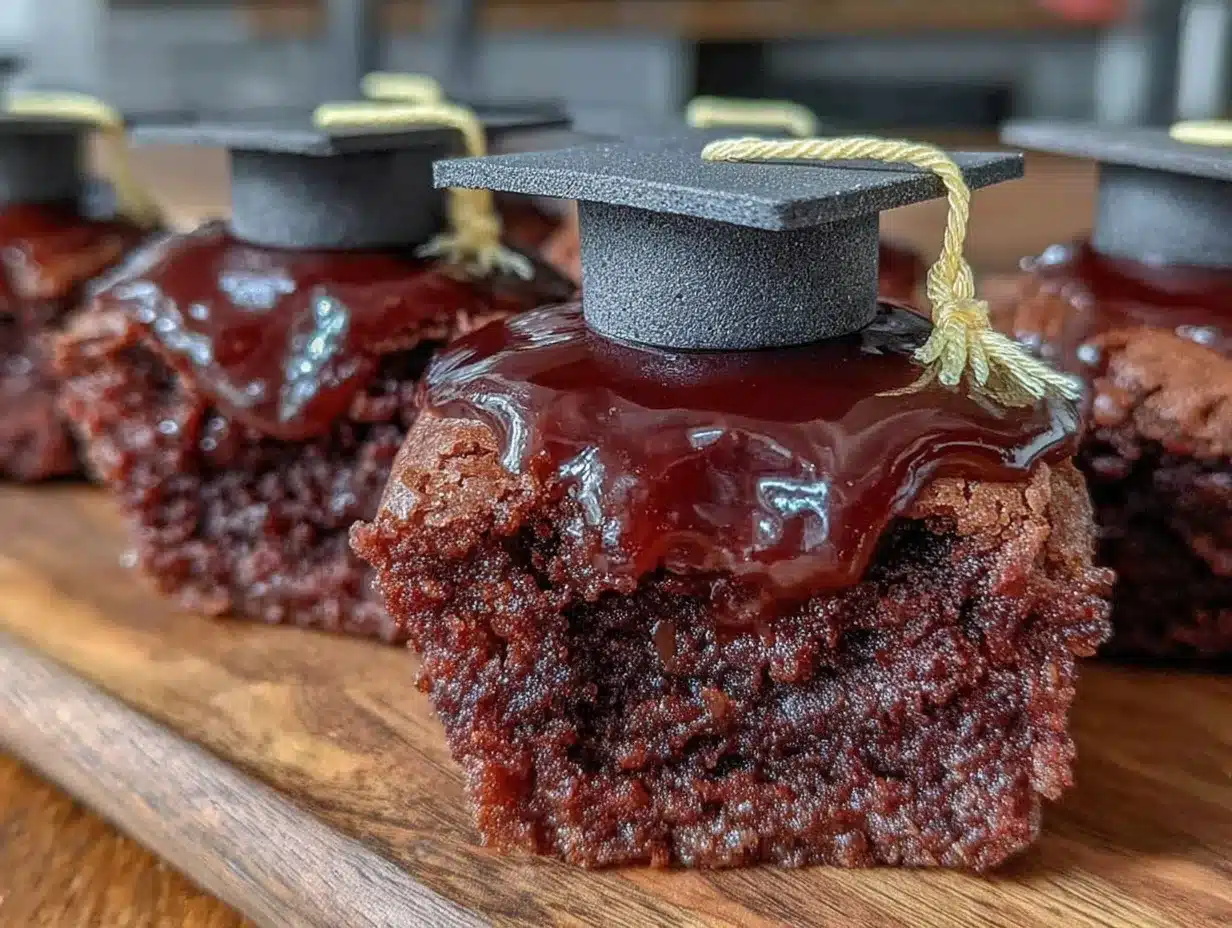
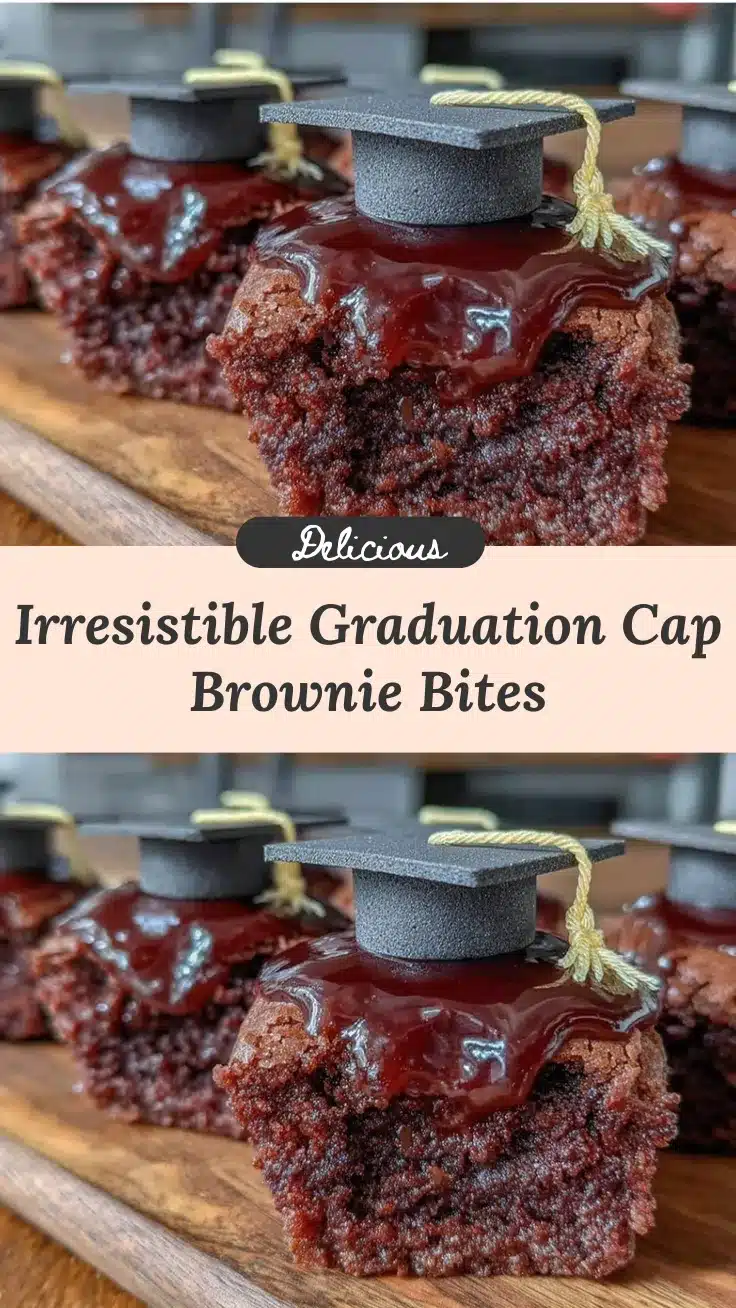
The smell of freshly baked chocolate hugging a hint of vanilla always reminds me of celebrations and sweet memories. I first whipped up these irresistible graduation cap brownie bites during my niece’s graduation party, and honestly, they stole the show. You know that perfect mix of fudgy brownie with a playful, festive touch? That’s exactly what these treats deliver. They’re bite-sized, adorable, and packed with rich chocolate flavor that makes you want to sneak more than one (or two).
Graduation parties call for something special, and these brownie bites fit perfectly. They’re not just tasty; they’re a little edible celebration in themselves. I’ve made—and tweaked—this recipe quite a few times, making sure it’s easy enough for busy parents juggling party prep but fancy enough to impress guests. Whether you’re a baking pro or a casual kitchen adventurer, these graduation cap brownie bites are a fun way to celebrate milestones.
What I love most about this recipe is how it combines simple ingredients and a clever design to bring a smile to everyone’s face. Plus, they’re perfect for kids, adults, and even picky eaters who sometimes turn their noses up at traditional desserts. So, if you’re planning a graduation bash and want something both charming and delicious, these brownie bites might just become your new go-to.
Why You’ll Love This Recipe
- Quick & Easy: Comes together in under an hour, perfect for last-minute party prep or spontaneous celebrations.
- Simple Ingredients: You probably have everything on hand—no fancy or hard-to-find items needed.
- Perfect for Celebrations: Graduation parties, milestone events, or even themed gatherings, these bites add a festive flair.
- Crowd-Pleaser: Kids and adults alike rave about the fudgy texture and the cute graduation cap design.
- Unbelievably Delicious: The rich chocolate brownie base pairs perfectly with the smooth, creamy frosting “caps.”
This isn’t just another brownie recipe you’ll find floating around. The secret is in the little details—the perfectly crisp edges, moist center, and the playful cap made from simple frosting and a mini candy tassel. I’ve tested this recipe multiple times to get the texture just right, ensuring it’s fudgy but firm enough to hold the decoration without crumbling. Plus, the design is easy enough that even beginner bakers can nail it and feel proud.
Honestly, these graduation cap brownie bites bring that little extra something that turns a simple dessert into a memory. It’s that moment when you see the smiles because everyone recognizes the effort and fun behind each bite. It’s comfort food with a festive twist, and you’ll want to keep this recipe in your back pocket for every celebration that comes your way.
What Ingredients You Will Need
This recipe uses simple, wholesome ingredients that come together to create rich, fudgy brownie bites with a festive flair. Most are pantry staples, so you won’t have to hunt down anything special.
- For the Brownie Bites:
- Unsalted butter, 1/2 cup (113g), melted (adds richness and moisture)
- Granulated sugar, 1 cup (200g) (balances sweetness)
- Large eggs, 2, room temperature (binds and adds structure)
- Pure vanilla extract, 1 teaspoon (for flavor depth)
- All-purpose flour, 3/4 cup (95g), sifted (for structure)
- Unsweetened cocoa powder, 1/3 cup (35g), sifted (rich chocolate flavor)
- Salt, 1/4 teaspoon (enhances flavors)
- Mini chocolate chips, 1/2 cup (optional, for extra chocolate bursts)
- For the Graduation Caps (Frosting & Decorations):
- Powdered sugar, 1 1/2 cups (180g), sifted (for smooth frosting)
- Unsalted butter, 1/4 cup (57g), softened (for creamy texture)
- Milk, 2-3 tablespoons (30-45ml), adjust for consistency (use dairy-free if needed)
- Pure vanilla extract, 1/2 teaspoon (adds subtle sweetness)
- Mini square-shaped cookies or crackers (homemade or store-bought) for the cap tops
- Black licorice strings or thin black licorice pieces for the tassels (optional)
For best results, I recommend using a high-quality unsweetened cocoa powder like Hershey’s Special Dark, which gives a deep chocolate taste without bitterness. If you want to make this gluten-free, swapping all-purpose flour for a 1:1 gluten-free flour blend works well. For the frosting, I’ve found that using softened butter at room temperature makes it easier to get that smooth, spreadable consistency you want to decorate those tiny brownie bites.
Equipment Needed
- Mini muffin pan or silicone mini cupcake molds – perfect for bite-sized brownies, and easy to pop out.
- Mixing bowls – a large one for the brownie batter and a smaller one for the frosting.
- Electric mixer or hand whisk – an electric mixer speeds things up, but a whisk works if you’re patient.
- Measuring cups and spoons – precise measurements make a huge difference, especially with cocoa and flour.
- Spatula – flexible for folding ingredients and scraping bowls clean.
- Cooling rack – to let your brownie bites cool evenly and avoid sogginess.
- Offset spatula or small butter knife – to spread frosting neatly on each brownie bite.
If you don’t have a mini muffin pan, a silicone mold with similar-sized cavities works great and is easier to clean. For frosting, I often use a small offset spatula because it gives me more control for decorating tiny treats. I’ve tried spreading frosting with spoons before, but it’s messier and less precise, so this little tool is worth the investment, especially if you like baking for parties.
Detailed Preparation Method
- Preheat your oven to 350°F (175°C). Grease your mini muffin pan or line with silicone molds to prevent sticking. This step takes about 10 minutes including prepping your ingredients.
- Make the brownie batter: In a large bowl, combine 1/2 cup (113g) melted unsalted butter with 1 cup (200g) granulated sugar. Whisk together until smooth and glossy, about 2 minutes.
- Add eggs and vanilla: Crack in 2 large eggs, one at a time, whisking well after each addition. Stir in 1 teaspoon pure vanilla extract.
- Combine dry ingredients: In a separate bowl, sift together 3/4 cup (95g) all-purpose flour, 1/3 cup (35g) unsweetened cocoa powder, and 1/4 teaspoon salt.
- Fold dry into wet: Gently fold the dry ingredients into the wet mixture using a spatula. Avoid overmixing; stop when just combined to keep brownies fudgy.
- Add mini chocolate chips (optional): Stir in 1/2 cup mini chocolate chips for extra pockets of melted chocolate.
- Fill the mini muffin pan: Spoon batter into prepared molds, filling each about 3/4 full. This yields around 24 bites. Bake for 12-15 minutes or until a toothpick inserted near the center comes out with a few moist crumbs.
- Cool completely: Let the brownie bites cool in the pan for 10 minutes, then transfer to a wire rack to cool fully. This prevents the frosting from melting when applied.
- Prepare the frosting: Beat 1/4 cup (57g) softened unsalted butter with 1 1/2 cups (180g) powdered sugar until fluffy. Add 2 tablespoons (30ml) milk and 1/2 teaspoon vanilla extract. Adjust milk by adding a little more if frosting is too thick for spreading.
- Assemble the graduation caps: Spread a small dollop of frosting on each brownie bite. Press a mini square cookie or cracker on top as the “cap.” Attach a thin piece of black licorice as the tassel, securing it with a tiny dot of frosting if needed.
- Serve or chill: These bites taste best at room temperature but can be stored in the fridge for up to 3 days. Just bring them back to room temp before serving for the best texture.
Quick tip: Don’t skip chilling the brownies before frosting; warm brownies will make the frosting melt and slide off. If your frosting ever feels too stiff, a splash of milk fixes it right up. Also, using a toothpick to gently nudge the licorice tassels into place helps make them look neat and professional.
Cooking Tips & Techniques
One thing I learned the hard way is that overbaking these brownie bites turns them cakey instead of fudgy—so keep a close eye on the timer. The toothpick test with a few moist crumbs is your best friend here. Also, folding the dry ingredients gently prevents the brownies from becoming tough.
When mixing frosting, start slow with the powdered sugar and butter—if you crank the mixer too fast, you’ll end up with a sugar cloud in your kitchen! A medium speed works wonders to get a smooth, creamy texture.
Another tip: If you want extra glossy brownie edges, melt the butter and sugar together gently before whisking in the eggs. This takes a little longer but delivers that beautiful crackly top.
Multitasking works well here—while the brownies bake, prep your frosting and gather your decorations. This way, you’re not rushing once the brownies are out of the oven.
Finally, when pressing the cookie “caps” onto the frosting, be gentle but firm. Too much pressure can crumble the brownie, but too little means the cap won’t stick well. I usually hold it in place for a few seconds until it feels secure.
Variations & Adaptations
- Dietary Twist: Swap regular flour for almond flour to make these gluten-free. Use dairy-free butter and milk alternatives for a vegan-friendly batch.
- Flavor Swap: Add a teaspoon of espresso powder to the batter for a mocha kick that intensifies the chocolate flavor.
- Seasonal Version: During spring or summer, toss in fresh raspberries or chopped strawberries into the batter for a fruity surprise.
- Alternative Decorations: Instead of licorice tassels, use colored icing or edible glitter for a more vibrant look.
- Cooking Method: If you don’t have a mini muffin pan, bake the batter in a regular 8×8 inch pan and cut into small squares, then decorate similarly.
Personally, I once tried adding a swirl of peanut butter into the batter before baking—total game changer! It added a creamy, nutty element that guests couldn’t stop talking about. Feel free to experiment and make these bites your own little celebration canvas.
Serving & Storage Suggestions
Serve these graduation cap brownie bites at room temperature to enjoy their full flavor and fudgy texture. Arrange them on a festive platter or tiered tray to make a charming centerpiece at your party. They pair wonderfully with a cold glass of milk, coffee, or even a sparkling fruit punch for the adults.
To store, keep the brownie bites in an airtight container in the refrigerator for up to 3 days. Before serving again, let them sit out for about 15 minutes to soften slightly. If you want to freeze them, place them on a baking sheet first to freeze individually, then transfer to a freezer-safe container for up to 2 months. Thaw in the fridge overnight before serving.
Flavors actually deepen after a day or two, so if you can wait, these bites taste even better the next day. Just be sure the frosting doesn’t dry out by keeping them covered well.
Nutritional Information & Benefits
Each graduation cap brownie bite contains approximately 110 calories, 6 grams of fat, 14 grams of carbohydrates, and 1 gram of protein. The cocoa powder provides antioxidants that are a nice bonus in a sweet treat.
While these are definitely a dessert indulgence, using real butter and quality ingredients means you’re enjoying a treat made with care. The portion size is small, so it’s easier to manage indulgence without going overboard.
For those with dietary needs, this recipe is adaptable to gluten-free and vegan diets with simple swaps, making it accessible for most guests. Just be mindful of the mini cookies and licorice used for decoration if you have allergy concerns.
As a longtime baker who loves celebrating with thoughtful food, I appreciate how this recipe balances fun and flavor without unnecessary additives or complicated steps.
Conclusion
These irresistible graduation cap brownie bites are a sweet, fun way to celebrate big moments without stress. They’re easy to make, look fantastic, and taste like a little chocolate party in every bite. Whether you’re new to baking or a seasoned pro, this recipe invites you to join in the fun and create memories alongside the treats.
Feel free to customize the decorations or try different flavor twists to make these bites uniquely yours. I love returning to this recipe because it never fails to bring smiles and a sense of accomplishment—both in the kitchen and at the party table.
Give these brownie bites a try at your next graduation or celebration, and please share your results! I’d love to hear how you made them your own or any creative ideas you added. Happy baking and congrats to all the grads out there!
FAQs
Can I make these brownie bites ahead of time?
Absolutely! You can bake and decorate them a day in advance. Store in an airtight container in the fridge and bring to room temperature before serving.
What if I don’t have mini square cookies for the caps?
You can use small crackers, cut larger cookies into squares, or even make simple fondant squares if you’re feeling crafty.
How do I keep the frosting from melting on the brownies?
Make sure the brownies are completely cool before frosting. If they’re warm, the frosting will melt and slide off.
Can I freeze these brownie bites?
Yes! Freeze them individually on a baking sheet, then transfer to a freezer-safe container. Thaw in the fridge overnight before serving.
Is there a vegan version of this recipe?
Definitely! Use dairy-free butter and milk alternatives, and swap eggs for flax eggs or a commercial egg replacer to make it vegan-friendly.
Pin This Recipe!
Irresistible Graduation Cap Brownie Bites Easy Recipe for Perfect Celebrations

These bite-sized, fudgy brownie bites topped with creamy frosting and mini cookie caps are perfect for graduation parties and celebrations. They combine simple ingredients with a playful design to delight kids and adults alike.
- Prep Time: 15 minutes
- Cook Time: 15 minutes
- Total Time: 30 minutes
- Yield: 24 brownie bites 1x
- Category: Dessert
- Cuisine: American
Ingredients
- 1/2 cup (113g) unsalted butter, melted
- 1 cup (200g) granulated sugar
- 2 large eggs, room temperature
- 1 teaspoon pure vanilla extract
- 3/4 cup (95g) all-purpose flour, sifted
- 1/3 cup (35g) unsweetened cocoa powder, sifted
- 1/4 teaspoon salt
- 1/2 cup mini chocolate chips (optional)
- 1 1/2 cups (180g) powdered sugar, sifted
- 1/4 cup (57g) unsalted butter, softened
- 2–3 tablespoons (30-45ml) milk (dairy or dairy-free)
- 1/2 teaspoon pure vanilla extract
- Mini square-shaped cookies or crackers for the cap tops
- Black licorice strings or thin black licorice pieces for tassels (optional)
Instructions
- Preheat oven to 350°F (175°C). Grease mini muffin pan or line with silicone molds.
- In a large bowl, whisk together melted butter and granulated sugar until smooth and glossy, about 2 minutes.
- Add eggs one at a time, whisking well after each addition. Stir in vanilla extract.
- In a separate bowl, sift together flour, cocoa powder, and salt.
- Gently fold dry ingredients into wet mixture using a spatula until just combined.
- Stir in mini chocolate chips if using.
- Spoon batter into prepared molds, filling each about 3/4 full (yields ~24 bites). Bake 12-15 minutes or until toothpick inserted comes out with a few moist crumbs.
- Cool brownie bites in pan for 10 minutes, then transfer to wire rack to cool completely.
- For frosting, beat softened butter with powdered sugar until fluffy. Add milk and vanilla extract, adjusting milk for spreadable consistency.
- Spread a small dollop of frosting on each brownie bite. Press a mini cookie or cracker on top as the cap. Attach a piece of black licorice as the tassel, securing with a dot of frosting if needed.
- Serve at room temperature or chill in fridge up to 3 days. Bring to room temperature before serving.
Notes
Do not frost warm brownies to prevent melting. Use a toothpick to help place licorice tassels neatly. Overbaking makes brownies cakey; toothpick test with moist crumbs is best. For gluten-free, substitute flour with 1:1 gluten-free blend. For vegan, use dairy-free butter, milk alternatives, and egg replacers.
Nutrition
- Serving Size: 1 brownie bite
- Calories: 110
- Fat: 6
- Carbohydrates: 14
- Protein: 1
Keywords: brownie bites, graduation party dessert, fudgy brownies, bite-sized brownies, chocolate treats, easy brownies, celebration dessert