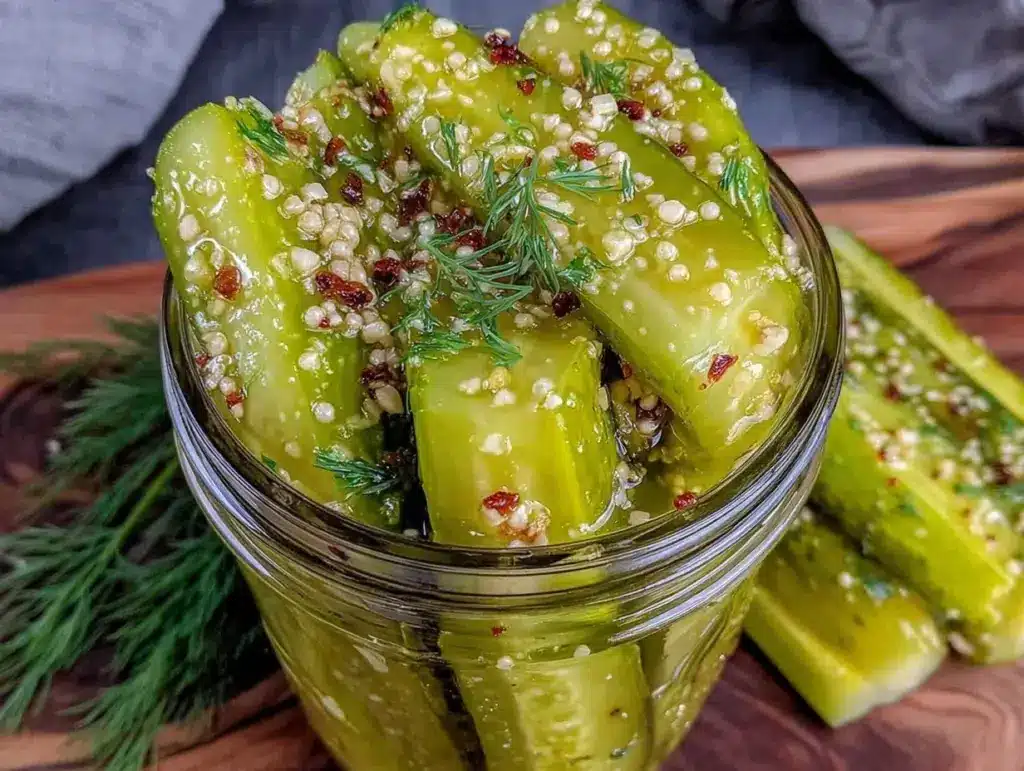
I figured making crunchy dill pickles was a drawn-out, fiddly affair — hours of brining, waiting, and hoping for that perfect snap. It took about thirty minutes for my skepticism to peel away completely, right alongside the first satisfying crunch of these quick refrigerator dill pickles. Honestly, I was just trying to salvage some cucumbers before they turned sad and floppy, but the recipe turned into a snack-time revelation. The brine, simple yet sharp with garlic and dill, soaked in faster than I expected, giving the pickles a fresh tang and a crisp bite that honestly outshone anything from the store.
There was a moment when I popped one in my mouth, the cold, vinegary snap hitting like a little surprise party for my taste buds. The kitchen smelled like a pickling dream, all fresh dill and garlic notes hanging in the air. What really caught me off guard was how this quick method bypassed the usual fuss without sacrificing the texture or flavor I crave. Plus, it was a great excuse to dust off my mason jars and feel a bit like a homegrown food alchemist.
It stuck with me because these pickles bridge the gap between a spontaneous craving and a homemade treat — no marathon waiting, no fancy ingredients, just straightforward, crunchy goodness. Now, they’re my go-to for quick snacks or when I want to add a zesty crunch to a sandwich or salad. It’s the kind of recipe that quietly earns its spot in the fridge, ready to surprise you with every bite.
Why You’ll Love This Recipe
Making easy crunchy quick refrigerator dill pickles isn’t just about the end product; it’s about how effortlessly they come together and how well they deliver every time. After several rounds of testing, I’ve nailed down why this recipe stands out in a sea of pickle options:
- Quick & Easy: Ready in under 24 hours, these pickles fit perfectly into busy schedules or last-minute snack emergencies.
- Simple Ingredients: No obscure spices or fancy equipment needed — just your basic pantry staples and fresh cucumbers.
- Perfect for Any Occasion: Whether you’re prepping for a backyard BBQ, need a crunchy addition to your lunchbox, or want a tangy side for dinner, these pickles deliver.
- Crowd-Pleaser: Kids, adults, picky eaters — everyone appreciates that satisfying crunch and bright dill flavor.
- Unbelievably Delicious: The balance between garlicky zing, dill herbiness, and crisp cucumber texture makes these pickles addictive.
What makes this recipe different? It’s the no-fuss approach that still produces a pickle with punch. I like to blend fresh dill sprigs with a pinch of dill seed for extra aroma, and the quick soak in a vinegar-salt-sugar brine hits the flavor trifecta just right. This isn’t some watered-down snack; it’s the kind of pickle that makes you pause and appreciate how simple ingredients can turn into something unexpectedly satisfying.
It’s a recipe that’s as much about the experience — the hum of anticipation while the jars chill in the fridge — as it is about the final crunch. And if you’re anything like me, that combo of tang and crisp is pure comfort food, minus the wait.
What Ingredients You Will Need
This recipe uses simple, wholesome ingredients to deliver bold flavor and satisfying texture without the fuss. Most are pantry staples, and fresh cucumbers are the star here, so choose them firm and crisp. If you prefer, you can swap out fresh dill for dill seed or even dill weed, but fresh gives the best aroma. I like to keep these on hand for easy snack upgrades or to perk up sandwiches.
- Fresh cucumbers (pickling cucumbers, about 1 pound / 450 g, sliced into spears or rounds) — firm and fresh for crunch
- Fresh dill sprigs (3-4 sprigs) — the essential herbaceous punch
- Garlic cloves (2, smashed) — adds a sharp, savory note
- White vinegar (1 cup / 240 ml) — the tangy base of the brine
- Water (1 cup / 240 ml) — balances the vinegar strength
- Salt (1 tablespoon, kosher or pickling salt preferred) — the magic behind the crunch and flavor
- Sugar (1 teaspoon) — softens the sharpness and rounds out the brine
- Black peppercorns (1 teaspoon) — for subtle spice
- Dill seed (optional, ½ teaspoon) — intensifies dill flavor (try McCormick for consistency)
- Optional extras: red pepper flakes (for a kick), mustard seeds (for tangy crunch), or sliced onion for sweetness
For substitutions, use apple cider vinegar if you want a fruitier note or swap sugar for honey or agave syrup to tweak sweetness. If you need gluten-free, all ingredients here are naturally safe. For a dairy-free twist, no worries — this recipe is naturally free of dairy. And if you’re curious about different pickling spices, feel free to experiment, but keep the basic brine to maintain that classic dill pickle vibe.
Equipment Needed
To make these easy crunchy quick refrigerator dill pickles, you don’t need much beyond basic kitchen tools. I’ve found that a straightforward setup works best — no fancy gadgets required.
- Mason jars or any airtight glass jar (1 quart / 1 liter size) — I prefer wide-mouth jars for easy packing and cleaning.
- Measuring cups and spoons — for accuracy in the brine.
- Small saucepan — to warm the brine and dissolve salt and sugar quickly.
- Sharp knife and cutting board — for slicing cucumbers evenly.
- Mixing bowl — optional, for tossing cucumbers with spices before packing.
If you don’t have mason jars, a clean, sealable container works fine, but glass is best to avoid flavor interference. I once tried using plastic containers, and while it worked, the pickles didn’t keep as long or taste quite as crisp. Also, keeping your knife razor-sharp helps you slice cucumbers thinly without crushing them, which keeps the texture spot on.
For maintenance, make sure your jars are well sterilized to prevent any off-flavors or spoilage. I usually run them through the dishwasher or boil them briefly before use.
Preparation Method
- Prepare your cucumbers: Wash about 1 pound (450 g) of fresh pickling cucumbers thoroughly. Slice them into spears about 3-4 inches (7-10 cm) long, or into ¼-inch (6 mm) thick rounds, depending on your preference. Use a sharp knife to avoid bruising the cucumbers, which can make pickles soggy.
- Make the brine: In a small saucepan, combine 1 cup (240 ml) white vinegar, 1 cup (240 ml) water, 1 tablespoon kosher salt, and 1 teaspoon sugar. Heat gently over medium heat, stirring until salt and sugar dissolve completely. Remove from heat and let cool slightly (about 5 minutes).
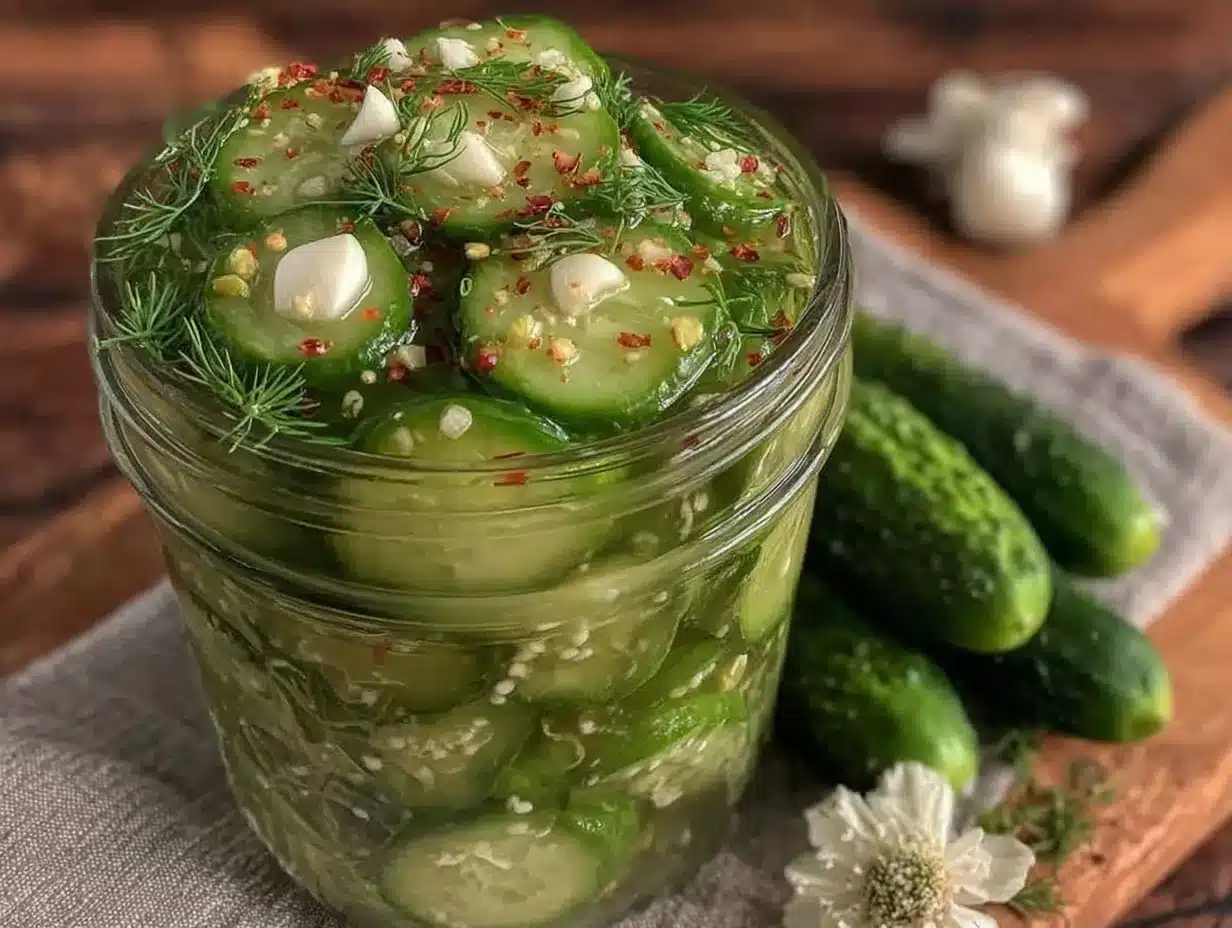
- Pack the jars: Into a clean 1-quart (1-liter) glass jar, add 3-4 fresh dill sprigs, 2 smashed garlic cloves, 1 teaspoon black peppercorns, and optional ½ teaspoon dill seed or a pinch of red pepper flakes if you like some heat. Pack the cucumber slices tightly but without crushing.
- Pour the brine: Pour the warm brine over the cucumbers until they’re completely submerged. Leave about ½ inch (1.5 cm) of headspace at the top of the jar. Tap the jar gently on the counter to release any trapped air bubbles.
- Seal and refrigerate: Screw on the lid tightly and place the jar in the refrigerator. Let the pickles chill for at least 24 hours before tasting. For best results, wait 2-3 days for the flavors to meld fully.
- Enjoy and store: These pickles will keep in the fridge for up to 2 weeks. Always use a clean fork or tongs to remove pickles to avoid contamination.
Pro tip: If you want extra crunch, soak sliced cucumbers in ice water for 30 minutes before pickling. Also, smaller cucumbers tend to stay crisper and have fewer seeds, so keep an eye out for those at the market.
When the jar is opened, the aroma of dill and garlic is unmistakable. The cucumbers should look bright and firm, not mushy or dull. If they taste too sharp, let them sit a bit longer — the vinegar mellows with time.
Cooking Tips & Techniques
Getting the perfect crunch and flavor in quick refrigerator dill pickles mostly comes down to balance and timing. Here are a few things I’ve learned along the way:
- Don’t skip the salt: It’s essential for flavor and texture. Use kosher or pickling salt, not iodized table salt — the latter can cloud the brine and impact taste.
- Keep your cucumbers firm: Overripe or soft cucumbers will turn mushy quickly. Look for small, firm ones with no yellow spots.
- Warm the brine: Dissolving salt and sugar in warm vinegar and water helps the flavors marry faster. But don’t pour hot brine directly onto cucumbers — let it cool slightly to avoid cooking them.
- Pack jars tightly but gently: Too much pressure can crush cucumbers, but loose packing leaves air pockets that reduce crispness.
- Refrigerate promptly: These are quick pickles, not canned, so keeping them cold is key to safety and texture.
Once, I left the brine too hot and ended up with soggy pickles — lesson learned! Also, don’t expect overnight miracles; a full day or two in the fridge really lets those flavors settle in. Multitasking is easy here — while the pickles chill, you can whip up a fresh salad like the fresh southwest chipotle salad for a crunchy, vibrant meal combo.
Variations & Adaptations
One of the best things about this recipe is how easy it is to tweak based on what you have or crave:
- Spicy Pickles: Add red pepper flakes or a few slices of jalapeño to the jar for a fiery kick.
- Garlic Lovers’ Version: Double the garlic cloves or add roasted garlic for a mellow, sweet garlic flavor.
- Low-Sodium Option: Reduce salt by half and increase soaking time, but watch for less crunch.
- Herb Twists: Swap dill for fresh tarragon or basil for a different herbaceous profile.
- Different Vinegars: Use apple cider vinegar for a fruitier tang or rice vinegar for a milder taste.
I’ve also tried making these pickles with baby carrots and green beans using the same brine — surprisingly addictive! If you want to make them shelf-stable, check out my crispy ham and cheese sticks recipe for some fun party ideas to serve alongside your homemade pickles.
Serving & Storage Suggestions
These easy crunchy quick refrigerator dill pickles are best served cold straight from the fridge. They’re perfect as a snack on their own or as a tangy companion to sandwiches, burgers, or even a creamy salad like the classic creamy church salad.
Store pickles in their brine in the fridge for up to two weeks. As they sit, the flavor deepens and mellows, but the crunch stays surprisingly good if you follow the tips above. When reheating isn’t necessary — these are meant to be enjoyed chilled. If you find they’re a bit too sharp after a day, pop the jar open for a few minutes to let the vinegar mellow before serving.
Nutritional Information & Benefits
These quick refrigerator dill pickles are a low-calorie, low-carb snack that packs flavor without guilt. Each serving (about 3 spears) contains roughly 10-15 calories, mostly from the cucumbers and vinegar.
The vinegar offers digestive benefits, and the garlic brings antioxidants, while dill adds trace vitamins and minerals. Since this recipe uses no added preservatives or artificial ingredients, it’s a fresh, wholesome alternative to store-bought pickles often loaded with excess salt and additives.
Perfect for gluten-free and keto-friendly diets, these pickles also offer a crunchy way to hydrate, thanks to their high water content. Just keep an eye on sodium if you’re watching salt intake.
Conclusion
Easy crunchy quick refrigerator dill pickles prove that sometimes the simplest recipes bring the most satisfying results. This recipe has stuck around in my kitchen because it’s fast, reliable, and delivers that unmistakable pickle crunch that’s hard to find elsewhere. I love how adaptable it is — you can tweak the spice, sweetness, or herb mix to fit your mood or meal.
Give it a try and see how a humble cucumber transforms into a snack that’s both refreshing and nostalgic — perfect for those moments when you want something homemade but don’t have hours to wait. And if you’re into adding a fresh crunch to your meals, you might enjoy pairing these pickles with easy appetizers like the crispy pepperoni pizza rolls for a fun snack spread.
Happy pickling, and may your fridge always hold a jar of something deliciously crunchy!
FAQs About Easy Crunchy Quick Refrigerator Dill Pickles
How long do these quick refrigerator dill pickles last in the fridge?
They usually stay fresh and crunchy for up to 2 weeks when kept sealed in the brine and refrigerated.
Can I use regular cucumbers instead of pickling cucumbers?
You can, but pickling cucumbers are smaller and firmer, which helps keep the pickles crisp. Regular slicing cucumbers tend to be more watery and softer.
Do I need to boil or can these be made raw in the fridge?
The brine is warmed just enough to dissolve salt and sugar but not boiled with cucumbers. This quick method relies on refrigeration for safety and crispness.
Can I make these pickles spicy?
Absolutely! Adding red pepper flakes, jalapeños, or even a dash of hot sauce to the jar will give your pickles a nice kick.
How soon can I eat these pickles after making them?
They’re best after at least 24 hours in the fridge to develop flavor, but you can taste-test after a few hours if you’re impatient.
Pin This Recipe!
Easy Crunchy Quick Refrigerator Dill Pickles Recipe for Perfect Homemade Snacks

A quick and easy recipe for crunchy dill pickles that are ready in under 24 hours, using simple ingredients and no fancy equipment. Perfect for snacks or adding a tangy crunch to meals.
- Prep Time: 15 minutes
- Cook Time: 10 minutes
- Total Time: 24 hours (including chilling time)
- Yield: About 1 quart jar (approximately 4 servings) 1x
- Category: Snack
- Cuisine: American
Ingredients
- 1 pound (450 g) fresh pickling cucumbers, sliced into spears or rounds
- 3–4 fresh dill sprigs
- 2 garlic cloves, smashed
- 1 cup (240 ml) white vinegar
- 1 cup (240 ml) water
- 1 tablespoon kosher or pickling salt
- 1 teaspoon sugar
- 1 teaspoon black peppercorns
- ½ teaspoon dill seed (optional)
- Optional extras: red pepper flakes, mustard seeds, sliced onion
Instructions
- Wash about 1 pound (450 g) of fresh pickling cucumbers thoroughly. Slice into spears about 3-4 inches (7-10 cm) long or into ¼-inch (6 mm) thick rounds.
- In a small saucepan, combine 1 cup (240 ml) white vinegar, 1 cup (240 ml) water, 1 tablespoon kosher salt, and 1 teaspoon sugar. Heat gently over medium heat, stirring until salt and sugar dissolve. Remove from heat and let cool slightly (about 5 minutes).
- Into a clean 1-quart (1-liter) glass jar, add 3-4 fresh dill sprigs, 2 smashed garlic cloves, 1 teaspoon black peppercorns, and optional ½ teaspoon dill seed or a pinch of red pepper flakes.
- Pack the cucumber slices tightly but gently into the jar without crushing.
- Pour the warm brine over the cucumbers until completely submerged, leaving about ½ inch (1.5 cm) headspace. Tap the jar gently to release air bubbles.
- Seal the jar tightly and refrigerate. Let pickles chill for at least 24 hours before tasting; for best flavor, wait 2-3 days.
- Enjoy chilled. Pickles keep in the fridge for up to 2 weeks. Use clean utensils to remove pickles to avoid contamination.
Notes
For extra crunch, soak sliced cucumbers in ice water for 30 minutes before pickling. Use small, firm cucumbers for best texture. Warm the brine to dissolve salt and sugar but let it cool slightly before pouring over cucumbers to avoid cooking them. Use kosher or pickling salt, not iodized table salt. Refrigerate promptly and keep pickles cold for safety and texture. Pickles taste best after 2-3 days but can be tasted after 24 hours.
Nutrition
- Serving Size: About 3 spears per s
- Calories: 1015
- Sugar: 1
- Sodium: 600
- Carbohydrates: 3
- Fiber: 1
Keywords: quick pickles, refrigerator pickles, dill pickles, crunchy pickles, easy pickles, homemade pickles, snack, dill, garlic