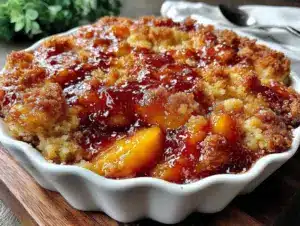
Juggling dinner plans while the clock’s ticking down is no joke—especially when you realize you forgot dessert entirely. Half-empty cans of peaches stared back at me from the pantry, and the last thing I wanted was to start a complicated baking project after a long day. So, with butter melting and sugar pouring, this Easy Peach Cobbler Dump Cake with Juicy, Golden Topping was born right in that chaotic moment. The kitchen smelled like warm summer afternoons and grandma’s recipe box, but without the fuss or the missing ingredients. Honestly, it’s one of those no-fail recipes that saved the evening and has stuck around ever since—not just because it’s quick, but because that golden crust and bubbling peach filling somehow tastes like a little slice of happiness, even on the busiest days.
What makes this peach cobbler dump cake special is how it manages to feel homemade and comforting while being ridiculously simple. It’s the kind of dessert that doesn’t require a ton of prep or fancy skills, yet it delivers a juicy, sweet punch with a crisp, buttery top that’s impossible to resist. You don’t have to be a baker or have a fully stocked pantry to pull this off, which is why it’s become my go-to when I’m pressed for time but still want something that tastes like I put in the effort. That moment of quiet, spoon-in-hand satisfaction after the chaos—that’s why this recipe sticks around in my kitchen.
Why You’ll Love This Recipe
This Easy Peach Cobbler Dump Cake has been tested more times than I can count, and it keeps winning hearts at every gathering. Here’s why it should be on your radar:
- Quick & Easy: Ready in under 45 minutes, perfect for those whirlwind evenings or unexpected guests.
- Simple Ingredients: Uses pantry staples and canned peaches—you probably already have everything on hand.
- Perfect for Summer or Anytime: Its juicy, golden topping screams sunshine, but it’s just as comforting in cooler months.
- Crowd-Pleaser: Kids, adults, picky eaters—everyone asks for seconds (and sometimes thirds).
- Juicy Golden Topping: The secret is the perfect balance of butter, sugar, and cake mix that creates a crispy, golden top that contrasts beautifully with the soft peach filling.
This isn’t your average dump cake. The trick lies in layering the ingredients just right, so you get that luscious peach filling mingling with a buttery, cake-like crust that’s both crunchy and tender. I’ve tried different boxed cake mixes here, but the yellow cake gives the best texture and flavor—it’s like a cozy hug in dessert form. Plus, it’s a snap to put together, which means less time stressed in the kitchen and more time actually enjoying the moment.
What Ingredients You Will Need
This recipe uses simple, wholesome ingredients to deliver bold flavor and satisfying texture without the fuss. Most are pantry staples, making it easy to throw together without a special grocery run.
- For the Peach Filling:
- 2 cans (15 oz each) sliced peaches in juice (I prefer Del Monte for consistent quality)
- ½ cup granulated sugar (adjust based on peach sweetness)
- 1 tsp ground cinnamon (adds warm spice)
- 1 tbsp lemon juice (brightens the peach flavor)
- For the Topping:
- 1 box yellow cake mix (15.25 oz; Duncan Hines or Pillsbury both work great)
- 1 stick (8 tbsp) unsalted butter, melted and slightly cooled (adds richness and crunch)
- Optional: ½ cup chopped pecans or walnuts (for texture and nutty flavor)
Note: You can swap fresh peaches when in season—just slice about 4 cups of peeled peaches and toss with sugar, cinnamon, and lemon juice. For a gluten-free option, try a gluten-free yellow cake mix.
Equipment Needed
- 9×13-inch baking dish (glass or metal works fine; I prefer glass for even baking)
- Mixing bowl (medium size for mixing peach filling)
- Measuring cups and spoons (accuracy helps the topping crisp up just right)
- Wooden spoon or spatula (for stirring)
- Oven mitts (to handle the hot dish safely)
- Optional: small strainer (if you want to drain excess juice from peaches)
If you don’t have a 9×13-inch dish, a similarly sized casserole dish will do. Some people swear by using a cast-iron skillet for extra crusty edges, which I’ve tried, and it does give a nice crispy bite. Just remember to reduce the baking time slightly to avoid burning the edges. And if you’re on a budget, any oven-safe pan that holds around 8 cups will work fine.
Preparation Method
- Preheat your oven to 350°F (175°C). This ensures it’s ready once you finish assembling.
- Prepare the peach filling: In a mixing bowl, combine the canned peaches with their juice, sugar, cinnamon, and lemon juice. Stir gently to blend flavors but keep the peach slices intact. If you prefer less liquid, carefully drain about half the juice before mixing (but don’t toss all of it—the juice adds moisture and juiciness).
- Pour the peach mixture evenly into the bottom of your 9×13-inch baking dish. Spread it out so it covers the entire base in one layer.
- Sprinkle the dry yellow cake mix evenly over the peaches. Don’t stir or mix; just let it cover the fruit layer completely. This step creates that classic dump cake layering effect.
- Drizzle the melted butter evenly over the cake mix. It might look like a lot, but the butter is key to getting that golden, crisp topping. Use the back of a spoon to spread butter where needed for even coverage.
- If using nuts, scatter them on top now. This adds a lovely crunch and subtle nutty flavor that pairs well with the peaches.
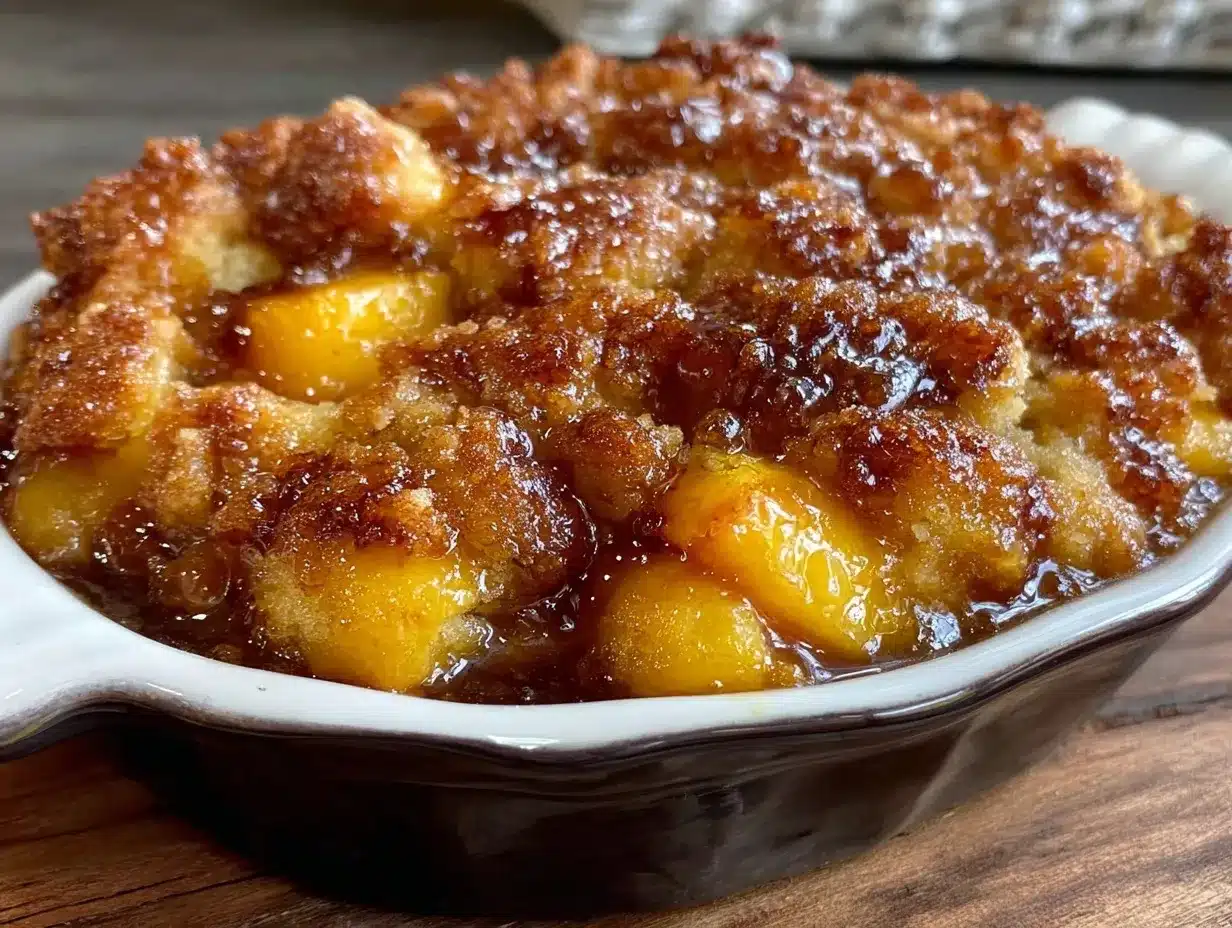
- Bake uncovered for 40-45 minutes. The topping should puff up and turn a deep golden brown, and the peach filling will be bubbly around the edges. If it starts browning too quickly, loosely cover with foil for the last 10 minutes.
- Remove from oven and let cool for at least 15 minutes. This resting time lets the filling thicken up and makes serving easier.
Pro tip: If the topping isn’t as crisp as you like, pop it under the broiler for 1-2 minutes—but watch it closely to prevent burning. The aroma of bubbling peaches and buttery cake will fill your kitchen and have everyone hovering near the oven.
Cooking Tips & Techniques
Making a dump cake might sound foolproof, but a few tips can make the difference between “meh” and “wow.”
- Don’t stir after layering: The hallmark of a dump cake is that distinct layered texture, so avoid mixing the cake mix into the fruit or butter.
- Butter temperature matters: Melt the butter but let it cool slightly. Pouring hot butter can sometimes make the cake mix clump unevenly.
- Use quality canned peaches: The canned fruit is the star here, so pick ones packed in juice, not syrup, to control sweetness.
- Watch your oven: Ovens vary, so check your cobbler at 35 minutes and adjust baking time as needed. Look for a bubbly filling and golden topping.
- Let it rest: I can’t stress this enough—cooling makes it easier to serve and helps the juices thicken instead of running all over the place.
I once tried skipping the lemon juice, thinking it was optional. Big mistake. The brightness it adds cuts through the sweetness and keeps the peaches tasting fresh, not cloying. Also, if you’re multitasking like me, setting a timer helps because the aroma can distract you until it’s almost burnt!
Variations & Adaptations
This dump cake is a great base for creativity. Here are a few ways to make it your own:
- Seasonal Twist: Swap canned peaches for fresh berries in summer or canned cherry pie filling in winter for a vibrant cherry dump cake.
- Gluten-Free: Use a gluten-free yellow cake mix and double-check your canned fruit for gluten additives.
- Dairy-Free: Replace butter with melted coconut oil or vegan butter substitute. The texture changes slightly but still delicious.
- Nutty Upgrade: Add chopped pecans or walnuts to the topping for extra crunch and flavor contrast.
- Spice it Up: Mix in a pinch of ground ginger or nutmeg with the cinnamon for a warm, cozy flavor.
I’ve tried adding a handful of shredded coconut on top once, and it turned into a tropical delight that disappeared in no time. Feel free to experiment with your favorite flavors; this recipe is forgiving and fun.
Serving & Storage Suggestions
This peach cobbler dump cake is best served warm, fresh from the oven or slightly cooled, with a scoop of vanilla ice cream or a dollop of whipped cream. The contrast between the warm, juicy peaches and the cold cream is honestly heavenly.
If you have leftovers (which is rare!), cover the dish tightly with foil or plastic wrap and refrigerate for up to 3 days. To reheat, either microwave individual portions for about 30 seconds or warm the whole dish at 325°F (160°C) for 10-15 minutes until heated through. The topping might lose a bit of its crispness, but the flavors all come back beautifully.
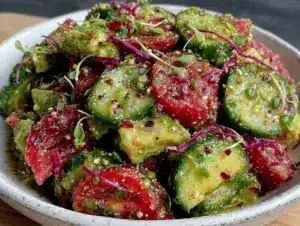
Interestingly, this cobbler seems to taste even better the next day as the flavors meld together. I often make it ahead for gatherings, and it’s still a star when reheated. Pair it with a simple green salad or even my fresh southwest chipotle salad for a light summer dinner spread.
Nutritional Information & Benefits
While this dessert isn’t exactly health food, it does have some redeeming qualities. Peaches are a good source of vitamins A and C, antioxidants, and dietary fiber, which support digestion and immune health. Using canned peaches in juice instead of syrup keeps the sugar content lower, making this a slightly lighter treat.
Here’s an estimate per serving (1/12th of the recipe): approximately 280 calories, 6g fat, 45g carbohydrates, 2g fiber, and 3g protein. This recipe is naturally gluten-free if you use gluten-free cake mix, and dairy-free adaptations are easy with butter substitutes.
Personally, I find that this cobbler offers a little sweet comfort after a long day without the guilt of overindulgence, especially when balanced with fresh fruit sides or light meals.
Conclusion
This Easy Peach Cobbler Dump Cake with Juicy, Golden Topping is one of those recipes that feels like a secret weapon during hectic days or last-minute dessert emergencies. It’s straightforward, forgiving, and delivers that warm, nostalgic sweetness with minimal effort. I love how you can tailor it to your tastes and still get amazing results every time.
Whether you’re a kitchen newbie or a seasoned cook just wanting a quick win, this recipe invites you to make it your own. Try it with a scoop of vanilla ice cream or alongside a fresh salad like the classic creamy church salad for a full meal experience. I’d love to hear how you tweak it or what toppings you add, so drop a comment below and share your version!
Here’s to sweet, simple successes in the kitchen—even on the busiest nights.
FAQs About Easy Peach Cobbler Dump Cake
Can I use fresh peaches instead of canned?
Yes! Use about 4 cups peeled and sliced fresh peaches. Toss them with sugar, cinnamon, and lemon juice before layering. You might want to slightly reduce baking time since fresh fruit releases less juice.
Do I have to use yellow cake mix?
Yellow cake mix gives the best buttery, golden topping, but you can try white or spice cake mixes for a different flavor profile. Avoid chocolate, as it won’t pair as well with peaches.
How do I keep the topping crispy?
Make sure to pour the melted butter evenly over the dry cake mix without stirring. Baking uncovered and letting the cake cool before serving also helps the topping crisp up nicely.
Can I make this dessert ahead of time?
Absolutely! Assemble it and refrigerate for up to 24 hours before baking. Add an extra 5-10 minutes to the baking time if baking from cold.
Is there a vegan version?
Yes, swap butter for vegan butter or coconut oil and use a vegan yellow cake mix. Check canned peaches for no added animal products. The texture may vary slightly but still delicious.
Pin This Recipe!
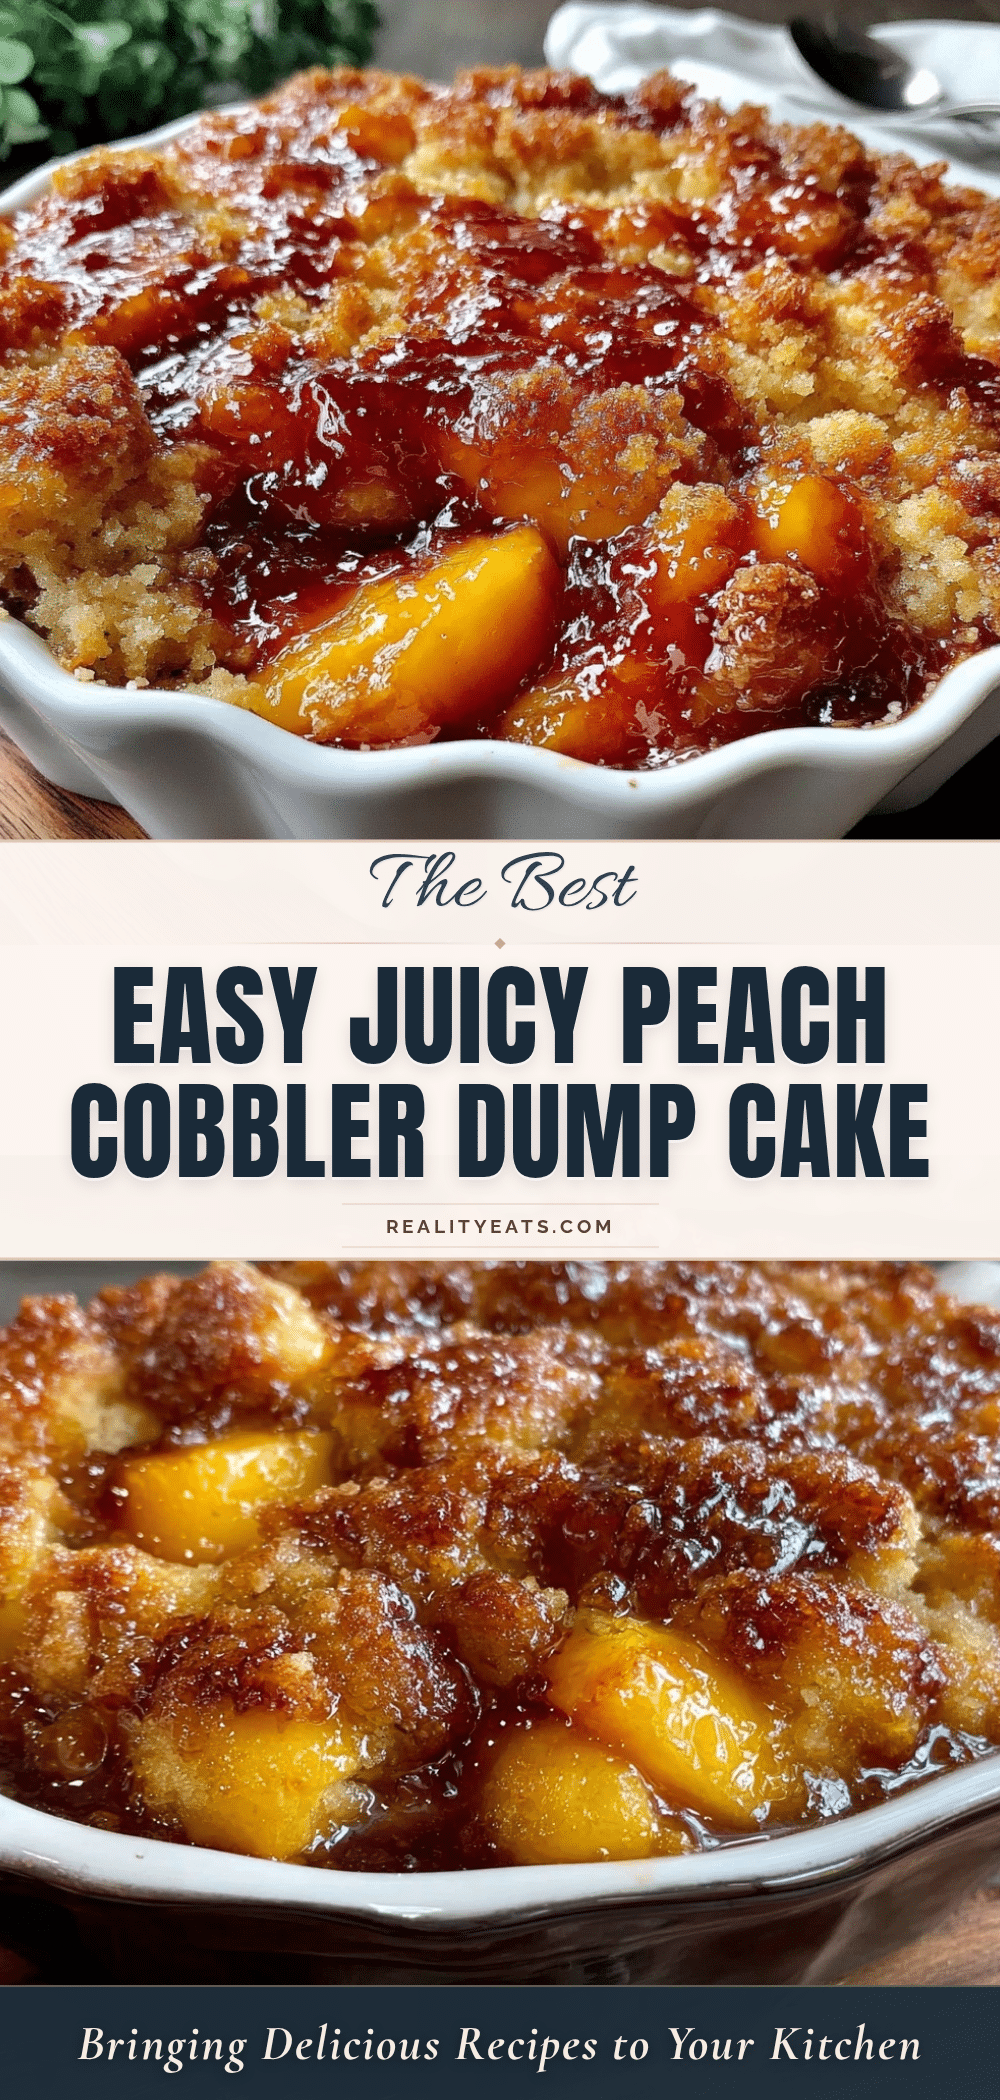
Easy Peach Cobbler Dump Cake Recipe with Juicy Golden Topping

A quick and easy peach cobbler dump cake with a juicy peach filling and a crispy, buttery golden topping. Perfect for busy days and crowd-pleasing at any gathering.
- Prep Time: 10 minutes
- Cook Time: 40-45 minutes
- Total Time: 50-55 minutes
- Yield: 12 servings 1x
- Category: Dessert
- Cuisine: American
Ingredients
- 2 cans (15 oz each) sliced peaches in juice
- ½ cup granulated sugar (adjust based on peach sweetness)
- 1 tsp ground cinnamon
- 1 tbsp lemon juice
- 1 box yellow cake mix (15.25 oz)
- 1 stick (8 tbsp) unsalted butter, melted and slightly cooled
- Optional: ½ cup chopped pecans or walnuts
Instructions
- Preheat your oven to 350°F (175°C).
- In a mixing bowl, combine the canned peaches with their juice, sugar, cinnamon, and lemon juice. Stir gently to blend flavors but keep the peach slices intact. Optionally drain about half the juice if you prefer less liquid.
- Pour the peach mixture evenly into the bottom of a 9×13-inch baking dish.
- Sprinkle the dry yellow cake mix evenly over the peaches without stirring.
- Drizzle the melted butter evenly over the cake mix, spreading with the back of a spoon if needed.
- If using nuts, scatter them on top now.
- Bake uncovered for 40-45 minutes until the topping is golden brown and the peach filling is bubbly. If browning too quickly, cover loosely with foil for the last 10 minutes.
- Remove from oven and let cool for at least 15 minutes before serving.
Notes
Do not stir after layering the cake mix and butter to maintain the classic dump cake texture. Let the cake cool before serving to allow the filling to thicken. For a crispier topping, broil for 1-2 minutes watching closely. Fresh peaches can be used in season, and gluten-free or dairy-free substitutions are possible.
Nutrition
- Serving Size: 1/12th of the cake
- Calories: 280
- Fat: 6
- Carbohydrates: 45
- Fiber: 2
- Protein: 3
Keywords: peach cobbler, dump cake, easy dessert, peach dessert, summer dessert, quick dessert, yellow cake mix, buttery topping