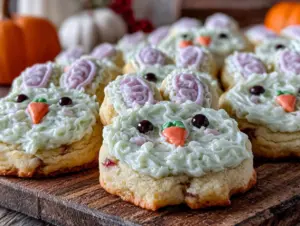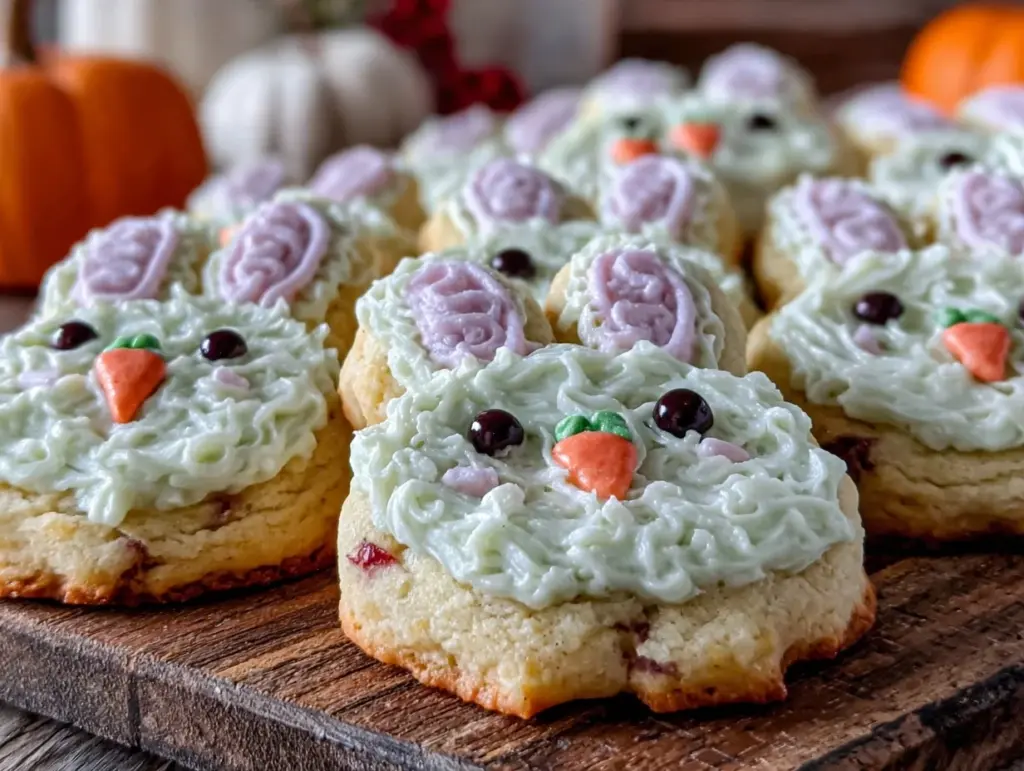
My partner took one bite of these pastel Halloween bunny sugar cookies and just stopped mid-chew, eyes wide, then asked if I could make them again next weekend. Honestly, that reaction caught me off guard — I wasn’t sure if Halloween-themed bunnies would really hit the sweet spot, but seeing that surprised delight made me realize these cookies aren’t just cute; they’re downright addictive. The pastel royal icing, with its soft hues and glossy finish, creates this gentle contrast to the usual bold Halloween colors, which makes these cookies stand out quietly but memorably on any dessert table.
Watching the way the icing cracked just right and how the sugar cookie stayed tender but firm, I knew this recipe had a little magic. The whole vibe feels playful but sophisticated, almost like a little secret between the spooky season and springtime sweetness. I caught myself sneaking a cookie while icing the next batch, the subtle vanilla and buttery base making them impossible to resist. There’s a calm in baking these pastel Halloween bunny sugar cookies that’s kind of soothing, especially when you’re juggling a million things.
It’s funny how a simple cookie can get you thinking about the little moments — like how a pastel color palette can soften a holiday that usually screams pumpkin and black cats. These pastel Halloween bunny sugar cookies with royal icing stuck with me because they blend fun and unexpected charm without trying too hard. They’re the kind of recipe that feels like a quiet celebration, something you’d want to share with friends who appreciate a little whimsy and sweetness without the usual Halloween sugar overload.
Why You’ll Love This Recipe
- Quick & Easy: Comes together in under 1.5 hours, perfect for last-minute Halloween baking frenzy or weekend fun.
- Simple Ingredients: No need for specialty stores—basic pantry staples and common baking ingredients deliver delightful results.
- Perfect for Halloween Parties and Fall Gatherings: These pastel bunnies add a fresh twist to traditional spooky treats.
- Crowd-Pleaser: Kids and adults both love these because they’re adorable and delicious, with a texture that’s just right — not too crunchy, not too soft.
- Unbelievably Delicious: The royal icing’s smooth finish and subtle sweetness pairs perfectly with the soft sugar cookie base for a melt-in-your-mouth experience.
This isn’t just another sugar cookie recipe with icing slapped on top. The secret lies in the royal icing technique — it dries perfectly smooth, giving these bunnies a polished, professional look that’s surprisingly easy to achieve at home. The batter is balanced so the cookies hold their shape yet stay tender, and the pastel colors bring a unique charm that’s a fresh take on Halloween baking. Plus, the recipe walks you through how to get that perfect icing consistency so your decorating doesn’t turn into a sticky mess.
For me, these cookies work because they hit that sweet spot between festive and fun without feeling over the top. They’re like a little party on your plate, but you don’t have to stress over complicated steps or hard-to-find ingredients. Honestly, I’ve made these for casual weekend baking and for a Halloween brunch, and they’ve always been a hit. They feel like a welcoming invitation to enjoy the season in a softer, more playful way.
What Ingredients You Will Need
This recipe uses simple, wholesome ingredients to deliver a bold flavor and satisfying texture without fuss. Most of these are pantry staples, and if you want to swap or tweak, I’ll note that along the way.
- For the Sugar Cookie Dough:
- 2 ¾ cups (345g) all-purpose flour (I recommend King Arthur for consistent texture)
- 1 teaspoon baking powder
- ½ teaspoon salt
- 1 cup (227g) unsalted butter, softened (room temperature for easy creaming)
- 1 ½ cups (300g) granulated sugar
- 1 large egg, room temperature
- 1 tablespoon vanilla extract (pure vanilla makes a difference here)
- 2 tablespoons whole milk (adds tenderness; swap with almond milk if dairy-free)
- For the Royal Icing:
- 3 cups (360g) powdered sugar, sifted
- 2 large egg whites or 4 tablespoons meringue powder + 6 tablespoons water (for safety and convenience)
- 1 teaspoon lemon juice (helps brighten the icing)
- Gel food coloring in pastel shades: soft pink, lavender, mint green, pale orange
- Optional: 1 teaspoon vanilla or almond extract for flavor boost
Look for fresh eggs and real vanilla extract—it really lifts the cookie flavor. If you want a gluten-free option, almond flour can replace part of the all-purpose flour, but expect a slightly different texture. For the icing, meringue powder is a great substitute for raw egg whites if you’re concerned about food safety or want a longer shelf life for your icing. Also, using gel colors keeps the consistency of the icing perfect without watering it down.
Equipment Needed
- Stand mixer or hand mixer with paddle attachment (makes creaming butter and sugar effortless)
- Mixing bowls (medium and large size)
- Measuring cups and spoons (accuracy is key for baking)
- Rolling pin (I prefer a non-stick one for sugar cookie dough)
- Bunny-shaped cookie cutters (various sizes add charm; I use a 3-inch cutter)
- Baking sheets lined with parchment paper or silicone mats (prevents sticking and promotes even baking)
- Cooling racks (to cool cookies before icing)
- Piping bags and small round tips (sizes #1 or #2 work well for royal icing details)
- Toothpicks or scribe tools (for smoothing icing edges or fixing tiny mistakes)
If you don’t have a stand mixer, a sturdy hand mixer will do just fine, though creaming might take a bit longer. For piping, disposable bags are budget-friendly and easy to clean up, but silicone reusable ones are eco-friendly and hold up well if you bake often. Keep your cookie cutters clean and dry to prevent dough sticking, and if you want to keep things simple, you can even freehand cut the bunnies with a sharp knife for a rustic look.
Preparation Method
- Mix Dry Ingredients: In a medium bowl, whisk together 2 ¾ cups (345g) flour, 1 teaspoon baking powder, and ½ teaspoon salt. Set aside. This keeps everything evenly distributed.
- Cream Butter and Sugar: In your mixer bowl, beat 1 cup (227g) softened butter and 1 ½ cups (300g) granulated sugar on medium speed for about 3-4 minutes until light and fluffy. The texture should be pale and airy — that’s your secret for tender cookies.
- Add Egg and Flavor: Beat in 1 large egg and 1 tablespoon vanilla extract until combined, scraping down the sides as needed.
- Combine Wet and Dry: Reduce speed to low and gradually add the flour mixture alternating with 2 tablespoons whole milk. Start and end with the flour. Mix just until incorporated — avoid overmixing or you’ll get tough cookies.
- Chill the Dough: Flatten the dough into a disk, wrap in plastic wrap, and refrigerate for at least 1 hour or overnight. Chilling helps prevent spreading and makes rolling easier.
- Preheat Oven: Heat to 350°F (175°C). Line baking sheets with parchment paper or silicone mats.
- Roll and Cut: Roll chilled dough on a lightly floured surface to about ¼ inch (6mm) thickness. Cut bunny shapes with your cookie cutter. Transfer carefully to baking sheets (leave about 1 inch between cookies).
- Bake: Bake for 8-10 minutes until edges are just starting to turn golden. Keep an eye — you want a soft edge, not browned.
- Cool Completely: Let cookies cool on sheets for 5 minutes, then move to wire racks to cool fully before icing.
- Prepare Royal Icing: Beat 3 cups (360g) powdered sugar with 2 egg whites (or 4 tablespoons meringue powder + 6 tablespoons water) and 1 teaspoon lemon juice until stiff peaks form (about 5-7 minutes). Divide icing into bowls and tint with gel colors to your preferred pastel shades.
- Decorate: Thin some icing with water to flooding consistency for smooth surfaces; keep some thicker for outlines and details. Pipe outlines first, then flood inside. Use toothpicks to pop bubbles or smooth edges while wet.
- Dry: Let iced cookies dry on racks at room temperature for several hours or overnight. This sets the royal icing to a beautiful matte finish.
Watch out for overbaking — the cookies will feel soft but firm up as they cool. Also, if your icing seems too thick to pipe, add water a drop at a time; too thin, add powdered sugar sparingly. I usually prep the icing while cookies bake to keep the process smooth and efficient. When I’m in a rush, chilling the dough overnight makes the next day’s baking faster.
Cooking Tips & Techniques
Royal icing can be intimidating at first, but a few tricks make all the difference. Use room temperature egg whites or meringue powder for a stable, glossy finish. When mixing, beat long enough for stiff peaks — that’s your sign the icing will pipe cleanly without sagging.
Don’t skimp on sifting powdered sugar; it prevents lumps that mess with smooth piping. When coloring, gel food colors work best because they don’t thin your icing like liquid dyes might. For piping, start with outlines first to give your cookies a “dam” to hold flooding icing inside.
Keep a damp cloth over your piping bag tip when not in use to avoid drying out. I learned the hard way that rushed drying leads to cracks, so patience is key — let your cookies sit undisturbed in a cool, dry place for the icing to set fully.
Multitasking helps: while the first batch cools, roll and cut the next. And if you want to speed things up, check out my soft sugar cookies with creamy icing recipe for a slightly different texture and icing method that’s less time-intensive but just as tasty.
Variations & Adaptations
If you want to switch things up, here are a few ideas I’ve tried or recommend:
- Flavor Twists: Add ½ teaspoon almond extract or lemon zest to the dough for a subtle, fresh note that pairs well with pastel colors.
- Dietary Changes: Substitute almond flour for a gluten-free version (expect a slightly crumbly texture) and use dairy-free butter and coconut milk to make these vegan-friendly.
- Seasonal Adaptations: For spring or Easter, swap pastel Halloween colors for brighter spring tones and add tiny edible flower decorations or sprinkles.
- Alternative Decorating: Replace royal icing with a simple glaze made from powdered sugar and lemon juice for a rustic, shiny finish.
- Different Shapes: If you want to try a different festive shape, bunny cutters also work great for baby showers or spring birthdays — just switch up the colors accordingly.
Last year, I made these with a splash of pumpkin spice in the dough for a cozy fall twist, pairing them with a batch of pumpkin spice cookies that brought some warmth to the pastel theme. The mix surprised my guests in the best way!
Serving & Storage Suggestions
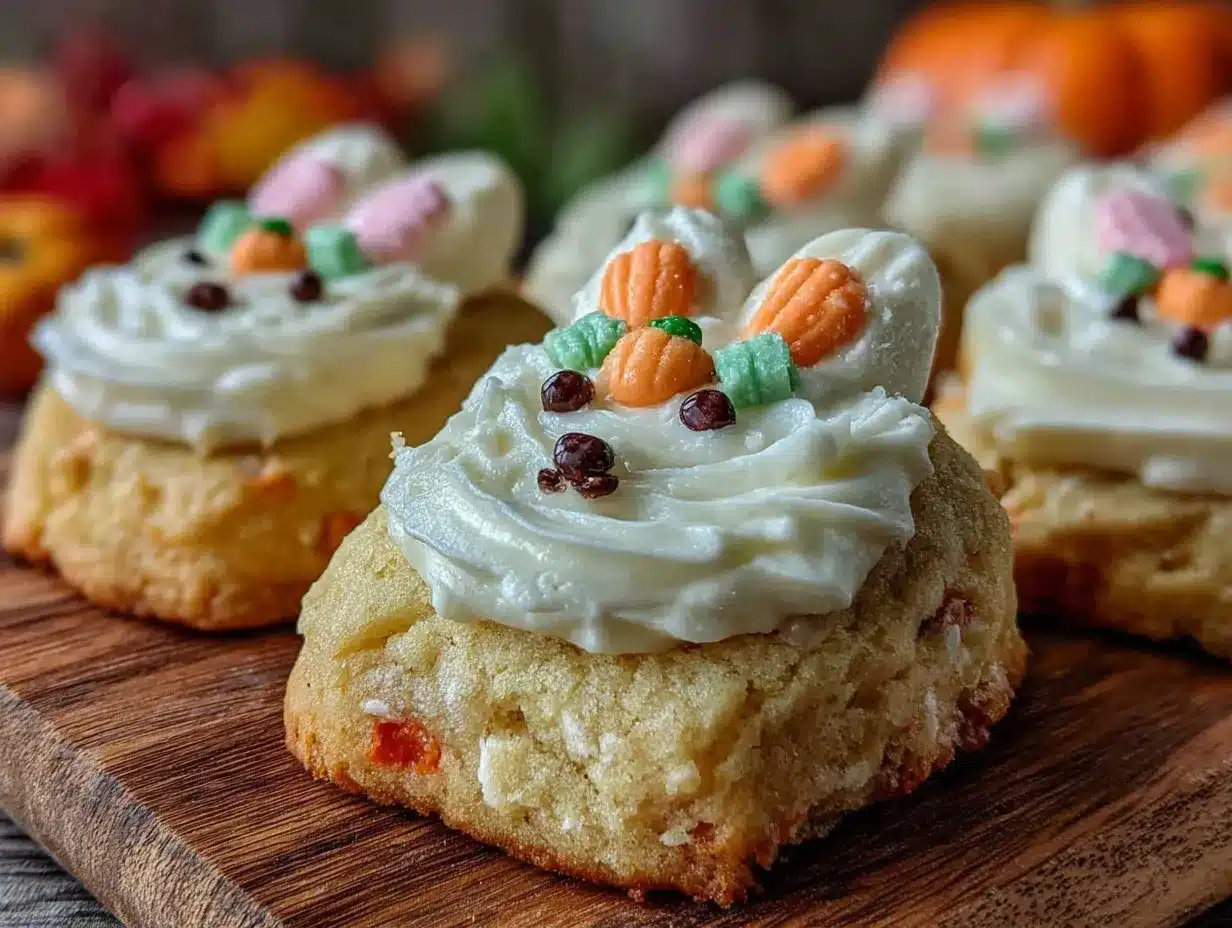
These pastel Halloween bunny sugar cookies are best served at room temperature to enjoy the full softness of the cookie and the smooth, set royal icing. Arrange them on a pretty platter, maybe with some autumn leaves or mini pumpkins for a festive touch.
They pair beautifully with a warm cup of spiced tea or even a creamy hot chocolate—perfect for cozy fall afternoons. If you want to offer a savory balance, something like the fresh southwest chipotle salad adds a tangy contrast that’s unexpected but delightful alongside sweet treats.
Store cookies in an airtight container at room temp for up to 3 days; beyond that, refrigeration helps keep the icing firm but may soften the cookies slightly. For longer storage, freeze uniced cookies in a single layer, then thaw and decorate when ready. I find that icing dries best when applied right before serving, but these will keep their charm even a day later.
Over time, the flavors meld and deepen, so leftovers can taste even better the next day — if they last that long!
Nutritional Information & Benefits
One pastel Halloween bunny sugar cookie (without icing) roughly contains about 150-170 calories, 7-9 grams of fat, 20 grams of carbohydrates, and 1-2 grams of protein. The royal icing adds minimal calories but contains sugar and egg whites, so keep portions in mind if you’re monitoring sugar intake.
Butter provides a touch of vitamin A and calcium, while the egg whites offer a bit of lean protein. Using real vanilla and fresh ingredients means you avoid artificial flavors and colors often found in store-bought cookies.
With pastel colors instead of heavy food dyes, this recipe is a bit gentler visually and can be adapted for gluten-free or dairy-free diets with simple substitutions. I like offering these as a treat that feels indulgent but balanced — not an everyday snack, but a special celebration of flavor and craft.
Conclusion
Perfect pastel Halloween bunny sugar cookies with royal icing have become a little highlight in my baking calendar. They feel festive without being over the top, and the blend of soft pastel colors with classic sugar cookie flavor is just right for anyone wanting something unique this Halloween. I love how adaptable they are, easy enough for beginners but with enough technique to make you feel like a decorating pro.
Try changing up the colors or flavors to fit your mood or occasion — they’re forgiving and fun, plus they bring that little spark of joy when someone takes that first bite and pauses in surprise. If you give these a try, I’d love to hear how you decorated yours or what twist you added. Drop a comment or share your photos — baking’s always better when it’s shared!
Happy baking and here’s to sweet, pastel moments this Halloween season.
FAQs
Can I make the cookie dough ahead of time?
Yes! In fact, chilling the dough overnight makes rolling and cutting easier and improves cookie shape retention during baking.
What if I don’t have meringue powder for the royal icing?
You can use fresh egg whites instead, but meringue powder is safer and more convenient, especially for longer-lasting icing.
How do I get pastel colors without making the icing too runny?
Use gel food coloring in small amounts and add drop by drop until you reach the desired shade without thinning the icing.
Can I freeze these cookies after baking?
Yes, freeze the uniced cookies in a single layer, then thaw before decorating. This helps you prep ahead without sacrificing freshness.
What’s the best way to store iced cookies?
Store them in an airtight container at room temperature for up to 3 days. For longer storage, refrigerate but bring them to room temp before serving for best texture.
Pin This Recipe!
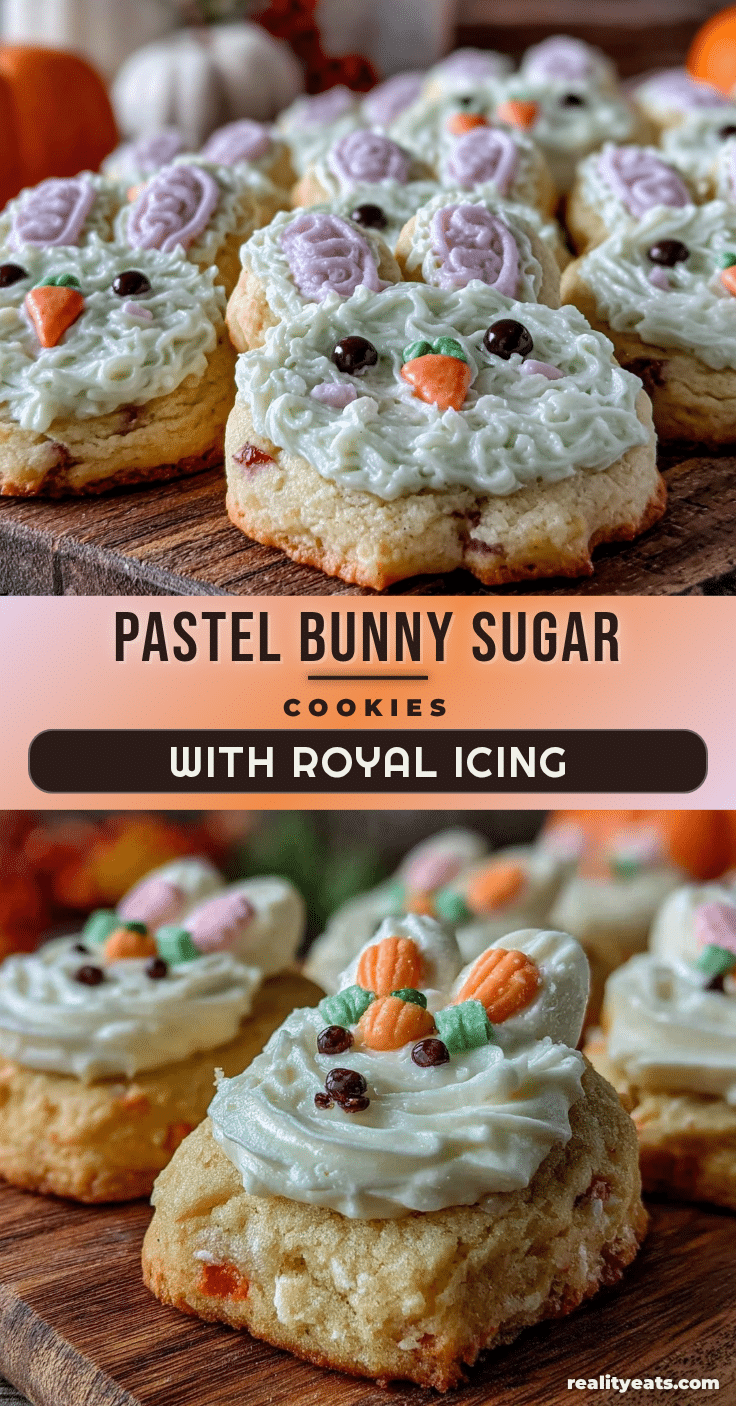
Perfect Pastel Halloween Bunny Sugar Cookies Easy Royal Icing Recipe

These pastel Halloween bunny sugar cookies feature a tender sugar cookie base topped with smooth, glossy royal icing in soft pastel hues, creating a playful yet sophisticated treat perfect for Halloween and fall gatherings.
- Prep Time: 20 minutes
- Cook Time: 10 minutes
- Total Time: 1 hour 30 minutes
- Yield: 24 cookies 1x
- Category: Dessert
- Cuisine: American
Ingredients
- 2 ¾ cups (345g) all-purpose flour
- 1 teaspoon baking powder
- ½ teaspoon salt
- 1 cup (227g) unsalted butter, softened
- 1 ½ cups (300g) granulated sugar
- 1 large egg, room temperature
- 1 tablespoon vanilla extract
- 2 tablespoons whole milk
- 3 cups (360g) powdered sugar, sifted
- 2 large egg whites or 4 tablespoons meringue powder + 6 tablespoons water
- 1 teaspoon lemon juice
- Gel food coloring in pastel shades: soft pink, lavender, mint green, pale orange
- Optional: 1 teaspoon vanilla or almond extract for flavor boost
Instructions
- Mix Dry Ingredients: In a medium bowl, whisk together flour, baking powder, and salt. Set aside.
- Cream Butter and Sugar: Beat softened butter and granulated sugar on medium speed for 3-4 minutes until light and fluffy.
- Add Egg and Flavor: Beat in egg and vanilla extract until combined, scraping down sides as needed.
- Combine Wet and Dry: Reduce speed to low and gradually add flour mixture alternating with milk, starting and ending with flour. Mix just until incorporated.
- Chill the Dough: Flatten dough into a disk, wrap in plastic wrap, and refrigerate for at least 1 hour or overnight.
- Preheat Oven: Heat oven to 350°F (175°C). Line baking sheets with parchment paper or silicone mats.
- Roll and Cut: Roll chilled dough to about ¼ inch thickness. Cut bunny shapes and transfer to baking sheets, leaving 1 inch between cookies.
- Bake: Bake for 8-10 minutes until edges start to turn golden but cookies remain soft.
- Cool Completely: Cool on baking sheets for 5 minutes, then transfer to wire racks to cool fully.
- Prepare Royal Icing: Beat powdered sugar with egg whites (or meringue powder and water) and lemon juice until stiff peaks form (5-7 minutes). Divide and tint with gel colors.
- Decorate: Thin some icing for flooding and keep some thick for outlines. Pipe outlines first, then flood inside. Use toothpicks to smooth edges and pop bubbles.
- Dry: Let iced cookies dry at room temperature for several hours or overnight until icing sets to a matte finish.
Notes
Chill dough overnight for easier rolling and better shape retention. Use gel food coloring to avoid thinning icing. Beat royal icing to stiff peaks for best piping results. Let icing dry undisturbed for a smooth matte finish. Meringue powder is a safer alternative to raw egg whites.
Nutrition
- Serving Size: 1 cookie
- Calories: 160
- Sugar: 12
- Sodium: 90
- Fat: 8
- Saturated Fat: 5
- Carbohydrates: 20
- Protein: 2
Keywords: Halloween cookies, sugar cookies, royal icing, pastel cookies, bunny cookies, Halloween baking, sugar cookie recipe, easy royal icing