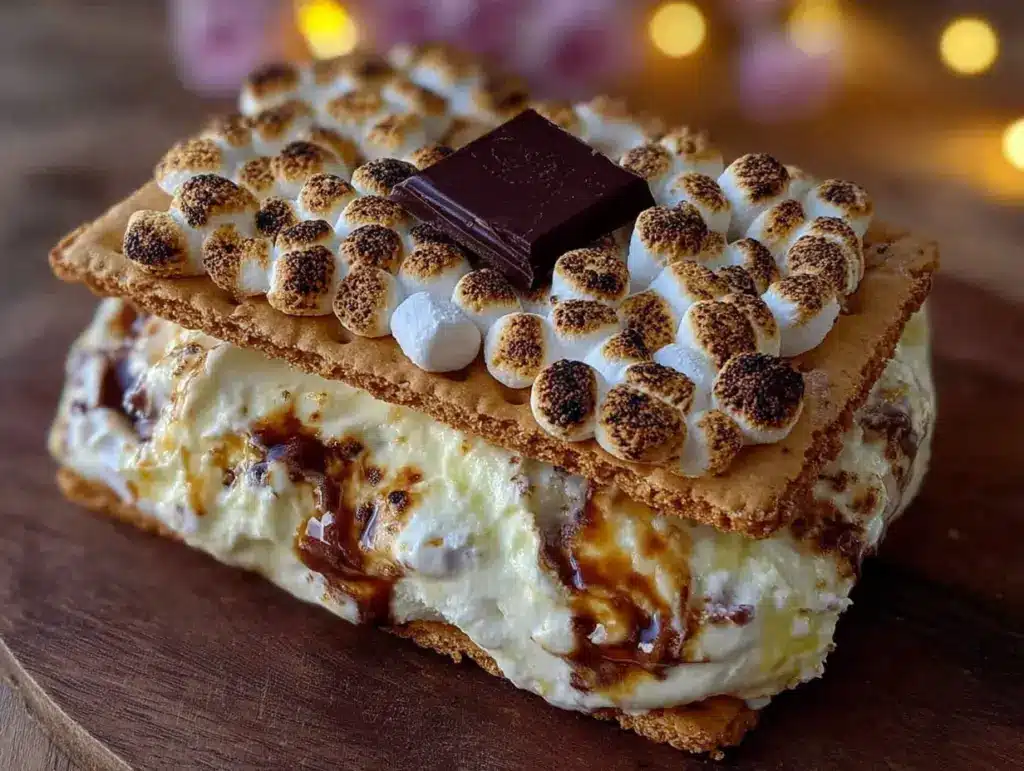
I had been looking for a frozen treat that actually tasted like a campfire s’more without requiring an actual fire, a cooler full of melting ice, or any of that churning nonsense. For a while, I just accepted that s’mores-flavored ice cream from the store was going to taste like artificial smoke and disappointment. You know that waxy chocolate coating they use? The marshmallow swirl that’s more corn syrup than anything else? It just wasn’t doing it for me.
Honestly, the idea came together on a Tuesday afternoon in July. I was standing in my kitchen, staring at a box of graham crackers I’d bought for a cheesecake crust that never happened, a bag of jet-puffed marshmallows, and a block of cream cheese. My brain did that weird little connection thing where it just clicked. Why was nobody making a no-churn s’mores ice cream that you could actually sandwich between two cookies? Why did every version out there require an ice cream maker or a complicated custard base? It felt like a gap that needed filling.
So I started testing. The first batch was a disaster—the marshmallow ribbon sank to the bottom, the graham cracker pieces got soggy, and the whole thing was just… off. But the second batch? That was the one. The texture was creamy, the chocolate chunks stayed crunchy, and the marshmallow swirl held its place. I knew I had something worth sharing.
This no-churn s’mores ice cream sandwiches recipe is the one I keep coming back to. It’s the kind of thing you make when you want summer in your mouth but you’re too lazy to build a fire. And honestly? It’s better than the real thing.
Why You’ll Love This Recipe
- No Ice Cream Maker Required — Seriously. You don’t need any fancy equipment. Just a mixing bowl, a whisk, and a freezer. That’s it.
- Five Simple Ingredients — Heavy cream, sweetened condensed milk, graham crackers, marshmallows, and chocolate. You probably have most of these in your kitchen right now.
- Perfect for Summer Parties — These sandwiches are a guaranteed crowd-pleaser. Kids love them, adults love them, and they disappear faster than you’d expect.
- Make-Ahead Friendly — You can prep the ice cream base days in advance. Just scoop and sandwich when you’re ready to serve.
- Customizable to the Max — Swap the chocolate for dark or white, add nuts, use gluten-free graham crackers—it’s your world.
What makes this recipe different from every other s’mores ice cream out there is the technique. I spent three weeks testing ratios, figuring out how to keep the graham cracker pieces from turning into mush, and perfecting that marshmallow swirl. The secret? Toasting the marshmallows first and folding them in at just the right moment. It’s a small detail, but it makes all the difference.
This is the kind of dessert that makes you close your eyes after the first bite. It’s comfort food reimagined—frozen, creamy, and loaded with all the nostalgic flavors of a summer campfire. Perfect for impressing guests without stress, or turning a simple Tuesday into something memorable.
What Ingredients You Will Need
This recipe uses simple, wholesome ingredients to deliver that classic s’mores flavor without any of the fuss. Most of these are pantry staples, and if you’re like me, you probably already have them on hand.
- Heavy cream (2 cups / 480 ml) — Make sure it’s cold. Cold cream whips up faster and holds its shape better. I prefer organic heavy cream from a local dairy, but any brand works.
- Sweetened condensed milk (1 can / 14 oz / 397 g) — This is the magic ingredient that gives no-churn ice cream its creamy texture. Don’t substitute with evaporated milk—it’s not the same.
- Graham crackers (1 ½ cups crushed, about 8 full sheets) — You want some fine crumbs and some small chunks for texture. I recommend Honey Maid for the classic flavor.
- Mini marshmallows (1 ½ cups / about 85 g) — The mini ones toast more evenly. Jet-Puffed is my go-to brand, but any brand works.
- Semi-sweet chocolate (4 oz / 113 g), chopped — Use a good quality chocolate bar, not chocolate chips. Chips have stabilizers that prevent them from melting smoothly. I like Ghirardelli or Baker’s.
- Vanilla extract (1 teaspoon) — Pure vanilla, not imitation. It adds depth to the flavor.
- Pinch of salt — This balances the sweetness and enhances the chocolate.
For the sandwiches:
- Chocolate graham crackers or chocolate wafer cookies (about 24 cookies) — These are the “bread” of your sandwich. Chocolate graham crackers add extra s’mores flavor, but regular graham crackers work too. If you want a softer bite, use chocolate wafer cookies like Famous Chocolate Wafers.
- Extra mini marshmallows and chocolate chunks for rolling the edges — Optional, but highly recommended for that bakery-style look.
Equipment Needed
The beauty of this recipe is that it doesn’t require any specialized equipment. Here’s what you’ll need:
- Large mixing bowl — For whipping the cream. A glass or stainless steel bowl works best.
- Electric hand mixer or stand mixer — You can whip the cream by hand with a whisk, but it’ll take about 10 minutes and your arm will get tired. I’ve done it both ways, and the hand mixer is worth the minimal cleanup.
- Spatula — A rubber spatula is essential for folding the ingredients together gently.
- 9×5-inch loaf pan — For freezing the ice cream. A metal pan works best because it conducts cold more efficiently.
- Parchment paper — Line the pan for easy removal.
- Baking sheet — For toasting the marshmallows. A rimmed baking sheet is ideal.
- Small saucepan or microwave-safe bowl — For melting the chocolate.
- Sharp knife — For cutting the ice cream into squares. A chef’s knife works great.
If you don’t have a loaf pan, you can use an 8×8-inch square baking dish instead. Just adjust the freezing time slightly—the thinner layer will freeze faster. And if you’re really in a pinch, a disposable aluminum loaf pan from the grocery store works perfectly.
Preparation Method
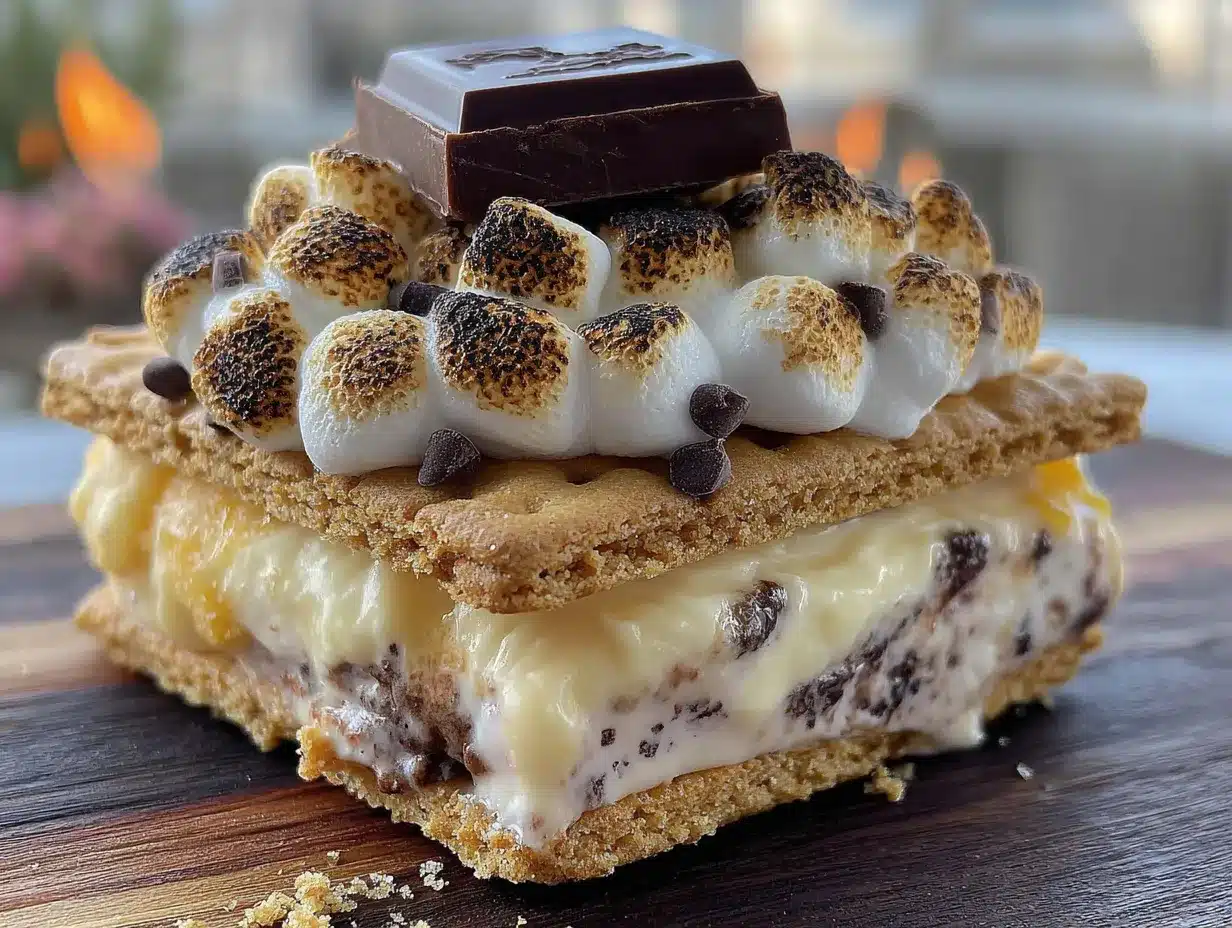
Let’s get to the good part. Here’s how to make these no-churn s’mores ice cream sandwiches step by step.
- Toast the marshmallows. Preheat your oven to 400°F (200°C). Spread the mini marshmallows on a rimmed baking sheet in a single layer. Toast for 3-5 minutes, watching closely—they go from golden to burnt in seconds. You want them puffed and lightly browned on top. Let them cool completely on the baking sheet. They’ll deflate a bit, but that’s okay.
- Whip the cream. Pour the cold heavy cream into a large mixing bowl. Using an electric hand mixer or stand mixer fitted with the whisk attachment, beat on medium-high speed until soft peaks form. This takes about 2-3 minutes. You’re looking for peaks that hold their shape but still droop slightly at the tips. Don’t over-whip, or you’ll end up with butter.
- Fold in the condensed milk. Add the sweetened condensed milk, vanilla extract, and a pinch of salt to the whipped cream. Gently fold everything together using a rubber spatula. Use a figure-eight motion, scraping the bottom and sides of the bowl. Fold until just combined—you don’t want to deflate all that air you just whipped in.
- Add the mix-ins. Gently fold in the cooled toasted marshmallows, crushed graham crackers, and chopped chocolate. Reserve about ¼ cup of each for topping later. Fold just until everything is evenly distributed. The mixture will look thick and creamy, like a soft-serve ice cream.
- Layer and freeze. Line a 9×5-inch loaf pan with parchment paper, leaving some overhang on the sides. Pour the ice cream mixture into the pan and spread it evenly. Sprinkle the reserved graham crackers, marshmallows, and chocolate on top. Press them in gently with the back of a spoon. Cover with plastic wrap and freeze for at least 6 hours, or overnight. The longer it freezes, the easier it is to slice.
- Assemble the sandwiches. Once the ice cream is fully frozen (it should be firm to the touch), remove it from the pan using the parchment paper overhang. Place it on a cutting board. Using a sharp knife, cut the ice cream into 12 equal squares. You can cut them into rectangles or circles if you prefer—just adjust the cookie size accordingly.
- Sandwich and serve. Place one square of ice cream between two chocolate graham crackers or chocolate wafer cookies. Press gently to adhere. If you want to roll the edges in extra goodies, spread a thin layer of melted chocolate around the exposed ice cream and dip it in crushed graham crackers, mini marshmallows, or chocolate shavings. Serve immediately, or wrap individually in plastic wrap and freeze for later.
Pro tip: If the ice cream starts to soften while you’re assembling, pop the cut squares back in the freezer for 10-15 minutes before sandwiching. This makes the process way less messy.
Cooking Tips & Techniques
After making this recipe about a dozen times (yes, really), I’ve picked up a few tricks that make the process smoother and the results better.
Don’t skip the toasting step. I know it feels like an extra step, but toasting the marshmallows first is what gives this ice cream that authentic campfire flavor. Raw marshmallows just taste like sugar—toasted marshmallows taste like nostalgia. I learned this the hard way when my first batch came out tasting flat and one-dimensional.
Use a hot knife for clean slices. When you’re cutting the frozen ice cream block, run your knife under hot water for a few seconds and wipe it dry before each cut. This prevents the ice cream from cracking or crumbling. It’s a small trick, but it makes a huge difference in presentation.
Let the ice cream sit out for 5 minutes before serving. No-churn ice cream freezes harder than churned ice cream because it has a higher fat content. Letting it sit at room temperature for 5 minutes softens it just enough to make it scoopable and creamy. If you serve it straight from the freezer, it’ll be too hard to bite into.
Don’t over-mix the base. When you’re folding in the condensed milk and mix-ins, use a light hand. Over-mixing deflates the whipped cream and results in a denser, less creamy ice cream. Stop folding as soon as everything is incorporated.
Double-wrap for long-term storage. If you’re making these in advance, wrap each sandwich individually in plastic wrap, then place them in a freezer-safe bag or container. This prevents freezer burn and keeps the cookies from getting soggy. They’ll keep for up to two weeks—if they last that long.
Variations & Adaptations
One of the best things about this recipe is how adaptable it is. Here are some variations I’ve tried and loved.
Gluten-Free Version — Swap the graham crackers for gluten-free graham crackers (I like the Kinnikinnick brand) and use gluten-free chocolate wafer cookies for the sandwiches. Everything else in the recipe is naturally gluten-free. I tested this for a friend with celiac disease, and she said it was better than the original.
Dark Chocolate Lovers — Use dark chocolate (70% cocoa or higher) in the ice cream base and dark chocolate graham crackers for the sandwiches. The bitterness of the dark chocolate balances the sweetness of the marshmallows beautifully. This is my personal favorite version.
Peanut Butter S’mores — Swirl in ½ cup of creamy peanut butter (warmed slightly for easier mixing) along with the marshmallows and chocolate. The peanut butter adds a savory richness that pairs perfectly with the chocolate and graham crackers. I made this for a party and it was the first thing to disappear.
Mint Chocolate Chip S’mores — Add ½ teaspoon of peppermint extract to the ice cream base and use mint chocolate chips instead of chopped chocolate. The cool mint flavor combined with the toasted marshmallows is surprisingly addictive. I tried this on a whim and it’s now my go-to summer variation.
Vegan Option — Use full-fat coconut cream (chilled and whipped) instead of heavy cream, and sweetened condensed coconut milk instead of dairy condensed milk. Use vegan marshmallows (Dandies brand works great) and dairy-free chocolate. The texture is slightly different—a bit icier—but the flavor is still fantastic.
Serving & Storage Suggestions
These no-churn s’mores ice cream sandwiches are best served straight from the freezer, but with that 5-minute softening window I mentioned earlier. Serve them on a chilled plate or a wooden board for that campfire aesthetic. If you’re feeling fancy, drizzle a little warm chocolate sauce over the top and sprinkle with flaky sea salt.
They pair beautifully with a cold glass of milk, a hot cup of coffee, or a scoop of vanilla bean ice cream on the side. For a full summer dessert spread, serve them alongside cozy apple pie bars or creamy no-bake apple pie cheesecake for a dessert table that’ll have everyone talking.
Storage: Wrap each sandwich individually in plastic wrap and store in an airtight container in the freezer. They’ll keep for up to 2 weeks. The cookies will soften slightly over time, but the flavor stays fantastic. If you want to keep the cookies crispier, store the ice cream base separately and assemble the sandwiches just before serving.
Flavor development: The flavors actually get better after a day or two in the freezer. The marshmallow and chocolate flavors meld together, and the graham cracker pieces soften slightly, creating a more cohesive texture. I actually prefer these on day two.
Nutritional Information & Benefits
Let’s be real—this is a dessert, not a health food. But here’s the estimated nutritional breakdown for one sandwich (based on 12 servings):
| Nutrient | Amount per Serving |
|---|---|
| Calories | 385 |
| Total Fat | 22g |
| Saturated Fat | 13g |
| Cholesterol | 68mg |
| Sodium | 210mg |
| Total Carbohydrates | 44g |
| Dietary Fiber | 2g |
| Sugars | 32g |
| Protein | 5g |
Dietary considerations: This recipe contains dairy, gluten, and eggs (in the cookies). For a gluten-free version, use gluten-free graham crackers and cookies. For a dairy-free version, use the vegan substitutions mentioned above. The recipe is naturally nut-free, but check your chocolate and graham crackers for cross-contamination if you have allergies.
Health benefits: On the bright side, the heavy cream provides calcium and vitamin A, and the dark chocolate (if you use it) is rich in antioxidants. The marshmallows? Well, they make you happy. And sometimes that’s enough.
Conclusion
This no-churn s’mores ice cream sandwiches recipe is the kind of dessert that makes you feel like a genius. It’s ridiculously easy—no churning, no custard, no fancy equipment—but the result tastes like something from a gourmet ice cream shop. The toasted marshmallows, the crunchy graham cracker pieces, the melty chocolate chunks, all sandwiched between two crisp cookies. It’s summer in a bite.
I love this recipe because it’s forgiving. You can mess up the measurements, over-whip the cream, forget to toast the marshmallows (please don’t), and it’ll still be delicious. It’s the kind of recipe that builds confidence in the kitchen, especially if you’re new to making homemade ice cream.
So go ahead—make a batch. Customize it however you want. Add extra marshmallows, use dark chocolate, roll the edges in sprinkles. Make it yours. And when you do, come back and let me know how it turned out in the comments. I’d love to hear about your variations.
Happy cooking, friends. And happy summer.
Frequently Asked Questions
Can I use store-bought ice cream instead of making the no-churn base?
Technically, yes. But the no-churn base is what gives these sandwiches their creamy, scoopable texture that doesn’t freeze rock-hard. Store-bought ice cream tends to be icier and won’t hold its shape as well when sandwiched between cookies. Plus, the homemade version lets you control the mix-ins and sweetness level.
How long does it take for the ice cream to freeze?
At least 6 hours, but overnight is best. The longer it freezes, the firmer it gets, which makes it easier to cut into clean squares. If you’re in a hurry, you can spread the mixture in a thin layer on a baking sheet (lined with parchment) and freeze for 3-4 hours. Just cut it into squares before it gets too hard.
Can I use regular graham crackers instead of chocolate ones?
Absolutely. Regular graham crackers work perfectly and give you that classic s’mores flavor. If you want a sweeter, more indulgent sandwich, go with chocolate graham crackers or chocolate wafer cookies. I’ve also used vanilla wafers and shortbread cookies—both are delicious.
How do I keep the cookies from getting soggy?
Assemble the sandwiches just before serving if you want the cookies to stay crisp. If you’re making them ahead, wrap each sandwich tightly in plastic wrap and store in the freezer. The cookies will soften slightly over time, but they’ll still have a nice texture. For the crispiest results, use chocolate wafer cookies—they’re denser and hold up better.
Can I make these without an electric mixer?
Yes, but it takes some elbow grease. You can whip the cream by hand using a whisk and a large bowl. It’ll take about 8-10 minutes of steady whisking. I’ve done it before when my hand mixer broke, and it’s totally doable—just be prepared for a bit of a workout. If you’re making a double batch, definitely use a mixer.
Pin This Recipe!
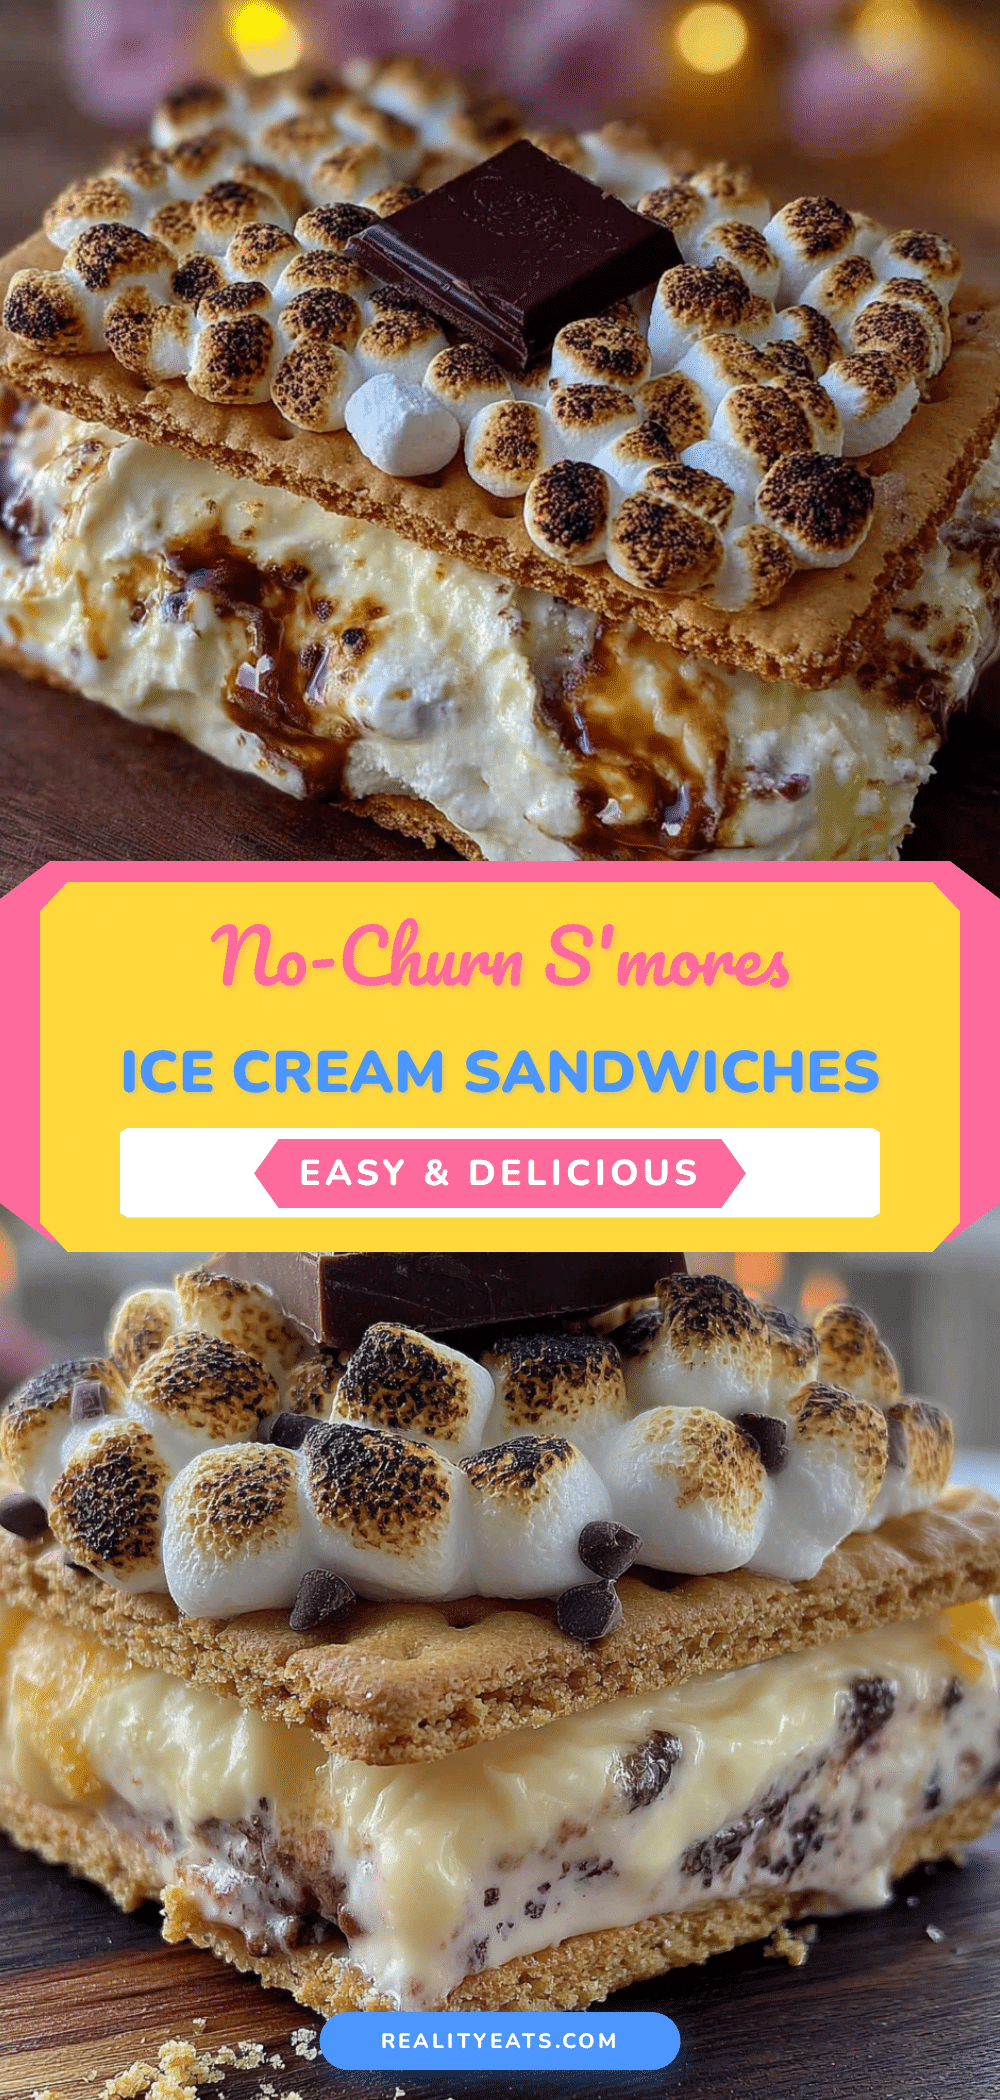
Best No-Churn S’mores Ice Cream Sandwiches Recipe

This no-churn s’mores ice cream sandwiches recipe is the one I keep coming back to. It’s the kind of thing you make when you want summer in your mouth but you’re too lazy to build a fire, and it’s better than the real thing.
- Prep Time: 20 minutes
- Cook Time: 5 minutes
- Total Time: 6 hours 25 minutes (includes freezing time)
- Yield: 12 servings 1x
- Category: Dessert
- Cuisine: American
Ingredients
- 2 cups (480 ml) heavy cream, cold
- 1 can (14 oz / 397 g) sweetened condensed milk
- 1 ½ cups crushed graham crackers (about 8 full sheets)
- 1 ½ cups (about 85 g) mini marshmallows
- 4 oz (113 g) semi-sweet chocolate, chopped
- 1 teaspoon vanilla extract
- Pinch of salt
- For the sandwiches: about 24 chocolate graham crackers or chocolate wafer cookies
- Optional: extra mini marshmallows and chocolate chunks for rolling the edges
Instructions
- Toast the marshmallows. Preheat your oven to 400°F (200°C). Spread the mini marshmallows on a rimmed baking sheet in a single layer. Toast for 3-5 minutes, watching closely—they go from golden to burnt in seconds. You want them puffed and lightly browned on top. Let them cool completely on the baking sheet. They’ll deflate a bit, but that’s okay.
- Whip the cream. Pour the cold heavy cream into a large mixing bowl. Using an electric hand mixer or stand mixer fitted with the whisk attachment, beat on medium-high speed until soft peaks form. This takes about 2-3 minutes. You’re looking for peaks that hold their shape but still droop slightly at the tips. Don’t over-whip, or you’ll end up with butter.
- Fold in the condensed milk. Add the sweetened condensed milk, vanilla extract, and a pinch of salt to the whipped cream. Gently fold everything together using a rubber spatula. Use a figure-eight motion, scraping the bottom and sides of the bowl. Fold until just combined—you don’t want to deflate all that air you just whipped in.
- Add the mix-ins. Gently fold in the cooled toasted marshmallows, crushed graham crackers, and chopped chocolate. Reserve about ¼ cup of each for topping later. Fold just until everything is evenly distributed. The mixture will look thick and creamy, like a soft-serve ice cream.
- Layer and freeze. Line a 9×5-inch loaf pan with parchment paper, leaving some overhang on the sides. Pour the ice cream mixture into the pan and spread it evenly. Sprinkle the reserved graham crackers, marshmallows, and chocolate on top. Press them in gently with the back of a spoon. Cover with plastic wrap and freeze for at least 6 hours, or overnight. The longer it freezes, the easier it is to slice.
- Assemble the sandwiches. Once the ice cream is fully frozen (it should be firm to the touch), remove it from the pan using the parchment paper overhang. Place it on a cutting board. Using a sharp knife, cut the ice cream into 12 equal squares. You can cut them into rectangles or circles if you prefer—just adjust the cookie size accordingly.
- Sandwich and serve. Place one square of ice cream between two chocolate graham crackers or chocolate wafer cookies. Press gently to adhere. If you want to roll the edges in extra goodies, spread a thin layer of melted chocolate around the exposed ice cream and dip it in crushed graham crackers, mini marshmallows, or chocolate shavings. Serve immediately, or wrap individually in plastic wrap and freeze for later.
Notes
Don’t skip the toasting step—it gives the ice cream authentic campfire flavor. Use a hot knife for clean slices. Let the ice cream sit out for 5 minutes before serving for best texture. Double-wrap for long-term storage. The flavors actually get better after a day or two in the freezer.
Nutrition
- Serving Size: 1 sandwich
- Calories: 385
- Sugar: 32
- Sodium: 210
- Fat: 22
- Saturated Fat: 13
- Carbohydrates: 44
- Fiber: 2
- Protein: 5
Keywords: no-churn ice cream, s'mores, ice cream sandwiches, summer dessert, no ice cream maker, graham crackers, marshmallow, chocolate