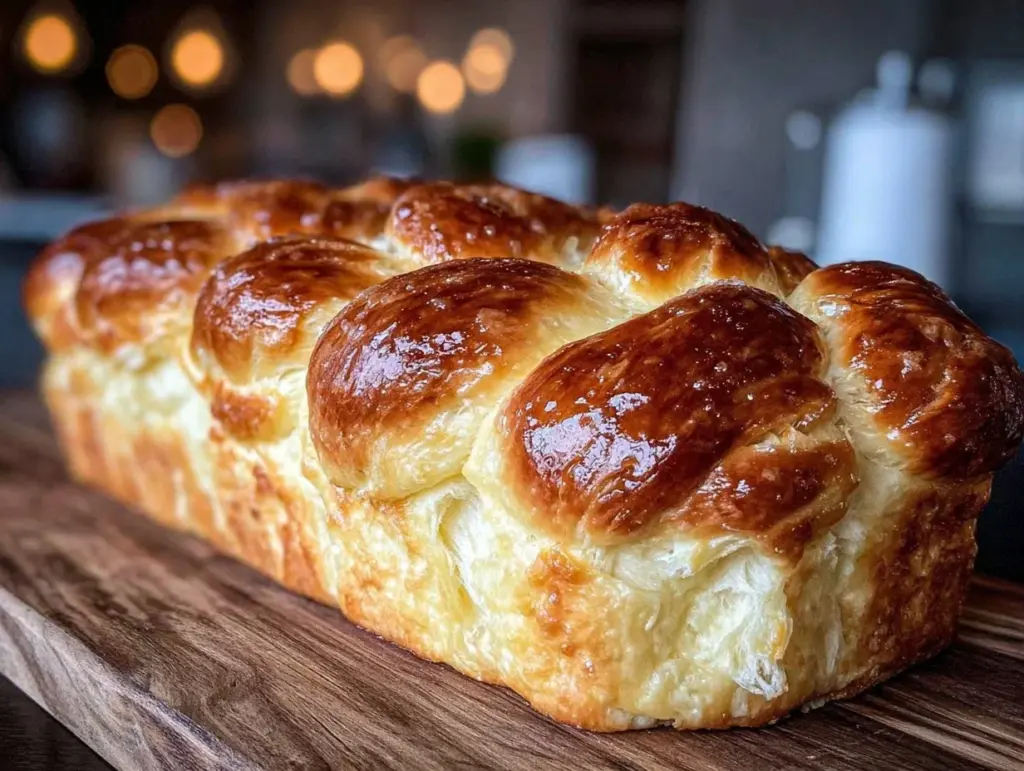
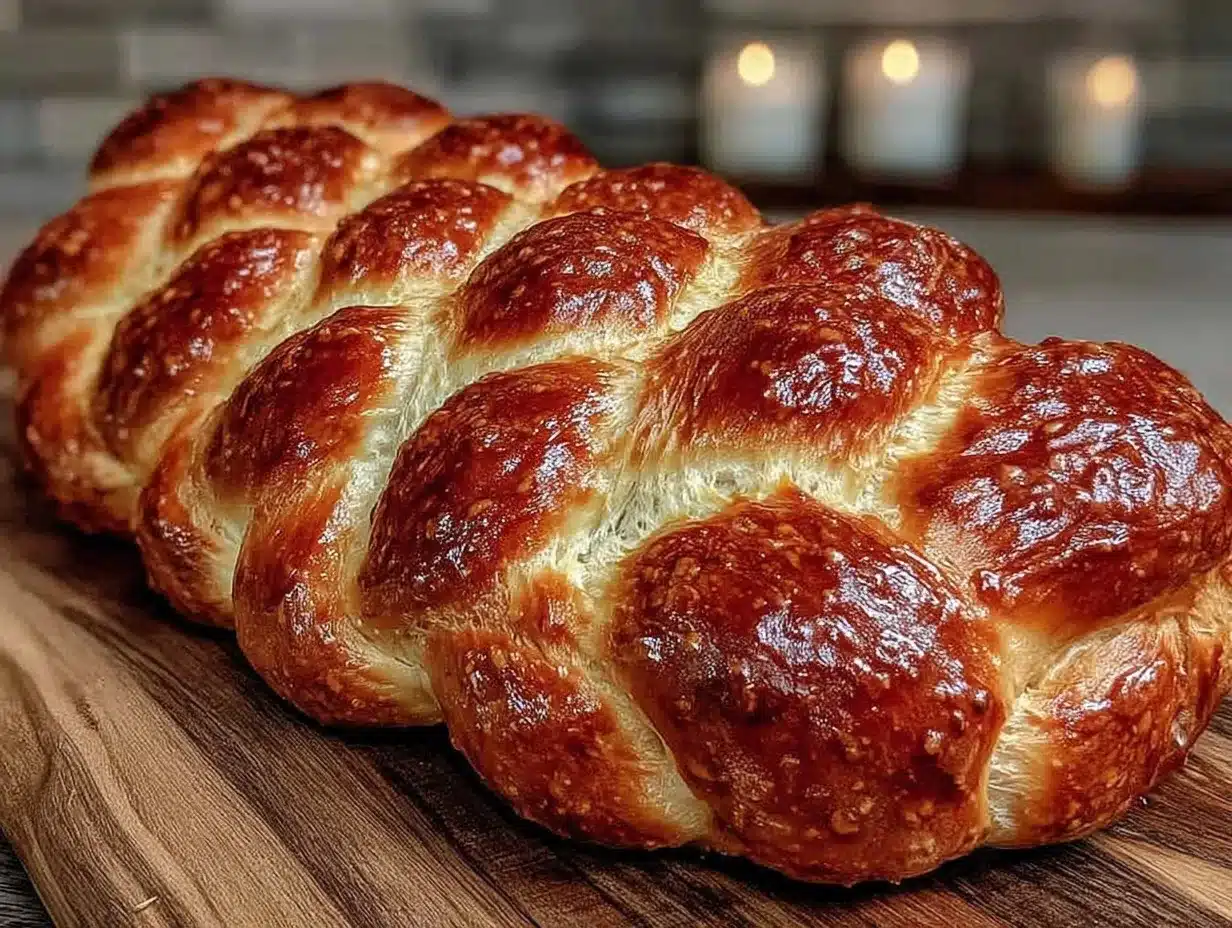
The smell of fresh braided challah bread cooling on the kitchen counter is pure magic—like a warm hug you didn’t know you needed. I first tried making this irresistible braided challah bread recipe a few years ago, right before a family gathering, and honestly, it became an instant favorite. There’s something about that golden crust, the soft, pillowy inside, and the subtle sweetness that just hits differently. It’s not just bread; it’s a comforting ritual, a little piece of tradition you can hold in your hands.
This recipe has been my go-to for weekends when I want to impress without stress. After baking this loaf more times than I can count (and yes, sometimes braiding it a little crookedly!), I know exactly how to get that perfect fluffy texture and beautiful shine. If you’ve ever been intimidated by braided breads, trust me, this step-by-step guide will make you feel like a pro in no time. Plus, it’s great for everything from holiday dinners to simple breakfast toasts. Whether you’re new to bread-making or just looking for a reliable challah recipe, you’re going to love how this one turns out.
So, if you’ve been searching for that perfect homemade loaf with a soft crumb and gorgeous braid, you’re in the right place. Let’s get those hands doughy and make some magic happen!
Why You’ll Love This Recipe
After testing this irresistible braided challah bread recipe multiple times in my kitchen, I can confidently say it ticks all the boxes. Here’s why it stands out:
- Easy to Follow: The step-by-step instructions break down the braiding and baking, making it approachable even if you’ve never made bread before.
- Simple Ingredients: No exotic items needed—basic pantry staples that you probably already have on hand.
- Perfect for Special Occasions: It’s stunning enough for holidays or family dinners but cozy enough for everyday enjoyment.
- Soft and Fluffy Texture: Thanks to the perfect balance of yeast and eggs, this challah has that signature tender crumb that melts in your mouth.
- Beautiful Golden Crust: The egg wash gives it a glossy, inviting shine that makes every loaf picture-perfect.
- Customizable Braiding: Whether you want a classic three-strand braid or something more intricate, this recipe adapts easily.
What really sets this recipe apart is how forgiving it is—if your braid isn’t perfect, the bread still tastes incredible (and that’s a relief, right?). It’s the kind of bread that makes you close your eyes after the first bite, savoring just how comforting and satisfying it is. Plus, it’s a wonderful way to impress guests without hours of fuss in the kitchen. Seriously, this isn’t just any bread—it’s your new favorite homemade loaf.
What Ingredients You Will Need
This irresistible braided challah bread recipe uses simple, wholesome ingredients that work together to create that classic flavor and texture. Most are pantry staples, so you won’t have to hunt down anything unusual.
- All-purpose flour (about 4 cups / 480 grams) – The base for your dough; I usually use King Arthur for consistent results.
- Active dry yeast (2 ¼ teaspoons / one packet) – The magic that makes your bread rise.
- Warm water (1 cup / 240 ml, about 110°F / 43°C) – Activates the yeast; make sure it’s not too hot or it’ll kill the yeast.
- Granulated sugar (¼ cup / 50 grams) – Adds subtle sweetness that balances the bread’s flavor.
- Salt (1 ½ teaspoons) – Enhances the overall flavor.
- Large eggs (3, room temperature) – Give the dough richness and help with structure.
- Vegetable oil or canola oil (¼ cup / 60 ml) – Keeps the bread tender and moist.
- Honey (2 tablespoons) – For that slightly sweet, golden touch that’s classic in challah.
- Egg wash: 1 egg beaten with 1 tablespoon water – For that shiny, golden crust.
Optional:
- Poppy or sesame seeds for sprinkling on top – Adds a nice crunch and traditional look.
- Whole wheat flour – You can swap up to half the all-purpose flour for a nuttier flavor.
If you want to try a gluten-free version, I recommend a trusted gluten-free flour blend, but keep in mind the texture will vary. For a dairy-free challah, this recipe already fits the bill since it uses oil instead of butter. Just double-check your honey if you want it vegan-friendly by swapping it for maple syrup or agave nectar.
Equipment Needed
To make this irresistible braided challah bread, you don’t need fancy tools—just some basics that most home kitchens already have.
- Large mixing bowl: For combining and proofing your dough. Glass or stainless steel works well.
- Measuring cups and spoons: Precise measurements make a big difference in bread baking.
- Wooden spoon or dough whisk: For initial mixing before kneading.
- Clean kitchen surface or silicone mat: For kneading your dough comfortably.
- Baking sheet or rectangular baking pan: To bake your braided loaf.
- Parchment paper: Prevents sticking and makes cleanup easier.
- Pastry brush: For applying the egg wash evenly.
- Kitchen towel or plastic wrap: To cover your dough while it rises.
If you want to use a stand mixer with a dough hook, that’s a great alternative to hand-kneading and can save time. I personally like kneading by hand since it helps me connect with the dough texture better and adjust as needed. Also, if you don’t have a pastry brush, a clean finger works in a pinch for egg washing!
Detailed Preparation Method
- Activate the yeast: In a large mixing bowl, combine 1 cup (240 ml) of warm water (about 110°F / 43°C) with 2 ¼ teaspoons of active dry yeast and 1 tablespoon of sugar. Stir gently and let it sit for 5-10 minutes until foamy and bubbly. If it doesn’t foam, your yeast might be old or the water temperature off—start again with fresh yeast.
- Mix the dough: To the yeast mixture, add 3 large room-temperature eggs, 2 tablespoons honey, ¼ cup (60 ml) vegetable oil, ¼ cup (50 grams) sugar, and 1 ½ teaspoons salt. Stir to combine. Gradually add about 4 cups (480 grams) of all-purpose flour, one cup at a time, mixing with a wooden spoon or your hands until a shaggy dough forms.
- Knead the dough: Transfer to a floured surface and knead for 8-10 minutes until smooth, elastic, and slightly tacky but not sticky. Add small amounts of flour if needed, but don’t overdo it or the bread will be dry. When the dough springs back when poked, you’re good.
- First rise: Lightly oil a large bowl and place the dough inside, turning it so it’s coated with oil. Cover with a clean kitchen towel or plastic wrap and let it rise in a warm spot for 1 to 1 ½ hours, or until doubled in size. I like to preheat my oven to about 100°F (38°C), turn it off, and place the dough inside to rise—it’s perfect for consistent warmth.
- Prepare your workspace: Once risen, punch down the dough gently to release air. Turn it onto a lightly floured surface and divide it into three equal pieces for a classic braid (or more pieces for a fancier braid).
- Shape and braid the dough: Roll each piece into a long rope, about 14-16 inches (35-40 cm) long. Pinch the three ropes together at one end and braid them by crossing the right strand over the center, then the left strand over the center, alternating until you reach the end. Pinch the ends together firmly and tuck them underneath the loaf.
- Second rise: Place the braided loaf on a parchment-lined baking sheet. Cover loosely with a towel and let it rise for another 30-45 minutes until puffy but not quite doubled.
- Preheat the oven: While the dough rises, preheat your oven to 350°F (175°C).
- Apply egg wash: Beat 1 egg with 1 tablespoon of water and brush it generously over the loaf. This gives the challah its signature golden, shiny crust. If you like, sprinkle with poppy or sesame seeds.
- Bake: Bake the challah for 30-35 minutes or until deep golden brown and the loaf sounds hollow when tapped underneath. If it browns too quickly, cover loosely with foil for the last 10 minutes to prevent burning.
- Cool: Remove from the oven and let cool completely on a wire rack before slicing. This resting step helps set the crumb texture and makes slicing easier.
Pro tip: If your dough feels too sticky during kneading, sprinkle a little flour at a time; if it’s too dry and cracks, add a teaspoon of water. Challah dough should be soft and supple, not tough or crumbly. Also, when braiding, keep strands taut but don’t stretch them too much or the loaf will shrink back while baking.
Cooking Tips & Techniques
Here’s what I’ve learned after baking this irresistible braided challah bread recipe more times than I can count:
- Keep your yeast fresh: Old yeast can lead to dense bread. Always check the expiration date and proof it in warm water to confirm it’s active.
- Use room temperature eggs: Cold eggs can slow down yeast activity and affect dough consistency.
- Don’t skip the second rise: It might seem tempting to bake right away, but that extra proofing time gives challah its light, airy texture.
- Perfect your braid: If you’re new to braiding, practice with playdough or extra dough scraps to get comfortable before shaping your loaf.
- Egg wash matters: Brush gently and evenly for that gorgeous glossy finish. I sometimes do two coats for extra shine.
- Watch your oven temperature: Every oven bakes differently, so keep an eye on your bread in the final minutes to avoid over-browning.
One time, I forgot to punch down the dough after the first rise and ended up with a loaf that was dense and heavy. Lesson learned: that punch-down step releases trapped air and keeps the crumb light. Also, if your challah is browning too fast but still undercooked inside, tent it with foil to slow down the crust development.
Timing-wise, multitasking works great here. While the dough rises, you can prep your kitchen or whip up a quick salad for dinner—just don’t forget to check on it!
Variations & Adaptations
This irresistible braided challah bread recipe is easy to adapt depending on your tastes or dietary needs:
- Sweet challah: Add ½ cup raisins or dried cranberries to the dough for a fruity twist that’s perfect for breakfast.
- Whole wheat challah: Substitute half the all-purpose flour with whole wheat flour for a nuttier, heartier loaf. You might need a splash more water since whole wheat absorbs more.
- Gluten-free option: Use a high-quality gluten-free flour blend designed for yeast breads. Be aware the texture will be different—denser but still delicious.
- Vegan challah: Replace the eggs with flax eggs (1 tablespoon ground flaxseed + 3 tablespoons water per egg) and swap honey for maple syrup. The texture changes but stays tasty.
- Different braids: Try a four- or six-strand braid for a fancier look. It’s easier than it sounds once you get the hang of it!
Personally, I’ve had fun experimenting with cinnamon and sugar swirl inside the dough for a sweet challah loaf that doubles as a dessert. Just roll out the dough, sprinkle cinnamon and sugar, then roll it back up before braiding. It’s a treat that disappears fast!
Serving & Storage Suggestions
Challah tastes amazing fresh out of the oven, but it’s surprisingly versatile:
- Serving: Slice warm with butter, honey, or jam for breakfast. It also makes incredible French toast or bread pudding (trust me on that!).
- Pairings: Serve alongside hearty soups or stews, or use it for sandwiches—the soft texture holds up beautifully.
- Storage: Store leftover challah wrapped tightly in plastic wrap or in an airtight container at room temperature for up to 3 days.
- Freezing: Slice and freeze in zip-top bags for up to 3 months. Toast slices straight from the freezer for a fresh taste.
- Reheating: Warm slices gently in a toaster or oven at 300°F (150°C) for 5-7 minutes to bring back that fresh-baked softness.
Interestingly, the flavor deepens a bit the next day, so if you can resist, letting it rest wrapped overnight actually makes it tastier. Just don’t wait too long or it’ll start to dry out.
Nutritional Information & Benefits
This irresistible braided challah bread recipe yields a loaf that’s rich but balanced. Per slice (about 1/12th of the loaf), you can expect roughly:
| Calories | Carbohydrates | Protein | Fat | Sugar |
|---|---|---|---|---|
| 190 kcal | 35 g | 6 g | 3.5 g | 5 g |
Thanks to eggs and oil, challah provides a good source of protein and healthy fats compared to some other breads. The honey adds natural sweetness without refined sugars. If you swap in whole wheat flour, you’ll boost fiber and nutrients further.
This recipe is naturally dairy-free, making it suitable for those avoiding lactose. It contains gluten and eggs, so it’s not safe for those with celiac disease or egg allergies without modifications.
From a wellness perspective, homemade challah lets you control the ingredients—no preservatives or additives here! It’s a comforting carbohydrate that fuels your day with a bit of nostalgia and joy.
Conclusion
If you’re looking for an irresistible braided challah bread recipe that’s straightforward and yields a gorgeous, soft loaf, this one’s for you. Its simple ingredients and clear steps make it accessible to bakers of all levels. Plus, it’s a recipe that fills your home with warmth and invites everyone around the table to slow down and enjoy.
Feel free to customize it with your favorite twists or braiding styles—you’ll quickly find it becomes a beloved staple in your kitchen. I love this recipe because it connects me to tradition while letting me play around with flavors and shapes. Honestly, there’s nothing quite like pulling a golden, glossy challah from the oven and sharing it fresh.
Give it a try, and let me know how your loaf turns out! Share your photos, questions, or your own adaptations—I’m always excited to hear from fellow bread lovers. Happy baking!
FAQs
How long does challah bread stay fresh?
Challah stays fresh at room temperature for about 3 days when wrapped well. Beyond that, freezing is best to maintain freshness.
Can I make challah bread without eggs?
Yes, you can use flax eggs or other egg substitutes, but the texture will be slightly different—less rich and tender.
What’s the best way to braid challah?
A simple three-strand braid is easiest and looks classic. Roll the dough into ropes, pinch one end, and alternate crossing the right and left strands over the center.
Can I prepare the dough the night before?
Absolutely! Refrigerate the dough after the first rise overnight. Bring it to room temperature before shaping and baking.
Why did my challah turn out dense?
Common causes are old yeast, insufficient rising time, or over-flouring the dough. Ensure your yeast is fresh and give the dough enough time to double in size.
Pin This Recipe!
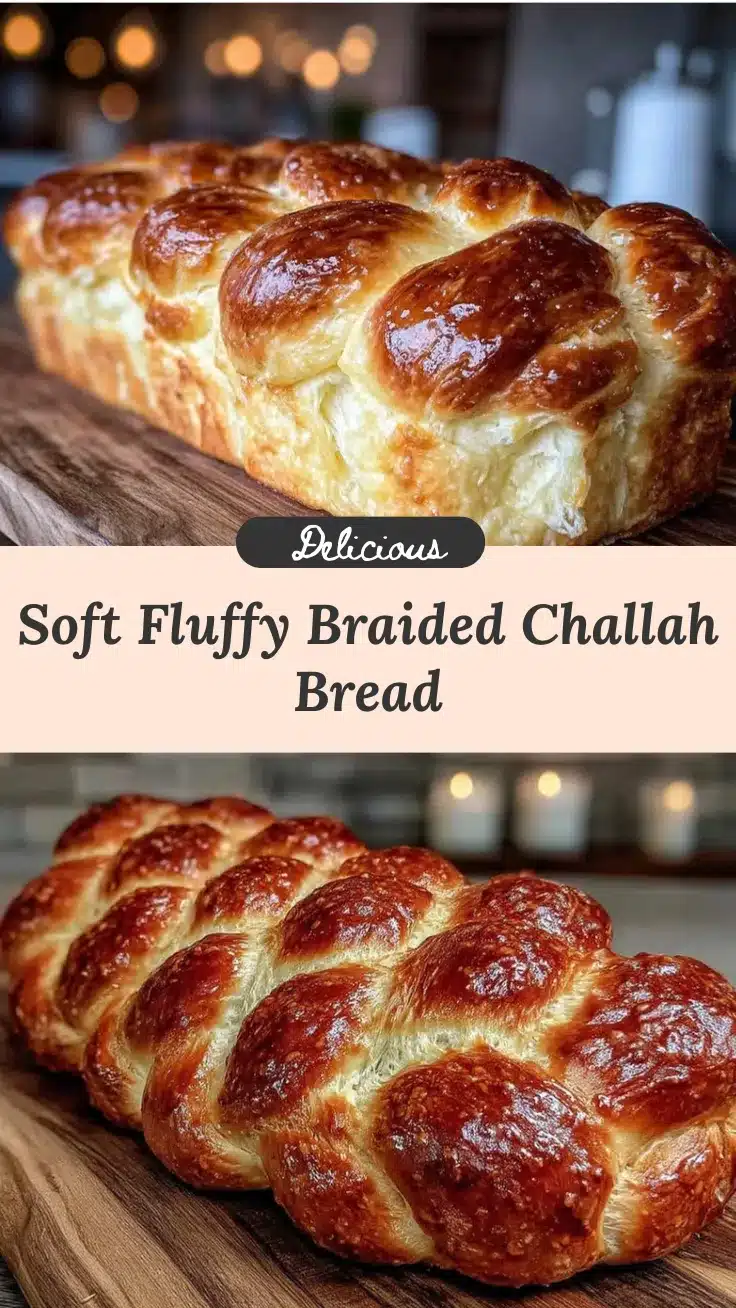
Irresistible Braided Challah Bread

A step-by-step guide to making a perfect homemade braided challah loaf with a soft, fluffy texture and beautiful golden crust. Ideal for special occasions or everyday enjoyment.
- Prep Time: 20 minutes
- Cook Time: 30-35 minutes
- Total Time: 2 hours 45 minutes
- Yield: 1 loaf (about 12 slices) 1x
- Category: Bread
- Cuisine: Jewish
Ingredients
- 4 cups (480 grams) all-purpose flour
- 2 ¼ teaspoons active dry yeast (one packet)
- 1 cup (240 ml) warm water (about 110°F / 43°C)
- ¼ cup (50 grams) granulated sugar
- 1 ½ teaspoons salt
- 3 large eggs, room temperature
- ¼ cup (60 ml) vegetable oil or canola oil
- 2 tablespoons honey
- Egg wash: 1 egg beaten with 1 tablespoon water
- Optional: poppy or sesame seeds for sprinkling
- Optional: whole wheat flour (can substitute up to half of all-purpose flour)
Instructions
- Activate the yeast: In a large mixing bowl, combine warm water, active dry yeast, and 1 tablespoon sugar. Stir gently and let sit for 5-10 minutes until foamy.
- Mix the dough: Add eggs, honey, vegetable oil, sugar, and salt to the yeast mixture. Stir to combine. Gradually add flour, one cup at a time, mixing until a shaggy dough forms.
- Knead the dough: Transfer to a floured surface and knead for 8-10 minutes until smooth, elastic, and slightly tacky but not sticky. Add flour as needed.
- First rise: Lightly oil a large bowl, place dough inside, cover with towel or plastic wrap, and let rise in a warm spot for 1 to 1 ½ hours until doubled in size.
- Prepare workspace: Punch down dough, turn onto floured surface, and divide into three equal pieces.
- Shape and braid: Roll each piece into 14-16 inch ropes. Pinch ends together and braid by crossing right strand over center, then left strand over center, alternating until end. Pinch ends and tuck underneath.
- Second rise: Place braided loaf on parchment-lined baking sheet, cover loosely, and let rise for 30-45 minutes until puffy.
- Preheat oven to 350°F (175°C).
- Apply egg wash: Brush beaten egg and water mixture over loaf. Sprinkle with seeds if desired.
- Bake: Bake for 30-35 minutes until deep golden brown and hollow sounding when tapped. Cover with foil last 10 minutes if browning too fast.
- Cool: Remove from oven and cool completely on wire rack before slicing.
Notes
If dough is too sticky, add flour a little at a time; if too dry and cracks, add a teaspoon of water. Keep strands taut but don’t overstretch when braiding. Use fresh yeast and room temperature eggs for best results. Cover loaf with foil if browning too quickly during baking.
Nutrition
- Serving Size: 1 slice (1/12th of l
- Calories: 190
- Sugar: 5
- Fat: 3.5
- Carbohydrates: 35
- Protein: 6
Keywords: braided challah bread, homemade challah, easy challah recipe, braided bread, traditional challah, soft bread, holiday bread