The smell of simmering spices and rich, meaty goodness wafting through the kitchen instantly takes me back to those classic roadside diners where the hot dog chili stole the show. Honestly, there’s something about a bowl of Irresistible Hot Dog Chili (Coney Island Style) that just hits the spot every time. I first stumbled upon this recipe years ago while craving that authentic Coney Island flavor but without the hassle of restaurant lines or mystery ingredients. After tweaking it a handful of times, I nailed down a version that’s quick, flavorful, and downright addictive.
What makes this hot dog chili recipe stand out is its perfect balance of spices and that signature thin, saucy texture that clings to your hot dog just right. It’s not about chunky chili beans or thick stews here—this is the kind of chili that’s meant to complement, not overpower. If you’re feeding a crowd or just want to bring a nostalgic twist to your next cookout, this recipe is your secret weapon. And trust me, after making this several times, it’s become a staple in my kitchen when I want a fuss-free, crowd-pleasing meal.
If you’ve ever wondered how to make that classic Coney Island style chili yourself—complete with the right spice mix and easy prep—stick around. I’ll share all my tips and tricks to get that irresistible flavor with minimal effort. Plus, this recipe works perfectly whether you’re serving up a few hot dogs for family or a big batch for your next party.
Why You’ll Love This Recipe
- Quick & Easy: Comes together in about 30 minutes, making it perfect for busy weeknights or unexpected guests.
- Simple Ingredients: No need for any fancy or hard-to-find items—most are pantry staples.
- True Coney Island Flavor: Brings the nostalgic taste of Coney Island hot dog stands right to your table.
- Crowd-Pleaser: Kids and adults alike can’t get enough of the bold, savory flavor.
- Versatile: Not just for hot dogs—you can spoon it over fries, burgers, or even baked potatoes.
This isn’t your run-of-the-mill chili. The magic lies in the blend of spices—think ground cumin, paprika, and a touch of cinnamon—that gives it a warm, inviting aroma without overpowering heat. Plus, the texture is just right; it’s thin and saucy, perfect for slipping under a bun and topping with mustard and onions. I’ve tried versions that were too thick or too bland, but after several tests, this recipe nails the balance every time.
Honestly, it’s the kind of recipe that makes you close your eyes with the first bite and smile. Whether you’re feeding a crowd or craving a comforting meal, this hot dog chili recipe offers that soul-satisfying punch without hours in the kitchen.
What Ingredients You Will Need
This hot dog chili recipe uses straightforward ingredients that come together to create that classic Coney Island flavor. You likely have most of these in your pantry already, which makes it a no-brainer to whip up anytime.
- Ground beef (85% lean, 1 pound / 450 grams) – for rich, meaty flavor
- Yellow onion (1 medium, finely chopped) – adds sweetness and depth
- Garlic cloves (2, minced) – for a subtle savory kick
- Tomato paste (2 tablespoons) – thickens and deepens the chili’s base
- Water or beef broth (1 cup / 240 ml) – to create the signature thin sauce
- Chili powder (2 tablespoons) – the heart of the spice mix
- Ground cumin (1 teaspoon) – adds earthy warmth
- Smoked paprika (1 teaspoon) – for subtle smoky notes
- Ground cinnamon (1/4 teaspoon) – a surprising but essential touch for authenticity
- Brown sugar (1 tablespoon) – balances the acidity
- Worcestershire sauce (1 tablespoon) – gives umami depth
- Salt (to taste)
- Black pepper (to taste)
- Hot dogs (8, your favorite kind) – for serving
- Hot dog buns (8) – fresh and soft
- Diced onions (optional, for topping)
- Yellow mustard (optional, for topping)
For best results, I prefer ground beef from a trusted local butcher or a brand like Organic Prairie for its flavor and quality. If you want a leaner option, ground turkey works, but the flavor won’t be quite the same.
Feel free to swap beef broth for water if you want to keep it simple. Also, when it comes to the hot dogs, I usually go with all-beef varieties for the authentic experience, but feel free to use whatever suits your taste or dietary needs.
Equipment Needed
- Large skillet or sauté pan: A heavy-bottomed pan works best for even cooking and browning the meat properly.
- Wooden spoon or spatula: For stirring and breaking up the ground beef.
- Measuring spoons and cups: To keep your spice ratios spot on.
- Knife and cutting board: For chopping onions and garlic.
- Small bowl: For mixing spices together before adding to the pan.
- Serving utensils: Like a ladle for spooning the chili onto hot dogs.
If you don’t have a heavy skillet, a regular non-stick pan will do, but the browning might be less even. I’ve tried a cast iron skillet for this recipe, and it gives a nice sear to the meat, which adds to the flavor, so if you have one, go for it! For budget-friendly kitchens, these are all common tools that don’t require any special investment.
Detailed Preparation Method
- Prepare the aromatics: Finely chop 1 medium yellow onion and mince 2 garlic cloves. Set aside. (Approx. 5 minutes)
- Brown the meat: Heat your skillet over medium-high heat. Add the 1 pound (450 grams) of ground beef and cook, breaking it up with a wooden spoon, until fully browned and no longer pink, about 6-8 minutes. Drain excess fat if desired. (Tip: Don’t rush this step; a good sear adds depth.)
- Sauté onions and garlic: Push the meat to one side of the pan. Add the chopped onions and minced garlic to the empty side. Cook, stirring occasionally, until onions are translucent and soft, about 4 minutes. Mix everything together. (Watch for garlic burning; it should just soften.)
- Add tomato paste and spices: Stir in 2 tablespoons tomato paste until it coats the meat and onions. Then, sprinkle in 2 tablespoons chili powder, 1 teaspoon ground cumin, 1 teaspoon smoked paprika, and 1/4 teaspoon ground cinnamon. Stir to evenly distribute spices and let them toast slightly for about 1 minute to release their aroma.
- Pour in liquids and sweetener: Add 1 cup (240 ml) of beef broth or water, 1 tablespoon brown sugar, and 1 tablespoon Worcestershire sauce. Stir to combine. Reduce heat to low and let simmer gently for 15-20 minutes, uncovered. Stir occasionally to prevent sticking. (You’re looking for a thick but pourable sauce.)
- Season to taste: Add salt and black pepper as desired. Taste the chili and adjust seasoning if needed—sometimes a pinch more sugar or a dash more chili powder can bring it just right.
- Warm the hot dogs and buns: While the chili simmers, heat your hot dogs according to package instructions—grill, boil, or pan-fry. Lightly toast the buns if you like for extra texture.
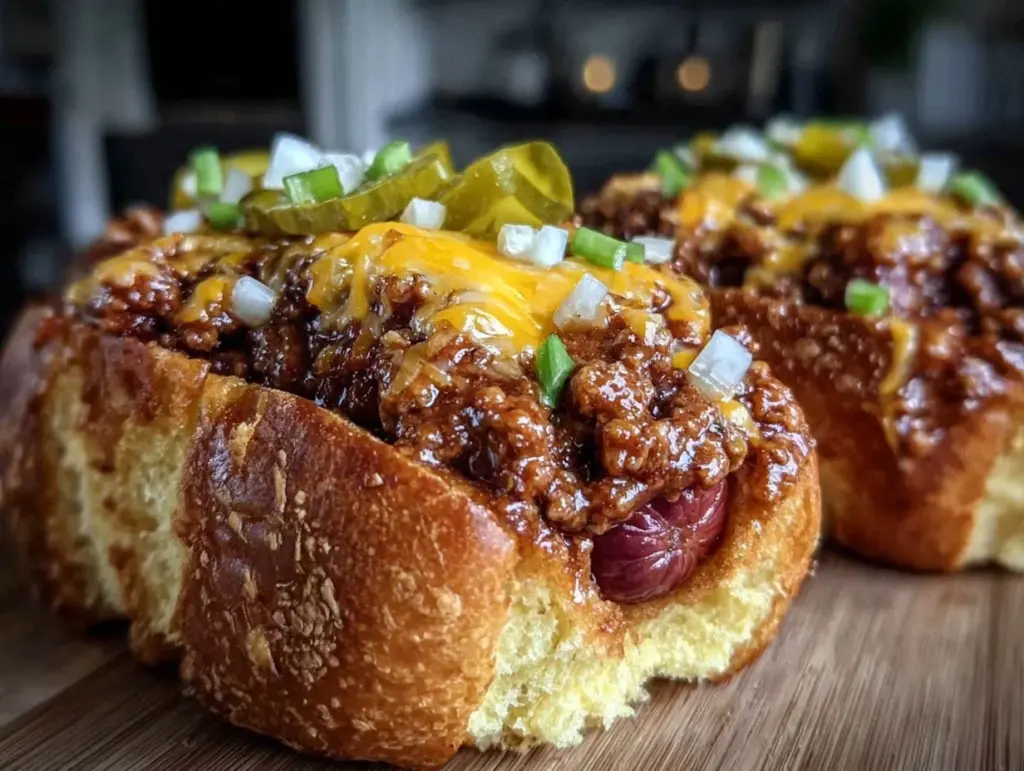
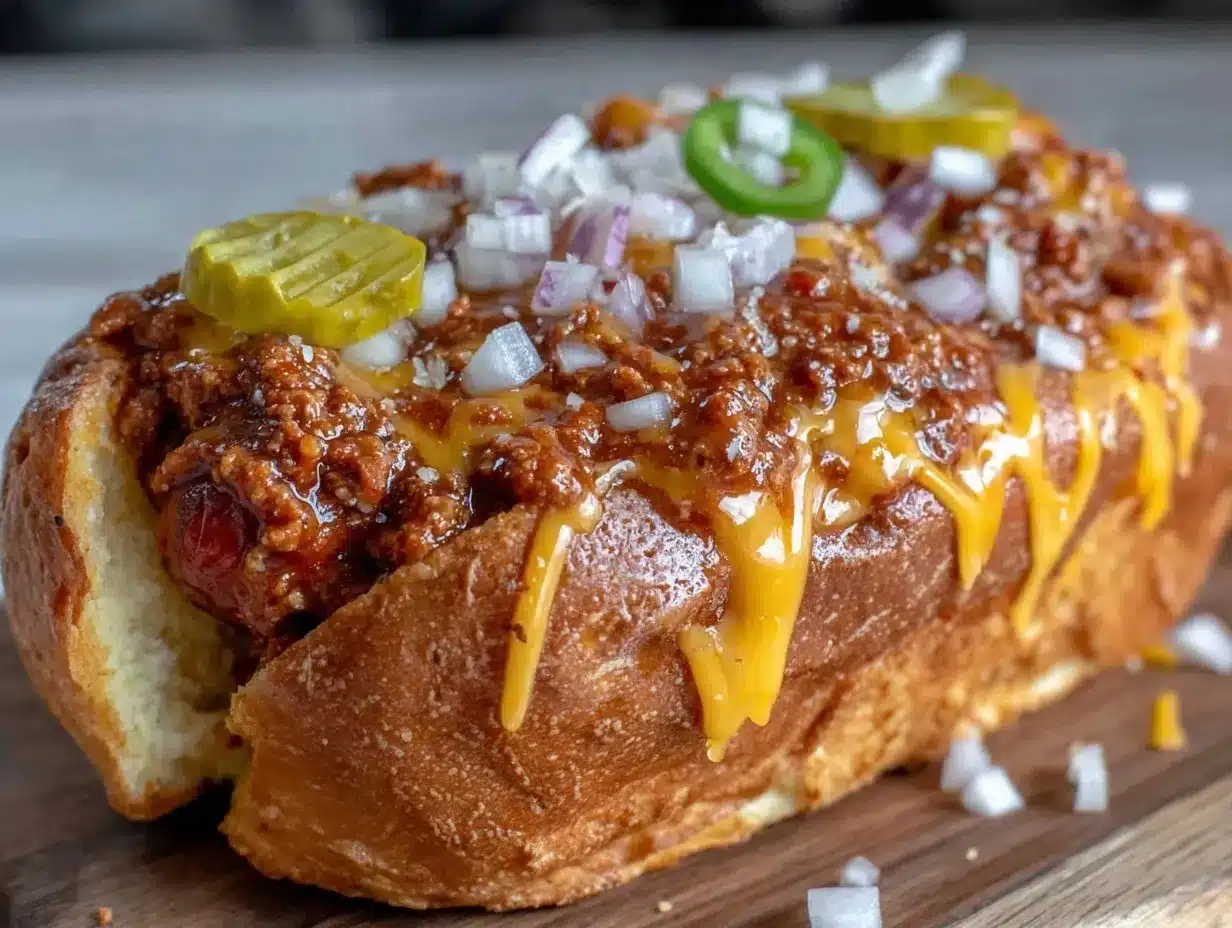
- Assemble and serve: Spoon the hot dog chili generously over the cooked hot dogs placed in buns. Top with diced onions and yellow mustard if you’re feeling traditional. Serve immediately and enjoy!
Pro tip: If your chili gets too thick, stir in a splash of water or broth to loosen it up. Conversely, if it’s too thin, simmer a bit longer to reduce. The goal is that perfect, drippy consistency.
Cooking Tips & Techniques
One of the trickiest parts of making Coney Island style hot dog chili is getting that thin, smooth texture without it turning into a thick stew. The key is careful control of liquid and simmer time. I’ve learned from experience that simmering too long can dry it out, so keep an eye on it and add liquid as needed.
Browning your ground beef properly first is a game-changer. Don’t rush it or crowd the pan, or you’ll end up steaming the meat instead of browning it. This step builds flavor through the Maillard reaction—sounds fancy, but it’s just a way to say the meat gets nice and tasty crusts.
When mixing the spices, toast them briefly in the pan with the tomato paste before adding liquids. It wakes up their flavors and brings that authentic chili aroma to life.
Also, don’t be shy with the Worcestershire sauce—it adds a wonderful umami depth that makes this chili stand apart from the rest. I’ve tried skipping it, and the flavor just feels flat.
For multitasking, start warming your hot dogs and toasting buns during the last 5 minutes of the chili simmer. This way, everything’s ready at the same time. Lastly, if you want to prep ahead, this chili refrigerates well and actually tastes better the next day once flavors meld.
Variations & Adaptations
Feel free to put your own spin on this classic recipe! Here are some ways I’ve tweaked it over time:
- Spicy Version: Add 1/2 teaspoon cayenne pepper or diced jalapeños for a kick. Perfect if you like it hot.
- Vegetarian Adaptation: Swap ground beef for crumbled tofu or cooked lentils, and use vegetable broth instead of beef broth.
- Low-Carb Option: Skip the buns and serve the chili over steamed veggies or cauliflower rice for a hearty meal without the carbs.
- Seasonal Twist: In fall, add a bit of pumpkin puree for subtle sweetness and creaminess.
- Personal Favorite: I like to mix in a splash of beer into the simmering sauce for extra depth and complexity—just about 1/4 cup (60 ml) added with the broth.
Each variation keeps the core essence of that iconic Coney Island chili but lets you customize to your taste or dietary needs.
Serving & Storage Suggestions
This hot dog chili is best served hot and fresh, right after assembly. The warmth enhances the savory spices and makes the whole experience comforting and satisfying. Arrange your hot dogs on a platter with sides like crispy fries or a simple coleslaw to round out the meal.
If you want to get fancy, sprinkle some shredded cheddar cheese or add pickled jalapeños on top. For drinks, a cold soda or a light lager pairs beautifully.
To store leftovers, place the chili in an airtight container and refrigerate for up to 3 days. It reheats quickly on the stovetop or microwave—just add a splash of water to loosen it if it thickens too much in the fridge. You can also freeze the chili for up to 2 months; thaw overnight in the fridge before reheating.
One thing I’ve noticed is that the flavors actually deepen after a day or two, so making it ahead can be a real timesaver for busy days.
Nutritional Information & Benefits
Per serving (1/8 of recipe with 1 hot dog and bun): Approximately 320 calories, 15g fat, 25g protein, 20g carbohydrates.
Ground beef provides a hearty dose of protein and essential nutrients like iron and B vitamins. The spices not only add flavor but also contain antioxidants and anti-inflammatory properties. Using tomato paste boosts vitamin C and lycopene, a powerful antioxidant linked to heart health.
If you opt for leaner meat or turkey, you can reduce fat content while keeping protein high. This recipe isn’t gluten-free as is (because of the buns), but swapping in gluten-free buns makes it accessible. Also, be mindful of any allergies to Worcestershire sauce ingredients or hot dogs.
From a wellness perspective, this hot dog chili recipe offers a satisfying way to enjoy a classic comfort food with better control over ingredients and portion.
Conclusion
In the end, this Irresistible Hot Dog Chili (Coney Island Style) recipe is a winner for anyone craving that nostalgic diner taste without fuss. It’s quick, simple, and packed with flavor that hits all the right notes. I love how versatile it is—you can dress it up or down, tweak spices, or keep it classic.
Give it a try, and don’t hesitate to make it your own. Whether you’re feeding a hungry family or looking for a memorable cookout addition, this chili will become a go-to favorite. Drop a comment below and let me know how your batch turns out or what fun variations you’ve tried!
Happy cooking, and here’s to many delicious hot dog nights ahead!
FAQs
What is Coney Island style chili?
Coney Island style chili is a thin, finely ground meat chili with a mild but flavorful spice blend, traditionally served on hot dogs with mustard and onions.
Can I make this chili ahead of time?
Absolutely! This chili tastes even better the next day after the flavors meld. Store in the fridge for up to 3 days or freeze for longer storage.
Is this recipe spicy?
Not overly. It has warm spices but is generally mild. You can add cayenne or jalapeños if you prefer more heat.
Can I use ground turkey instead of beef?
Yes, ground turkey works as a leaner alternative, though the flavor will be slightly different. Adjust seasoning to your taste.
What toppings go best with hot dog chili?
Classic toppings include diced onions and yellow mustard. You can also add shredded cheese, pickles, or jalapeños for extra flavor.
Pin This Recipe!

Irresistible Hot Dog Chili Recipe How to Make Easy Coney Island Style Chili

A quick and flavorful Coney Island style hot dog chili with a perfect balance of spices and a thin, saucy texture that complements hot dogs perfectly.
- Prep Time: 10 minutes
- Cook Time: 20 minutes
- Total Time: 30 minutes
- Yield: 8 servings 1x
- Category: Main Course
- Cuisine: American
Ingredients
- 1 pound (450 grams) ground beef (85% lean)
- 1 medium yellow onion, finely chopped
- 2 garlic cloves, minced
- 2 tablespoons tomato paste
- 1 cup (240 ml) water or beef broth
- 2 tablespoons chili powder
- 1 teaspoon ground cumin
- 1 teaspoon smoked paprika
- 1/4 teaspoon ground cinnamon
- 1 tablespoon brown sugar
- 1 tablespoon Worcestershire sauce
- Salt, to taste
- Black pepper, to taste
- 8 hot dogs, your favorite kind
- 8 hot dog buns
- Diced onions (optional, for topping)
- Yellow mustard (optional, for topping)
Instructions
- Finely chop 1 medium yellow onion and mince 2 garlic cloves. Set aside.
- Heat a large skillet over medium-high heat. Add 1 pound of ground beef and cook, breaking it up with a wooden spoon, until fully browned and no longer pink, about 6-8 minutes. Drain excess fat if desired.
- Push the meat to one side of the pan. Add the chopped onions and minced garlic to the empty side. Cook, stirring occasionally, until onions are translucent and soft, about 4 minutes. Mix everything together.
- Stir in 2 tablespoons tomato paste until it coats the meat and onions. Sprinkle in 2 tablespoons chili powder, 1 teaspoon ground cumin, 1 teaspoon smoked paprika, and 1/4 teaspoon ground cinnamon. Stir to evenly distribute spices and let them toast slightly for about 1 minute.
- Add 1 cup of beef broth or water, 1 tablespoon brown sugar, and 1 tablespoon Worcestershire sauce. Stir to combine. Reduce heat to low and let simmer gently for 15-20 minutes, uncovered, stirring occasionally.
- Season with salt and black pepper to taste. Adjust seasoning if needed.
- While the chili simmers, heat hot dogs according to package instructions and lightly toast buns if desired.
- Spoon the hot dog chili generously over cooked hot dogs in buns. Top with diced onions and yellow mustard if desired. Serve immediately.
Notes
If chili is too thick, add a splash of water or broth to loosen. If too thin, simmer longer to reduce. Browning the meat properly adds depth of flavor. Toast spices briefly with tomato paste to release aroma. Worcestershire sauce adds umami depth. Chili tastes better the next day after flavors meld. Can be stored refrigerated up to 3 days or frozen up to 2 months.
Nutrition
- Serving Size: 1 hot dog with chili
- Calories: 320
- Fat: 15
- Carbohydrates: 20
- Protein: 25
Keywords: hot dog chili, Coney Island chili, easy chili recipe, quick chili, hot dog topping, classic chili, savory chili