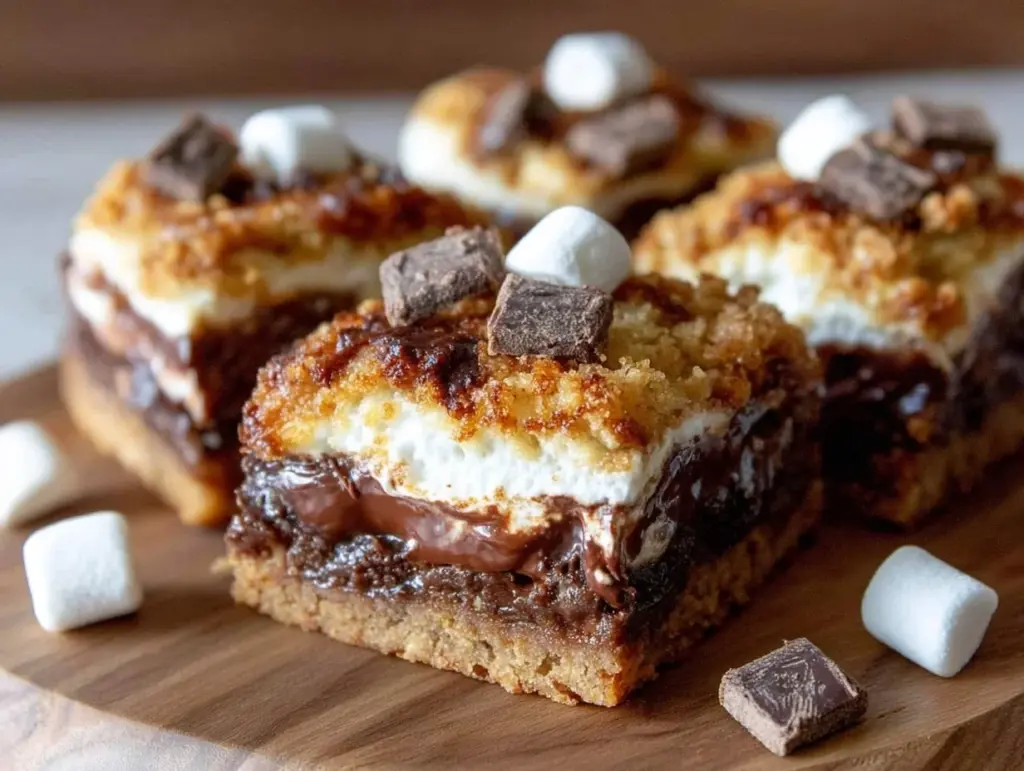
The smell of warm, melted chocolate mingling with toasted marshmallows instantly takes me back to those carefree summer nights around the campfire. You know that sticky, sweet delight that everyone craves? Well, that’s exactly what the ultimate gooey s’mores bars bring to your kitchen—no campfire needed. Honestly, after making these bars a dozen times, I can say they’re just as satisfying (and way less messy) than the classic s’mores on a stick.
I first stumbled on this recipe during a weekend baking frenzy when I wanted to capture that nostalgic campfire magic but with a modern twist. These gooey s’mores bars have since become my go-to treat for family gatherings, potlucks, or when I just need a quick sweet fix that feels like a warm hug. The combination of a buttery graham cracker crust, a layer of rich chocolate, and ooey-gooey marshmallow topping is simply unbeatable.
What makes this recipe truly stand out is how easy it comes together and how perfectly balanced the flavors are — sweet, crunchy, and soft all at once. Whether you’re a seasoned baker or someone who just likes to whip up something fun with the kids, these ultimate gooey s’mores bars will definitely become a favorite in your dessert lineup.
Why You’ll Love This Recipe
- Quick & Easy: Ready in about 45 minutes, perfect for last-minute dessert cravings or weekend baking sessions.
- Simple Ingredients: No need for fancy or hard-to-find items; most are pantry staples like graham crackers, chocolate chips, and marshmallows.
- Ideal for Every Occasion: Great for potlucks, birthday parties, or cozy nights in when you want to impress without the fuss.
- Crowd-Pleaser: Kids adore the gooey texture, and adults love the nostalgic flavor hit—and it’s always the first dessert to disappear.
- Unbelievably Delicious: The buttery crust combined with melty chocolate and fluffy marshmallows creates that perfect gooey bite every time.
Unlike your average s’mores recipe, this one uses a homemade graham cracker crust that’s buttery and crisp, lending a sturdy base that holds all the gooey goodness together without falling apart. Plus, I’ve found that layering the chocolate and marshmallows just right ensures the marshmallows toast lightly in the oven, giving you that campfire feel without any smoke or fuss.
Honestly, it’s the kind of dessert that makes you close your eyes and smile after the first bite. It’s comforting, nostalgic, and yet fresh enough to make any dessert table feel special. This recipe isn’t just a sweet treat; it’s a way to bring a little magic to your everyday baking.
What Ingredients You Will Need
This recipe uses simple, wholesome ingredients that come together to create a bold flavor and irresistible texture. Most of these are pantry staples, and you can easily swap in alternatives if needed.
- Graham Cracker Crust:
- 1 ½ cups graham cracker crumbs (about 10 full sheets, finely crushed) — I like to use Honey Maid for that perfect balance of sweetness.
- 6 tablespoons unsalted butter, melted (adds richness and helps bind the crust)
- ¼ cup granulated sugar (for a touch of sweetness)
- Chocolate Layer:
- 1 ½ cups semi-sweet chocolate chips — Ghirardelli or Nestlé Toll House work great for melty, smooth chocolate.
- ½ cup heavy cream (to make a luscious ganache-like layer)
- Marshmallow Topping:
- 3 cups mini marshmallows (use fresh ones for best gooey texture)
- Optional:
- Flaky sea salt (sprinkled on top for a sweet-salty contrast)
- 1 teaspoon vanilla extract (adds depth to the crust)
If you’re feeling adventurous, you can swap the graham cracker crumbs with gluten-free crackers or almond flour for a gluten-free crust. Also, dairy-free butter and cream alternatives work well if you want a vegan-friendly treat. Just remember that the texture might shift slightly, but the gooey magic remains!
Equipment Needed
- 8×8 inch baking pan: A glass or metal pan works fine; glass tends to brown the crust a bit more evenly.
- Mixing bowls: For combining your crust and melting chocolate.
- Measuring cups and spoons: Accurate measurements are key to getting that perfect gooey texture.
- Spatula or wooden spoon: For mixing and spreading layers smoothly.
- Microwave-safe bowl or double boiler: To melt the chocolate and cream together.
- Aluminum foil or parchment paper: To line the baking pan for easy removal and cleanup.
If you don’t have a double boiler, no worries—just microwave your chocolate and cream in short bursts, stirring frequently to avoid burning. For budget-conscious cooks, a simple glass bowl and a sturdy saucepan will do the trick for melting chocolate.
Detailed Preparation Method
- Preheat your oven to 350°F (175°C). Line your 8×8 inch baking pan with parchment paper, leaving an overhang on the sides for easy removal later. This little trick saves you from sticky fingers and crust breakage.
- Prepare the graham cracker crust. In a medium bowl, combine 1 ½ cups graham cracker crumbs, 6 tablespoons melted unsalted butter, ¼ cup granulated sugar, and 1 teaspoon vanilla extract (if using). Mix until all crumbs are evenly coated and the mixture holds together when pressed.
- Press the crust mixture firmly into the bottom of the prepared pan. Use the back of a measuring cup to get an even, compact base. This should take about 3-5 minutes.
- Bake the crust for 8-10 minutes. You want it lightly golden and set but not too dark. Remove from oven and let it cool slightly while you prepare the chocolate layer.
- Make the chocolate layer. In a microwave-safe bowl or double boiler, heat 1 ½ cups semi-sweet chocolate chips with ½ cup heavy cream until smooth and glossy. Stir continuously to avoid burning. This should take about 2-3 minutes in the microwave, stirring every 30 seconds.
- Pour the melted chocolate mixture over the warm crust. Spread evenly with a spatula, covering the entire surface. The warmth of the crust helps the chocolate settle nicely.
- Sprinkle 3 cups mini marshmallows evenly over the chocolate layer. Make sure to cover every inch for that perfect gooey top layer.
- Bake for an additional 10-12 minutes. Watch closely—marshmallows should puff up and turn a light golden brown. For extra toasty marshmallows, you can switch to the broiler for 1-2 minutes, but keep a close eye to avoid burning.
- Remove from oven and allow to cool completely on a wire rack. This step is crucial for the bars to set properly. If you’re impatient like me, chilling them in the fridge for 30 minutes speeds things up.
- Once cooled and set, use the parchment overhang to lift bars out of the pan. Cut into squares with a sharp knife, wiping the blade between cuts for cleaner edges.
Pro tip: If your marshmallows seem to melt too much and disappear, try adding them halfway through baking instead of right at the start. It keeps that iconic gooey layer intact.
Cooking Tips & Techniques
- Use fresh mini marshmallows: Older marshmallows can dry out and won’t melt as nicely, resulting in a less gooey top layer.
- Press the crust firmly: A well-packed crust prevents crumbling when slicing your bars.
- Don’t skip cooling: Warm bars are tempting but too soft to cut cleanly; patience pays off with neat squares.
- Chocolate melt technique: Stir frequently when melting chocolate and cream to avoid scorching and get a silky smooth spread.
- Broiler caution: Marshmallows toast fast under the broiler—stay close and watch carefully to avoid charring.
One time, I left the bars under the broiler for just a bit too long, and let’s just say my kitchen smelled like a campfire disaster—but I learned that quick peek-and-pull method fast! Also, multitasking by prepping your crust while the oven preheats saves precious time.
Variations & Adaptations
- Peanut Butter S’mores Bars: Swirl in ½ cup creamy peanut butter into the melted chocolate for a nutty twist that pairs beautifully with the marshmallows.
- Vegan-Friendly Option: Use dairy-free butter, coconut cream instead of heavy cream, dairy-free chocolate chips, and vegan marshmallows to keep it plant-based without losing that gooey goodness.
- Seasonal Berry S’mores: Add a layer of fresh raspberries or strawberries between the crust and chocolate for a fruity surprise—it adds a nice tart contrast to the sweetness.
If you want to shake things up, try baking these in muffin tins for portable, individual portions. I’ve done this for kids’ parties, and they were a big hit! Also, for a less sweet option, swap half the chocolate chips for chopped dark chocolate with at least 70% cocoa.
Serving & Storage Suggestions
Serve these ultimate gooey s’mores bars slightly warm or at room temperature for the perfect gooey bite. Pair them with a cold glass of milk, hot chocolate, or even coffee for a cozy treat that hits all the right notes. For presentation, dusting a little cocoa powder or powdered sugar on top adds a nice finishing touch.
Store leftover bars in an airtight container at room temperature for up to 2 days; after that, I recommend refrigerating to keep them fresh longer—up to 5 days. These bars freeze well too; just wrap tightly in plastic wrap and foil before freezing. To thaw, leave them overnight in the fridge, then bring to room temperature before serving.
Reheating in a microwave for 10-15 seconds revives that gooey texture if they’ve been chilled. Plus, the flavors tend to meld and deepen after sitting a day or two, making them taste even better the next day—if you can wait that long!
Nutritional Information & Benefits
Each serving of these gooey s’mores bars (assuming 16 squares) contains approximately 220 calories, 10g fat, 30g carbohydrates, and 2g protein. While definitely a treat, the recipe uses real butter and quality chocolate, which provide some beneficial fats and antioxidants.
The graham cracker crust adds a bit of fiber compared to typical cookie crusts, and the marshmallows are fat-free, so the main indulgence comes from the chocolate and butter. For those mindful of allergens, note that this recipe contains dairy and gluten, but substitutions can make it gluten-free or vegan as needed.
From a personal wellness view, I like to enjoy these bars as an occasional indulgence that brings joy and nostalgia without overdoing it on artificial ingredients or preservatives. Baking them at home means you control the quality and freshness of every bite.
Conclusion
The ultimate gooey s’mores bars are everything you want in a nostalgic dessert—rich, melty, sweet, and totally satisfying. They’re perfect for when you want to impress without spending hours in the kitchen or lighting a campfire. I love how this recipe brings smiles every single time I make it, whether for family, friends, or just a little self-care treat.
Feel free to customize the layers, swap ingredients, or add your favorite mix-ins. Baking is all about making recipes your own, and these bars are a perfect canvas. I’d love to hear how you tweak them or any fun memories they bring back—leave a comment or share your pics!
Now, grab that mixing bowl, and let’s make some gooey magic happen. Happy baking!
FAQs
Can I use regular marshmallows instead of mini marshmallows?
Yes, but mini marshmallows melt more evenly and create a better gooey top. If using regular-sized marshmallows, cut them into smaller pieces for best results.
How do I prevent the marshmallows from burning under the broiler?
Keep a close eye and broil for just 1-2 minutes max. It’s easy to go from perfectly toasted to burnt quickly, so watch continuously and pull them out as soon as they turn golden.
Can I make these bars gluten-free?
Absolutely! Use gluten-free graham cracker crumbs or substitute with almond flour for the crust. Just make sure your other ingredients are also gluten-free.
What’s the best way to store leftover s’mores bars?
Store in an airtight container at room temperature for up to 2 days, or refrigerate for up to 5 days. They freeze well too—just wrap tightly and thaw in the fridge before enjoying.
Can I make these bars ahead of time for a party?
Yes! Make them a day ahead and store them covered at room temperature or in the fridge. They actually taste even better after the flavors meld overnight. Just warm slightly before serving for that gooey effect.
Pin This Recipe!

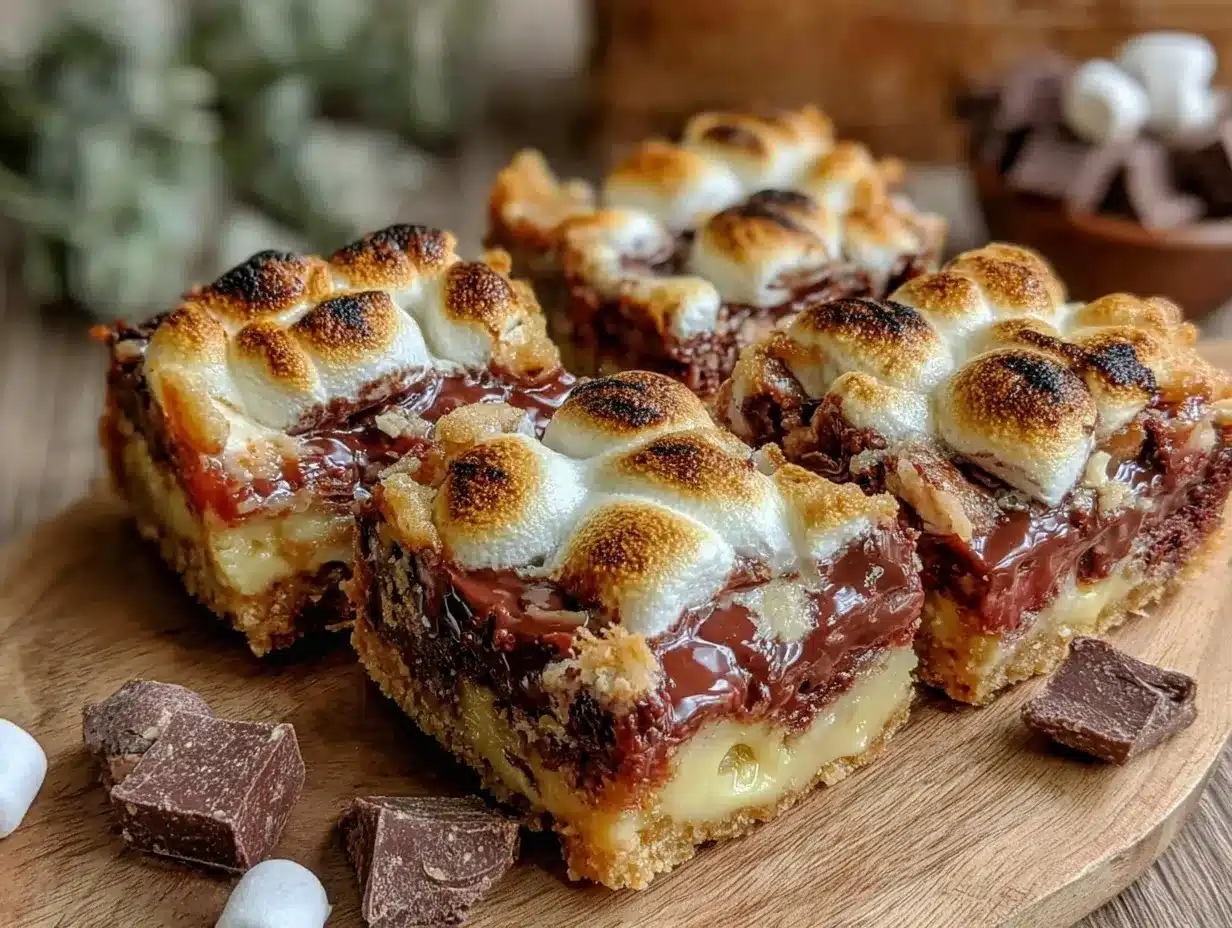
Ultimate Gooey S’mores Bars

These easy homemade s’mores bars combine a buttery graham cracker crust, rich chocolate layer, and gooey toasted marshmallow topping for a nostalgic, crowd-pleasing dessert.
- Prep Time: 15 minutes
- Cook Time: 30 minutes
- Total Time: 45 minutes
- Yield: 16 bars 1x
- Category: Dessert
- Cuisine: American
Ingredients
- 1 ½ cups graham cracker crumbs (about 10 full sheets, finely crushed)
- 6 tablespoons unsalted butter, melted
- ¼ cup granulated sugar
- 1 teaspoon vanilla extract (optional)
- 1 ½ cups semi-sweet chocolate chips
- ½ cup heavy cream
- 3 cups mini marshmallows
- Flaky sea salt (optional)
Instructions
- Preheat your oven to 350°F (175°C). Line an 8×8 inch baking pan with parchment paper, leaving an overhang on the sides.
- In a medium bowl, combine graham cracker crumbs, melted butter, granulated sugar, and vanilla extract if using. Mix until evenly coated and mixture holds when pressed.
- Press the crust mixture firmly into the bottom of the prepared pan using the back of a measuring cup for an even base.
- Bake the crust for 8-10 minutes until lightly golden and set. Remove from oven and let cool slightly.
- In a microwave-safe bowl or double boiler, heat chocolate chips and heavy cream until smooth and glossy, stirring frequently to avoid burning.
- Pour the melted chocolate mixture over the warm crust and spread evenly with a spatula.
- Sprinkle mini marshmallows evenly over the chocolate layer.
- Bake for an additional 10-12 minutes until marshmallows puff up and turn light golden brown. Optionally, broil for 1-2 minutes for extra toasting, watching carefully.
- Remove from oven and cool completely on a wire rack. Chill in the fridge for 30 minutes if desired to speed setting.
- Use parchment overhang to lift bars from pan and cut into 16 squares with a sharp knife, wiping blade between cuts.
Notes
Use fresh mini marshmallows for best gooey texture. Press crust firmly to prevent crumbling. Cool bars completely before cutting for clean squares. Watch marshmallows closely under broiler to avoid burning. For gluten-free, substitute graham cracker crumbs with gluten-free crackers or almond flour. Vegan options include dairy-free butter, coconut cream, dairy-free chocolate chips, and vegan marshmallows.
Nutrition
- Serving Size: 1 bar (1/16th of rec
- Calories: 220
- Fat: 10
- Carbohydrates: 30
- Protein: 2
Keywords: s’mores bars, gooey dessert, chocolate bars, marshmallow dessert, easy s’mores, homemade s’mores, campfire dessert