The first time I made this no-bake Oreo cheesecake, I was honestly blown away by how effortlessly delicious it turned out. The creamy, dreamy texture paired with chunks of Oreo cookies took me right back to my childhood snack cravings—only better because it’s homemade. You know, there’s something about that cool, rich cheesecake that just feels like a hug in dessert form. I’ve tried countless cheesecake recipes, but this no-bake Oreo cheesecake recipe quickly became my go-to when I want something impressive without sweating over the oven.
It’s perfect for those days when you crave something sweet but don’t want to fuss with long baking times or complicated steps. Plus, it’s ideal for busy families, last-minute guests, or anyone who just loves the classic Oreo cookie twist. I’ve whipped this up more times than I can count, tweaking it here and there to nail the texture and flavor. Trust me, this no-bake Oreo cheesecake recipe is one you’ll want to keep in your dessert arsenal for easy, impressive treats.
Whether you’re a cheesecake newbie or a seasoned pro, this recipe delivers that smooth, velvety bite combined with the crunch of Oreos in every forkful. Let’s face it, who can say no to a dessert that’s this simple yet so satisfying?
Why You’ll Love This Recipe
After making this no-bake Oreo cheesecake recipe multiple times, I can confidently say it hits all the right notes. Here’s why it’s a winner:
- Quick & Easy: Ready in just about 30 minutes of hands-on time, making it perfect for busy nights or spontaneous dessert cravings.
- Simple Ingredients: No fancy or hard-to-find items here—you probably already have Oreos, cream cheese, and a few basics sitting in your pantry.
- Perfect for Any Occasion: Whether it’s a birthday, potluck, or just a cozy night in, this cheesecake fits right in.
- Crowd-Pleaser: Kids, adults, and even picky eaters adore the Oreo chunks mixed throughout the creamy filling.
- Unbelievably Delicious: The contrast between the crunchy Oreo crust and smooth cheesecake filling is pure magic.
What sets this recipe apart is the way the Oreos are folded into the filling, not just the crust, adding layers of texture and flavor. Plus, it’s chilled to just the right firmness—not too hard, not too soft. Seriously, the balance in this no-bake Oreo cheesecake recipe is something I’m proud of. It’s like the classic dessert got a friendly, easy-to-make makeover without losing any of its charm.
It’s the kind of recipe that makes you close your eyes and savor each bite. Comfort food, no fuss, and guaranteed smiles all around.
What Ingredients You Will Need
This no-bake Oreo cheesecake recipe uses straightforward ingredients that combine to create a rich, creamy dessert with just the right crunch. Most are pantry staples, and the Oreos bring that nostalgic cookie flavor we all love.
- Oreo Cookies (about 24 cookies): Divided into two parts—some crushed for the crust, and some roughly chopped to mix into the filling. I like to use the classic Oreo Original for that perfect balance of cookie and cream.
- Unsalted Butter (6 tbsp / 85 g), melted: Binds the cookie crust into a firm base. I always use a good-quality butter like Kerrygold for richness.
- Cream Cheese (16 oz / 450 g), softened: The star of the filling—makes it creamy and smooth. Using full-fat cream cheese gives the best texture.
- Powdered Sugar (¾ cup / 90 g): Adds sweetness without graininess. Sift it for a perfectly smooth filling.
- Heavy Whipping Cream (1 cup / 240 ml), cold: Whipped to soft peaks, it lightens the cheesecake filling beautifully.
- Vanilla Extract (1 tsp): Enhances the overall flavor with a warm, sweet note.
If you want to switch things up, you can swap the heavy cream for coconut cream for a dairy-free twist, or use gluten-free Oreo cookies to keep it gluten-free. The key is having a firm crust and a rich, fluffy filling with Oreo pieces for texture. I’ve found small-curd cream cheese works best—not too lumpy, not too runny.
Equipment Needed
Making this no-bake Oreo cheesecake recipe requires just a handful of kitchen tools—nothing fancy or intimidating.
- 9-inch (23 cm) Springform Pan: Makes releasing the cheesecake a breeze. If you don’t have one, a regular cake pan lined with parchment paper will work, but be extra careful when removing the cake.
- Mixing Bowls: One large for the filling and one smaller for whipping cream.
- Electric Mixer (handheld or stand): Essential for whipping cream and beating the cream cheese until smooth. I use a hand mixer most times; it’s quick and easy to clean.
- Spatula: For folding the chopped Oreos gently into the filling.
- Measuring Cups and Spoons: Accuracy matters for the perfect texture.
I’ve tried making this cheesecake by hand before—possible but takes more elbow grease, especially whipping the cream. So if you’re planning to make it regularly, investing in a decent hand mixer is worth it. Also, keep your cream cheese and heavy cream chilled before starting—this helps with whipping and achieving that silky filling.
Detailed Preparation Method

- Prepare the Oreo Crust: Crush 16 Oreo cookies finely using a food processor or by placing them in a sealed bag and smashing with a rolling pin. Combine the crushed Oreos with the melted butter until the mixture looks like wet sand. Press this evenly into the base of your springform pan. Use the back of a spoon or a flat glass to pack it tightly. Pop it in the fridge to chill while you make the filling. (Approx. 10 minutes)
- Make the Cream Cheese Filling: In a large bowl, beat the softened cream cheese with an electric mixer on medium speed until smooth and fluffy—no lumps! Gradually add the powdered sugar and vanilla extract, continuing to beat until fully incorporated. This step usually takes about 3-5 minutes. It’s important the cream cheese is truly softened; otherwise, you’ll get clumps.
- Whip the Heavy Cream: In a separate chilled bowl, whip the cold heavy whipping cream until soft peaks form. Be careful not to overwhip; you want it light and airy, not grainy or butter-like. This usually takes about 4-6 minutes with a mixer.
- Combine Cream Cheese Mixture and Whipped Cream: Gently fold the whipped cream into the cream cheese mixture using a spatula. Use slow, careful motions to keep as much air as possible in the mixture—this keeps the cheesecake light. Once mostly combined, fold in the remaining 8 Oreos roughly chopped into chunky pieces. This adds that iconic Oreo crunch throughout the filling.
- Assemble and Chill: Pour the filling over the chilled crust, smoothing the top with a spatula. Cover the pan tightly with plastic wrap and refrigerate for at least 4 hours, ideally overnight. The longer it chills, the better the texture and flavor meld. When ready, release the springform pan and slice with a warm knife for clean cuts.
Pro tip: If your cream cheese isn’t soft enough, microwave it in 10-second bursts, checking often, so it doesn’t get too runny. Also, chilling the cheesecake overnight makes it firm but still creamy—perfect for slicing and serving.
Cooking Tips & Techniques
When it comes to this no-bake Oreo cheesecake recipe, a few tricks make all the difference:
- Softening the Cream Cheese: Don’t rush this step! Soft cream cheese mixes smoother, preventing a grainy filling. I always leave mine out for at least 30 minutes or soften gently in the microwave.
- Whipping Cream to Soft Peaks: Timing is everything. Stop whipping as soon as soft peaks form. Overwhipping leads to butter, and underwhipping means a runny filling.
- Folding, Not Stirring: When mixing whipped cream into the cream cheese base, fold gently with a spatula to keep air trapped inside, making the cheesecake fluffy.
- Crust Pressing: Firmly packing the crust prevents crumbling when slicing later. Use a flat bottom glass to press evenly.
- Serving Knife Tip: Warm your knife under hot water and wipe dry before slicing. This helps cut clean, beautiful pieces without dragging the filling.
My first attempt was a bit too soft because I didn’t chill it long enough. Lesson learned: patience is key! Also, using the right Oreos matters—regular Oreos with that creamy filling balance the texture best. If you want a twist, try Mint Oreos for a refreshing flavor.
Variations & Adaptations
If you want to mix things up, this no-bake Oreo cheesecake recipe is super adaptable:
- Dietary Variation: Use gluten-free Oreo alternatives and a dairy-free cream cheese and coconut cream to make it vegan and gluten-free. The texture changes a bit but still delicious!
- Seasonal Twist: Add a handful of fresh berries on top before chilling for a pop of color and tartness. In winter, sprinkle crushed peppermint candies for a festive spin.
- Flavor Boost: Mix in a tablespoon of instant coffee or espresso powder to the cream cheese for a mocha Oreo cheesecake variation. It adds a grown-up depth to the sweet treat.
- Cooking Method Adaptation: If you prefer a firmer cheesecake, pop it in the freezer for 1-2 hours before serving, but bring it back to fridge temperature to soften slightly before slicing.
- Personal Favorite: I once added a swirl of peanut butter into the filling before folding the Oreos in. It was a hit—rich, nutty, and extra comforting.
Serving & Storage Suggestions
This no-bake Oreo cheesecake is best served chilled, straight from the fridge. The cool, creamy texture with crunchy Oreo bits makes it perfect for warm days but honestly delicious any time of year.
For presentation, garnish with extra Oreo halves or a dusting of cocoa powder. Serve alongside fresh berries or a drizzle of chocolate sauce if you want to get fancy.
To store, cover the cheesecake tightly with plastic wrap and keep it refrigerated for up to 4 days. It freezes well too—wrap tightly in foil and freeze for up to 1 month. When thawing, move it to the fridge overnight to keep the texture intact.
Reheat? No need! This cheesecake shines best cold. If the edges get a bit dry in the fridge, just add a dollop of whipped cream before serving.
Fun fact: The flavors actually deepen and meld the longer it chills, so if you can wait 24 hours, you’re in for a real treat!
Nutritional Information & Benefits
This no-bake Oreo cheesecake recipe is indulgent but also offers some nutritional perks, thanks to simple ingredients.
| Nutrient | Per Serving (1 slice, approx.) |
|---|---|
| Calories | 350-400 kcal |
| Protein | 6-8 g |
| Fat | 25-30 g |
| Carbohydrates | 30-35 g |
| Sugar | 20-25 g |
The cream cheese provides calcium and protein, while the Oreos add that classic cookie flavor with a bit of sugar and carbs. For those watching carbs or dairy, substitutions like almond flour crust or dairy-free cheeses can make it more diet-friendly.
Personally, I see this cheesecake as a treat to enjoy mindfully—something that brings joy and comfort. It’s not everyday food, but when you want a homemade dessert that feels special, this fits the bill perfectly.
Conclusion
So, there you have it—my favorite no-bake Oreo cheesecake recipe that’s simple, quick, and seriously delicious. If you’re looking for a dessert that wows without a ton of fuss, this one’s for you. Customize it with your favorite Oreo flavors or mix-ins, and make it your own.
I love this recipe because it reminds me that great desserts don’t have to be complicated. It’s a friendly, approachable treat that brings smiles and satisfied sweet cravings every time. Give it a try and let me know how you customize yours—I’m always excited to hear new twists!
If you enjoyed this recipe, please share it with friends or leave a comment below. Your feedback means the world and helps me keep sharing tasty, easy recipes just like this.
Happy no-bake baking and enjoy every creamy, crunchy bite!
FAQs
Can I make this no-bake Oreo cheesecake ahead of time?
Absolutely! It actually tastes better after chilling overnight, so preparing it a day in advance is perfect for flavor and texture.
What if I don’t have a springform pan?
You can use a regular cake pan lined with parchment paper, but removing the cheesecake might be trickier. Chill longer to help it set firmly.
Can I use a different cookie for the crust?
Yes! Graham crackers, chocolate wafers, or gluten-free cookies work well. Just crush them finely and mix with melted butter like the Oreos.
Is it okay to freeze the cheesecake?
Yes, wrap it tightly and freeze for up to one month. Thaw it overnight in the fridge before serving for best results.
How do I get the filling extra smooth and fluffy?
Make sure your cream cheese is fully softened and whip the heavy cream to soft peaks before folding gently into the cream cheese mixture. Avoid overmixing to keep that airy texture.
Pin This Recipe!
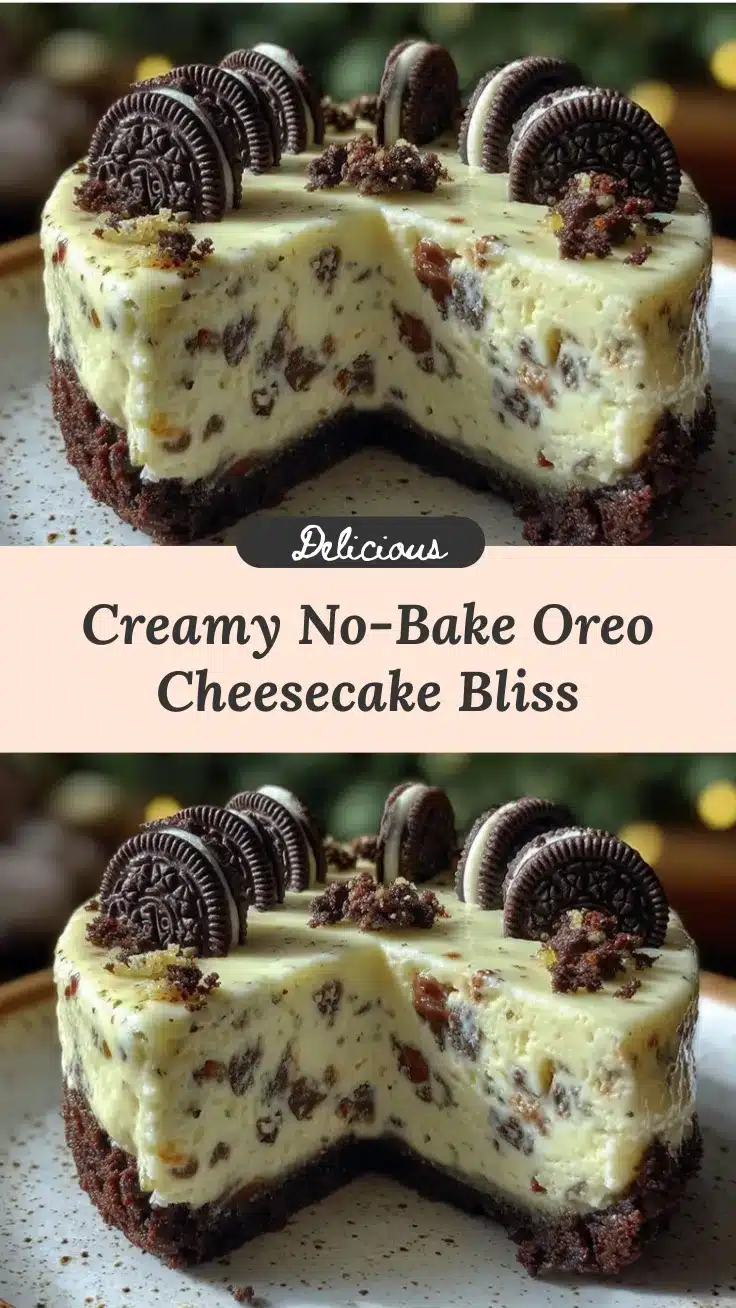
No-Bake Oreo Cheesecake Recipe Easy 5-Step Homemade Delight

A quick and easy no-bake Oreo cheesecake with a creamy, dreamy texture and crunchy Oreo chunks, perfect for any occasion and requiring no oven.
- Prep Time: 20 minutes
- Cook Time: 0 minutes
- Total Time: 4 hours 20 minutes
- Yield: 12 servings 1x
- Category: Dessert
- Cuisine: American
Ingredients
- 24 Oreo Cookies (divided: 16 crushed for crust, 8 roughly chopped for filling)
- 6 tbsp (85 g) unsalted butter, melted
- 16 oz (450 g) cream cheese, softened
- 3/4 cup (90 g) powdered sugar
- 1 cup (240 ml) heavy whipping cream, cold
- 1 tsp vanilla extract
Instructions
- Prepare the Oreo crust: Crush 16 Oreo cookies finely using a food processor or by smashing in a sealed bag. Combine crushed Oreos with melted butter until mixture resembles wet sand. Press evenly into the base of a 9-inch springform pan and chill in fridge for about 10 minutes.
- Make the cream cheese filling: Beat softened cream cheese with an electric mixer on medium speed until smooth and fluffy. Gradually add powdered sugar and vanilla extract, beating until fully incorporated.
- Whip the heavy cream: In a separate chilled bowl, whip cold heavy cream until soft peaks form, about 4-6 minutes.
- Combine mixtures: Gently fold whipped cream into cream cheese mixture using a spatula to keep air in. Fold in the remaining 8 chopped Oreos.
- Assemble and chill: Pour filling over chilled crust, smooth the top, cover with plastic wrap, and refrigerate for at least 4 hours or overnight before slicing and serving.
Notes
Use softened cream cheese for smooth filling. Whip heavy cream to soft peaks to avoid grainy texture. Fold whipped cream gently to keep cheesecake light and airy. Chill cheesecake overnight for best texture and flavor. Warm knife under hot water before slicing for clean cuts. Variations include using gluten-free Oreos and coconut cream for dairy-free version.
Nutrition
- Serving Size: 1 slice (1/12 of che
- Calories: 375
- Sugar: 22.5
- Sodium: 220
- Fat: 27.5
- Saturated Fat: 17
- Carbohydrates: 32.5
- Fiber: 1
- Protein: 7
Keywords: no-bake cheesecake, Oreo cheesecake, easy dessert, no oven dessert, creamy cheesecake, Oreo dessert