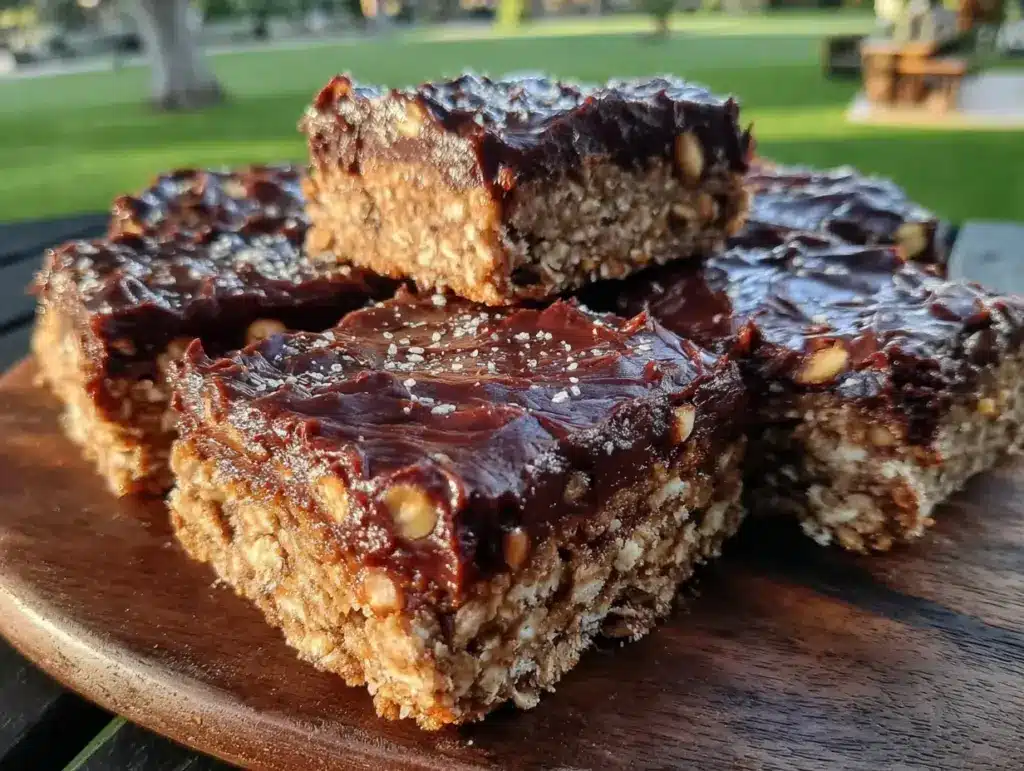
“Hey, did you bring the bars?” my friend texted just as I was fumbling through my picnic basket. Honestly, I wasn’t sure I’d nailed the snack this time. I’d been experimenting with something quick and fuss-free — you know, the kind of recipe you can throw together in minutes without turning your kitchen into a disaster zone. These Easy No-Bake Chocolate Peanut Butter Oat Bars were born out of sheer picnic desperation, more than a carefully planned masterpiece. I had to find something that could survive the heat, travel well, and please a crowd that ranges from picky kids to adults with sweet cravings.
At first, I was skeptical about no-bake bars. I mean, how could something that doesn’t get baked hold together and taste amazing? But after a few tries — tweaking the peanut butter to chocolate ratio, adjusting the oats texture, and adding just the right touch of honey — it clicked. The smell that hit me when they set in the fridge was like a warm, nutty hug. And the best part? These bars didn’t melt into a gooey mess under the picnic sun, which honestly felt like a small miracle.
Now, I find myself making these bars every other week. They’re my go-to for that casual get-together or a quick grab-and-go treat when life gets hectic. You’ll find the perfect balance of chewy oats, creamy peanut butter, and chocolate that’s just sweet enough without overdoing it. Plus, since they don’t need baking, there’s zero sweating over the oven while the weather’s begging you to be outside.
These bars stick with you — not just in your picnic basket but in your mind, too. They’re simple, comforting, and a little bit nostalgic. And honestly, they’re the kind of snack that makes you pause and appreciate the little moments, like sitting on a blanket with friends, sharing bites, and knowing you nailed the snack game without breaking a sweat.
Why You’ll Love This Recipe
Having tested this Easy No-Bake Chocolate Peanut Butter Oat Bars recipe multiple times, I can say it’s a lifesaver for anyone who loves picnic snacks that are fuss-free but never boring.
- Quick & Easy: Comes together in under 20 minutes, perfect for last-minute picnic plans or whenever that sweet craving hits.
- Simple Ingredients: Uses pantry staples like rolled oats, peanut butter, and cocoa powder — no fancy or hard-to-find items needed.
- Perfect for Picnics: These bars hold up well outside the fridge and travel beautifully without turning into a sticky mess.
- Crowd-Pleaser: Loved by both kids and adults, they always get asked for seconds (and sometimes thirds).
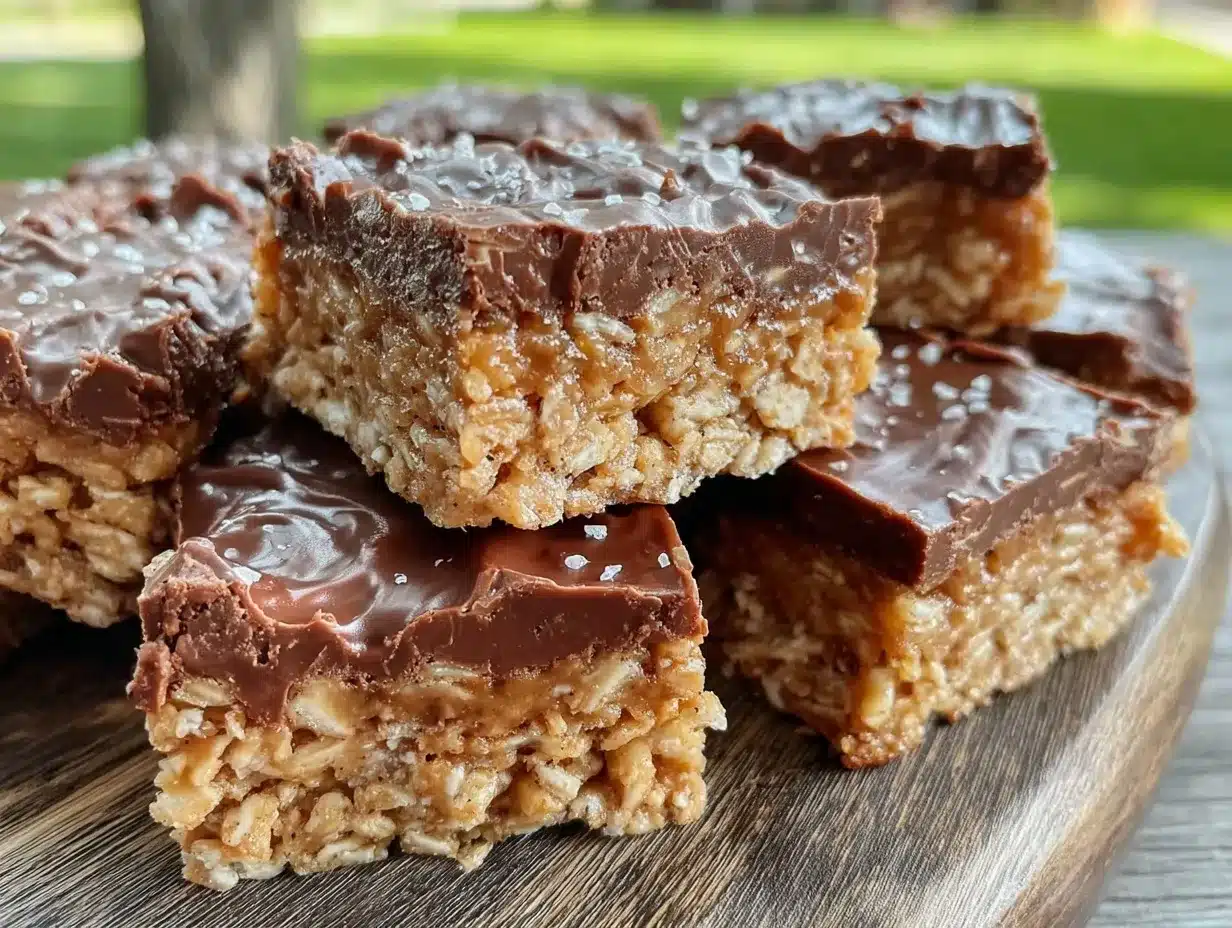
- Unbelievably Delicious: The combo of chocolate and peanut butter here hits that nostalgic comfort food spot, with a chewy yet soft texture that’s just right.
What sets this recipe apart is the careful balance of textures and flavors. I’ve blended the peanut butter until ultra-smooth before mixing it with the oats to keep a creamy feel inside the bars. Also, the touch of honey adds just enough natural sweetness to round out the cocoa without overwhelming it. It’s not just another chocolate oat bar; it’s a recipe that’s been tweaked with care so every bite feels like a little reward.
Whether you’re packing up for a casual afternoon in the park, a beach day, or just need an easy snack to keep energy up during a hike, these bars are a quiet winner that won’t let you down.
What Ingredients You Will Need
This recipe uses simple, wholesome ingredients to deliver bold flavor and a satisfying chewy texture without any fuss. Most of these ingredients are pantry staples you likely already have, and substitutions are easy if you need them.
- Rolled oats (2 cups / 180 g): The base of the bars, providing chewiness and fiber. I recommend old-fashioned oats over quick oats for better texture.
- Natural creamy peanut butter (1 cup / 250 g): Adds richness and binds everything together. I usually go for unsweetened, natural peanut butter like Smucker’s Natural for the best flavor.
- Honey (1/3 cup / 115 g): Acts as a natural sweetener and helps hold the bars together. You can swap with maple syrup if you want a vegan option.
- Unsweetened cocoa powder (1/4 cup / 25 g): Brings that deep chocolate flavor without excess sugar.
- Vanilla extract (1 tsp): Enhances the overall flavor with a warm, sweet note.
- Salt (a pinch): Balances the sweetness and enhances the peanut butter’s flavor.
- Optional add-ins: Chopped nuts, mini chocolate chips, or dried fruit (like raisins or cranberries) can be stirred in for extra texture and taste.
If you’re looking for a gluten-free version, using certified gluten-free oats works perfectly. For those allergic to peanuts, sunflower seed butter is a great substitute that keeps the same creamy texture and nutty flavor. In summer, I sometimes add fresh or freeze-dried berries for a fruity twist that brightens up the bars.
Equipment Needed
- Mixing bowl: A large bowl to combine all your ingredients comfortably.
- Measuring cups and spoons: For precise ingredient amounts. Having both metric and US standard helps if you like exactness like me.
- Spoon or spatula: To mix everything thoroughly — a sturdy silicone spatula works best to scrape the bowl clean.
- 8×8 inch (20×20 cm) baking pan: For pressing the mixture into shape. I line mine with parchment paper to make removal easier.
- Plastic wrap or aluminum foil: To cover the bars while chilling.
If you don’t have an 8×8 pan, any similar size pan or even a square container with straight sides works fine. I once used a loaf pan in a pinch, pressing the mixture in tightly — it worked out just fine!
Preparation Method
- Prepare your pan: Line an 8×8 inch (20×20 cm) baking pan with parchment paper, leaving some overhang on the sides. This helps lift the bars out easily once set. (5 minutes)
- Mix the wet ingredients: In a large bowl, combine 1 cup (250 g) of creamy peanut butter with 1/3 cup (115 g) of honey and 1 teaspoon of vanilla extract. Stir until smooth and fully blended. The mixture should be creamy and glossy. (3 minutes)
- Add dry ingredients: Sprinkle in 2 cups (180 g) of rolled oats, 1/4 cup (25 g) of unsweetened cocoa powder, and a pinch of salt. Stir until everything is evenly mixed and coated. The oats should be well covered but not soggy. (3-4 minutes)
- Optional add-ins: If you’re using any extras like mini chocolate chips (1/3 cup / 60 g), chopped nuts (1/2 cup / 60 g), or dried fruit (1/3 cup / 50 g), fold them in now. This adds a nice texture contrast. (2 minutes)
- Press the mixture into the pan: Transfer the mixture to your prepared pan. Using a spatula or your hands (lightly wet to prevent sticking), press it down firmly and evenly. This step is crucial for bars that hold together well. (5 minutes)
- Chill to set: Cover the pan with plastic wrap or foil and refrigerate for at least 2 hours until the bars are firm. This makes slicing much easier and prevents crumbling. (2 hours minimum)
- Slice and serve: Use the parchment overhang to lift the block out, then cut into 12 bars. Keep the bars refrigerated until ready to pack in your picnic basket. (5 minutes)
Pro tip: If the bars seem too soft after slicing, pop them back in the fridge for 15-20 minutes. The cold really helps them hold shape without losing that chewy bite. Also, when pressing the mixture, don’t rush — firm pressure means bars that don’t fall apart when you’re eating them on the go.
Cooking Tips & Techniques
Working with no-bake bars can feel a bit tricky at first, but a few insider tips can make all the difference.
- Choose the right peanut butter: Natural peanut butter with oil separation works best, but make sure to stir it well before measuring. Avoid overly dry or powdered versions, or your bars might crumble.
- Don’t skip chilling: Patience here pays off big time. The chilling step helps the bars set firmly so they won’t fall apart in your picnic bag. I’ve learned this the hard way during one too many sticky snack emergencies.
- Press firmly: When you’re pressing the mixture into the pan, think of it like packing a snowball — you want it compact but not squished to the point of being dense.
- Mix add-ins gently: If you’re including chocolate chips or nuts, fold them in carefully to keep the mix uniform. Otherwise, you might get bars with uneven bites.
- Cut with a sharp knife: For clean edges, use a sharp, non-serrated knife and wipe it between cuts. This keeps the bars looking neat and appetizing.
A lesson I’ve learned? Avoid substituting crunchy peanut butter — creamy gives just the right texture. Also, if your honey is very thick, warming it slightly (just a few seconds in the microwave) makes mixing easier without cooking the peanut butter.
Variations & Adaptations
One of the best things about this recipe is how easy it is to tweak based on what you have or your dietary needs.
- Nut-free version: Swap peanut butter for sunflower seed butter or soy nut butter to accommodate allergies. Both work well and keep that creamy consistency.
- Vegan adaptation: Replace honey with maple syrup or agave nectar. The bars will have a slightly different sweetness, but still delicious.
- Flavor twists: Add a teaspoon of cinnamon for warmth, or a tablespoon of espresso powder to deepen the chocolate flavor. I once threw in some shredded coconut for a tropical flair — surprisingly good!
- Seasonal berries: Stir in freeze-dried raspberries or chopped dried cherries for a tart contrast that brightens the bars.
- Cooking method alternative: While these are no-bake bars, you can warm the peanut butter and honey gently on the stove to make mixing easier during colder months.
My personal favorite variation involves tossing in some chopped salted pretzels for a sweet-salty combo that’s addictive — it’s a fun twist for when you want to mix things up for a picnic snack. If you like experimenting, this recipe is forgiving and flexible.
Serving & Storage Suggestions
These bars are best served chilled or at room temperature. They hold up great outside the fridge for a few hours, making them ideal for picnics, hikes, or packed lunches.
Presentation-wise, wrapping individual bars in parchment paper makes them easy to grab and keeps them neat. If you’re heading to a party, stacking them on a pretty plate or in a tiered tray alongside savory bites like crispy ham and cheese sticks adds nice variety.
Store leftover bars in an airtight container in the refrigerator for up to one week. They freeze nicely too — just wrap individually and pop them in a freezer-safe bag for up to three months. Thaw in the fridge or at room temperature before serving.
Reheating isn’t really needed, but if you want a softer texture, warm a bar in the microwave for 10-15 seconds. Over time, the flavors deepen, especially if you include add-ins like nuts or dried fruit.
Nutritional Information & Benefits
Each bar roughly contains:
| Nutrient | Per Bar (1 of 12) |
|---|---|
| Calories | 160-180 kcal |
| Protein | 5 g |
| Carbohydrates | 18 g |
| Fiber | 3 g |
| Fat | 9 g (mostly healthy fats) |
Thanks to the oats and peanut butter, these bars provide a good source of fiber and plant-based protein, making them more satisfying than your average sweet snack. The natural ingredients mean they’re free from artificial additives, and the moderate sugar content comes mostly from honey. For those watching gluten, using certified gluten-free oats makes these bars safe and inclusive.
From a wellness perspective, I appreciate how this snack offers a balance — indulgent yet nourishing, with ingredients that fuel rather than just fill you up.
Conclusion
These Easy No-Bake Chocolate Peanut Butter Oat Bars have quietly become my picnic MVP — simple, satisfying, and surprisingly reliable. Whether you’re packing for a sunny afternoon at the park, a casual beach day, or just need a quick snack to keep energy up, these bars fit the bill without fuss or fancy ingredients.
Feel free to tweak the add-ins or sweetness to match your taste buds. I love how forgiving this recipe is; it’s like a blank canvas that always turns out tasty. Honestly, I keep coming back to it because it strikes that perfect balance between comfort and convenience.
If you try making these bars, I’d love to hear how you customize them or any little tricks you discover along the way. Sharing food stories and recipe twists is part of what makes cooking fun, right? Here’s to many more effortless, delicious picnic snacks ahead!
FAQs
Can I use quick oats instead of rolled oats for these bars?
Quick oats can work in a pinch, but rolled oats provide a better chewy texture that holds the bars together more firmly.
How long do these bars keep at room temperature?
They can stay fresh for a few hours at room temperature, making them great for picnics. For longer storage, keep them refrigerated.
Can I substitute peanut butter with almond butter?
Yes, almond butter is a great alternative and will give a slightly different but delicious flavor.
Do I have to refrigerate the bars before cutting?
It’s best to chill them for at least 2 hours so they set properly and slice cleanly without crumbling.
Are these bars suitable for kids?
Absolutely! They’re a kid-friendly treat with natural sweetness and familiar flavors of chocolate and peanut butter.
Pin This Recipe!
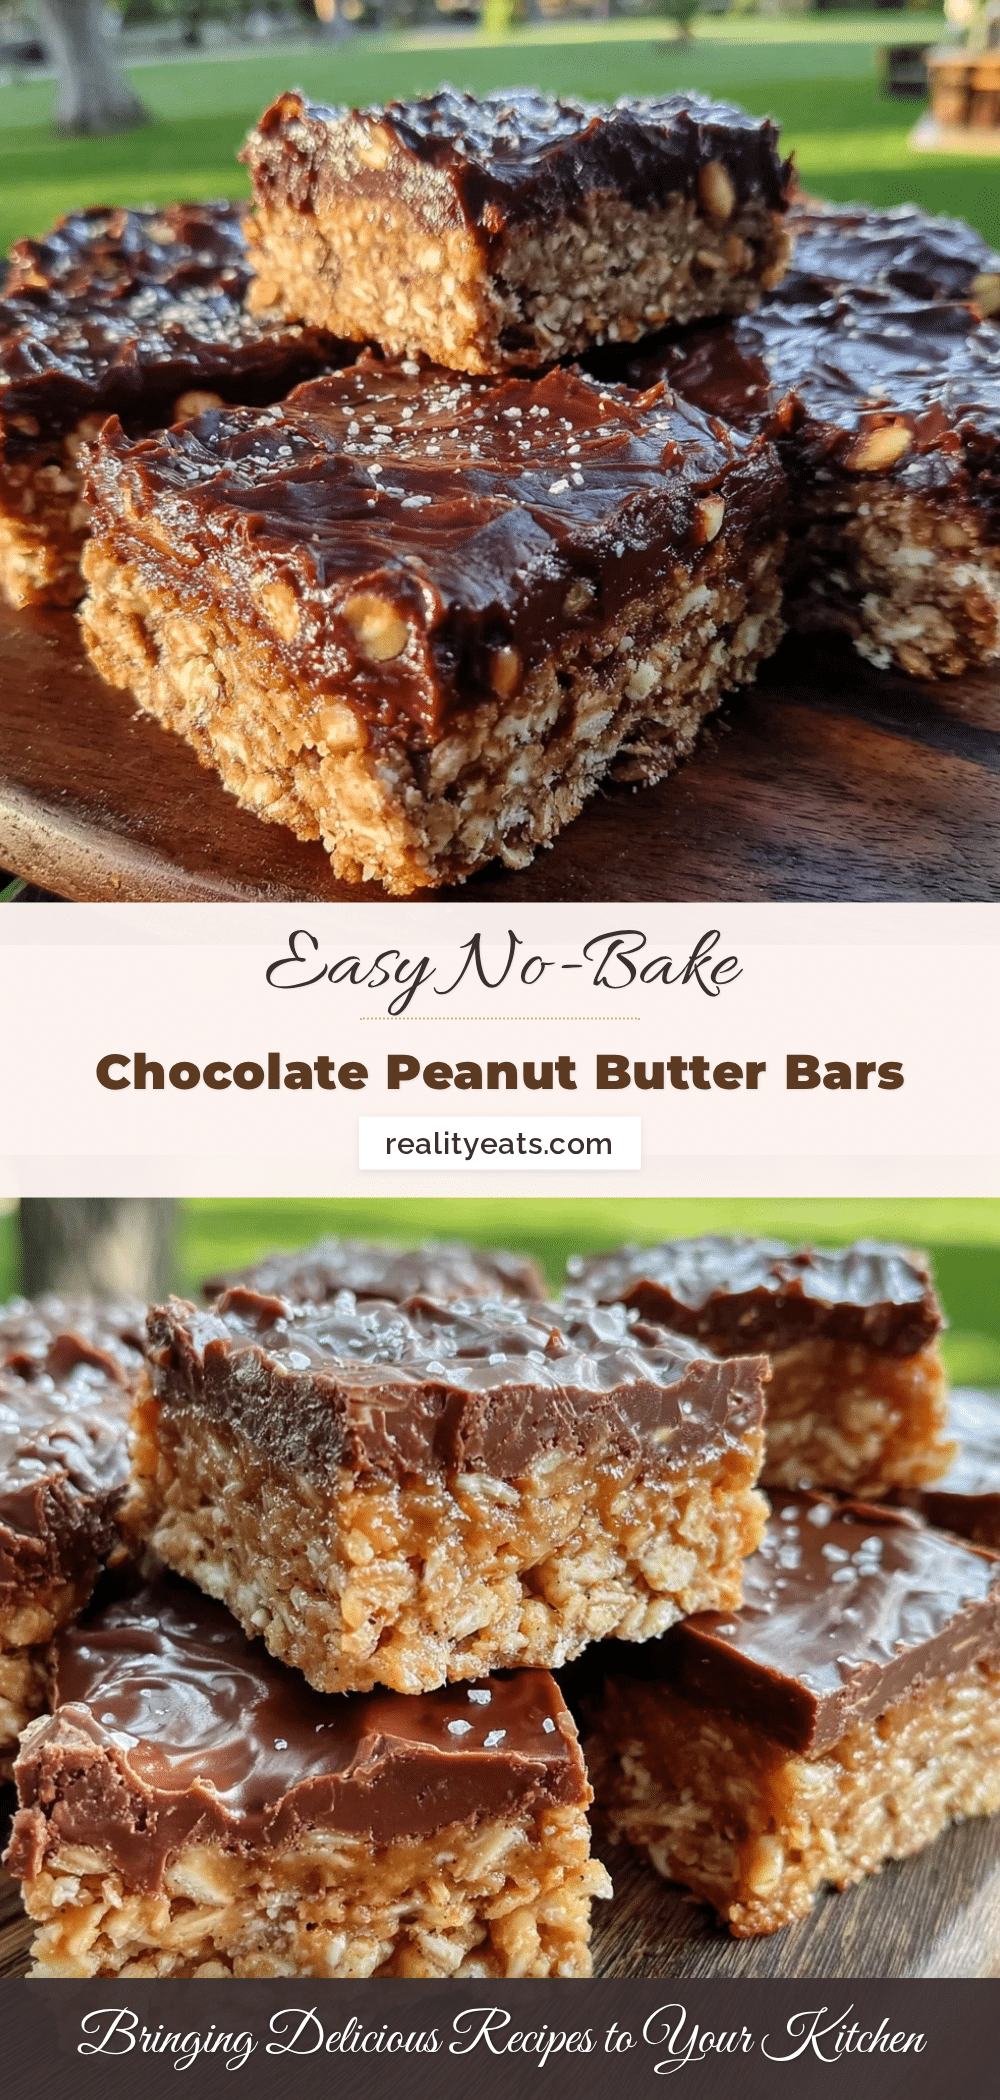
Easy No-Bake Chocolate Peanut Butter Oat Bars

Quick and fuss-free no-bake bars combining chewy oats, creamy peanut butter, and chocolate, perfect for picnics and snacks that hold up well without melting.
- Prep Time: 15 minutes
- Cook Time: 0 minutes
- Total Time: 2 hours 15 minutes
- Yield: 12 bars 1x
- Category: Snack
- Cuisine: American
Ingredients
- 2 cups (180 g) rolled oats
- 1 cup (250 g) natural creamy peanut butter
- 1/3 cup (115 g) honey
- 1/4 cup (25 g) unsweetened cocoa powder
- 1 teaspoon vanilla extract
- Pinch of salt
- Optional add-ins: 1/3 cup (60 g) mini chocolate chips, 1/2 cup (60 g) chopped nuts, 1/3 cup (50 g) dried fruit (raisins or cranberries)
Instructions
- Line an 8×8 inch (20×20 cm) baking pan with parchment paper, leaving some overhang on the sides. (5 minutes)
- In a large bowl, combine 1 cup (250 g) creamy peanut butter, 1/3 cup (115 g) honey, and 1 teaspoon vanilla extract. Stir until smooth and fully blended. (3 minutes)
- Add 2 cups (180 g) rolled oats, 1/4 cup (25 g) unsweetened cocoa powder, and a pinch of salt. Stir until evenly mixed and coated. (3-4 minutes)
- Fold in any optional add-ins like mini chocolate chips, chopped nuts, or dried fruit if using. (2 minutes)
- Transfer the mixture to the prepared pan and press down firmly and evenly using a spatula or lightly wet hands. (5 minutes)
- Cover the pan with plastic wrap or foil and refrigerate for at least 2 hours until firm.
- Use the parchment overhang to lift the block out and cut into 12 bars. Keep refrigerated until serving. (5 minutes)
Notes
Use natural creamy peanut butter for best texture. Chill bars for at least 2 hours to set properly. Press mixture firmly to avoid crumbling. Use a sharp knife and wipe between cuts for clean edges. For vegan option, substitute honey with maple syrup. Gluten-free oats can be used for gluten-free version.
Nutrition
- Serving Size: 1 bar
- Calories: 160180
- Fat: 9
- Carbohydrates: 18
- Fiber: 3
- Protein: 5
Keywords: no-bake bars, chocolate peanut butter bars, oat bars, picnic snacks, easy snack, no bake dessert, peanut butter oat bars


