For a while, I just accepted that making a sourdough starter from scratch was something that belonged to those elusive artisan bakers—or at least, that it would take ages and endless fuss. I’d peeked into countless guides promising quick results or magical transformations, but honestly, none of them quite felt approachable or reliable. The idea of nurturing a wild yeast colony in my kitchen sounded fascinating, but also a little intimidating, like a science experiment I might accidentally kill off by overfeeding or neglecting.
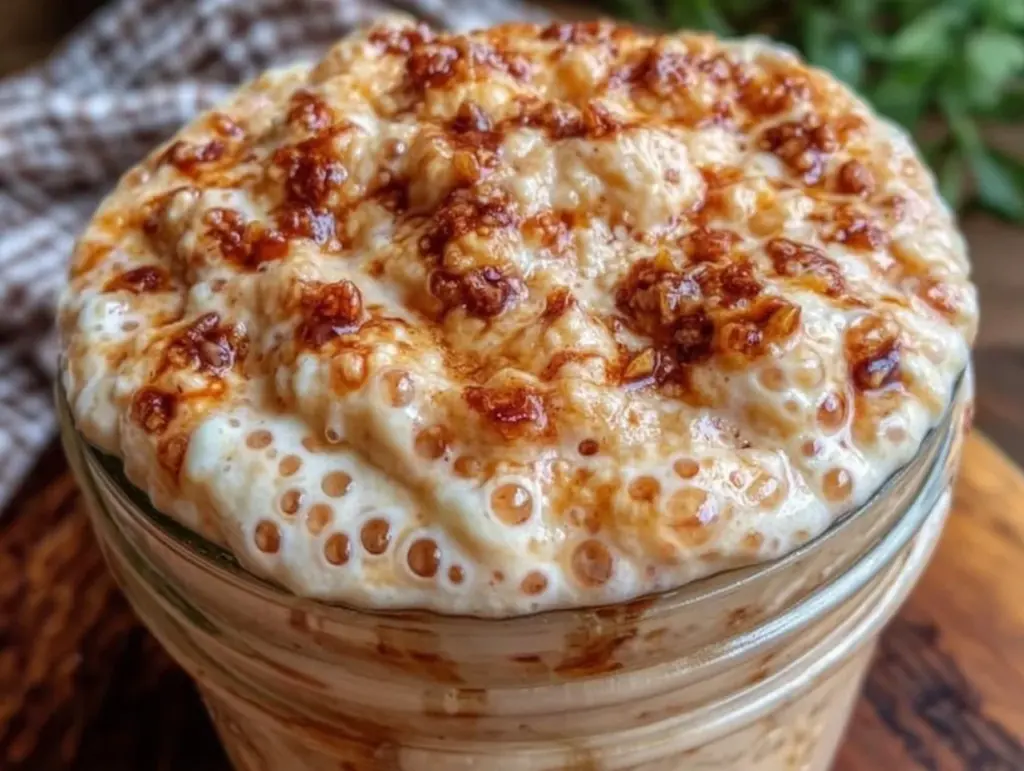
One morning, while waiting for a loaf of bread to bake, I found myself watching the tiny bubbles form on my almost-forgotten jar of flour and water. It wasn’t overnight, but day by day, that simple mixture started to come alive, like a quiet little companion right there on the counter. The smell shifted from bland flour to tangy and alive, and the surface transformed with delicate bubbles and a slight jiggle that promised bread worth the wait.
That slow awakening was oddly satisfying—not flashy or dramatic, just a patient, steady progression of nature doing its thing in my kitchen. No rush, no stress, just a quiet rhythm of feeding and waiting, watching something invisible become something vital. That’s what made this easy homemade sourdough starter recipe stick with me. It’s not about instant gratification; it’s about a small routine that turns into a rewarding habit.
And now, I can’t imagine baking without it. It’s the kind of thing that quietly changes how you think about bread, about time, and about the simple joy of making something from scratch that truly breathes.
Why You’ll Love This Recipe
After trying a handful of starters that fizzled out or smelled off, this easy homemade sourdough starter from scratch became my go-to method. It’s straightforward, with no tricky ingredients or complicated gadgets, just flour, water, and a little patience. Here’s why it’s a keeper:
- Simple & Reliable: This starter only needs all-purpose or whole wheat flour and water—no fancy additives or secret ingredients.
- Visual 7-Day Guide: Instead of vague instructions, you get clear, day-by-day signs to watch for so you know exactly what’s going on.
- Perfect for Beginners: Whether you’re a kitchen novice or a seasoned baker, this recipe walks you through every step in a friendly, non-intimidating way.
- Flexible Feeding: The feeding schedule can easily adjust to your lifestyle; if you miss a day, it’s not the end of the world.
- Great Foundation: Once your starter is bubbly and active, you can use it to bake everything from crusty loaves to soft sandwich breads, or even try fun recipes like the moist blueberry cream cheese bread for an unexpected twist.
- Gentle Learning Curve: This recipe’s approach makes you comfortable with the process rather than overwhelmed, so you actually enjoy the journey.
Honestly, this isn’t just another sourdough starter method—it’s the one I trust to get consistent results without fuss. It’s a quiet companion in my kitchen routine and a reminder that good bread takes time but doesn’t have to be complicated.
What Ingredients You Will Need
This recipe uses simple, wholesome ingredients to deliver a lively sourdough starter that’s easy to maintain and full of flavor. Most of these are pantry staples, so you probably have everything on hand already.
- Unbleached all-purpose flour – The backbone of the starter; I prefer unbleached for a more natural flavor and better yeast activity.
- Whole wheat flour – Adds extra nutrients and wild yeast to kickstart fermentation; you can swap this for rye flour if you want a slightly different flavor profile.
- Filtered or bottled water – Chlorine in tap water can slow down yeast growth, so filtered water works best. Room temperature is ideal to keep the starter cozy.
- Glass or plastic jar – For mixing and storing the starter; a quart-sized jar with a loose lid or cloth cover works perfectly.
- Kitchen scale – For precise measurements; sourdough starters thrive on consistent feeding ratios.
Optional but handy:
- Rubber spatula – Great for stirring and scraping down the sides of your jar without damaging it.
- Thermometer – To check ambient temperature; sourdough yeast loves warmth around 70–75°F (21–24°C).
If you’re curious, I’ve found that starting with a mix of 50% whole wheat and 50% all-purpose flour gives the starter a robust flavor and faster activity. But feel free to experiment once you have the basics down.
Equipment Needed
Making this easy homemade sourdough starter doesn’t require fancy kitchen gadgets. Here’s what you’ll need:
- Kitchen scale: This is essential for accuracy. I used a simple digital scale from my local store, and it’s been reliable for years.
- Mixing jar or container: A clear glass jar about 1-quart (1-liter) capacity is ideal so you can watch the bubbles form. Plastic works too, but glass feels cleaner to me.
- Loose lid or breathable cover: You can use a clean kitchen towel, coffee filter, or a jar lid left loosely on top to allow airflow while keeping dust out.
- Spoon or rubber spatula: For mixing. I prefer a spatula because it’s easier to scrape the sides and bottom.
If you don’t have a kitchen scale, measuring cups can work in a pinch, but your starter might be less consistent. I recommend picking one up if you plan to bake often—it really pays off. As a tip, I clean my glass jar with hot water and avoid soap to keep the natural yeast environment friendly.
Preparation Method
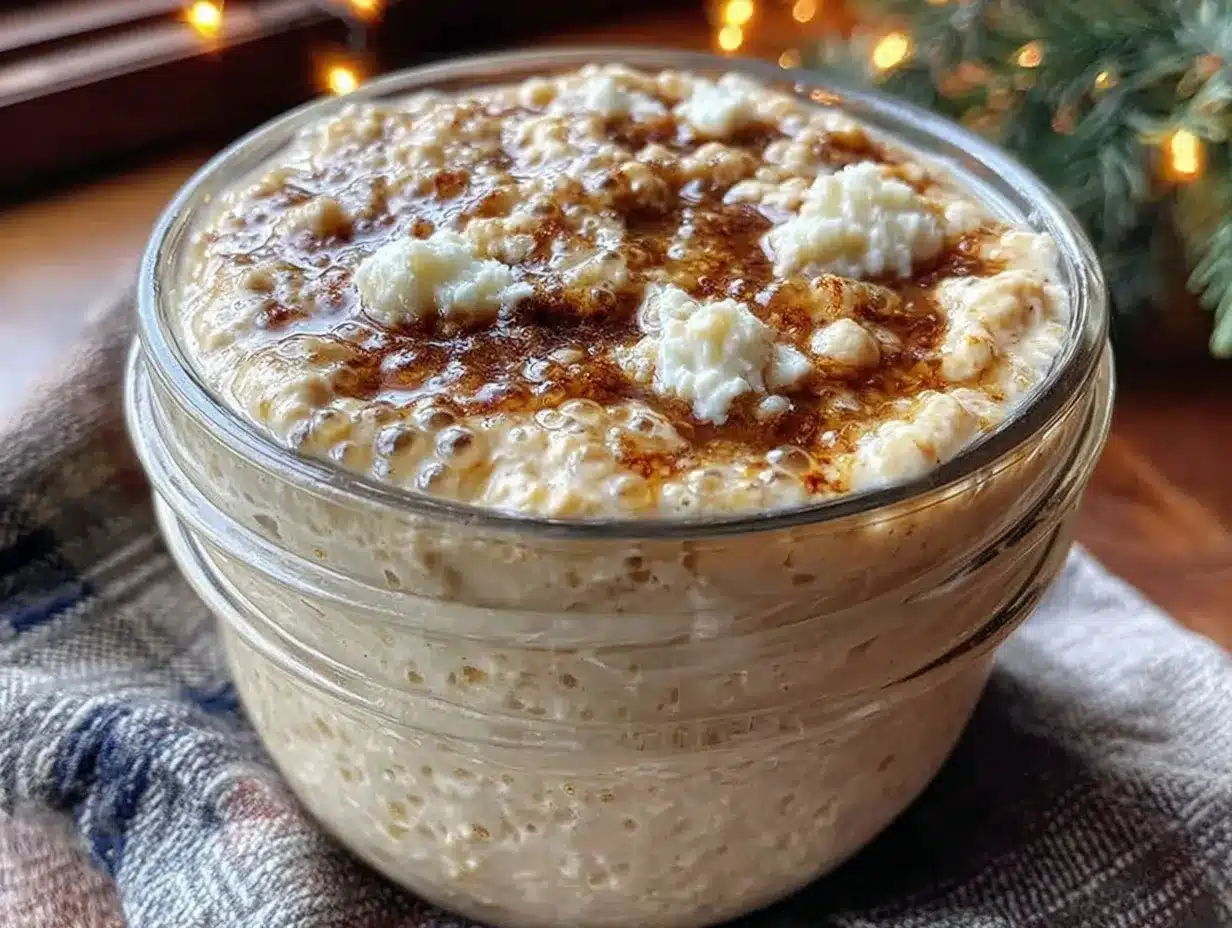
- Day 1: Mix your starter – Combine 50g (1/3 cup) whole wheat flour with 50g (3 tablespoons plus 1 teaspoon) filtered water in your jar. Stir until smooth and no dry flour remains. Cover loosely, and leave it at room temperature (about 70°F/21°C). This mixture looks just like thick pancake batter. Let it rest for 24 hours.
- Day 2: Check for bubbles – You might see a few tiny bubbles, or just notice a slight rise in volume. Don’t worry if nothing’s obvious yet—wild yeast can be shy at first. Stir the starter once today to introduce oxygen, then cover again.
- Day 3: Feed your starter – Discard half the starter (about 100g), then add 50g all-purpose flour and 50g water. Stir thoroughly. By now, you may notice a tangy aroma and more bubbles. Keep it covered and warm.
- Day 4: Observe growth – The starter should be bubbling and rising, with a pleasant sour smell. Repeat the Day 3 feeding routine. If it smells off (like nail polish remover), rinse the jar and start fresh.
- Day 5: Twice daily feedings – Your starter is waking up! Switch to feeding twice a day, every 12 hours: discard half, then feed with 50g all-purpose flour and 50g water. Look for doubling in size within 6-8 hours.
- Day 6: Active and bubbly – The starter should be very bubbly and rise consistently. Give it a gentle stir before each feeding. If it’s doubling quickly and smells tangy but pleasant, it’s almost ready.
- Day 7: Ready to bake – Perform the “float test”: drop a spoonful of starter into a bowl of water. If it floats, it’s airy and ready to use in your favorite recipes. If it sinks, keep feeding daily and watch for more bubbles.
Throughout the week, keep your starter in a spot away from direct sunlight but not too cold. I learned the hard way that a chilly kitchen slows everything down, so find a cozy nook near your oven or on top of the fridge. Stirring daily mixes in oxygen and helps yeast thrive, so don’t skip it.
Cooking Tips & Techniques
Getting a sourdough starter going feels like babysitting a tiny living thing, and there are some tricks I picked up to keep mine happy.
- Temperature matters: Yeast loves warmth. Keep your starter around 70–75°F (21–24°C). If your kitchen is cold, try placing the jar in a turned-off oven with the light on.
- Consistency is key: Feeding the starter at the same time every day helps build a rhythm. Twice daily feedings after day 4 speed up activity.
- Discard smartly: Don’t just dump the discarded starter—use it in pancakes or waffles to avoid waste. I had a batch of fluffy sourdough pancakes that came straight from my discard stash.
- Watch the smell: It should smell tangy and yeasty, sometimes a bit fruity. If it smells sharply like acetone or rotten, it’s time to rinse and restart.
- Float test isn’t foolproof: If your starter sinks but looks active and bubbly, give it more time. Sometimes hydration and flour type affect buoyancy.
- Be patient: It can take a full week or longer, depending on your environment. Don’t rush by adding commercial yeast—it defeats the purpose.
From experience, I’ve learned to trust the visual cues—the bubbles, the rise, the smell—more than any strict schedule. It’s a living thing, after all.
Variations & Adaptations
Once you have the basics down, you can tweak your sourdough starter to suit your preferences or dietary needs.
- Gluten-free starter: Use brown rice flour or buckwheat flour instead of wheat. The feeding schedule is similar but expect a milder aroma.
- Rye flour boost: Swap whole wheat flour with rye for a more robust, earthy flavor and faster fermentation.
- Hydration tweaks: Some bakers prefer a thicker starter (less water) for easier handling or a thinner one for more active bubbles. Adjust flour-to-water ratios slightly to experiment.
- Feeding frequency: In warmer climates, you might feed your starter three times a day to keep it from becoming overly sour.
- Personal twist: I once added a teaspoon of freshly ground flaxseed meal on day 3, which seemed to give the starter a nice extra boost without overpowering flavor.
Feel free to explore these variations once you feel confident with the basic process. Remember, every kitchen is different, and a little experimentation is part of the fun.
Serving & Storage Suggestions
Once your starter is active, you can use it to bake all sorts of breads, from crusty baguettes to soft sandwich loaves. Keep your starter healthy and ready with these tips:
- Serving temperature: Use your starter at room temperature for the best rise and flavor in your dough.
- Refrigeration: If you don’t bake daily, store your starter in the fridge and feed it once a week. Let it warm up and feed it twice before baking for best results.
- Freezing: You can freeze a portion of starter, but it may take a couple of feedings to reactivate fully.
- Storage container: Keep your starter in a clear jar to watch its progress and use a breathable cover to avoid pressure buildup.
- Flavor development: The longer you keep and feed your starter, the more complex the flavor becomes—sometimes a slight tangy depth that makes bread truly special.
If you’re planning to bake something sweet, pairing your starter bread with a batch of soft sugar cookies with creamy icing makes for a fun mix of textures and tastes.
Nutritional Information & Benefits
A homemade sourdough starter itself doesn’t add calories—it’s just flour and water—but it’s the magic behind breads that often digest easier and have a richer nutrient profile. The natural fermentation breaks down phytic acid in flour, which can improve mineral absorption and aid digestion.
This starter recipe uses whole wheat flour initially, which contributes fiber, vitamins, and minerals. It’s naturally gluten-containing, so not suitable for gluten intolerance, but fermentation can reduce gluten content slightly.
From my experience, baking with a live starter feels like a small step toward wholesome eating, connecting you to traditional methods that prioritize slow fermentation and natural ingredients over additives.
Conclusion
Making an easy homemade sourdough starter from scratch is less about rushing and more about patience, observation, and a little daily care. This 7-day visual guide is my quiet companion in the kitchen, a reminder that simple ingredients and steady attention can create something alive and nourishing.
Whether you’re baking crusty artisan loaves or experimenting with sweet breads, this starter offers a reliable foundation. I love how it fits into my day-to-day rhythm without taking over, and how it turns baking into a rewarding ritual rather than a chore.
If you decide to give it a try, feel free to tweak it to fit your kitchen’s personality and your taste buds. And if you’re curious to see how a sourdough starter can lead to amazing baked goods, you might enjoy the light and fluffy texture in my moist blueberry cream cheese bread.
Don’t be shy to share your own starter stories or questions—I’d love to hear how your journey goes.
FAQs
How long does it take to make a sourdough starter from scratch?
Typically, it takes about 7 days to develop a bubbly, active starter ready for baking, though times can vary depending on temperature and flour type.
Can I use tap water to make my starter?
Chlorine in tap water can inhibit yeast growth. Using filtered or bottled water at room temperature is best for a healthy starter.
What if my starter smells bad or has mold?
A healthy starter smells tangy or fruity. If it smells like nail polish remover or has visible mold, it’s safer to discard it and start over.
How do I feed and maintain my sourdough starter?
Feed your starter by discarding half and adding equal parts flour and water, usually twice daily during the build phase, then once weekly if refrigerated.
Can I bake with my starter before day 7?
It’s best to wait until your starter is reliably bubbly and passes the float test, usually around day 7, to ensure good rise and flavor.
Pin This Recipe!

Easy Homemade Sourdough Starter from Scratch 7-Day Step-by-Step Guide

A simple and reliable method to create a lively sourdough starter using just flour, water, and patience over 7 days. Perfect for beginners and adaptable to various flours and feeding schedules.
- Prep Time: 5 minutes
- Cook Time: 0 minutes
- Total Time: 7 days
- Yield: 1 quart starter 1x
- Category: Baking
- Cuisine: American
Ingredients
- 50g (1/3 cup) whole wheat flour
- 50g (3 tablespoons plus 1 teaspoon) filtered or bottled water
- 50g all-purpose flour (for feedings after day 3)
- 50g water (for feedings after day 3)
Instructions
- Day 1: Mix 50g whole wheat flour with 50g filtered water in a jar. Stir until smooth, cover loosely, and leave at room temperature (about 70°F). Let rest for 24 hours.
- Day 2: Check for tiny bubbles or slight rise. Stir once to introduce oxygen, cover again.
- Day 3: Discard half the starter (~100g), then add 50g all-purpose flour and 50g water. Stir thoroughly and cover.
- Day 4: Repeat Day 3 feeding. Starter should bubble and rise with a pleasant sour smell. If it smells off, rinse jar and start over.
- Day 5: Feed twice daily every 12 hours: discard half, then feed with 50g all-purpose flour and 50g water. Look for doubling in size within 6-8 hours.
- Day 6: Starter should be very bubbly and consistently rising. Stir gently before each feeding.
- Day 7: Perform float test by dropping a spoonful of starter into water. If it floats, it is ready to use; if it sinks, continue feeding daily.
Notes
Keep starter at 70–75°F for best yeast activity. Stir daily to introduce oxygen. Use filtered or bottled water to avoid chlorine. Discarded starter can be used in pancakes or waffles. Float test indicates readiness but is not foolproof. Be patient; starter may take longer depending on environment.
Nutrition
- Serving Size: Approximately 1 tabl
- Carbohydrates: 12
- Fiber: 1.5
- Protein: 2
Keywords: sourdough starter, homemade starter, sourdough, baking, bread starter, wild yeast, fermentation, beginner baking