“Hey, are you seriously making a chocolate graduation cake shaped like a cap and gown?” That was my sister’s skeptical text when I first told her about my plan. Honestly, I wasn’t sure if it would turn out as envisioned either. I’d been scrambling to create something special for my niece’s graduation party last minute, and after a few Pinterest fails, this chocolate cake idea felt a bit wild. But you know how it goes—sometimes the best recipes come from a last-minute scramble and a dash of stubbornness.
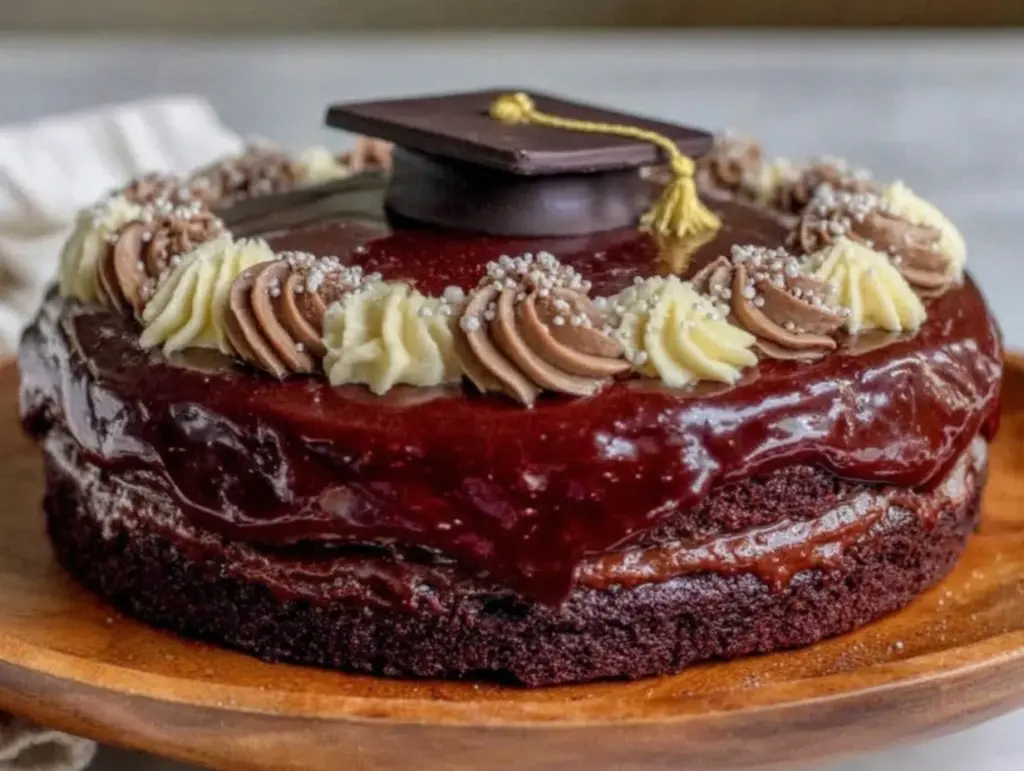
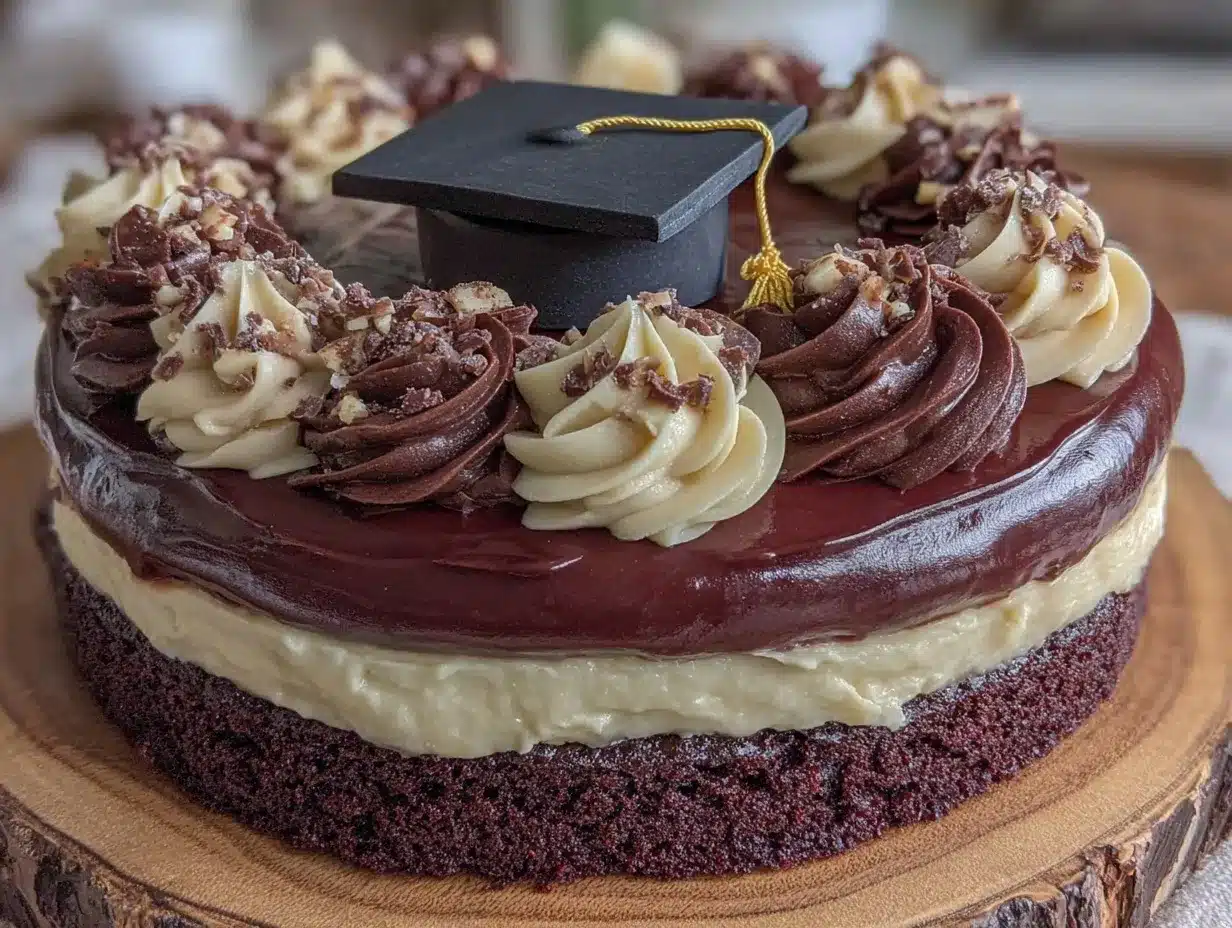
The rich aroma of cocoa filled my kitchen as I baked layer after layer, imagining the proud smile on my niece’s face when she saw the graduation cap and gown design. The cake’s texture was surprisingly moist, with that perfect chocolate crumb that feels indulgent but not too heavy. Decorating it was a test of patience and creativity—who knew piping the tassel could be so nerve-wracking? But when I finally set it on the table, framed by colorful balloons and proud family members, there was a hush, then applause. This wasn’t just any dessert; it was a celebration in every bite.
So, why does this Decadent Cap and Gown Chocolate Graduation Cake stick with me? It’s not just the chocolate (though, let’s be real, that’s a big part), but the way it turned a hectic day into a moment of joy. The cake embodies celebration, accomplishment, and a little bit of fun—just like graduation itself. If you want a centerpiece that tastes as good as it looks and makes your party unforgettable, this recipe is your new go-to.
Why You’ll Love This Recipe
After making this cake a handful of times (yeah, it became a bit of an obsession), I can say it’s genuinely one of the easiest show-stoppers you’ll ever bake. Here’s why it quickly became a favorite around here:
- Quick & Easy: The cake layers come together in under an hour, making it totally doable even if you’re juggling a million graduation party details.
- Simple Ingredients: No need to hunt down fancy stuff—just pantry staples like cocoa powder, flour, eggs, and sugar. I usually grab King Arthur Flour for the best texture and Ghirardelli cocoa powder for that rich chocolate flavor.
- Perfect for Celebrations: Whether it’s a graduation, milestone birthday, or just a sweet way to honor someone special, this cake fits the bill.
- Crowd-Pleaser: It’s always the first dessert to disappear at family gatherings, especially among kids and adults who appreciate a classic chocolate treat.
- Unbelievably Delicious: The crumb is tender and moist, and the frosting is smooth and creamy—the perfect balance without being overly sweet.
What sets this cake apart from others is the thoughtful design and texture. The piping technique for the cap and gown details gives it a professional flair, but I’ll walk you through it step-by-step so it’s approachable. Plus, the chocolate frosting recipe I use is a little secret (no butter, just cream cheese and cocoa) that makes it silky without being cloying. It’s the kind of cake that makes you pause mid-bite because it’s just that good.
So, if you’re looking for a dessert that feels like a real celebration but won’t have you stressing hours in the kitchen, this recipe will be your trusty sidekick. It’s a sweet way to honor big moments with a little bit of fun and a whole lot of chocolate.
What Ingredients You Will Need
This recipe relies on simple, wholesome ingredients to deliver bold, rich flavor and a satisfying texture without any fuss. Most of these are pantry staples, and substitutions are easy if you’re catering to dietary preferences.
- For the Chocolate Cake Layers:
- All-purpose flour – 2 ½ cups (312 g) (I recommend King Arthur Flour for consistent results)
- Granulated sugar – 2 cups (400 g)
- Unsweetened cocoa powder – ¾ cup (75 g) (Ghirardelli is my go-to for deep chocolate flavor)
- Baking soda – 1 ½ tsp
- Baking powder – 1 ½ tsp
- Salt – 1 tsp
- Large eggs – 3, room temperature (helps with proper rise and texture)
- Buttermilk – 1 ½ cups (360 ml) (or milk + 1 tbsp lemon juice as a substitute)
- Vegetable oil – 1 cup (240 ml) (adds moistness)
- Pure vanilla extract – 2 tsp
- Boiling water – 1 cup (240 ml) (enhances cocoa flavor and creates a tender crumb)
- For the Cream Cheese Chocolate Frosting:
- Cream cheese – 8 oz (226 g), softened (use full-fat for best texture)
- Unsalted butter – ½ cup (115 g), softened
- Powdered sugar – 4 cups (480 g), sifted
- Unsweetened cocoa powder – ¾ cup (75 g)
- Pure vanilla extract – 1 tsp
- Heavy cream or milk – 2-4 tbsp (30-60 ml), to adjust consistency
- For Decoration:
- Black and gold edible glitter or sprinkles (optional for the cap shine)
- Black fondant or black candy melts (for the cap’s flat top, optional)
- Food coloring (optional, if you want to add accents)
For a gluten-free version, you can swap the all-purpose flour for a 1-to-1 gluten-free baking flour blend. Also, if you need a dairy-free option, use coconut-based cream cheese and dairy-free milk alternatives when making the frosting.
Seasonally, you might want to add a touch of espresso powder to the batter—it deepens the chocolate notes without giving a coffee flavor. I’ve tried this on a whim during one graduation party, and it really made the chocolate “pop.”
Equipment Needed
Making this Decadent Cap and Gown Chocolate Graduation Cake doesn’t require a fancy kitchen setup, but having the right tools makes all the difference:
- Two 9-inch (23 cm) round cake pans – standard size for even layers
- Mixing bowls – at least two, medium and large
- Electric mixer or stand mixer – makes creaming and frosting easier, but a sturdy hand mixer will work too
- Measuring cups and spoons – precise measurements are key for baking success
- Rubber spatula – for scraping down the bowl and folding ingredients
- Cooling racks – to cool cake layers evenly
- Offset spatula and bench scraper – for smoothing frosting and shaping the gown and cap details
- Piping bags and small round piping tips – essential for the cap and tassel decorations
- Sharp knife or cake leveler – to trim tops for flat layers
If you don’t have piping bags, you can use zip-top bags with a corner snipped off as a budget-friendly alternative. I once decorated the entire cake with just a plastic bag and a butter knife, so don’t stress if your tool kit is minimal.
For fondant decoration, a rolling pin and a clean surface dusted with powdered sugar or cornstarch work best. I recommend cleaning your tools immediately after use to keep them in good shape—especially the piping tips; they tend to clog if left too long.
Preparation Method
- Preheat your oven and prep pans: Heat oven to 350°F (175°C). Grease two 9-inch round cake pans and lightly dust with cocoa powder to prevent sticking. Line the bottoms with parchment paper for easy removal. (Prep time: 10 minutes)
- Mix dry ingredients: In a large bowl, sift together 2 ½ cups flour, 2 cups sugar, ¾ cup cocoa powder, 1 ½ teaspoons baking soda, 1 ½ teaspoons baking powder, and 1 teaspoon salt. Sifting helps avoid lumps and ensures even mixing.
- Combine wet ingredients: In a separate bowl, whisk 3 large eggs, 1 ½ cups buttermilk, 1 cup vegetable oil, and 2 teaspoons vanilla extract until smooth.
- Make the batter: Slowly add the wet ingredients to the dry, mixing on medium speed until just combined. Avoid overmixing to keep the crumb tender. Then, carefully stir in 1 cup boiling water. The batter will be thin—that’s normal, and it helps create a moist cake.
- Bake: Divide batter evenly between the two pans. Bake for 30-35 minutes or until a toothpick inserted in the center comes out clean. The cakes will spring back lightly when pressed.
- Cool the layers: Let cakes cool in pans for 10 minutes, then turn out onto cooling racks to cool completely (about 1 hour). Warm cake can cause frosting to melt.
- Prepare the frosting: Beat 8 oz softened cream cheese with ½ cup softened butter until smooth. Gradually add 4 cups powdered sugar and ¾ cup cocoa powder, mixing on low speed to avoid a sugar cloud. Add 1 tsp vanilla and 2-4 tbsp heavy cream to reach spreadable consistency.
- Level and assemble: Once cooled, trim the rounded tops of each cake with a sharp knife for flat layers. Place one layer on your serving plate and spread a generous layer of frosting on top.
- Create the gown shape: Stack the second layer, then carve the top edges slightly to form the shoulders of the gown. Use an offset spatula to crumb coat the entire cake with a thin layer of frosting and chill for 15 minutes.
- Final frosting layer and decoration: Apply a thicker, smooth layer of frosting. Use piping bags fitted with small round tips to pipe the cap’s outline on top of the cake and create the gown’s folds. Add the tassel detail with a thin piping tip, and sprinkle edible glitter for that graduation sparkle.
- Optional cap top: Roll out black fondant and cut a square to place on top of the cake for a realistic mortarboard look. Secure with a dab of frosting.
Pro tip: If your frosting feels too soft, pop it in the fridge for 10 minutes before piping. That helps keep the shapes crisp. Also, keep a damp towel handy to wipe your piping tips frequently to avoid clogs.
Cooking Tips & Techniques
One of the trickiest parts of this cake is balancing moistness with structure, especially since you want it to hold the cap and gown shape without collapsing. Here are some tips I learned the hard way:
- Don’t skip sifting: Cocoa powder and flour can clump up and cause uneven texture. Sifting smooths everything out for a tender crumb.
- Use room temperature eggs and buttermilk: This helps the batter blend more evenly and rise better.
- Thin batter is expected: The boiling water thins the batter but also intensifies the chocolate flavor. Resist the urge to add more flour if it looks runny.
- Chill between frosting layers: This lets the crumb coat set and prevents crumbs from mixing into your final smooth layer.
- Piping practice: Before decorating the actual cake, practice the cap and tassel shapes on parchment paper. It saves time and nerves!
- Keep the frosting cold when piping: Warm frosting can lose its shape quickly. Chill your frosting or piping bags if needed.
- Multitasking during baking: While the cake layers bake, prep your frosting and clean up. It makes the assembly go faster.
Personally, I once forgot to cool the cakes completely before frosting and ended up with a melty mess (lesson learned!). Also, piping the tassel took a few tries to perfect, but it’s all part of the fun. Don’t rush it. A steady hand and patience pay off.
Variations & Adaptations
This cake is pretty versatile, so feel free to tweak it to suit your taste or dietary needs:
- Flavor twist: Add a teaspoon of instant espresso powder to the dry ingredients to deepen the chocolate flavor without tasting like coffee.
- Filling option: Layer raspberry jam or salted caramel between cake layers for an indulgent surprise.
- Dietary swaps: Use almond flour or a gluten-free blend for gluten-free guests. Swap cream cheese frosting for dairy-free coconut cream frosting if needed.
- Color accents: Use food coloring in the frosting to match school colors for the gown or cap tassel.
- Alternative shapes: If you’re short on time, bake cupcakes and decorate each with mini caps made from fondant or candy melts for individual servings.
One time, I made a version with a salted caramel apple sheet cake twist by adding caramel drizzle between the layers—it was a crowd-pleaser and gave a nice surprise to chocolate lovers. Also, pairing this cake with a fresh salad like the fresh southwest chipotle salad makes for a balanced celebration meal.
Serving & Storage Suggestions
This cake is best served at room temperature to fully appreciate the creamy frosting and tender crumb. Take it out of the fridge about 30 minutes before slicing. Presentation-wise, placing it on a decorative cake stand with some fresh flowers or balloons nearby adds to the festive vibe.
It pairs beautifully with a rich cup of coffee, milk, or even a fruity iced tea. For a party, consider complementing it with easy finger foods like crispy ham and cheese sticks for a savory balance.
To store, keep the cake covered in an airtight container in the fridge for up to 4 days. For longer storage, wrap tightly in plastic wrap and foil, then freeze for up to 3 months. When ready to enjoy, thaw overnight in the fridge and bring to room temperature before serving.
Flavors actually deepen a bit after a day, so if you can resist, letting it rest overnight can make the experience even better. Just watch out for the frosting—once chilled, it firms up and might need a quick warm-up (a minute at a low temp in the microwave) before slicing.
Nutritional Information & Benefits
This decadent chocolate cake balances indulgence with some wholesome ingredients. Each serving (assuming 12 servings) provides approximately:
| Nutrient | Amount |
|---|---|
| Calories | 420 kcal |
| Fat | 22 g |
| Saturated Fat | 9 g |
| Carbohydrates | 52 g |
| Sugars | 38 g |
| Protein | 5 g |
| Fiber | 3 g |
The cake’s cocoa powder is rich in antioxidants, and using buttermilk adds a pleasant tang plus calcium. The cream cheese frosting, while decadent, provides a bit of protein and a smoother fat profile compared to butter-only frostings.
If you’re mindful of allergens, note this recipe contains dairy, eggs, and gluten but can be adapted as mentioned earlier. I appreciate that it’s a recipe that feels special yet isn’t over-the-top in sugar or fat, striking a nice balance for celebration desserts.
Conclusion
This Decadent Cap and Gown Chocolate Graduation Cake isn’t just about the chocolate or the fancy design—it’s about marking a milestone with something homemade and heartfelt. I love how it combines rich flavor, approachable prep, and a design that really captures the spirit of celebration.
Feel free to tweak the colors, add your favorite fillings, or adjust frosting sweetness to make it your own. Whatever you do, this cake will bring smiles and create memories worth savoring.
If you try it, I’d love to hear how it turned out or what personal touches you added. Sharing your experience not only makes the baking journey richer but helps others feel confident to try it too. Here’s to sweet celebrations and many more reasons to bake with love!
FAQs About Decadent Cap and Gown Chocolate Graduation Cake
Can I make this cake ahead of time?
Yes! You can bake the cake layers and make the frosting up to 2 days in advance. Store layers wrapped tightly in plastic wrap at room temperature and keep frosting refrigerated. Assemble and decorate the day of the event for best results.
How do I prevent the cake from crumbling when carving the gown shape?
Chilling the cake layers before carving helps firm them up and reduces crumbling. Use a sharp serrated knife and make gentle, slow cuts. Crumb coating the cake also seals crumbs before the final frosting layer.
What if I don’t have cream cheese for the frosting?
You can substitute with an equal amount of unsalted butter for a classic chocolate buttercream or use dairy-free cream cheese alternatives if needed. Keep in mind the texture and flavor will vary slightly.
Can I use this cake recipe for other celebrations?
Absolutely! The chocolate cake and frosting base work well for birthdays, anniversaries, or any special occasion. Just adjust the decorations to fit the theme.
How do I store leftover cake?
Cover leftovers tightly and store in the refrigerator for up to 4 days. Bring to room temperature before serving to enjoy the best texture and flavor.
Pin This Recipe!
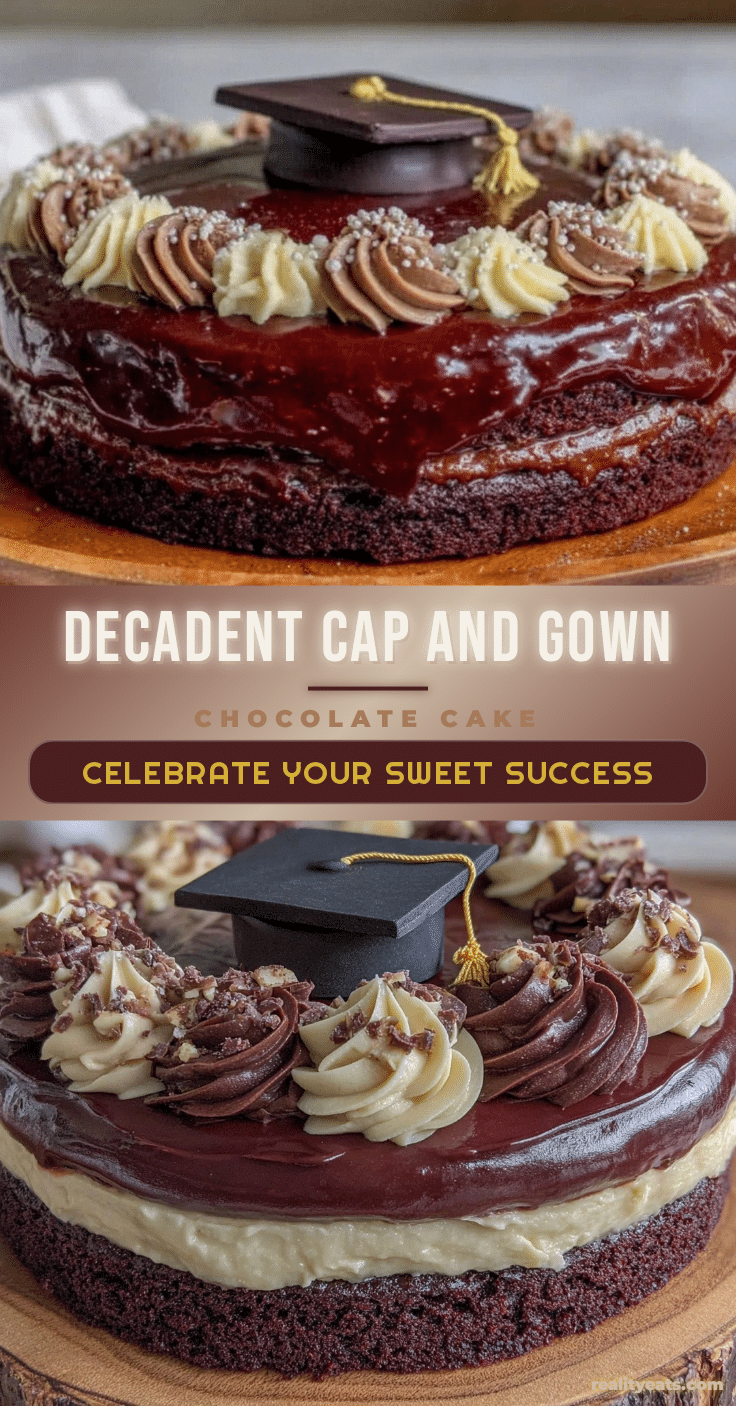
Decadent Cap and Gown Chocolate Graduation Cake

A rich, moist chocolate cake designed to look like a graduation cap and gown, perfect for celebrations. Features a smooth cream cheese chocolate frosting and decorative piping for a festive touch.
- Prep Time: 20 minutes
- Cook Time: 35 minutes
- Total Time: 1 hour 55 minutes
- Yield: 12 servings 1x
- Category: Dessert
- Cuisine: American
Ingredients
- 2 ½ cups (312 g) all-purpose flour (King Arthur Flour recommended)
- 2 cups (400 g) granulated sugar
- ¾ cup (75 g) unsweetened cocoa powder (Ghirardelli recommended)
- 1 ½ tsp baking soda
- 1 ½ tsp baking powder
- 1 tsp salt
- 3 large eggs, room temperature
- 1 ½ cups (360 ml) buttermilk (or milk + 1 tbsp lemon juice as substitute)
- 1 cup (240 ml) vegetable oil
- 2 tsp pure vanilla extract
- 1 cup (240 ml) boiling water
- 8 oz (226 g) cream cheese, softened (full-fat recommended)
- ½ cup (115 g) unsalted butter, softened
- 4 cups (480 g) powdered sugar, sifted
- ¾ cup (75 g) unsweetened cocoa powder
- 1 tsp pure vanilla extract
- 2–4 tbsp (30–60 ml) heavy cream or milk, to adjust consistency
- Black and gold edible glitter or sprinkles (optional)
- Black fondant or black candy melts (optional for cap top)
- Food coloring (optional)
Instructions
- Preheat oven to 350°F (175°C). Grease two 9-inch round cake pans and dust with cocoa powder. Line bottoms with parchment paper.
- In a large bowl, sift together flour, sugar, cocoa powder, baking soda, baking powder, and salt.
- In a separate bowl, whisk eggs, buttermilk, vegetable oil, and vanilla extract until smooth.
- Slowly add wet ingredients to dry ingredients, mixing on medium speed until just combined. Stir in boiling water carefully; batter will be thin.
- Divide batter evenly between pans and bake 30-35 minutes or until a toothpick comes out clean.
- Cool cakes in pans for 10 minutes, then transfer to cooling racks to cool completely (about 1 hour).
- Beat cream cheese and butter until smooth. Gradually add powdered sugar and cocoa powder, mixing on low speed. Add vanilla and heavy cream to reach spreadable consistency.
- Trim rounded tops of cakes for flat layers. Place one layer on serving plate and spread frosting generously.
- Stack second layer and carve top edges to form gown shoulders. Crumb coat entire cake with thin frosting layer and chill 15 minutes.
- Apply final thick, smooth frosting layer. Use piping bags with small round tips to pipe cap outline and gown folds. Pipe tassel detail and sprinkle edible glitter.
- Optional: Roll black fondant and cut a square to place on top of cake for mortarboard look, securing with frosting.
Notes
Sift dry ingredients to avoid lumps. Use room temperature eggs and buttermilk for better rise. Thin batter is normal due to boiling water. Chill cake layers before carving to reduce crumbling. Chill frosting if too soft before piping. Practice piping on parchment paper to perfect decoration. Store cake covered in fridge up to 4 days or freeze up to 3 months.
Nutrition
- Serving Size: 1 slice (1/12 of cak
- Calories: 420
- Sugar: 38
- Fat: 22
- Saturated Fat: 9
- Carbohydrates: 52
- Fiber: 3
- Protein: 5
Keywords: chocolate cake, graduation cake, celebration cake, cream cheese frosting, cap and gown cake, easy chocolate cake, party dessert


