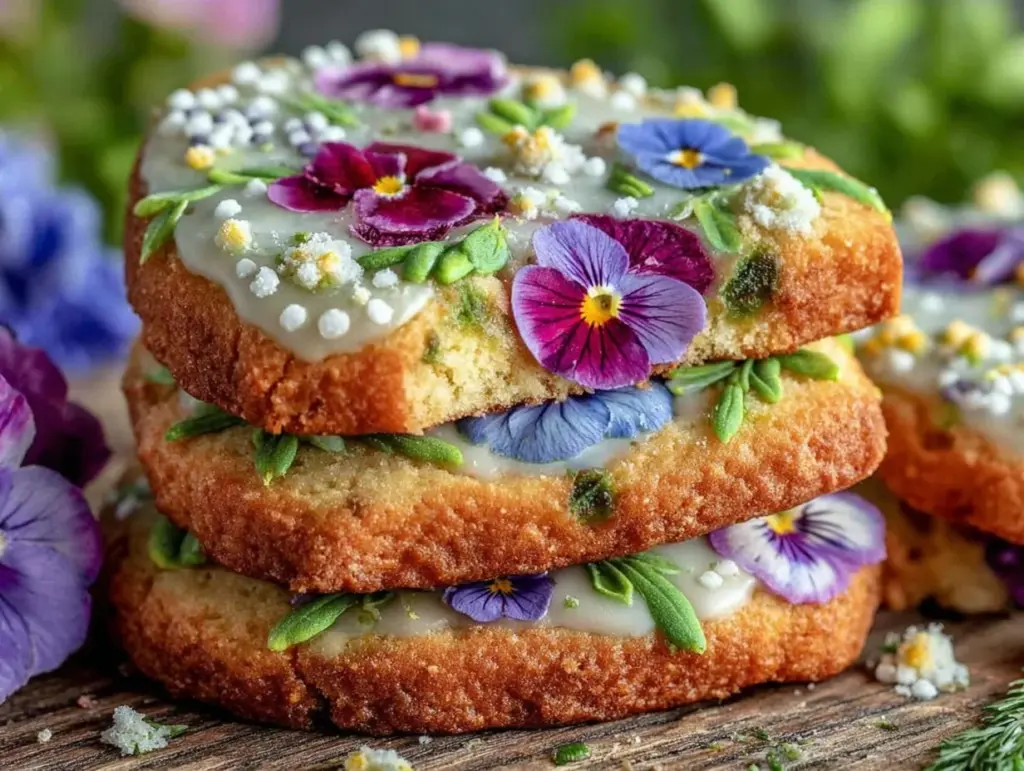
“Are those real flowers on your cookies?” my friend asked, eyes wide as I handed her a delicately decorated butter cookie. Honestly, I wasn’t sure myself at first. The pressed flowers looked so fragile and perfectly preserved under the smooth, glossy royal icing. It all started one quiet afternoon when I stumbled upon a forgotten book of edible flowers my grandmother had given me years ago. I had this urge to bake something that felt both nostalgic and fresh, something that could capture the light, delicate beauty of a spring garden on a plate.
I wasn’t a baker who usually fussed over intricate decorations, but these pressed flower butter cookies called for a little patience and a lot of love. The magic was in how the soft, buttery cookie played the perfect canvas for the royal icing “garden” details and the real edible flowers pressed gently into the surface. I found myself making these cookies multiple times in a week—once for a friend’s bridal shower, another time just to brighten a slow Sunday. Each batch brought that quiet joy of creating something both simple and exquisite. The best part? They tasted just as dreamy as they looked, buttery and tender with a subtle floral hint that felt like a secret handshake from a garden in full bloom.
These cookies aren’t just pretty faces; they have a way of turning moments into memories. Whether you’re gifting them or savoring your own little tea party, there’s a calm delight in biting into one and realizing how something so delicate can feel so satisfying. I hope this recipe invites you to slow down, roll up your sleeves, and find a little serenity in your kitchen with each perfectly pressed flower butter cookie you make.
Why You’ll Love This Recipe
After many tests and tweaks, I’m convinced this pressed flower butter cookies recipe is a keeper. It’s not just a pretty project—it’s a trustworthy go-to for when you want to impress without the stress.
- Quick & Easy: The cookie dough comes together in under 15 minutes, and with chilling time, you can have fresh cookies in about an hour—perfect for last-minute celebrations or spontaneous baking moods.
- Simple Ingredients: No need for specialty shops; most ingredients like unsalted butter, powdered sugar, and all-purpose flour are pantry staples. If you have a stash of edible flowers, you’re golden.
- Perfect for Special Occasions: These cookies are show-stoppers at bridal showers, garden parties, or as a unique homemade gift. The royal icing garden details add that whimsical touch everyone notices.
- Crowd-Pleaser: Kids love the sweet, buttery flavor, and adults appreciate the elegant look and floral hint. I’ve brought these to potlucks and family gatherings, and they disappear fast.
- Unbelievably Delicious: The tender crumb of the butter cookie combined with smooth royal icing creates a perfect balance of texture and flavor—comfort food with a twist.
This recipe stands out because of the pressed flower technique paired with the royal icing garden detail; it’s like crafting a tiny edible artwork with every cookie. I use a tried-and-true method for the royal icing that dries smooth and hard, giving a beautiful backdrop to the flowers without overpowering the cookie’s flavor. Plus, the dough’s buttery richness is balanced just right to hold its shape and taste amazing.
Honestly, the first time I bit into one, I closed my eyes and felt like I was sitting in a sunlit garden. That’s why this recipe has stuck with me—it’s more than just cookies. It’s a little moment of calm and beauty you can make at home.
What Ingredients You Will Need
This recipe uses simple, wholesome ingredients to deliver bold flavor and satisfying texture without the fuss. Most are pantry staples, and the pressed flowers add a touch of seasonal charm. Here’s everything you’ll want to gather:
- Unsalted butter, softened (1 cup / 227 g) – The base for that rich, tender cookie texture. I prefer Plugrá butter for its creaminess.
- Powdered sugar (3/4 cup / 90 g) – For smooth sweetness that dissolves perfectly into the dough.
- Pure vanilla extract (1 teaspoon) – Adds warm depth to the cookie flavor.
- All-purpose flour (2 cups / 250 g) – The structure of the cookie; sifted for lightness.
- Salt (1/4 teaspoon) – A pinch to balance the sweetness.
- Edible pressed flowers (assorted, about 1/4 cup) – Use dried flowers like pansies, violets, or calendula. If fresh, press them for a few days between parchment paper.
For the Royal Icing Garden Detail:
- Powdered sugar (2 cups / 240 g) – The base for a smooth and pipeable icing.
- Meringue powder (2 tablespoons) – Helps the icing dry hard and glossy.
- Water (4-6 tablespoons) – To reach the perfect consistency.
- Gel food coloring (optional) – For tinting the icing green or pastel shades to mimic garden hues.
- Vanilla extract or almond extract (1/2 teaspoon) – For subtle flavor.
If you don’t have pressed flowers on hand, you can carefully swap in edible flower petals from the grocery store or grow your own. Just remember to avoid any pesticides. For a gluten-free twist, almond flour works well but changes texture slightly.
Equipment Needed
- Mixing bowls: A large one for the dough and a smaller one for the royal icing.
- Electric mixer: Handheld or stand mixer to cream butter and sugar smoothly. I’ve tried both; a stand mixer saves your arms but a hand mixer works fine.
- Sifter or fine mesh sieve: To aerate flour and powdered sugar for tender cookies and smooth icing.
- Rolling pin: For rolling out dough evenly to about 1/4 inch (6 mm) thickness.
- Cookie cutters: Choose garden-themed shapes like flowers, leaves, or simple circles to showcase the pressed flowers.
- Baking sheets: Lined with parchment paper or silicone mats to prevent sticking.
- Piping bags and small round tips: For precise application of royal icing details.
- Flower press or heavy books: If you intend to press your own flowers at home.
If you don’t have a cookie press, a steady hand with rolling and cutting works perfectly. For piping, if you don’t own bags and tips, you can use small zip-top bags and snip a tiny corner. I’ve found that even budget-friendly tools give excellent results if you take your time.
Preparation Method
- Cream the butter and sugar: In a large bowl, beat 1 cup (227 g) of softened unsalted butter with 3/4 cup (90 g) powdered sugar using an electric mixer on medium speed. Beat until light and fluffy, about 3-4 minutes. This step is key for that melt-in-your-mouth texture.
- Add vanilla extract: Mix in 1 teaspoon pure vanilla extract until combined.
- Combine dry ingredients: Sift together 2 cups (250 g) all-purpose flour and 1/4 teaspoon salt in a separate bowl to avoid lumps.
- Mix dry ingredients into wet: Gradually add the flour mixture to the butter mixture, mixing on low speed until just combined. Avoid overmixing to keep the dough tender.
- Chill the dough: Gather the dough into a ball, wrap it in plastic wrap, and refrigerate for at least 1 hour. This firms up the dough and makes rolling easier.
- Preheat oven: Set your oven to 350°F (175°C) and line baking sheets with parchment paper.
- Roll and cut: On a lightly floured surface, roll the dough out to about 1/4 inch (6 mm) thickness. Use cookie cutters to cut shapes. Transfer to baking sheets with a spatula.
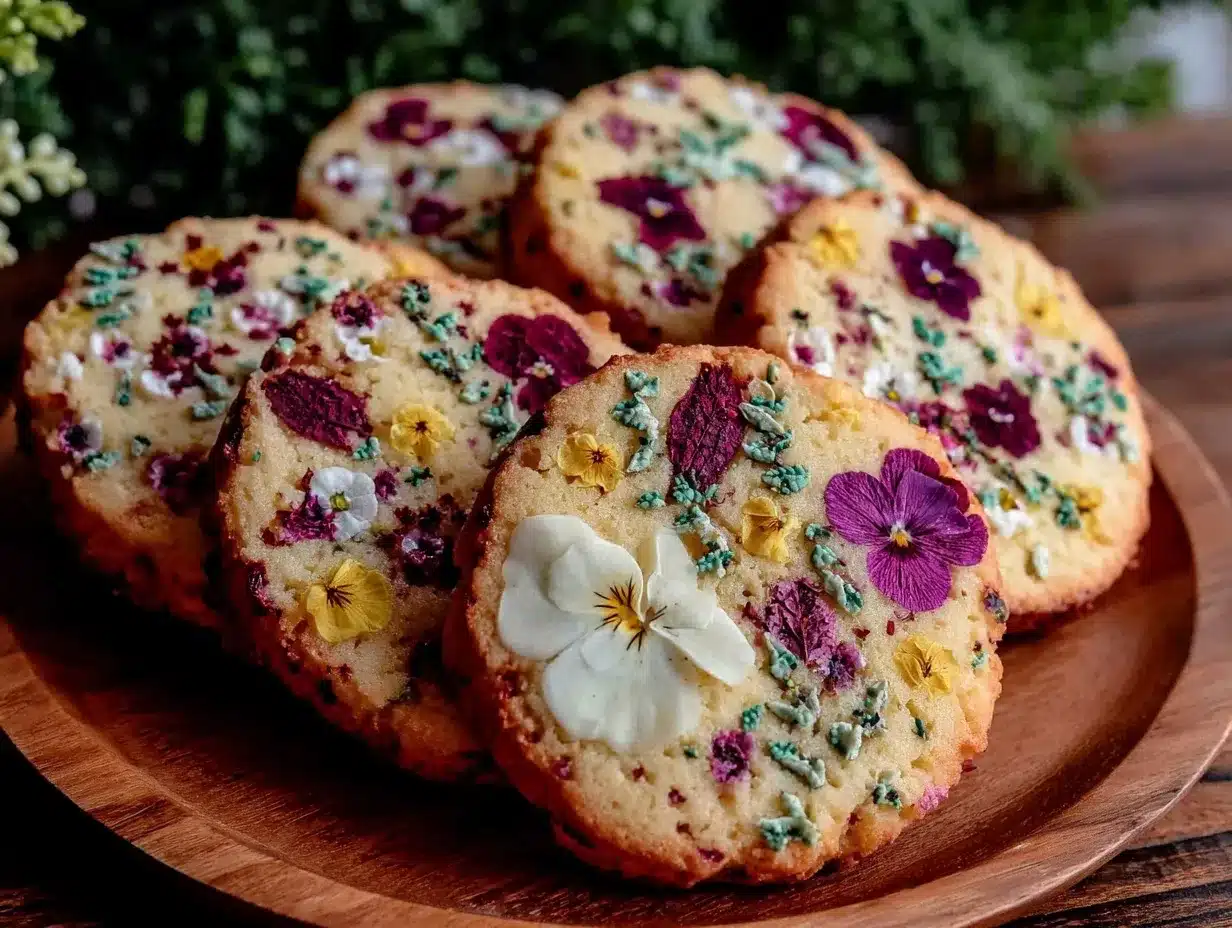
- Press flowers on cookies: Gently place edible pressed flowers on each cookie, pressing lightly to adhere.
- Bake: Bake cookies for 10-12 minutes or until the edges just start to turn golden. Watch closely; you want a pale, tender cookie.
- Cool completely: Let cookies cool on the baking sheet for 5 minutes, then transfer to a wire rack to cool fully before icing.
- Prepare royal icing: In a bowl, sift 2 cups (240 g) powdered sugar and 2 tablespoons meringue powder. Slowly add 4-6 tablespoons water and 1/2 teaspoon vanilla extract. Beat until stiff peaks form and icing is smooth but pipeable. Adjust water to get a consistency that holds shape but pipes easily.
- Add color: Tint some icing green or soft pastel colors with gel food coloring for garden detail.
- Pipe the garden detail: Use piping bags with small round tips to outline and fill areas on the cookie around the pressed flowers—think leaves, vines, or whimsical dots. Let the icing dry completely, about 4-6 hours or overnight.
If the flowers shift during baking, you can gently press them again while the cookies are warm but not hot. For icing, keep a damp cloth over piping bags when not in use to prevent drying out. I find working in small batches of icing helps keep the detail crisp.
Cooking Tips & Techniques
Honestly, the secret to these pressed flower butter cookies is patience and gentle hands. Overworking dough or rushing the icing dries can ruin the delicate look.
- Don’t skip chilling: It firms the dough, making it easier to handle and prevents spreading in the oven.
- Press flowers carefully: Use tweezers or clean fingers to position flowers; avoid too much pressure or they’ll bruise.
- Royal icing consistency matters: For outlining, use thicker icing; for flooding areas, thin it just enough to spread smoothly.
- Practice piping on parchment: Before decorating cookies, test your icing flow for steady lines.
- Drying time: Don’t rush removing cookies from the work surface until icing hardens. I once impatiently packed cookies too soon and ended with smudged designs—lesson learned!
- Multitasking: While dough chills, prep your flowers and set up piping bags to save time.
One thing I’ve learned is that even if your first attempt looks a bit rustic, the buttery flavor and floral charm win every time. It’s all part of the handmade beauty.
Variations & Adaptations
This recipe is flexible if you want to make it your own or accommodate dietary needs:
- Gluten-free version: Substitute all-purpose flour with a 1:1 gluten-free blend. The texture will be slightly different but still tender and buttery.
- Flavor twists: Add a teaspoon of lemon zest or lavender extract to the dough to complement the floral theme.
- Alternative decorations: Instead of royal icing, try a simple glaze made from powdered sugar and lemon juice for a lighter finish.
- Seasonal flowers: Use seasonal edible flowers to match holidays or events—think rose petals for Valentine’s or marigolds for fall.
- Vegan option: Replace butter with vegan butter and use aquafaba in place of meringue powder for royal icing.
I once swapped in a bit of matcha powder into the icing for a soft green hue and subtle earthiness—it was a hit at a tea party! Feel free to experiment with colors and flavors that suit your style.
Serving & Storage Suggestions
These pressed flower butter cookies shine when served at room temperature, letting the buttery richness and sweet floral notes come through. Arrange them on a pretty platter surrounded by fresh flowers for an unforgettable presentation.
They pair beautifully with light teas or a sparkling lemonade, turning any gathering into a garden-inspired celebration. If you’re hosting a brunch or afternoon tea, these cookies complement the Fresh Southwest Chipotle Salad nicely, balancing savory and sweet flavors.
To store, keep cookies in an airtight container at room temperature for up to 5 days. If you want to keep them longer, freeze un-iced cookies wrapped tightly for up to 3 months. Icing is best applied fresh after thawing. When reheating, avoid the microwave; instead, let cookies come to room temperature naturally to maintain texture.
Over time, the royal icing hardens completely and the pressed flowers maintain their delicate look, so these cookies can be made a day ahead without losing charm.
Nutritional Information & Benefits
Each pressed flower butter cookie (approximate per serving) contains around 120 calories, 7 grams of fat, 15 grams of carbohydrates, and 1 gram of protein. The key ingredients—unsalted butter and powdered sugar—make these treats rich and satisfying in moderation.
Edible flowers add minimal calories but bring antioxidants and trace vitamins, giving a subtle health boost along with their lovely aroma. Using real vanilla extract instead of artificial flavoring adds a natural element to the taste.
For those watching gluten intake, swapping to gluten-free flour blends keeps these cookies accessible. The recipe is naturally nut-free unless you add flavorings or substitutions.
From a wellness point of view, these cookies feel like a small indulgence that’s thoughtfully crafted, perfect for mindful treats shared with friends or family.
Conclusion
These perfect pressed flower butter cookies with royal icing garden detail are a little piece of edible art that’s surprisingly easy to make. They bring together buttery richness, delicate floral beauty, and charming garden-inspired icing in a way that feels special without being complicated.
Whether you want to impress guests or create a peaceful baking moment for yourself, this recipe invites you to personalize with your favorite flowers, colors, and flavors. It’s a gentle reminder that baking can be both creative and soothing.
I love this recipe because it turns simple ingredients into something magical—there’s a quiet joy in seeing those flowers set in icing and knowing you made it from scratch. If you try it, I’d love to hear your own twists or how your “garden” turns out!
FAQs About Pressed Flower Butter Cookies
Can I use fresh flowers instead of pressed flowers?
Fresh edible flowers can work if very thin and lightly pressed before baking, but pressed flowers hold up better and won’t wilt or discolor as much during baking and icing.
How long does royal icing take to dry?
Typically, royal icing dries hard in about 4-6 hours at room temperature. For best results, let decorated cookies dry overnight before stacking or packaging.
Are these cookies suitable for beginners?
Absolutely! The dough is simple to make, and while the royal icing detail takes some practice, you can start with minimal decoration and build your skills over time.
Can I make the dough ahead of time?
Yes, you can prepare the dough and refrigerate it for up to 2 days before rolling and cutting. Just bring it to room temperature before rolling for easier handling.
What if I don’t have meringue powder for royal icing?
You can use pasteurized egg whites carefully or look for substitute royal icing recipes that use aquafaba. Meringue powder is preferred for ease and food safety.
For a soft sugar cookie alternative with creamy icing that’s just as delightful but simpler, you might enjoy the soft sugar cookies with creamy icing. They offer a different texture but the same kind of sweet satisfaction.
Pin This Recipe!
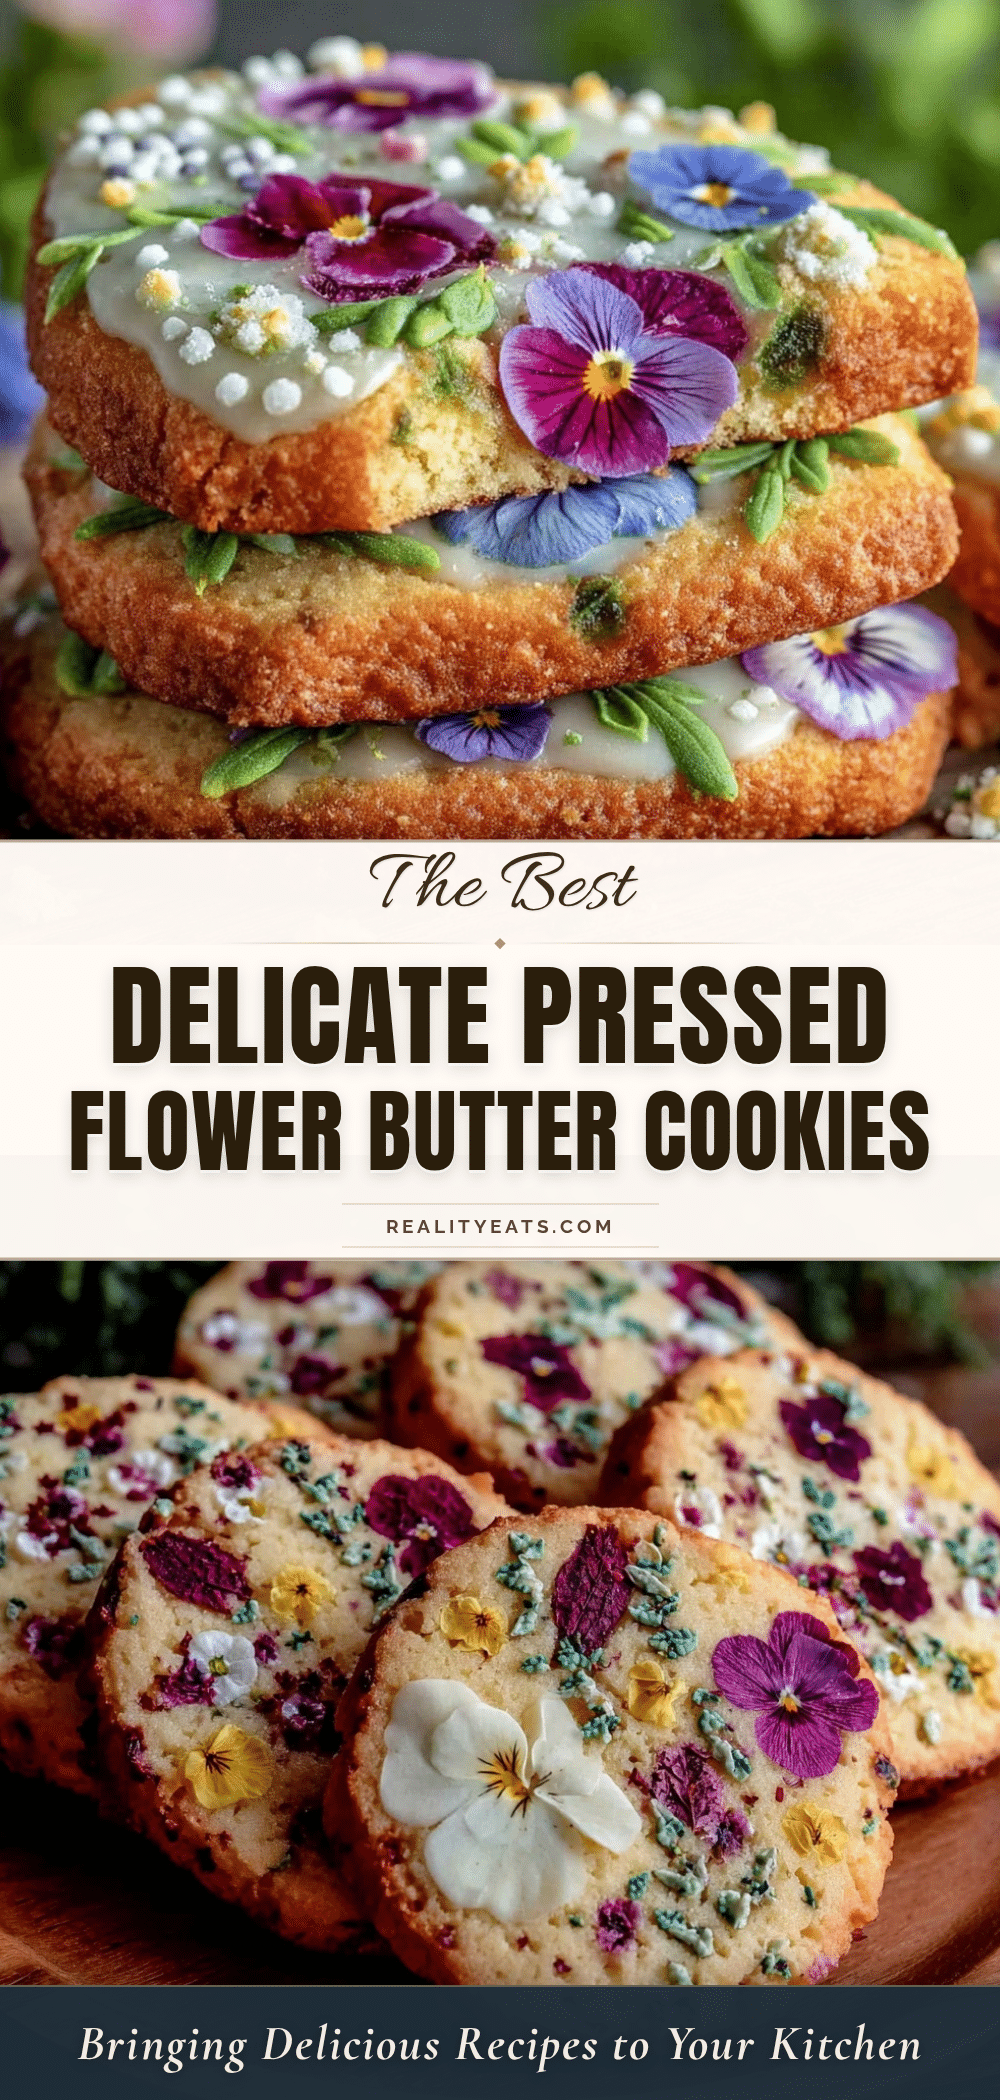
Pressed Flower Butter Cookies

Delicate butter cookies adorned with real pressed edible flowers and decorated with smooth royal icing, perfect for special occasions and garden-inspired celebrations.
- Prep Time: 15 minutes
- Cook Time: 12 minutes
- Total Time: 1 hour 30 minutes
- Yield: 24 cookies 1x
- Category: Dessert
- Cuisine: American
Ingredients
- 1 cup (227 g) unsalted butter, softened
- 3/4 cup (90 g) powdered sugar
- 1 teaspoon pure vanilla extract
- 2 cups (250 g) all-purpose flour, sifted
- 1/4 teaspoon salt
- 1/4 cup assorted edible pressed flowers (pansies, violets, calendula)
- 2 cups (240 g) powdered sugar (for royal icing)
- 2 tablespoons meringue powder
- 4–6 tablespoons water (for royal icing)
- 1/2 teaspoon vanilla or almond extract (for royal icing)
- Gel food coloring (optional)
Instructions
- Cream the butter and sugar: In a large bowl, beat 1 cup (227 g) of softened unsalted butter with 3/4 cup (90 g) powdered sugar using an electric mixer on medium speed until light and fluffy, about 3-4 minutes.
- Add vanilla extract and mix until combined.
- Sift together 2 cups (250 g) all-purpose flour and 1/4 teaspoon salt in a separate bowl.
- Gradually add the flour mixture to the butter mixture, mixing on low speed until just combined. Avoid overmixing.
- Gather the dough into a ball, wrap in plastic wrap, and refrigerate for at least 1 hour.
- Preheat oven to 350°F (175°C) and line baking sheets with parchment paper.
- Roll dough on a lightly floured surface to about 1/4 inch (6 mm) thickness. Cut shapes with cookie cutters and transfer to baking sheets.
- Gently place edible pressed flowers on each cookie, pressing lightly to adhere.
- Bake for 10-12 minutes until edges just start to turn golden. Let cool on baking sheet for 5 minutes, then transfer to wire rack to cool completely.
- Prepare royal icing: sift 2 cups (240 g) powdered sugar and 2 tablespoons meringue powder into a bowl. Slowly add 4-6 tablespoons water and 1/2 teaspoon vanilla or almond extract. Beat until stiff peaks form and icing is smooth but pipeable.
- Tint some icing with gel food coloring if desired.
- Use piping bags with small round tips to pipe garden details around pressed flowers. Let icing dry completely for 4-6 hours or overnight.
Notes
Do not skip chilling the dough to prevent spreading. Press flowers gently to avoid bruising. Use thicker royal icing for outlining and thinner for flooding. Let icing dry completely before stacking or packaging. You can substitute gluten-free flour for a gluten-free version and vegan butter plus aquafaba for a vegan option.
Nutrition
- Serving Size: 1 cookie
- Calories: 120
- Fat: 7
- Carbohydrates: 15
- Protein: 1
Keywords: pressed flower cookies, butter cookies, royal icing, edible flowers, garden cookies, floral cookies, spring baking, decorative cookies


