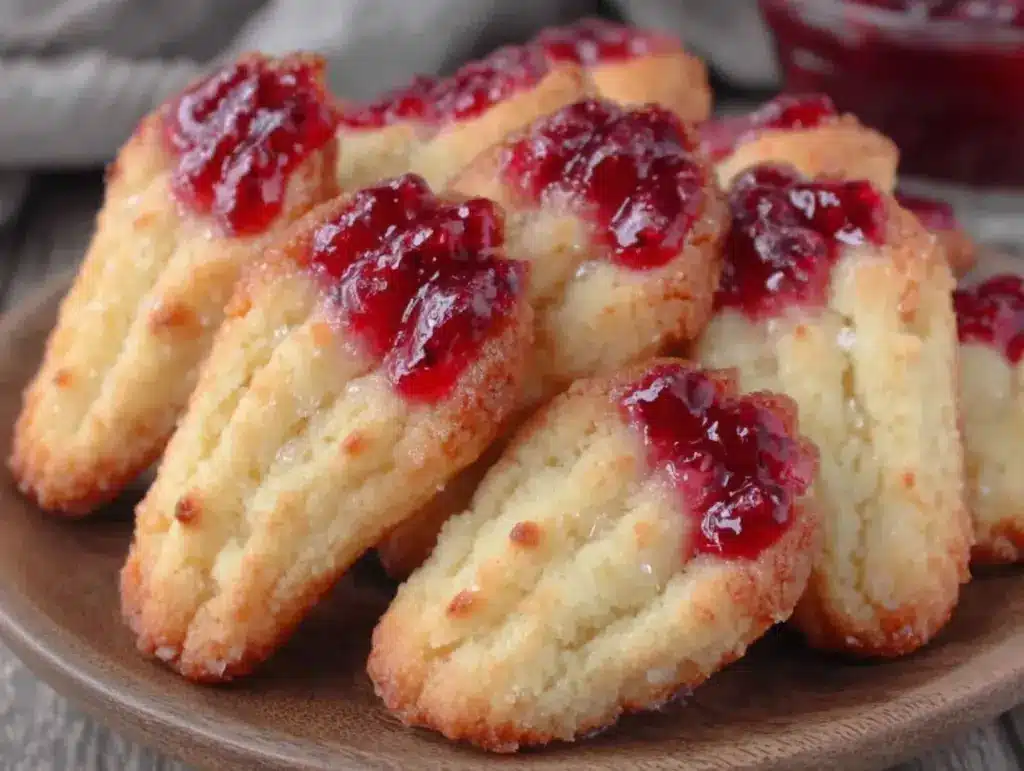
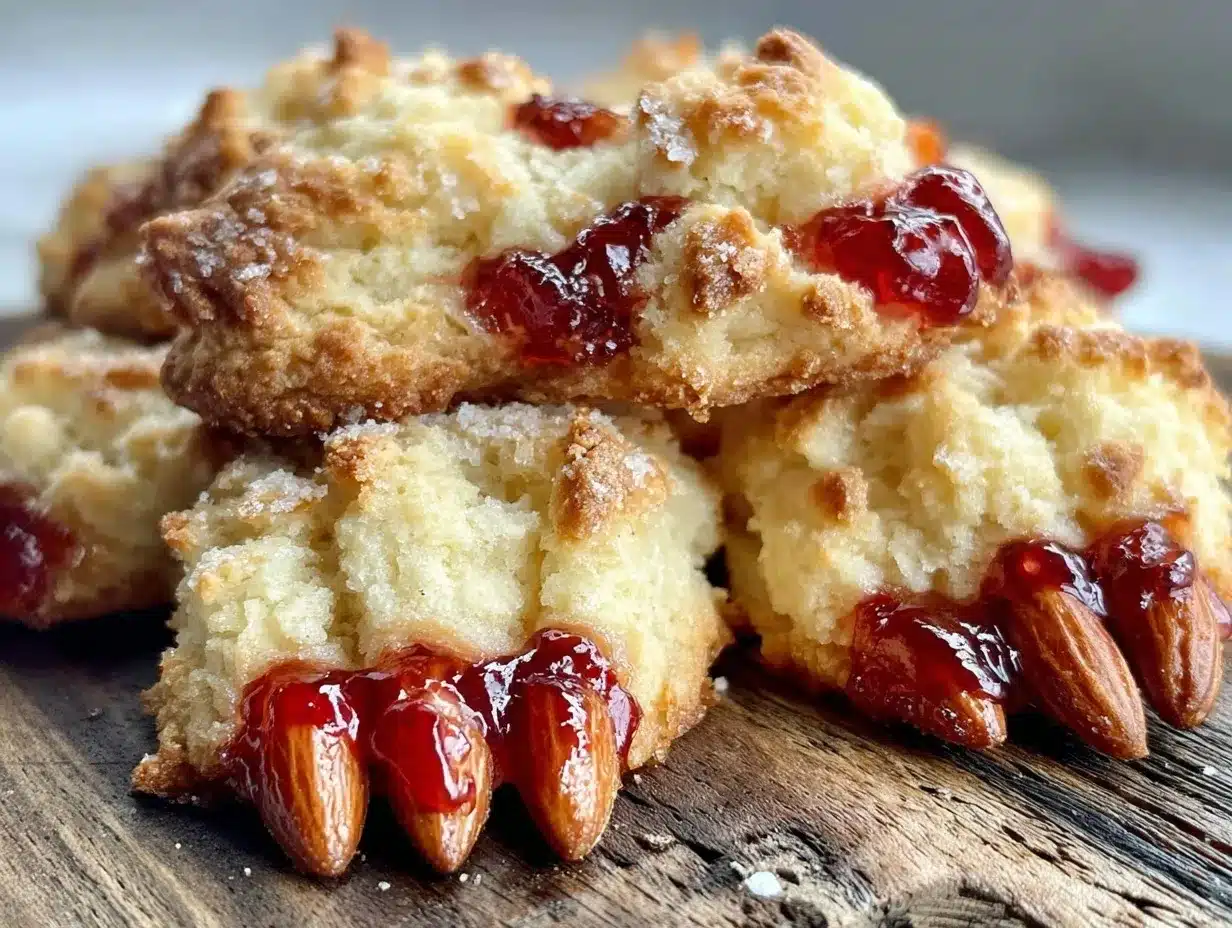
“Watch out, those witch fingers are coming for you!” my niece joked as she reached for one of the crispy witch finger shortbread cookies with almond nails cooling on the counter. Honestly, I wasn’t sure how spooky a cookie could get until I tried shaping buttery shortbread dough into finger-like forms and pressing sliced almonds at the tips to mimic nails. It started as a last-minute Halloween baking experiment when I realized I had forgotten the usual batch of pumpkin cookies I usually make. I grabbed a few pantry staples—flour, butter, sugar—and thought, why not try something fun and a little eerie?
The aroma of toasted almonds and browned edges wafting through the kitchen was oddly comforting for a recipe so cheekily named. I remember the first time my husband peeked into the kitchen, eyebrows raised, asking if I was really making edible witch fingers. When he tasted one, the crunch and buttery melt-in-your-mouth texture won him over instantly. A quick Google search later confirmed these shortbread cookies are a classic Halloween treat, but I added my own crisp twist—because, let’s face it, no one wants soggy fingers lurking around Halloween night.
These cookies have since become a staple when friends drop by unexpectedly or when I want that perfect mix of creepy and delicious without fuss. They’re surprisingly simple, but they carry just enough character to make the kitchen feel festive and a little magical. So if you’re craving a treat that’s equal parts fun and buttery-crisp, these witch finger cookies might just be your new go-to. You might even find yourself baking them more than once this October—trust me, it’s happened to me.
Why You’ll Love This Recipe
After baking these crispy witch finger shortbread cookies multiple times, I can honestly say they check all the boxes for a memorable Halloween treat. Here’s why this recipe stands out:
- Quick & Easy: From mixing the dough to having your spooky fingers on the table, it takes about 30 minutes. Perfect for those last-minute party plans or a cozy night in.
- Simple Ingredients: No need for specialty stores. Flour, butter, sugar, and almonds—nothing fancy, just pantry staples you already have.
- Perfect for Halloween Parties: They’re the ultimate conversation starters and bring a playful vibe to any gathering.
- Crowd-Pleaser: Kids love the “gross” factor, adults appreciate the buttery crispness, and everyone keeps coming back for more.
- Unbelievably Delicious: The balance between a crisp exterior and a tender crumb inside is spot on, thanks to a little chill time and a careful bake.
What makes this recipe different? The secret lies in the dough chilling step and the use of sliced almonds as “nails” that toast beautifully in the oven. This isn’t just any shortbread cookie—it’s a crunchy, buttery treat with a fun Halloween twist. Plus, I’ve found that slightly underbaking by a minute or two gives the perfect snap without any crumbliness.
Honestly, these cookies are like a little Halloween story on a plate. They bring out that childlike excitement for spooky treats while still feeling homemade and heartfelt. If you want to add a unique touch to your holiday menu, these fingers will do the trick without any complicated steps or weird ingredients.
What Ingredients You Will Need
This recipe uses straightforward, wholesome ingredients that come together to create a buttery and crisp shortbread base with just a hint of almond crunch on top. Most are pantry staples, and if you’re missing something, there are easy swaps to keep you baking.
- Unsalted Butter, softened (about 1 cup / 227 grams) – The heart of the shortbread, for richness and flavor. I prefer Land O Lakes if you want that creamy texture.
- Granulated Sugar (½ cup / 100 grams) – Adds sweetness and helps with the crisp texture.
- Vanilla Extract (1 teaspoon) – For warmth and depth; pure vanilla is worth it here.
- All-Purpose Flour (2 cups / 250 grams) – The base of the dough. You can substitute with gluten-free flour blend if needed.
- Salt (¼ teaspoon) – Balances sweetness and enhances flavor.
- Sliced Almonds (about ½ cup / 50 grams) – Used as the “nails” on the witch fingers; they toast beautifully in the oven. Look for thin slices for the best effect.
If you want to add a little twist, a pinch of cinnamon or nutmeg can add subtle fall warmth. For a dairy-free option, swap the butter with a plant-based spread, but keep in mind it might affect the crispness a bit.
Equipment Needed
You won’t need anything fancy to make these witch finger cookies, but having the right tools makes the process smoother:
- Mixing Bowl: A large one for combining your ingredients comfortably.
- Electric Mixer or Hand Whisk: For creaming the butter and sugar until fluffy. I use a hand mixer, but a stand mixer works too.
- Baking Sheet: A rimmed cookie sheet lined with parchment paper or silicone baking mat to prevent sticking and promote even baking.
- Measuring Cups and Spoons: Accurate measurements matter, especially for flour and butter.
- Cooling Rack: To let the cookies cool completely for that perfect snap.
- Optional – Small Knife or Toothpick: To carve knuckle lines and details on the fingers for a spooky effect.
If you don’t have parchment paper, lightly grease your baking sheet, but I highly recommend parchment for easy cleanup and even baking. I once tried silicone mats, and while they’re reusable, the parchment gives a slightly crisper bottom crust which I love.
Preparation Method
- Cream the Butter and Sugar: In a large bowl, beat 1 cup (227 g) softened unsalted butter with ½ cup (100 g) granulated sugar until pale and fluffy, about 3-4 minutes. The mixture should look light and slightly airy, which helps the cookies stay crisp but tender.
- Add Vanilla: Mix in 1 teaspoon pure vanilla extract until evenly combined. The scent should be fragrant but not overpowering.
- Incorporate Dry Ingredients: Sift together 2 cups (250 g) all-purpose flour and ¼ teaspoon salt. Gradually add to the wet mixture, stirring gently until a smooth dough forms. If the dough feels crumbly, add a teaspoon of cold water to bring it together.
- Chill the Dough: Wrap the dough in plastic wrap and refrigerate for at least 30 minutes. This step is key for crispness and makes shaping easier.
- Shape the Fingers: Preheat the oven to 350°F (175°C). Take a small piece of dough (about 1 tablespoon or 14 g) and roll it into a finger shape about 3 inches (7.5 cm) long. Flatten slightly and taper the ends.
- Add Almond Nails: Press one sliced almond at the narrow end to form the “nail.” Use a small knife or toothpick to carve knuckle lines and add texture. Don’t press too hard or the dough might crack.
- Arrange and Bake: Place the shaped fingers on a parchment-lined baking sheet, spacing about 1 inch (2.5 cm) apart. Bake for 15-18 minutes until edges are golden and almonds are toasted.
- Cool Completely: Transfer cookies to a wire rack to cool fully before moving or serving. This helps them crisp up perfectly.
Pro tip: Watch the cookies closely in the last few minutes to avoid overbaking. They should be golden but not dark brown. If you want extra crispiness, leave them on the baking sheet for a few minutes after turning off the oven.
Cooking Tips & Techniques
Making the perfect witch finger shortbread cookies requires a few simple tricks I’ve picked up through trial and error:
- Butter Temperature: Use softened butter, not melted. Too soft and the dough gets greasy; too cold and it won’t cream well.
- Don’t Overwork Dough: Handle the dough lightly to avoid tough cookies. Shortbread’s charm is its crumbly, tender texture.
- Chilling is Crucial: It prevents spreading and helps the cookies hold their shape during baking.
- Use Light-Colored Baking Sheets: Dark pans can brown the bottoms too quickly, making the cookies less crisp and more burnt.
- Almond Placement: Gently press the almond “nail” so it stays during baking but doesn’t break the dough.
- Watch Bake Time: Every oven is different. Start checking at 15 minutes. You want just golden edges.
I once forgot to chill the dough and ended up with flat, lifeless fingers. Lesson learned! Also, carving knuckle lines with a toothpick adds that creepy detail that makes these cookies stand out. If you’re looking for a savory snack to balance the sweet treats, these crispy ham and cheese sticks are a crowd-friendly option.
Variations & Adaptations
These witch finger cookies are a fun base for creativity. Here are a few ways I’ve played with the recipe:
- Chocolate-Dipped Fingers: Dip the baked cookies halfway into melted dark or white chocolate for an extra indulgent touch.
- Spiced Shortbread: Add ½ teaspoon ground cinnamon or pumpkin pie spice to the dry ingredients for a seasonal twist.
- Gluten-Free Version: Replace all-purpose flour with a 1:1 gluten-free baking blend. Keep the same measurements and chilling time.
- Nut-Free Nails: Use small pieces of dried fruit or colored sugar sprinkles instead of almonds for the “nails” if allergies are a concern.
- Colorful Halloween: Add natural food coloring to the dough (like beet juice or matcha powder) to tint the fingers green or purple.
One favorite I tried was adding a hint of orange zest to the dough, which gave a subtle brightness. If you want to explore more cookie recipes with a twist, you might enjoy the soft sugar cookies with creamy icing that are always a hit at any gathering.
Serving & Storage Suggestions
These crispy witch finger cookies are best served at room temperature, allowing the almond nails to stay crunchy and the shortbread to have that perfect snap. They make a fantastic addition to a Halloween dessert platter or a spooky-themed party spread.
Pairing them with a warm cup of spiced cider or hot chocolate is my go-to comfort combo. They also work well alongside a fresh salad like the fresh southwest chipotle salad if you want to balance sweet and savory flavors at your party.
To store, place the cookies in an airtight container at room temperature for up to 5 days. They hold their crispness well if kept away from humidity. For longer storage, freeze in a single layer on a baking sheet, then transfer to a freezer bag for up to 2 months. Thaw at room temperature before serving.
If you want to re-crisp cookies that have softened, pop them in a 300°F (150°C) oven for 5 minutes—watch carefully to avoid burning!
Nutritional Information & Benefits
Each crispy witch finger shortbread cookie contains approximately 110 calories, 7 grams of fat, 12 grams of carbohydrates, and 1 gram of protein, depending on the size you make them. The recipe is naturally free from artificial additives and uses real butter, which provides a satisfying richness.
Almonds add a boost of healthy fats, vitamin E, and fiber, making these cookies a slightly better option than your average sugary treat. While these cookies aren’t low-calorie, their simple ingredients and portion-friendly size help keep indulgence reasonable.
This recipe can be adapted for gluten-free diets by swapping flour blends and is naturally free from eggs, making it suitable for some allergy considerations. Just be mindful of nut allergies with the almond “nails.”
Conclusion
These crispy witch finger shortbread cookies with almond nails have become my favorite go-to for a playful yet delicious Halloween treat. They strike the perfect balance between spooky and scrumptious, making them memorable for guests and fun to bake with minimal fuss.
Feel free to customize the spice, nails, or even dip them in chocolate to make them your own. I keep coming back to this recipe because it’s simple, satisfying, and always brings a smile—even if it’s a little creepy.
Give these cookies a try this season and share your spooky baking stories below. I’d love to hear your favorite variations or tips for making Halloween treats that are both fun and tasty. Happy baking!
FAQs
Can I make these witch finger cookies ahead of time?
Yes! You can bake and store them in an airtight container at room temperature for up to 5 days or freeze them for longer storage. Just bring to room temp before serving.
What if I don’t have sliced almonds for the nails?
Try using whole almonds, pecan halves, or even small pieces of dried fruit or colored sprinkles for a fun alternative.
How do I keep the cookies crispy?
Chilling the dough before baking and baking until just golden are key. Store cookies in an airtight container away from moisture and consider reheating briefly in the oven if they soften.
Can I add flavors like chocolate or spices?
Absolutely! Adding cinnamon, pumpkin spice, or dipping the fingers in melted chocolate are popular and tasty variations.
Are these cookies suitable for a gluten-free diet?
You can substitute all-purpose flour with a gluten-free flour blend in equal amounts to make this recipe gluten-free. Just keep an eye on the dough texture and chilling time.
Pin This Recipe!
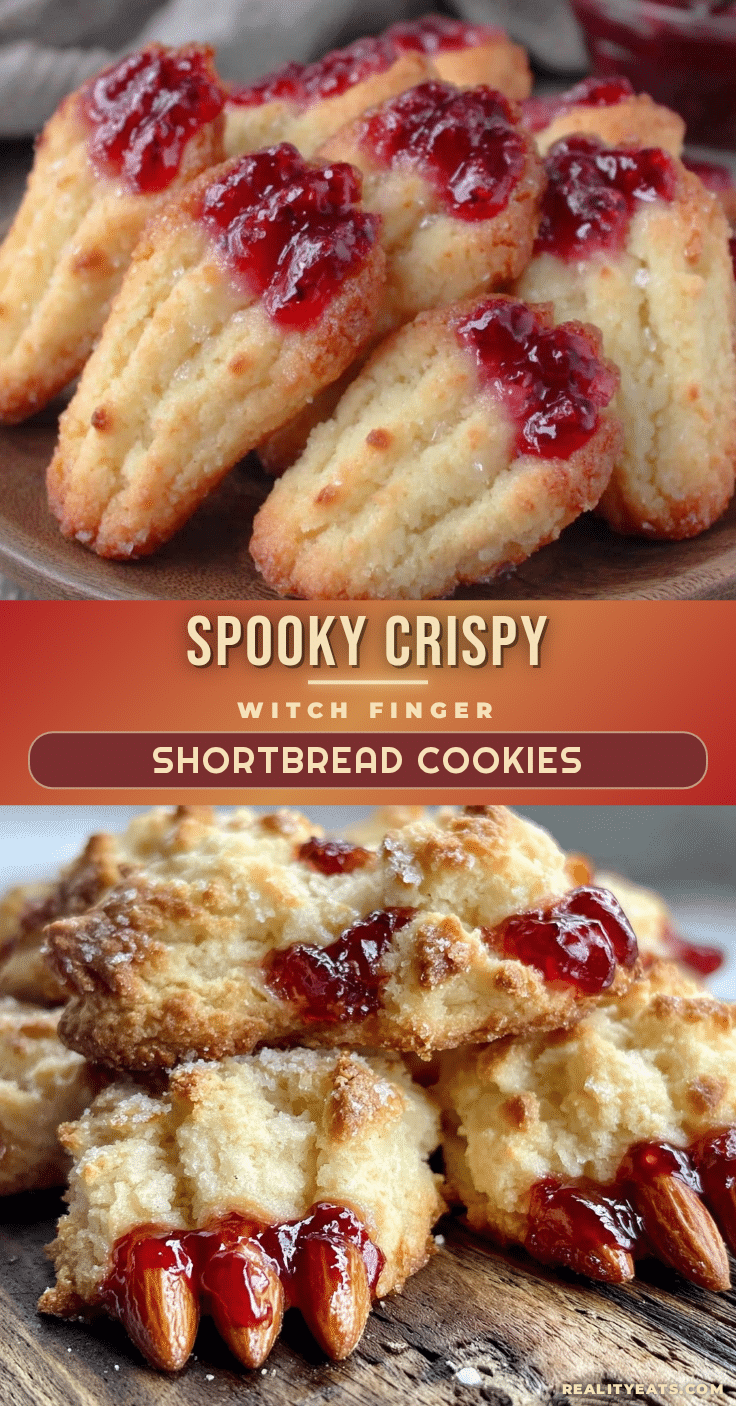
Crispy Witch Finger Shortbread Cookies

These crispy witch finger shortbread cookies with almond nails are a fun and spooky Halloween treat featuring a buttery, crisp texture and a playful design.
- Prep Time: 10 minutes
- Cook Time: 18 minutes
- Total Time: 38 minutes
- Yield: 24 cookies 1x
- Category: Dessert
- Cuisine: American
Ingredients
- 1 cup (227 grams) unsalted butter, softened
- ½ cup (100 grams) granulated sugar
- 1 teaspoon vanilla extract
- 2 cups (250 grams) all-purpose flour
- ¼ teaspoon salt
- ½ cup (50 grams) sliced almonds
Instructions
- Cream the butter and sugar in a large bowl until pale and fluffy, about 3-4 minutes.
- Mix in the vanilla extract until evenly combined.
- Sift together the flour and salt, then gradually add to the wet mixture, stirring gently until a smooth dough forms. Add a teaspoon of cold water if dough is crumbly.
- Wrap the dough in plastic wrap and refrigerate for at least 30 minutes.
- Preheat oven to 350°F (175°C).
- Take about 1 tablespoon (14 grams) of dough and roll into a finger shape about 3 inches (7.5 cm) long. Flatten slightly and taper the ends.
- Press one sliced almond at the narrow end to form the nail. Use a small knife or toothpick to carve knuckle lines and add texture.
- Place shaped fingers on a parchment-lined baking sheet about 1 inch (2.5 cm) apart.
- Bake for 15-18 minutes until edges are golden and almonds are toasted.
- Transfer cookies to a wire rack to cool completely before serving.
Notes
Use softened butter, not melted, for best texture. Chill dough for at least 30 minutes to prevent spreading and ensure crispness. Watch cookies closely near the end of baking to avoid overbaking. Carve knuckle lines with a toothpick for a spooky effect. Use light-colored baking sheets for even baking. For extra crispiness, leave cookies on the baking sheet for a few minutes after turning off the oven.
Nutrition
- Serving Size: 1 cookie
- Calories: 110
- Fat: 7
- Carbohydrates: 12
- Protein: 1
Keywords: Halloween cookies, witch finger cookies, shortbread cookies, almond cookies, spooky treats, crispy cookies, easy Halloween recipe


