“You won’t believe what I just made!” my friend texted me late one evening, showing a photo of beautifully decorated chocolate cookies shaped like diplomas, each topped with the smoothest, most elegant royal icing you could imagine. Honestly, I was skeptical at first—how hard could it be to get royal icing just right, especially on chocolate cookies? But curiosity got the best of me, and I embarked on a little kitchen experiment that turned out to be a sweet success. These Perfect Chocolate Diploma Cookies with Elegant Royal Icing quickly became my go-to treat for celebrations, not just graduation parties.
What struck me most was how the bittersweet richness of the chocolate cookie paired with the delicate, glossy icing created this unexpected harmony. It’s the kind of cookie you can bring out when you want to impress without stress, and the best part? The recipe isn’t fussy at all. I’ve made these cookies multiple times in one week, tweaking the icing just a bit here and there, and each batch came out with that same lovely snap and smooth finish that feels so professional but tastes homemade.
Somehow, these cookies remind me that even a simple kitchen mistake or an offhand idea can turn into something memorable. It’s not just about the cookie; it’s about the quiet satisfaction when the icing sets perfectly, and you realize you’ve nailed something that looks elegant enough to gift. That’s why this recipe stuck with me—because it’s approachable but still makes you feel like a baking star.
Why You’ll Love This Recipe
After many rounds of trial and error, this recipe for Perfect Chocolate Diploma Cookies with Elegant Royal Icing has become one of my favorites for several reasons. I’m not just saying that because they taste great (though they do); it’s about how easy and rewarding the process is.
- Quick & Easy: The cookie dough comes together in under 15 minutes, and the icing dries beautifully within a couple of hours, making it perfect for last-minute celebrations or thoughtful gifts.
- Simple Ingredients: You probably have everything in your pantry already—no need for specialty chocolates or fancy baking sugars.
- Perfect for Graduations and Special Occasions: These cookies bring a festive touch without the fuss, ideal for parties, gift baskets, or even a classy dessert table.
- Crowd-Pleaser: The rich chocolate flavor appeals to both kids and adults, while the royal icing adds a delicate sweetness that balances the cookie perfectly.
- Unbelievably Delicious Texture: The cookies are crisp on the edges but soft and chewy inside, with the royal icing adding a smooth, melt-in-your-mouth finish.
What sets this recipe apart is the icing technique—I blend the royal icing just right to get a smooth, glossy finish that dries hard but doesn’t crack or lose its shine. Plus, the chocolate base has just enough cocoa to keep things rich without overwhelming the subtle vanilla notes in the icing. Honestly, it’s the kind of treat that makes you close your eyes with the first bite and smile.
If you’ve ever struggled with royal icing or felt intimidated by decorated cookies, this recipe breaks those barriers. It’s approachable, forgiving, and perfect for creating those little moments of joy that good food brings. If you love baking elegant treats but want to keep it simple, this one’s for you.
What Ingredients You Will Need
This recipe uses simple, wholesome ingredients to deliver bold chocolate flavor and a smooth, elegant royal icing without the fuss. Most ingredients are pantry staples, and substitutions are easy if you’re catering to dietary needs.
- For the Chocolate Diploma Cookies:
- All-purpose flour – 2 ½ cups (312 g), sifted for a tender crumb
- Cocoa powder – ¾ cup (75 g), unsweetened, preferably a good-quality Dutch-processed cocoa for richer flavor
- Baking powder – 1 teaspoon, to give a slight lift
- Salt – ½ teaspoon, balances the sweetness
- Unsalted butter – 1 cup (227 g), softened, for that perfect buttery base
- Granulated sugar – 1 cup (200 g), for sweetness and crisp edges
- Large egg – 1, room temperature, binds the dough
- Pure vanilla extract – 2 teaspoons, adds warmth and depth
- For the Elegant Royal Icing:
- Powdered sugar – 4 cups (480 g), sifted to avoid lumps
- Egg whites – 3 large (or 6 tablespoons pasteurized egg whites for safety)
- Fresh lemon juice – 1 tablespoon, to brighten the icing
- Vanilla extract – 1 teaspoon, for subtle flavor
- Optional: Gel food coloring – white or any color you want for accents
For best results, I recommend brands like King Arthur for flour and Ghirardelli for cocoa powder—they consistently give me great texture and flavor. If you want to make these gluten-free, almond flour can be a decent substitute, though the dough will be softer and require gentle handling. For a dairy-free version, swap the butter with vegan margarine or coconut oil, but keep in mind the flavor will shift slightly.
When it comes to the royal icing, using pasteurized egg whites is a safer option if you’re concerned about raw eggs. And if you want to add a touch of color to your diplomas, a tiny dab of gel food coloring blends smoothly without thinning the icing.
Equipment Needed
- Mixing bowls – at least two, medium and large sizes
- Electric mixer or stand mixer – helps whip the icing to the right consistency and mix the cookie dough evenly
- Measuring cups and spoons – precise measurements are key
- Sifter – for flour, cocoa powder, and powdered sugar to avoid lumps
- Rolling pin – to roll out the cookie dough evenly
- Diploma-shaped cookie cutter – or a rectangular cutter plus a small circle cutter for the seal
- Baking sheets lined with parchment paper or silicone baking mats – ensures easy cookie removal
- Piping bags with small round tips (size #1 or #2) – for piping the royal icing elegantly
- Spatula or bench scraper – for mixing and handling dough
If you don’t have a stand mixer, a handheld electric mixer works just fine. I’ve even made the royal icing by hand, but it does take a bit more muscle and patience. For rolling, if you don’t own a rolling pin, a smooth wine bottle can do the trick in a pinch.
Keep your piping tips clean and dry. I learned the hard way that even a tiny bit of moisture can mess with the icing flow. When storing your piping bags between decorating sessions, wrap the tips in plastic wrap to prevent drying out.
Preparation Method
- Prepare the Cookie Dough: In a medium bowl, sift together 2 ½ cups (312 g) of all-purpose flour, ¾ cup (75 g) unsweetened cocoa powder, 1 teaspoon baking powder, and ½ teaspoon salt. Set aside. This dry mix gives your cookies the perfect chocolate base.
- Cream Butter and Sugar: In your mixing bowl, beat 1 cup (227 g) softened unsalted butter with 1 cup (200 g) granulated sugar until light and fluffy, about 3-4 minutes. The texture should feel airy—you’ll notice the color lighten, which means you’re on the right track.
- Add Egg and Vanilla: Beat in 1 large egg (room temperature) and 2 teaspoons pure vanilla extract until fully combined. The mixture might look slightly curdled at this point, but that’s normal.
- Incorporate Dry Ingredients: Gradually add the sifted dry ingredients to the wet mixture, mixing on low speed. Stop as soon as the dough comes together—overmixing can make cookies tough. The dough should be soft but firm enough to roll.
- Chill the Dough: Shape the dough into a disk, wrap in plastic wrap, and refrigerate for at least 1 hour. Chilling helps the dough firm up, making it easier to roll and cut precise shapes.
- Roll and Cut Cookies: Preheat your oven to 350°F (175°C). On a lightly floured surface, roll the dough to about ¼ inch (6 mm) thickness. Use a diploma-shaped cookie cutter or a rectangle cutter about 3 inches (7.5 cm) long and 1.5 inches (4 cm) wide. Don’t forget a small circle cutter for the seal detail!
- Bake: Arrange cookies on parchment-lined baking sheets, spacing them about 1 inch (2.5 cm) apart. Bake for 10-12 minutes or until the edges are set but the centers are still soft. The cookies will firm up as they cool.
- Cool Completely: Transfer cookies to a wire rack and let cool fully before decorating. This step is crucial for royal icing to set nicely without melting.
- Make the Royal Icing: In a clean bowl, combine 4 cups (480 g) sifted powdered sugar, 3 large egg whites (or 6 tbsp pasteurized whites), 1 tbsp fresh lemon juice, and 1 tsp vanilla extract. Beat with an electric mixer on medium-high speed until stiff peaks form, about 7-10 minutes. The icing should be thick but pipeable.
- Decorate: Transfer royal icing to piping bags fitted with small round tips. Outline the diploma shape first, then flood the center with icing. Use a slightly thinner consistency if needed for flooding (add a few drops of water). Pipe the seal circle and add any lettering or decoration before the icing sets.
- Let Icing Set: Allow the decorated cookies to dry at room temperature for at least 2 hours or overnight for a perfect firm finish.
Pro tip: If your icing cracks as it dries, check the humidity in your kitchen. Sometimes a humid day means you’ll want to dry the cookies in a cooler, less humid spot.
Cooking Tips & Techniques
Getting royal icing just right can feel intimidating, but I’ve learned a few tricks that really help.
- Beat Egg Whites Properly: Start with clean, grease-free bowls and beat your egg whites until they hold stiff peaks. This is the foundation for a shiny, smooth icing.
- Consistency is Key: For outlining, keep the icing thick enough to hold shape. For flooding, thin it slightly with water until it flows smoothly but isn’t runny. A good test is to drizzle a bit of icing back into the bowl; it should settle flat in about 10 seconds.
- Don’t Overbake Cookies: Chocolate cookies can go from soft to dry fast. Pull them as soon as the edges set to maintain that tender chew inside.
- Chill Dough Well: Chilling stops cookies from spreading too much and helps keep crisp edges.
- Practice Piping: If you’re new to royal icing, practice on parchment paper first. It builds confidence and helps steady your hand.
- Avoid Humidity: High humidity can cause royal icing to stay tacky. If you live in a humid area, consider using a dehumidifier or drying your cookies in a cool room.
One time, I rushed the icing dry time and ended up with cracked, dull surfaces. Lesson learned: patience is part of the process. Also, trying this recipe alongside something like the soft sugar cookies with creamy icing helped me understand how different doughs and icings behave, which improved my decorating skills overall.
Variations & Adaptations
This recipe is pretty flexible, so you can tailor it to your needs or season.
- Flavor Variations: Add ½ teaspoon cinnamon or espresso powder to the cookie dough for a warm twist. For the icing, try swapping vanilla for almond extract for a delicate nutty note.
- Dietary Adjustments: Use almond or oat flour for a gluten-free version, but expect a softer cookie. For egg-free royal icing, consider a meringue powder substitute, though the texture will differ slightly.
- Color and Design: Customize the royal icing colors with natural food dyes like beet powder or matcha for festive or themed diplomas.
- Alternative Shapes: Instead of diploma shapes, try this dough with star or heart cutters for other celebrations. The rich chocolate base pairs wonderfully with many designs.
Personally, I once added a small sprinkle of sea salt on the icing before it dried, giving the cookies a surprising depth that got rave reviews at a party. If you love savory-sweet combos, this is a game-changer.
Serving & Storage Suggestions
These Perfect Chocolate Diploma Cookies with Elegant Royal Icing are best served at room temperature, allowing the chocolate’s richness and the icing’s delicate sweetness to shine. Present them on a pretty platter or wrapped individually in cellophane tied with a little ribbon for gifting.
They pair beautifully with a cup of coffee or a glass of cold milk—comfort food meets sophistication. For a party spread, consider balancing these sweet cookies with savory bites like the crispy ham and cheese sticks or the fresh southwest chipotle salad to keep things interesting.
Store the cookies in an airtight container at room temperature for up to 5 days. If you want to keep them longer, freeze them in a single layer on a baking sheet, then transfer to a freezer-safe container for up to 3 months. Thaw at room temperature before serving.
When reheating, avoid microwaving as it can soften the royal icing. Instead, let them come to room temp naturally. Over time, the icing hardens slightly more but remains deliciously crisp, making these cookies perfect for making ahead of time.
Nutritional Information & Benefits
Per cookie (approximate): 150 calories, 7g fat, 22g carbohydrates, 2g protein.
Chocolate brings antioxidants, and using real butter ensures natural fats instead of processed oils. The powdered sugar in the royal icing is the primary source of carbs, but since these are treats, portion control is key.
This recipe can be adapted to be gluten-free or dairy-free, accommodating many dietary needs without sacrificing flavor. Just remember to substitute carefully to maintain texture.
From a wellness perspective, making your own cookies means no preservatives or artificial additives—just pure ingredients you trust. Plus, the act of decorating can be wonderfully mindful and relaxing.
Conclusion
Perfect Chocolate Diploma Cookies with Elegant Royal Icing are more than just a dessert; they’re a little celebration you can bake anytime. Whether you’re marking a milestone or just craving a rich chocolate treat with refined decoration, this recipe delivers every time. It’s approachable enough for beginners but rewarding enough to impress seasoned bakers.
Feel free to personalize the icing colors, shapes, or flavors to match your occasion or mood. I love how these cookies bring a touch of elegance without complicated techniques, making every bite feel special.
Give this recipe a try, and don’t hesitate to share your decorating adventures or tweaks—you never know who might be inspired to create their own batch of memories. Baking is better when shared, after all.
FAQs
How long does royal icing take to dry completely?
Typically, royal icing dries to a firm finish within 2 hours at room temperature, but for best results, let it set overnight.
Can I make these cookies ahead of time?
Yes, you can bake the cookies up to a week ahead and store them in an airtight container. Decorate with royal icing a day or two before serving.
Is it safe to use raw egg whites in royal icing?
Using fresh raw egg whites carries a small risk; it’s safer to use pasteurized egg whites or meringue powder to eliminate concerns.
What can I substitute for cocoa powder?
You can use an equal amount of Dutch-processed or natural cocoa powder, but the flavor and color may vary slightly.
How do I prevent royal icing from cracking?
Keep the icing at the right consistency, avoid rushing the drying process, and store cookies in a low-humidity environment to prevent cracking.
Pin This Recipe!
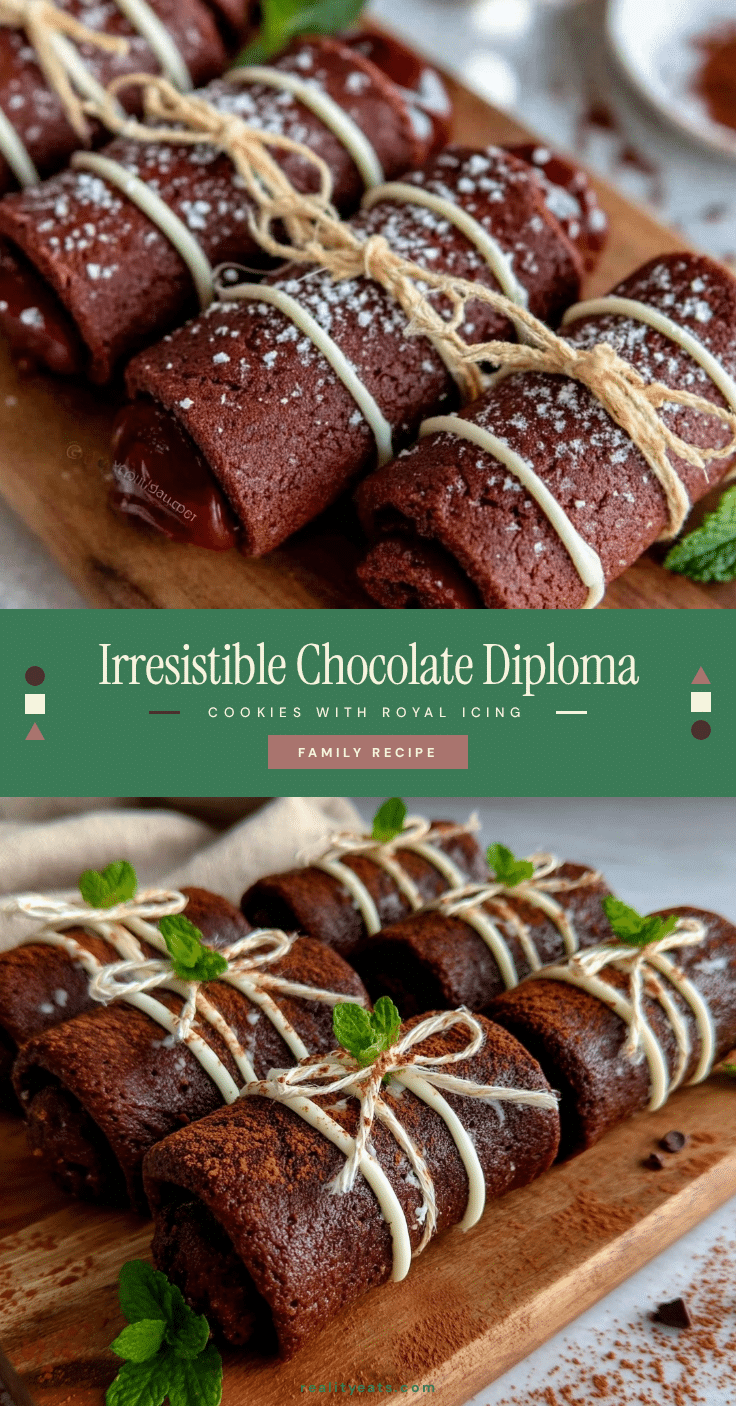
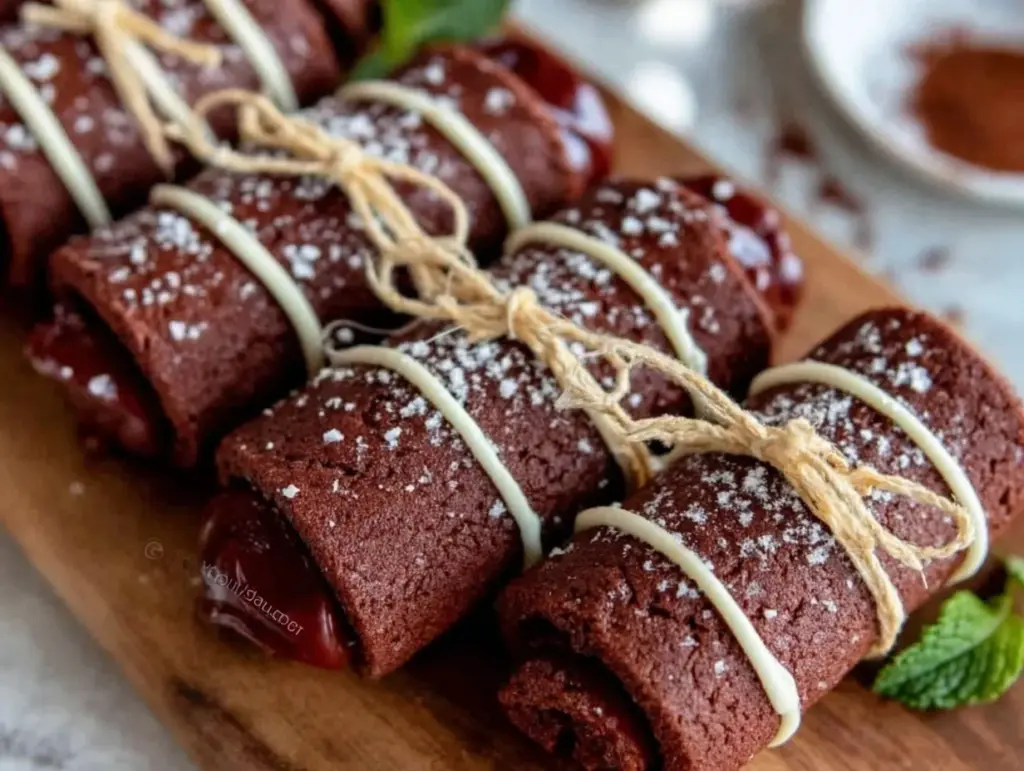
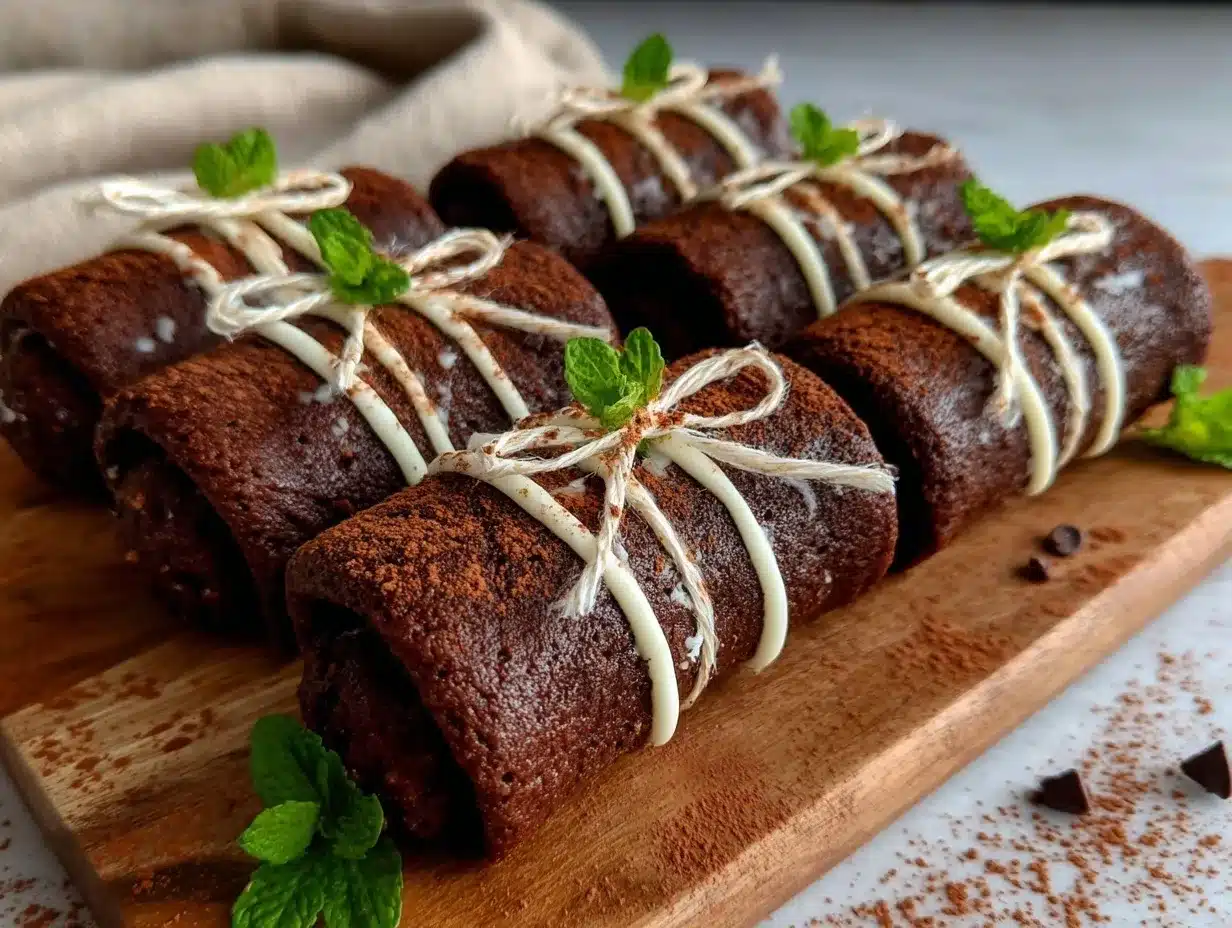
Perfect Chocolate Diploma Cookies with Elegant Royal Icing

These chocolate diploma-shaped cookies feature a rich, bittersweet chocolate base paired with smooth, glossy royal icing. Perfect for celebrations, they offer a crisp edge with a soft, chewy center and an elegant finish.
- Prep Time: 15 minutes
- Cook Time: 12 minutes
- Total Time: 2 hours 30 minutes
- Yield: 24 cookies 1x
- Category: Dessert
- Cuisine: American
Ingredients
- 2 ½ cups (312 g) all-purpose flour, sifted
- ¾ cup (75 g) unsweetened cocoa powder, preferably Dutch-processed
- 1 teaspoon baking powder
- ½ teaspoon salt
- 1 cup (227 g) unsalted butter, softened
- 1 cup (200 g) granulated sugar
- 1 large egg, room temperature
- 2 teaspoons pure vanilla extract
- 4 cups (480 g) powdered sugar, sifted
- 3 large egg whites or 6 tablespoons pasteurized egg whites
- 1 tablespoon fresh lemon juice
- 1 teaspoon vanilla extract
- Optional: gel food coloring (white or any color)
Instructions
- In a medium bowl, sift together flour, cocoa powder, baking powder, and salt. Set aside.
- In a mixing bowl, beat softened butter and granulated sugar until light and fluffy, about 3-4 minutes.
- Beat in the egg and vanilla extract until fully combined.
- Gradually add the dry ingredients to the wet mixture on low speed until dough comes together; avoid overmixing.
- Shape dough into a disk, wrap in plastic wrap, and refrigerate for at least 1 hour.
- Preheat oven to 350°F (175°C). Roll dough on a lightly floured surface to ¼ inch (6 mm) thickness.
- Cut dough using a diploma-shaped cookie cutter or rectangle cutter (3 inches by 1.5 inches) and a small circle cutter for the seal.
- Place cookies on parchment-lined baking sheets about 1 inch apart.
- Bake for 10-12 minutes until edges are set but centers remain soft.
- Cool cookies completely on a wire rack before decorating.
- To make royal icing, beat powdered sugar, egg whites, lemon juice, and vanilla extract on medium-high speed until stiff peaks form, about 7-10 minutes.
- Transfer icing to piping bags with small round tips. Outline diploma shapes, flood centers with slightly thinned icing, pipe seal circles and decorations.
- Allow decorated cookies to dry at room temperature for at least 2 hours or overnight for best results.
Notes
Use pasteurized egg whites for safer royal icing. Chill dough well to prevent spreading. Practice piping on parchment paper to build confidence. Avoid high humidity when drying icing to prevent cracking. For gluten-free, substitute almond or oat flour but expect softer cookies. For dairy-free, use vegan margarine or coconut oil instead of butter.
Nutrition
- Serving Size: 1 cookie
- Calories: 150
- Fat: 7
- Carbohydrates: 22
- Protein: 2
Keywords: chocolate cookies, royal icing, diploma cookies, graduation cookies, homemade cookies, decorated cookies, easy cookie recipe


