
Introduction
The scent of bubbling apples, warm caramel, and buttery shortbread always takes me straight back to autumn afternoons in my grandma’s kitchen. I remember the first time I made these caramel apple pie shortbread bars—honestly, it was a total accident. I’d planned to bake a classic apple pie, but halfway through, realized I was out of pie crust ingredients. Instead, I grabbed my favorite shortbread base recipe, tossed together some apples, and whipped up a quick crumble. The result? Pure dessert magic.
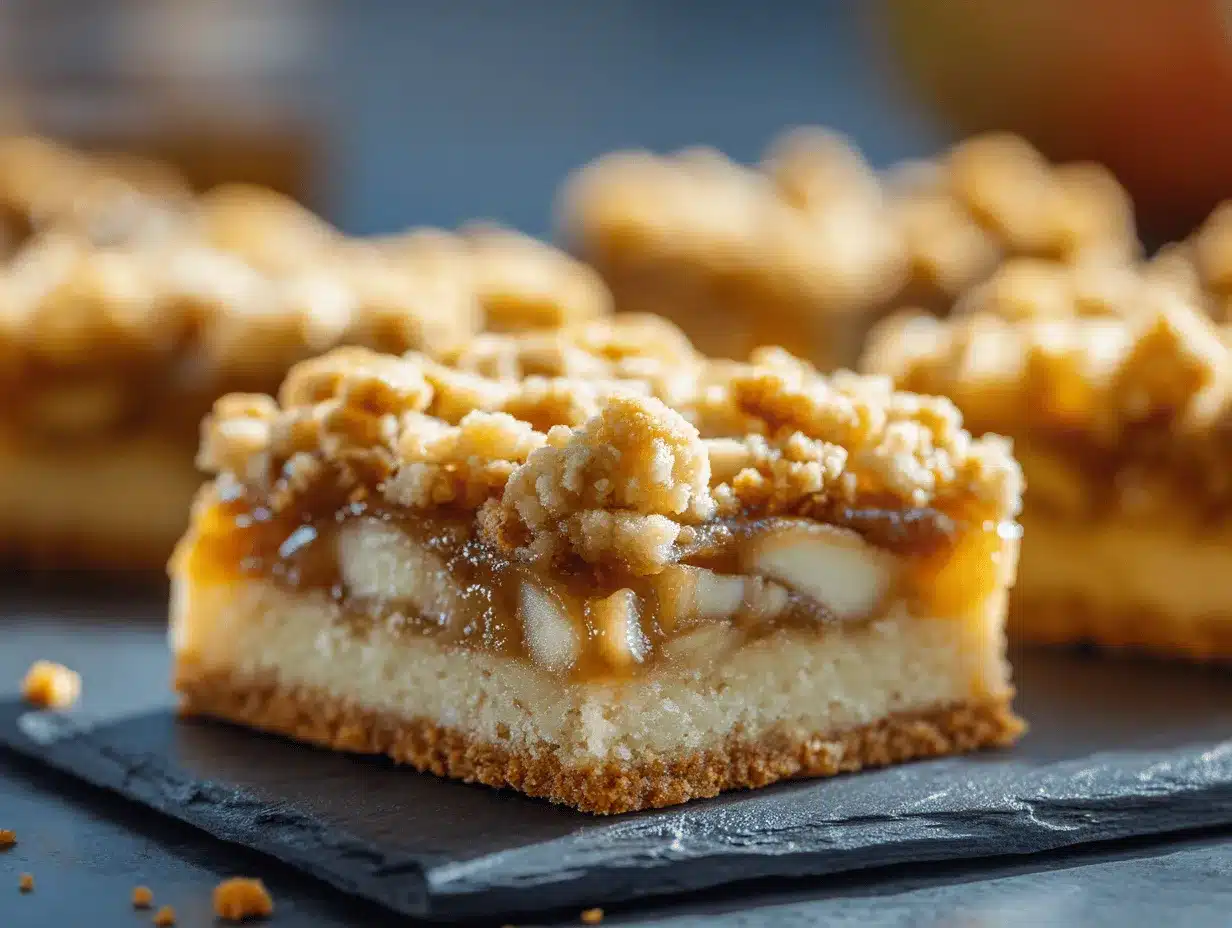
These caramel apple pie shortbread bars have all the best parts of a homemade apple pie—sweet-tart apples, gooey caramel, and a golden crumbly topping—packed into an easy, hand-held treat. You get a sturdy shortbread crust, a layer of juicy spiced apples, silky caramel sauce, and a buttery crumble that’s just begging for a scoop of vanilla ice cream. And let’s face it, who can resist a dessert that feels both nostalgic and a bit modern at the same time?
I’ve tested this recipe more times than I can count (family and friends never complain when I show up with a tray!). Whether you’re baking for a cozy family night or need a show-stopping treat for a potluck, these caramel apple pie shortbread bars are guaranteed to be a hit. Plus, they’re way easier than making a traditional pie from scratch. If you love the flavors of apple pie but want something that travels well, this is the dessert for you. Trust me, once you try these bars, you’ll find yourself making them for every occasion—from holidays to lazy Sunday afternoons.
Why You’ll Love This Recipe
- Quick & Easy: These bars come together in about an hour (with just 20 minutes of hands-on time). Perfect for when you want a homemade treat without a ton of fuss.
- Simple Ingredients: No need for fancy groceries—everything here is a pantry or fridge staple. Apples, flour, butter, sugar, and a jar of caramel sauce are all you need.
- Perfect for Any Occasion: Ideal for fall gatherings, Thanksgiving dessert tables, or just a sweet bite with afternoon coffee. They even travel well for bake sales or lunchbox treats.
- Crowd-Pleaser: These bars have never made it past the first day in my house. Kids love the gooey caramel, grown-ups adore the buttery shortbread, and everyone goes back for seconds.
- Unbelievably Delicious: Imagine the classic flavors of apple pie—sweet, tart, and spiced—layered with golden, crumbly shortbread and a drizzle of caramel. It’s comfort food in bar form, and honestly, nothing beats that first bite.
What really makes these caramel apple pie shortbread bars stand out is the perfect balance of textures. You’ve got a melt-in-your-mouth shortbread, tender baked apples, and a crumble topping that’s golden and crisp. I’ve played around with different apples, caramel brands, and even tried making my own caramel sauce. Each time, the bars come out a little different—but always delicious. If you’re looking for a recipe that feels homemade, comforting, and just a little bit special, this is it.
There’s something about these bars that just feels like a warm hug on a chilly day. They’re not just dessert—they’re a slice of nostalgia, a little taste of the holidays, and a treat to share with the people you love. Whether you’re baking for family, friends, or just yourself (no judgment!), you’ll fall for this recipe just like I did.
What Ingredients You Will Need
This recipe uses simple, wholesome ingredients to deliver bold flavor and satisfying texture without any complicated steps. Most of these are probably already in your kitchen, but I’ll share a few tips and swaps as we go. Here’s what you need for these irresistible caramel apple pie shortbread bars:
- For the Shortbread Base:
- 1 cup (226g) unsalted butter, softened (adds rich, buttery flavor)
- 1/2 cup (100g) granulated sugar
- 2 cups (240g) all-purpose flour (King Arthur or Bob’s Red Mill give a lovely tender crumb)
- 1/4 tsp salt
- 1 tsp vanilla extract (optional, but adds a nice roundness)
- For the Apple Pie Filling:
- 3 medium apples (about 400g), peeled, cored, and diced (I love Granny Smith for tartness, but Honeycrisp or Fuji work too)
- 2 tbsp (30g) granulated sugar
- 1 tbsp (8g) all-purpose flour (helps absorb juices)
- 1 tsp ground cinnamon
- 1/4 tsp ground nutmeg
- 1/8 tsp salt
- 2 tsp lemon juice (brightens the apple flavor)
- For the Caramel Layer:
- 1/2 cup (120ml) thick caramel sauce (store-bought or homemade; Smucker’s or Trader Joe’s are my go-tos)
- For the Crumble Topping:
- 1/2 cup (60g) all-purpose flour
- 1/4 cup (55g) unsalted butter, cold and cubed
- 1/4 cup (50g) light brown sugar, packed
- 1/2 tsp ground cinnamon
- Pinch of salt
- Optional: 1/3 cup (35g) chopped pecans or walnuts (for extra crunch!)
Ingredient Tips: For a gluten-free version, you can swap the all-purpose flour for almond flour in both the base and crumble (the texture is a bit more delicate, but so good!). If you want to cut down on sugar, use a sugar substitute like Swerve—just know the bars may brown a bit differently. And if you can, use real butter for the best shortbread flavor—it truly makes a difference.
Substitutions: Dairy-free butter works if needed, and coconut caramel sauce is a great option for a non-dairy version. If you’re out of fresh apples, canned apple pie filling can pinch-hit (just reduce the sugar in the filling by half).
Equipment Needed
- 8×8-inch (20x20cm) Baking Pan: Glass or metal both work. I use my trusty metal pan for even browning, but glass is fine too. In a pinch, a 9×9-inch pan can be used—just adjust baking time down by 5 minutes.
- Parchment Paper: For easy removal and less mess. You’ll thank yourself later!
- Mixing Bowls: At least two—one for the shortbread/crumble and one for the apples.
- Hand Mixer or Stand Mixer: Creams butter quickly. If you don’t have one, a sturdy whisk and some elbow grease work—just takes a bit longer.
- Measuring Cups and Spoons: For accuracy. A kitchen scale is even better if you have one.
- Spatula and Wooden Spoon: For mixing and spreading the layers.
- Small Saucepan (if making homemade caramel): Not required if using jarred caramel sauce.
- Knife and Cutting Board: For prepping apples.
Honestly, you don’t need anything fancy. I used to make these with just a bowl, spoon, and an old Pyrex dish. If you line your pan with parchment, clean-up is a breeze. And if you’re using a hand mixer, make sure to cream the butter while it’s soft—cold butter will just give you a workout! For the crumble, I like to use my fingers to squish the butter in (it’s more fun, and you get those perfect buttery clumps).
Preparation Method
- Prep Your Pan and Oven: Preheat your oven to 350°F (175°C). Line an 8×8-inch (20x20cm) baking pan with parchment paper, leaving a slight overhang on two sides for easy removal. If you skip this, the bars might stick!
- Make the Shortbread Base: In a large bowl, cream together 1 cup (226g) unsalted butter and 1/2 cup (100g) granulated sugar until light and fluffy—about 2-3 minutes with a hand mixer. Add 2 cups (240g) all-purpose flour, 1/4 tsp salt, and 1 tsp vanilla (if using). Mix until a soft dough forms. It should look a bit crumbly, but hold together when pressed.
- Press and Bake the Base: Press the dough evenly into the bottom of your prepared pan. Use the bottom of a measuring cup to smooth it out. Bake for 15 minutes, until edges are just starting to turn golden. Don’t overbake at this stage—the base will bake more with the toppings.
- Prepare the Apple Filling: While the base bakes, toss the diced apples with 2 tbsp (30g) sugar, 1 tbsp (8g) flour, 1 tsp cinnamon, 1/4 tsp nutmeg, 1/8 tsp salt, and 2 tsp lemon juice in a bowl. The apples should glisten and smell amazing—like classic apple pie. If your apples are super juicy, pat them dry with a paper towel first.
- Make the Crumble Topping: In another bowl, combine 1/2 cup (60g) flour, 1/4 cup (55g) cold butter, 1/4 cup (50g) brown sugar, 1/2 tsp cinnamon, and a pinch of salt. Use your fingers or a pastry cutter to squish the butter into the dry mix until pea-sized clumps form. Stir in 1/3 cup (35g) chopped nuts if using.
- Assemble the Bars: Remove the base from the oven (it’s fine if it’s still a bit pale). Layer the apple mixture evenly over the crust. Drizzle with 1/2 cup (120ml) caramel sauce, making sure you get some in every corner—this is where the magic happens! Sprinkle the crumble topping over everything.
- Bake the Bars: Return the pan to the oven and bake for 35–40 minutes, or until the top is golden brown and you can see caramel bubbling around the edges. Your kitchen will smell like heaven!
- Cool and Slice: Let the bars cool completely in the pan—this takes at least 1 hour, but 2 hours is even better. If you try to cut them too soon, they’ll fall apart (trust me, I’ve done it). Once cool, lift out using the parchment and cut into squares or bars.
- Serve: Enjoy at room temperature, or warm slightly and top with vanilla ice cream. Store leftovers in an airtight container at room temp for 1–2 days, or in the fridge for up to 5 days.
Personal tip: If you’re in a hurry, pop the cooled pan in the fridge for 30 minutes before slicing—the bars will hold together even better. And don’t stress if your crumble looks a little uneven—that’s the homemade charm!
Cooking Tips & Techniques
- Shortbread Success: Make sure your butter is truly softened before creaming for the base. Cold butter won’t combine as easily, and over-softened butter can make the crust greasy. I’ve rushed this and ended up with a tough base—patience pays off.
- Even Apple Layer: Dice your apples into small, even cubes (about 1/2 inch). If they’re too big, they won’t soften enough in the oven. If your apples are too juicy, drain a bit of the liquid before layering to avoid soggy bars.
- Crumble Perfection: Don’t overmix the crumble topping. You want buttery clumps, not a sandy mess. I use my fingertips to “pinch” the butter into the flour and sugar. If it gets too warm, pop the crumble in the fridge for 5 minutes before sprinkling on top.
- Baking Time: Ovens can be quirky—if your bars aren’t golden after 40 minutes, let them go another 3–5 minutes, but watch closely. The caramel will bubble and the top should be crisp but not burnt.
- Cutting Clean Bars: Cool completely for perfect slices. For super clean edges, wipe your knife between cuts and use a large chef’s knife instead of a small blade.
- Multi-tasking: While the base is baking, prep your apples and crumble. This way, everything comes together quickly—no wasted time staring at the oven timer!
- Personal lesson: Once, I overfilled with too much caramel and the bars got super gooey (not a disaster, but hard to slice). Stick to the recommended amount for best results, or serve extra on the side for drizzling.
Variations & Adaptations
- Gluten-Free Version: Swap all-purpose flour for a cup-for-cup gluten-free flour blend. Almond flour also works in a pinch, but the bars will be a bit softer. I’ve tried both, and my gluten-free friends loved them!
- Dairy-Free Option: Use a plant-based butter and coconut caramel sauce. The flavor’s slightly different (a bit nuttier), but still totally delicious.
- Seasonal Fruit Swap: In the summer, use peaches or mixed berries instead of apples. Just adjust the sugar down a bit if your fruit is super sweet. A sprinkle of lemon zest with berries is fantastic.
- Flavor Twists: Mix a handful of dried cranberries or raisins into the apple filling for a tart pop, or add a pinch of ground ginger for extra spice.
- For Nut Allergies: Skip the nuts in the crumble, or add toasted sunflower seeds for crunch.
- Personal Favorite: Once, I added a layer of thinly sliced pears with the apples—totally dreamy! Pears add extra juiciness and a delicate flavor that pairs perfectly with caramel.
Don’t be afraid to get creative—these bars are super forgiving. Just keep the proportions similar (about 3 cups of fruit total) and you’ll be golden.
Serving & Storage Suggestions
These caramel apple pie shortbread bars are best served at room temperature, but they’re also amazing warmed up with a scoop of vanilla ice cream or a drizzle of extra caramel. For presentation, I like to cut them into generous squares and stack them on a pretty platter—they look rustic and inviting, perfect for Pinterest-worthy dessert tables.
Pair with hot coffee, spiced chai, or even a glass of chilled apple cider. For a fancier touch, dust lightly with powdered sugar or top with a dollop of whipped cream.
Storage: Store leftover bars in an airtight container at room temperature for up to 2 days. If you want them to last longer, keep them in the refrigerator for up to 5 days. For freezing, wrap individual bars in plastic wrap and store in a zip-top bag for up to 2 months. Thaw at room temp or microwave for a few seconds for that just-baked taste.
Reheating: For the gooeyest texture, warm briefly in a 300°F (150°C) oven or microwave for 10–15 seconds. The crumble will crisp back up, and the caramel gets melty again—so good! Honestly, these bars get even better after a day or two as the flavors meld. If you’re making ahead for an event, bake a day in advance and store chilled.
Nutritional Information & Benefits
Estimated per bar (based on 16 bars): 220 calories, 11g fat, 29g carbs, 2g protein, 15g sugar. Of course, this will vary if you swap ingredients or cut larger bars (no judgment here!).
Health Highlights: Apples bring fiber and vitamin C, plus cinnamon has natural antioxidants. If you use nuts in the crumble, you’ll get a little boost of healthy fats and crunch. For a lower sugar version, use a sugar substitute and less caramel—still sweet, but lighter.
These bars are vegetarian, and can be made gluten-free and dairy-free with the swaps above. There are nuts in the crumble if you add them, so watch out for allergies. Personally, I love that these bars are portion-controlled (unless you eat three, like I sometimes do) and you can sneak in whole grain flour for extra nutrition.
Conclusion
If you’re craving the flavors of apple pie but want an easier, more portable dessert, these caramel apple pie shortbread bars are calling your name. They deliver all the nostalgia and coziness of homemade apple pie, but in a fuss-free, hand-held package. You can totally customize them with your favorite fruits, nuts, or even a gluten-free base.
I keep coming back to this recipe because every bite reminds me why I love baking—simple ingredients, lots of flavor, and a treat that brings people together. Whether you’re baking for family, friends, or just yourself, I hope these bars make your next gathering extra special.
Give these caramel apple pie shortbread bars a try, and let me know what you think! Leave a comment with your favorite variation, share a photo on Pinterest, or tag me on Instagram. Nothing makes me happier than seeing your baking adventures. Happy baking, and don’t forget to save a bar (or two) for yourself!
FAQs
Can I use store-bought caramel sauce for these bars?
Absolutely! Store-bought caramel works great and saves time. Just pick a thick, pourable kind for the best gooey texture.
Do I have to peel the apples?
Peeled apples make for a softer, more pie-like filling. You can leave the skin on for extra fiber and a rustic look, though—totally up to you!
Can I double the recipe for a 9×13-inch pan?
Yes, just double all ingredients and bake in a 9×13-inch pan. Add 5–10 minutes to the baking time and check for golden brown edges.
How do I keep the shortbread from getting soggy?
Pre-bake the shortbread base as directed and avoid using too much caramel or overly juicy apples. Letting the bars cool completely before slicing helps, too.
Can I freeze caramel apple pie shortbread bars?
Definitely! Wrap individual bars well and freeze for up to two months. Thaw at room temp or warm briefly for that fresh-baked taste.
Pin This Recipe!
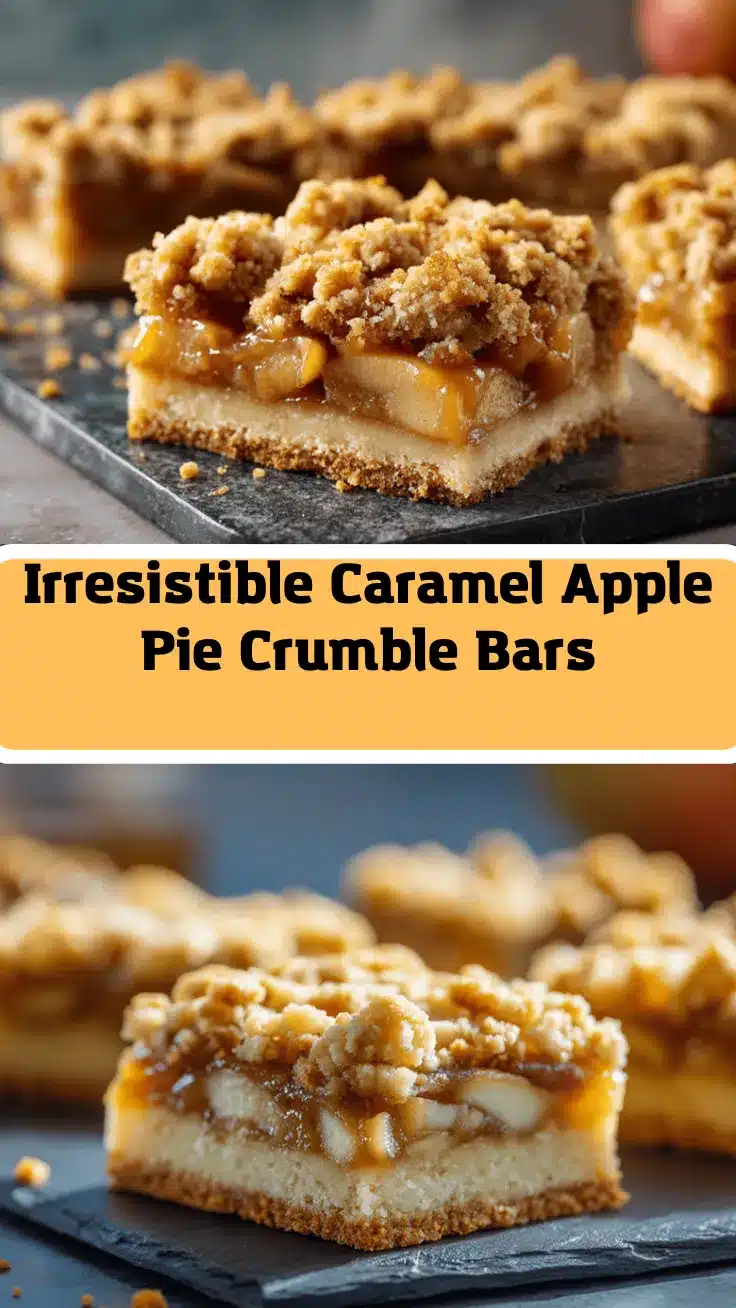
Caramel Apple Pie Shortbread Bars

These caramel apple pie shortbread bars combine all the best parts of a classic apple pie—spiced apples, gooey caramel, and buttery shortbread—into an easy, hand-held dessert. Perfect for gatherings or cozy nights in, they’re simple to make and always a crowd-pleaser.
- Prep Time: 20 minutes
- Cook Time: 50 minutes
- Total Time: 1 hour 10 minutes
- Yield: 16 bars 1x
- Category: Dessert
- Cuisine: American
Ingredients
- 1 cup (226g) unsalted butter, softened
- 1/2 cup (100g) granulated sugar
- 2 cups (240g) all-purpose flour
- 1/4 tsp salt
- 1 tsp vanilla extract (optional)
- 3 medium apples (about 400g), peeled, cored, and diced
- 2 tbsp (30g) granulated sugar
- 1 tbsp (8g) all-purpose flour
- 1 tsp ground cinnamon
- 1/4 tsp ground nutmeg
- 1/8 tsp salt
- 2 tsp lemon juice
- 1/2 cup (120ml) thick caramel sauce (store-bought or homemade)
- 1/2 cup (60g) all-purpose flour
- 1/4 cup (55g) unsalted butter, cold and cubed
- 1/4 cup (50g) light brown sugar, packed
- 1/2 tsp ground cinnamon
- Pinch of salt
- Optional: 1/3 cup (35g) chopped pecans or walnuts
Instructions
- Preheat your oven to 350°F (175°C). Line an 8×8-inch (20x20cm) baking pan with parchment paper, leaving an overhang for easy removal.
- In a large bowl, cream together 1 cup unsalted butter and 1/2 cup granulated sugar until light and fluffy (about 2-3 minutes). Add 2 cups flour, 1/4 tsp salt, and 1 tsp vanilla extract (if using). Mix until a soft, crumbly dough forms.
- Press the dough evenly into the bottom of the prepared pan. Smooth with the bottom of a measuring cup. Bake for 15 minutes, until edges are just starting to turn golden.
- While the base bakes, toss diced apples with 2 tbsp sugar, 1 tbsp flour, 1 tsp cinnamon, 1/4 tsp nutmeg, 1/8 tsp salt, and 2 tsp lemon juice in a bowl.
- In another bowl, combine 1/2 cup flour, 1/4 cup cold butter, 1/4 cup brown sugar, 1/2 tsp cinnamon, and a pinch of salt. Use your fingers or a pastry cutter to mix until pea-sized clumps form. Stir in nuts if using.
- Remove the base from the oven. Layer the apple mixture evenly over the crust. Drizzle with 1/2 cup caramel sauce. Sprinkle the crumble topping over everything.
- Return the pan to the oven and bake for 35–40 minutes, or until the top is golden brown and caramel is bubbling at the edges.
- Let the bars cool completely in the pan (at least 1 hour, preferably 2). Lift out using the parchment and cut into squares or bars.
- Serve at room temperature or slightly warmed, optionally topped with vanilla ice cream. Store leftovers in an airtight container at room temperature for 1–2 days or in the fridge for up to 5 days.
Notes
For gluten-free bars, substitute all-purpose flour with a cup-for-cup gluten-free blend or almond flour (texture will be more delicate). For dairy-free, use plant-based butter and coconut caramel sauce. Dice apples evenly for best texture, and don’t overmix the crumble. Cool bars completely before slicing for clean edges. Store leftovers in an airtight container at room temp for 2 days or in the fridge for up to 5 days. Bars can be frozen for up to 2 months.
Nutrition
- Serving Size: 1 bar (1/16 of recipe)
- Calories: 220
- Sugar: 15
- Sodium: 90
- Fat: 11
- Saturated Fat: 7
- Carbohydrates: 29
- Fiber: 2
- Protein: 2
Keywords: caramel apple pie bars, shortbread bars, apple dessert, fall baking, easy apple bars, crumble bars, homemade apple pie bars, caramel dessert, potluck dessert, Thanksgiving dessert


