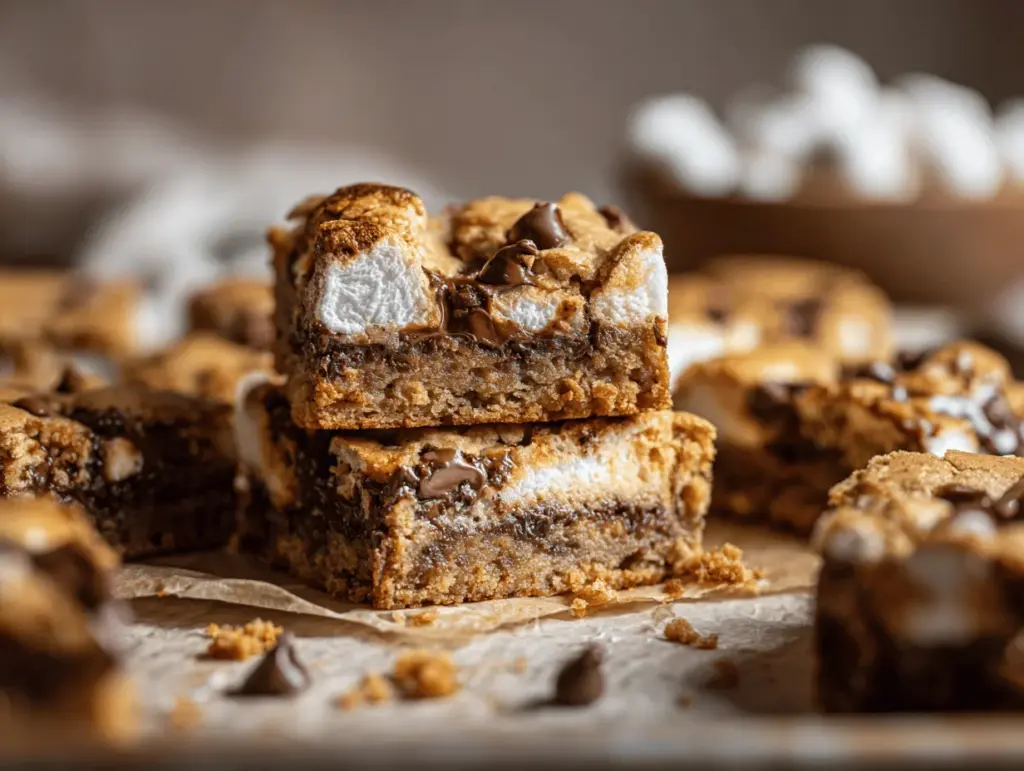
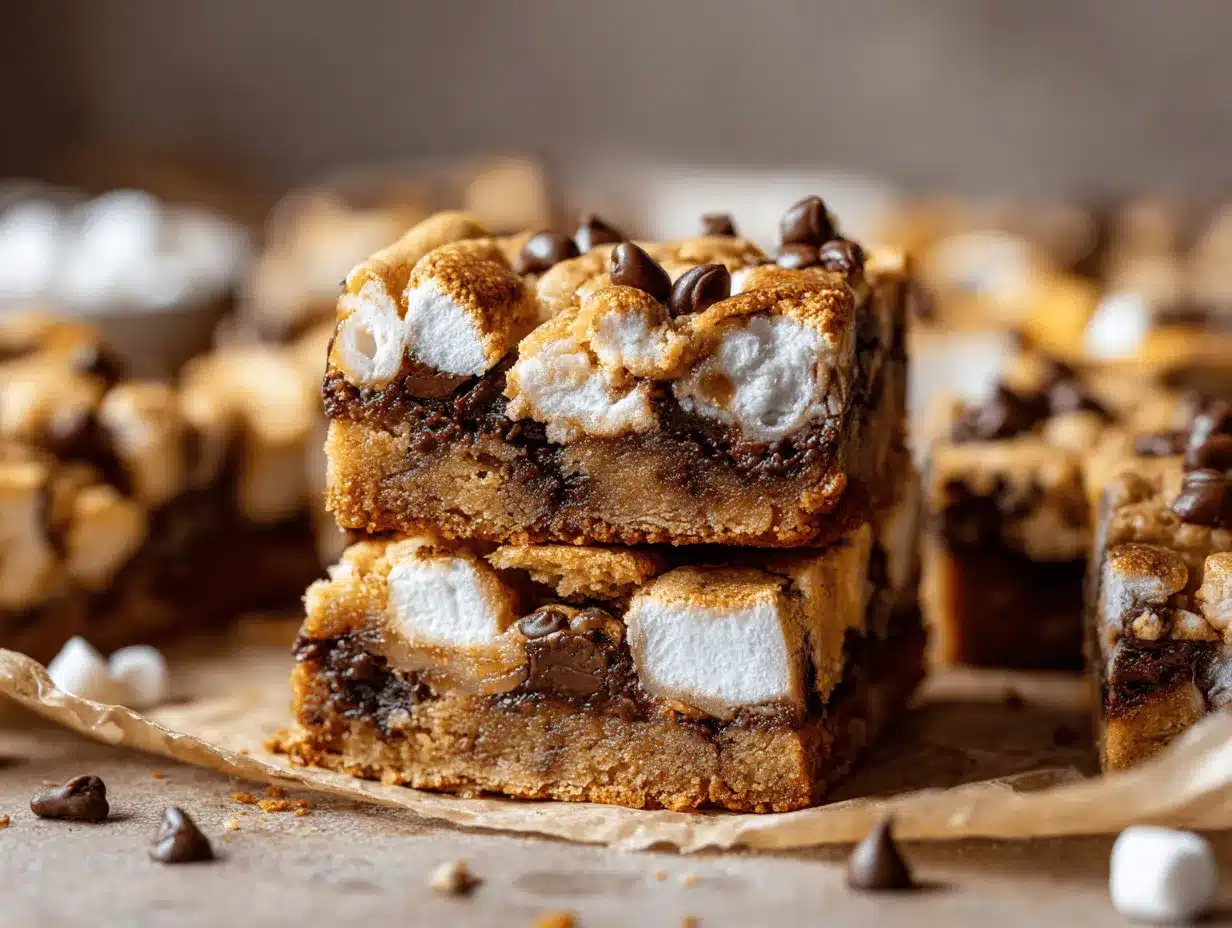
The scent of toasted marshmallows and gooey chocolate melting into buttery cookie dough always stops me in my tracks. One bite of these s’mores cookie bars and it’s like autumn bonfire nights, minus the smoky hair and sticky fingers. I remember the first time I made these—it was a chilly October evening, and honestly, I just wanted that s’mores magic without the hassle of building a fire in my backyard. Fast forward, these cookie bars have become my go-to easy fall dessert for parties (and for those “just because” cravings, too!).
There’s something incredibly nostalgic about s’mores, and transforming them into a simple, oven-baked bar means you can bring that cozy campfire vibe right into your kitchen—no matches required. These bars are layered with golden graham cracker crumbs, rich chocolate, and oozy marshmallows, all sandwiched by the softest cookie dough. And yes, they’re every bit as indulgent as they sound. If you love classic s’mores, you’re going to adore this easy twist that you can whip up in under an hour. Plus, they’re practically foolproof—I’ve baked these dozens of times for friends, bake sales, and even as a sweet pick-me-up after a long week.
So if you’re on the hunt for a show-stopping, crowd-pleasing treat that’s a breeze to make, this s’mores cookie bars recipe is about to become your new fall obsession. Trust me, they’re perfect for potlucks, fall parties, or just cozying up with a mug of hot chocolate. Let’s get baking—you won’t regret it!
Why You’ll Love This S’mores Cookie Bars Recipe
After baking and tweaking these s’mores cookie bars more times than I can count, I can confidently say this recipe is a keeper. Whether you’re a baking newbie or a seasoned pro, here’s why this easy fall dessert is about to become a staple in your kitchen:
- Quick & Easy: Everything comes together in under an hour—no campfire or fancy baking skills required. If you can stir, you can make these!
- Simple Ingredients: No need for a grocery store scavenger hunt. Most of these are pantry staples—think graham crackers, butter, chocolate chips, and mini marshmallows.
- Perfect for Parties: These bars are made for sharing. They slice up beautifully and hold together, making them ideal for potlucks, fall gatherings, Halloween parties, or even Thanksgiving dessert tables.
- Crowd-Pleaser: I haven’t met anyone who’s turned these down! Kids and adults both light up at the sight (and smell) of these bars.
- Unbelievably Delicious: It’s that classic s’mores flavor, but with a soft, chewy, cookie twist. The marshmallows get perfectly toasty, and the chocolate melts into every bite.
What sets this s’mores cookie bars recipe apart? For starters, the dough is just the right balance of soft and structured—so you get those gooey, melty pockets of chocolate and marshmallow, but the bars never fall apart on you. I like to use a mix of milk and semi-sweet chocolate chips for a rich, layered chocolate flavor. And blending crushed graham crackers into the dough itself? Pure genius. It gives the bars that unmistakable s’mores flavor in every bite, not just in the crust.
This isn’t just another cookie bar—it’s a shortcut to that fireside feeling, any time of year. The first bite is always a little wow moment, and honestly, these are the kind of treats that make a simple day feel special. If you want to impress without stress, or just need an easy fall dessert that never disappoints, trust me—this s’mores cookie bars recipe is it.
What Ingredients You Will Need
This s’mores cookie bars recipe is all about easy, approachable ingredients that deliver big on flavor. You probably have most of these in your pantry already, and if not, there are lots of simple swaps. Here’s what you’ll need:
- For the Cookie Dough Base:
- Unsalted butter, softened (1 cup/225g) – Creamy and rich, it gives the dough that classic cookie softness. I use Kerrygold when I want extra buttery flavor.
- Brown sugar (1 cup/200g, packed) – Adds moisture and that caramel-y sweetness that makes cookies so irresistible.
- Granulated sugar (1/2 cup/100g) – For just the right level of sweetness.
- Large eggs (2, room temperature) – Helps everything bind and gives a soft, chewy texture.
- Pure vanilla extract (2 teaspoons/10ml) – Adds warmth and depth (don’t skimp on this one!).
- Dry Ingredients:
- All-purpose flour (2 1/2 cups/315g) – The backbone of the cookie bars.
- Graham cracker crumbs (1 1/2 cups/150g, about 12 full sheets) – Gives that classic s’mores flavor. Use gluten-free graham crackers if needed!
- Baking soda (1 teaspoon/5g) – For just the right lift.
- Salt (1/2 teaspoon/3g) – Balances the sweetness.
- The S’mores Magic:
- Milk chocolate chips (1 cup/170g) – For that classic Hershey’s vibe.
- Semi-sweet chocolate chips (1 cup/170g) – Adds a bit more depth and chocolatey punch (feel free to use all of one type if you prefer).
- Mini marshmallows (2 cups/100g) – The star of the show! Don’t worry if a few get toasty on top—that’s where all the flavor is.
- For the Top:
- Extra graham cracker pieces (about 1/2 cup/50g, broken into chunks) – For that signature s’mores look and a little crunch.
- Extra marshmallows and chocolate chips (a small handful, for scattering on top before baking).
Ingredient Tips & Swaps: If you need these s’mores cookie bars to be gluten-free, sub in your favorite gluten-free flour blend and gluten-free grahams. For a dairy-free version, swap the butter for vegan sticks and use dairy-free chocolate chips—I’ve tried it, and it works great! If you want a little nutty twist, try adding chopped pecans or walnuts to the dough. And if you’re feeling fancy, sprinkle a pinch of flaky sea salt on top just before baking for a sweet-and-salty finish. The recipe is super forgiving, so don’t be afraid to get creative.
Equipment Needed
You don’t need any fancy gadgets for this s’mores cookie bars recipe—just the basics, and maybe a little elbow grease! Here’s what I use every time:
- 9×13-inch (23x33cm) baking pan: The perfect size for thick, shareable bars. I prefer metal pans for even browning, but glass works too (just add a few extra minutes to the bake time).
- Parchment paper: Makes it a breeze to lift the bars out for clean slicing. If you’re out of parchment, a good greasing with butter or nonstick spray does the job.
- Mixing bowls: One large for the dough, one small for dry ingredients. I’ve made this recipe with just one big bowl when I’m in a hurry—no shame in that!
- Electric hand mixer or stand mixer: Creams the butter and sugar perfectly, but you can use a sturdy whisk or wooden spoon if that’s more your style.
- Measuring cups and spoons: Accuracy matters for that classic cookie texture.
- Rubber spatula: For scraping every bit of dough and spreading it evenly in the pan.
- Sharp knife: Makes neat squares once the bars are cooled.
If you don’t have a 9×13 pan, two 8×8 pans work in a pinch. I’ve even baked a batch in a rimmed cookie sheet for thinner, crispier bars—just watch the bake time. For easy cleanup, line your pan with parchment and leave a little overhang on the sides to lift the bars out in one piece. And don’t forget: hand mixers last longer if you keep the beaters untangled (learned that the hard way!).
How to Make S’mores Cookie Bars – Step by Step
-
Prep Your Pan and Oven (5 minutes):
- Preheat your oven to 350°F (175°C). Line a 9×13-inch (23x33cm) baking pan with parchment paper, leaving a little overhang for easy lifting. Lightly spray or butter the parchment for extra insurance (especially if your bars tend to stick).
-
Mix Dry Ingredients (3 minutes):
- In a medium bowl, whisk together 2 1/2 cups (315g) all-purpose flour, 1 1/2 cups (150g) graham cracker crumbs, 1 teaspoon (5g) baking soda, and 1/2 teaspoon (3g) salt. Set aside—this blend is what gives the bars their signature s’mores taste.
-
Cream Butter and Sugars (3-4 minutes):
- In a large mixing bowl, cream 1 cup (225g) unsalted butter with 1 cup (200g) brown sugar and 1/2 cup (100g) granulated sugar. Use a hand mixer or stand mixer on medium speed until light and fluffy—about 2-3 minutes. If mixing by hand, just go until it’s well combined and a bit lighter in color.
-
Add Eggs and Vanilla (2 minutes):
- Beat in 2 large eggs, one at a time, making sure each is fully incorporated. Add 2 teaspoons (10ml) vanilla extract. The batter should look creamy and smooth (don’t worry if it looks a little curdled—it’ll come together with the dry mix).
-
Combine Wet and Dry Ingredients (2-3 minutes):
- Gradually add the flour-graham mixture to your wet ingredients, mixing on low until just combined. Scrape down the sides with a spatula to make sure no pockets of flour remain. The dough will be thick and a bit sticky—totally normal!
-
Add the S’mores Magic (2 minutes):
- Fold in 1 cup (170g) milk chocolate chips, 1 cup (170g) semi-sweet chocolate chips, and 2 cups (100g) mini marshmallows. I like to reserve a small handful of each for sprinkling on top—the more the merrier, right?
-
Spread and Layer (3 minutes):
- Press about two-thirds of the dough evenly into the bottom of your prepared pan. Use the back of a spoon or your hands (lightly dampen your fingers if it sticks). Scatter extra marshmallows, chocolate chips, and broken graham cracker pieces over this layer.
- Dollop the remaining dough on top in spoonfuls and gently spread. It won’t cover everything—that’s okay! Those little pockets let the marshmallows get toasty and golden.
-
Bake to Perfection (25-30 minutes):
- Bake in the center of the oven for 25-30 minutes, until the top is golden brown and the edges look set. The marshmallows on top should be a little toasty. If you like extra-gooey centers, pull them at 25 minutes; for firmer bars, wait for 30. The middle may seem a little soft, but it’ll firm up as it cools.
-
Cool and Slice (at least 30 minutes):
- Let the pan cool on a wire rack. For the cleanest slices, wait until the bars are completely cool (trust me, I’ve rushed it and ended up with a delicious mess). Lift out using the parchment, then slice into squares with a sharp knife.
Troubleshooting: If your bars seem too gooey, chill them in the fridge for 30 minutes before slicing. If the marshmallows brown too quickly, tent loosely with foil for the last 10 minutes of baking. And if you “accidentally” eat the warm, gooey edge pieces straight from the pan—no judgment!
Pro Baking Tips & Techniques for S’mores Cookie Bars
After making these s’mores cookie bars for countless get-togethers (and just because days), I’ve picked up a few tricks that make them come out perfectly every time. Here’s what I’ve learned along the way:
- Don’t overbake: The top should be golden and set, but the center will look a little soft. Overbaking dries them out, so pull the pan when the edges are done and the middle has a slight jiggle—like brownies.
- Room temperature ingredients matter: Cold butter and eggs make the dough tough and uneven. Set them out 30 minutes before you start for the best texture.
- Layering is key: Pressing most of the dough into the pan and dolloping the rest on top lets the marshmallows peek through and toast. If you spread the top layer too thick, you’ll miss that gooey, golden magic.
- Let them cool before slicing: I know, it’s tough! But if you want defined bars (and not a sticky s’mores avalanche), patience pays off. For extra-clean slices, chill in the fridge before cutting.
- Mix up your chocolate: Use a combo of milk, dark, or even white chocolate chips for a fun twist. I sometimes chop up leftover Halloween candy bars—waste not, want not!
- Use parchment for easy removal: Every time I skip this, I regret it. The marshmallows like to stick, so parchment is your best friend for clean, Instagram-worthy bars.
Multitasking tip: While the bars are baking, set out your serving platter and make a quick hot chocolate to go with them. The timing works out perfectly. If you find your marshmallows are melting too much (sometimes happens with big brands), try refrigerating them before folding into the dough. That little trick helps them hold their shape as they bake. And hey, even if you make a mistake (like I once did and forgot the graham crumbs), the end result is still a delicious, chocolatey treat—just not quite s’mores!
Variations & Adaptations for Every Taste
One of my favorite things about this s’mores cookie bars recipe is how easy it is to tweak for different tastes or dietary needs. Here are some fun ways to make the recipe your own:
- Gluten-Free S’mores Bars: Swap the all-purpose flour for a 1:1 gluten-free baking blend and use gluten-free graham crackers. I’ve done this for celiac friends, and they turn out just as chewy and delicious.
- Peanut Butter S’mores Bars: Add 1/2 cup (130g) creamy peanut butter to the dough before mixing in the dry ingredients. You can also sprinkle chopped peanut butter cups on top for an extra treat. It’s like a peanut butter cup met a s’more and fell in love.
- Autumn Spice Twist: Stir 1 teaspoon ground cinnamon and 1/4 teaspoon ground nutmeg into the dry ingredients for a cozy, fall-inspired flavor. I’ve even added a pinch of ground ginger for a little extra warmth on chilly nights.
- Vegan/Dairy-Free Version: Use vegan butter sticks, flax eggs (2 tablespoons ground flax + 5 tablespoons water), dairy-free chocolate chips, and vegan marshmallows. The texture is slightly different, but still amazing!
- Campfire Classic: For extra authenticity, try adding a few broken pieces of actual chocolate bars (like Hershey’s) instead of chips. They melt unevenly for that real-deal s’mores effect.
Personally, my favorite variation is the autumn spice version—I made it for a fall book club, and everyone wanted the recipe. Don’t be afraid to get creative and make these bars your own!
Serving & Storage Suggestions
These s’mores cookie bars taste best slightly warm, when the chocolate is still a little melty and the marshmallows are extra gooey. I love serving them straight from the pan at room temperature, or popping them in the microwave for 10 seconds if they’ve cooled down. For parties, cut them into small squares and arrange on a rustic wooden board—super Pinterest-worthy!
If you want to go all out, pair with hot apple cider, coffee, or even a scoop of vanilla ice cream (trust me, that’s next-level comfort food). They also make a killer addition to fall dessert tables alongside pumpkin pie or caramel apples.
To store, keep the bars in an airtight container at room temperature for up to 3 days. For longer storage, refrigerate for up to a week—just let them come to room temp before serving, or warm gently in the microwave. They also freeze beautifully: wrap tightly in plastic and store in a freezer bag for up to 2 months. Thaw at room temp or microwave individual bars for a quick treat. The flavors actually deepen after a day or two, so don’t worry if you’re baking ahead!
Nutritional Information & Benefits
Here’s a quick look at what you get in each s’mores cookie bar (based on 24 bars per batch):
- Calories: about 220
- Fat: 10g
- Carbohydrates: 31g
- Protein: 2g
- Sugar: 19g
- Contains: wheat, eggs, dairy (use adaptions for allergies)
While these are definitely a treat (hey, it’s dessert!), they do offer some perks. Marshmallows are fat-free, and graham crackers add a bit of whole grain. You can always use lower-sugar chocolate or reduce the sugar by a couple of tablespoons if you’d like. I love knowing exactly what’s in my dessert—no weird preservatives or unpronounceable ingredients. If you need to watch allergens, just sub in your favorite alternatives for flour, chocolate, or marshmallows (vegan and gluten-free versions work great). As always, moderation is key, but these bars are worth savoring—sometimes dessert is good for the soul, you know?
Conclusion
If you’re searching for an easy fall dessert that delivers on both nostalgia and flavor, this s’mores cookie bars recipe is a total winner. It’s the kind of recipe that comes together in a flash but tastes like you spent all afternoon baking. Whether you’re making them for a Halloween party, a Thanksgiving treat, or just a cozy night in, there’s something about that gooey chocolate and toasted marshmallow combo that brings everyone together.
Don’t be afraid to mix things up—add your own favorite candies, spices, or gluten-free swaps. I love these bars because they’re so reliable, and every time I share them, someone asks for the recipe. So, grab your ingredients, preheat that oven, and treat yourself to a batch of fall bliss. And hey, if you try a twist on this recipe, let me know in the comments—I’m always up for a new s’mores adventure!
Bake happy, share generously, and remember: a little gooey chocolate goes a long way to making any day feel special.
FAQs
Can I make these s’mores cookie bars ahead of time?
Absolutely! Bake the bars, let them cool completely, then store them in an airtight container for up to 3 days at room temperature or refrigerate for up to a week. The flavors get even better after a day.
How do I get perfectly clean slices?
Let the bars cool completely—chilling in the fridge helps, too. Use a sharp knife and wipe it clean between cuts for those neat bakery-style edges.
Can I use jumbo marshmallows instead of minis?
Mini marshmallows work best, but you can chop jumbo marshmallows into smaller pieces if that’s what you have. Just try to keep the chunks evenly sized for even melting.
What’s the best way to freeze these bars?
Once cooled and sliced, wrap bars individually in plastic wrap and store in a freezer-safe bag or container. Thaw at room temperature or microwave for about 10 seconds for that fresh-baked feel.
Are there any nut-free adaptations?
Yes! The recipe as written is nut-free, but always check your graham crackers and chocolate chips to be sure. For extra peace of mind, use allergen-friendly brands like Enjoy Life.
Pin This Recipe!

S’mores Cookie Bars

These s’mores cookie bars capture all the nostalgic flavors of classic campfire s’mores in an easy, oven-baked dessert bar. Perfect for fall parties, potlucks, or cozy nights in, they’re layered with graham cracker crumbs, gooey marshmallows, and melty chocolate in a soft cookie dough base.
- Prep Time: 15 minutes
- Cook Time: 30 minutes
- Total Time: 45 minutes
- Yield: 24 bars 1x
- Category: Dessert
- Cuisine: American
Ingredients
- 1 cup (225g) unsalted butter, softened
- 1 cup (200g) brown sugar, packed
- 1/2 cup (100g) granulated sugar
- 2 large eggs, room temperature
- 2 teaspoons (10ml) pure vanilla extract
- 2 1/2 cups (315g) all-purpose flour
- 1 1/2 cups (150g, about 12 full sheets) graham cracker crumbs
- 1 teaspoon (5g) baking soda
- 1/2 teaspoon (3g) salt
- 1 cup (170g) milk chocolate chips
- 1 cup (170g) semi-sweet chocolate chips
- 2 cups (100g) mini marshmallows
- 1/2 cup (50g) extra graham cracker pieces, broken into chunks (for topping)
- Extra marshmallows and chocolate chips (a small handful, for topping)
Instructions
- Preheat your oven to 350°F (175°C). Line a 9×13-inch baking pan with parchment paper, leaving an overhang for easy lifting. Lightly spray or butter the parchment.
- In a medium bowl, whisk together flour, graham cracker crumbs, baking soda, and salt. Set aside.
- In a large mixing bowl, cream the butter, brown sugar, and granulated sugar with a hand mixer or stand mixer on medium speed until light and fluffy (2-3 minutes).
- Beat in eggs, one at a time, then add vanilla extract. Mix until creamy and smooth.
- Gradually add the dry ingredients to the wet ingredients, mixing on low until just combined. Scrape down the sides as needed.
- Fold in milk chocolate chips, semi-sweet chocolate chips, and mini marshmallows, reserving a small handful of each for topping.
- Press about two-thirds of the dough evenly into the bottom of the prepared pan. Scatter extra marshmallows, chocolate chips, and broken graham cracker pieces over this layer.
- Dollop the remaining dough on top in spoonfuls and gently spread. It’s okay if some marshmallows and chocolate peek through.
- Bake for 25-30 minutes, until the top is golden brown and the edges look set. The center may look slightly soft but will firm up as it cools.
- Let the pan cool on a wire rack. For clean slices, wait until completely cool, then lift out using the parchment and cut into squares with a sharp knife.
Notes
For gluten-free bars, use a 1:1 gluten-free flour blend and gluten-free graham crackers. For dairy-free, substitute vegan butter and dairy-free chocolate chips. Don’t overbake—the center should look slightly soft for gooey bars. Let bars cool completely before slicing for clean edges. Store in an airtight container at room temperature for up to 3 days, refrigerate for up to a week, or freeze for up to 2 months.
Nutrition
- Serving Size: 1 bar (1/24 of recipe)
- Calories: 220
- Sugar: 19
- Sodium: 120
- Fat: 10
- Saturated Fat: 6
- Carbohydrates: 31
- Fiber: 1
- Protein: 2
Keywords: s'mores, cookie bars, fall dessert, easy dessert, party dessert, marshmallow, chocolate, graham cracker, oven baked, potluck, Halloween, Thanksgiving, American dessert


