Introduction
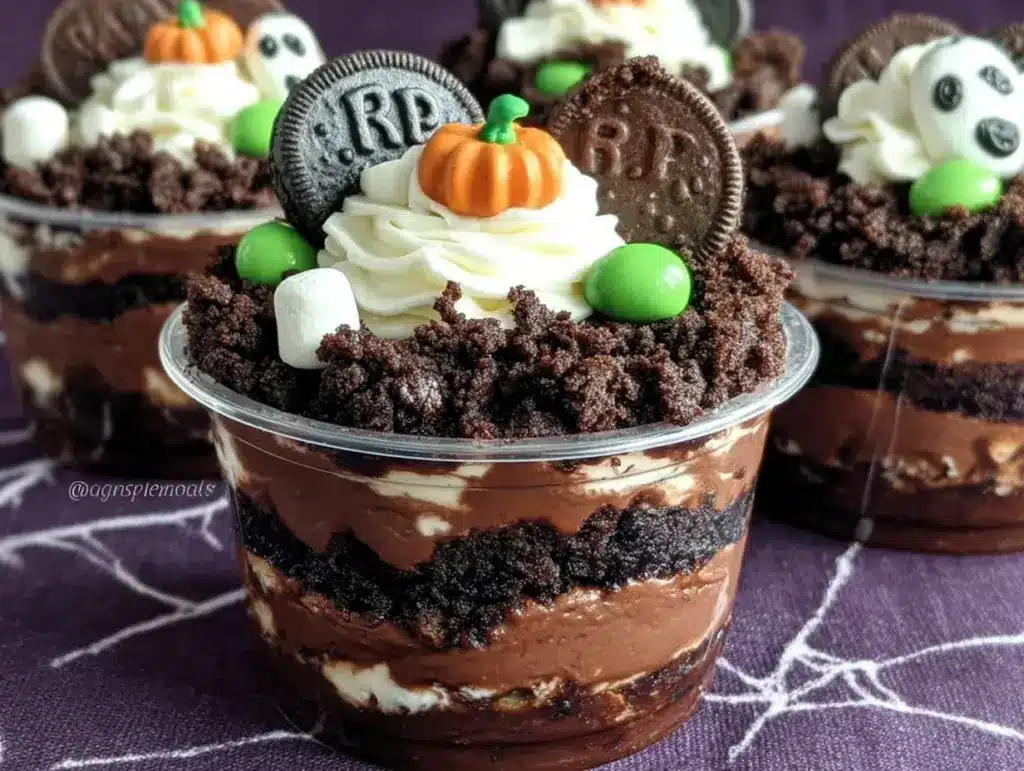
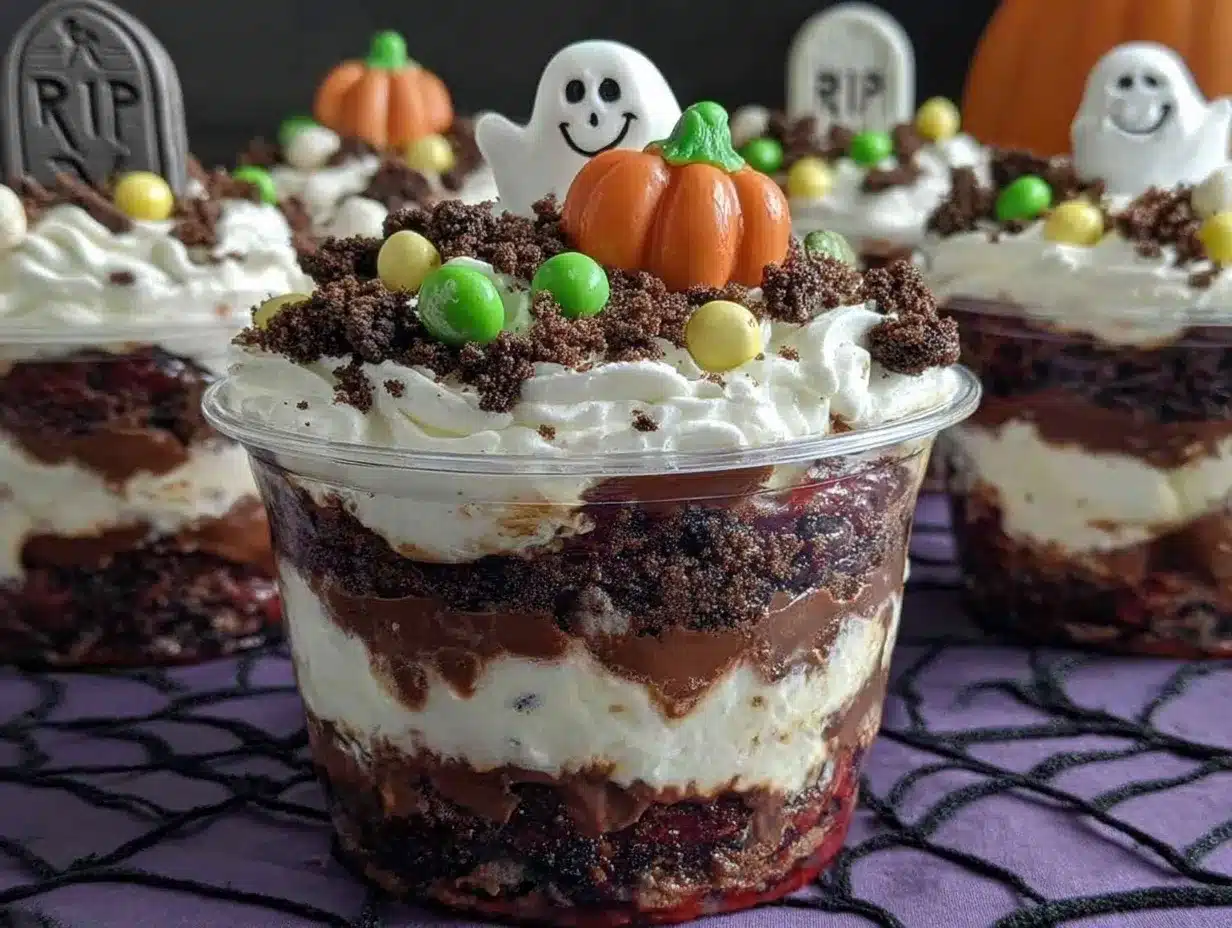
There’s something about Halloween that brings out the creative, spooky side of all of us. It’s the perfect time to whip up festive treats that are eerie but oh-so-delicious. Enter the Spooky Halloween Graveyard Dirt Cups—a dessert that’s as fun to make as it is to eat! With layers of rich chocolate pudding, crushed Oreo “dirt,” and some creepy edible decorations, these cups will be the star of your Halloween party. Trust me, they’re a guaranteed crowd-pleaser, especially with kids who’ll love the spooky factor!
The first time I made these spooky treats was for my niece’s Halloween party. I wanted something quick, easy, and festive, but also something that could double as a fun activity for the little ones. The result? A table full of giggles, chocolatey smiles, and zero leftovers. These dirt cups have become a tradition in my home every October, and I’m excited to share my recipe with you!
Whether you’re hosting a Halloween party, need a quick dessert for a fall gathering, or simply want to surprise your family with a spooky treat, these Halloween dirt cups are just the thing. They’re easy to customize, take minimal effort, and are perfect for adding a festive touch to your celebrations. Ready to make your Halloween extra memorable? Let’s dig in (pun intended)!
Why You’ll Love This Recipe
- Super Easy to Make: With just a few simple ingredients and steps, you’ll have festive dirt cups ready in no time!
- Perfect for Halloween Parties: Whether it’s for kids or adults, everyone loves these spooky treats—they’re always the first to disappear from the dessert table.
- Customizable: You can easily swap out ingredients or decorations to match your theme or dietary preferences, making it a versatile recipe.
- Interactive Fun: Decorating the dirt cups can be a fun activity for kids (or kids at heart). Let everyone create their own spooky masterpiece!
- Rich and Decadent: The combination of creamy chocolate pudding, crunchy Oreo crumbs, and gummy candy is indulgent and irresistible.
- Kid-Approved: This recipe is a favorite among kids, thanks to its sweet taste and playful presentation.
What sets this recipe apart is the balance of spooky fun and delicious flavors. The crushed Oreos mimic dirt perfectly, while the pudding offers a smooth, chocolatey base. Plus, the creative decorations—like gummy worms and cookie tombstones—add an extra layer of Halloween magic.
If you’re looking for a dessert that’s more than just tasty, these dirt cups are a no-brainer. They bring the Halloween spirit to life and are sure to make your party unforgettable. So grab your apron, and let’s start creating some creepy, crawly, and delicious magic!
What Ingredients You Will Need
This recipe uses simple ingredients to create a spooky and delicious Halloween treat. Here’s what you’ll need:
- Chocolate pudding mix: Instant pudding works perfectly for this recipe. You’ll need about 2 packs (3.4 ounces each).
- Milk: Use whole milk for a creamier pudding, but you can opt for a dairy-free alternative like almond or oat milk.
- Oreo cookies: Crushed to resemble dirt. Any chocolate sandwich cookies will work, but Oreos are the classic choice.
- Gummy worms: For that creepy, crawly effect. Choose colorful ones for a more playful look.
- Chocolate wafer cookies: These will act as your tombstones. You can write spooky messages on them with edible markers.
- Whipped cream: Perfect for layering or adding a fluffy touch to the cups.
- Candy pumpkins: Optional, but they add a festive Halloween vibe.
- Green shredded coconut: Mix unsweetened shredded coconut with green food coloring for a grass-like effect.
- Chocolate chips: Optional, but adding them to the pudding layer adds even more richness.
These ingredients are pantry staples and easy to find at any grocery store. If you’re looking for substitutions, you can use gluten-free cookies, sugar-free pudding mix, or vegan whipped cream to meet dietary needs. Make sure to pick up edible markers or gel icing for decorating your tombstones and adding spooky designs.
Equipment Needed
This recipe doesn’t require any fancy tools, making it ideal for a quick and easy Halloween treat:
- Mixing bowls: For preparing the pudding and mixing the crushed Oreos.
- Whisk: To ensure smooth pudding without any lumps.
- Food processor: Optional, but helpful for crushing Oreos quickly. A zip-top bag and rolling pin work too.
- Serving cups or jars: Clear cups work best to show off the layered dirt cup effect.
- Spatula: To evenly layer the pudding and crushed Oreos.
- Edible markers or icing pens: For decorating tombstones and adding spooky details.
If you don’t have a food processor, don’t worry—you can crush Oreos by placing them in a zip-top bag and rolling over them with a rolling pin. Clear plastic cups or mason jars work great for serving, and you can find edible markers at most craft or baking stores.
Preparation Method
- Prepare the chocolate pudding: In a medium-sized mixing bowl, combine the chocolate pudding mix with the required amount of cold milk (usually 2 cups per pack). Whisk for 2 minutes until the pudding thickens. Set aside in the refrigerator to chill for about 10 minutes.
- Crush the Oreos: Place the Oreo cookies in a food processor and pulse until they resemble fine crumbs. If using a zip-top bag and rolling pin, seal the bag tightly and crush the cookies manually. Reserve about 1/4 cup of crumbs for topping.
- Prepare the “grass”: Mix a few drops of green food coloring with shredded coconut until evenly coated. Set aside.
- Set up your serving cups: Use clear cups or small jars for the best visual effect. Spoon a layer of chocolate pudding into the bottom of each cup, filling about 1/3 of the way.
- Add Oreo “dirt”: Sprinkle a layer of crushed Oreos on top of the pudding, covering it completely.
- Repeat the layers: Add another layer of pudding, followed by more Oreo crumbs. Top with a final layer of pudding and a thin sprinkle of Oreo crumbs for the finishing “dirt” effect.
- Decorate your graveyard: Use chocolate wafer cookies to create tombstones. Write spooky messages like “RIP” or “Boo!” with edible markers or gel icing. Gently insert the tombstones into the top layer of dirt.
- Add creepy details: Place gummy worms on the surface to make them look like they’re crawling out of the dirt. Sprinkle green coconut “grass” around the tombstones, and add candy pumpkins for extra flair.
- Chill and serve: Refrigerate the dirt cups for at least 30 minutes to allow them to set. Serve cold and enjoy the spooky fun!
Cooking Tips & Techniques
Here are some helpful tips to ensure your Spooky Halloween Dirt Cups turn out perfectly every time:
- Use room temperature ingredients: Ensure the milk is cold and the pudding mix is fresh for the best texture.
- Crush the Oreos evenly: If using a rolling pin, be careful not to leave big chunks. You want a fine, even texture for the dirt effect.
- Make the decorations ahead: Prepare the tombstones, grass, and other decorations before assembling the cups to save time during preparation.
- Layer neatly: Use a small spatula or spoon to create clean layers of pudding and cookie crumbs for a polished look.
- Experiment with flavors: Try adding a splash of vanilla extract or espresso powder to the pudding for a unique twist.
Keep an eye on the consistency of your pudding—it should be smooth and thick, but not runny. If it doesn’t set properly, chill it for a few more minutes before layering. And don’t forget to have fun with the decorations—the spookier, the better!
Variations & Adaptations
One of the best things about Halloween Dirt Cups is how customizable they are. Here are some fun variations to try:
- Gluten-Free: Use gluten-free chocolate cookies instead of Oreos and ensure your pudding mix is certified gluten-free.
- Vegan-Friendly: Substitute regular pudding mix with a dairy-free alternative and use almond or coconut milk. Swap the whipped cream for a plant-based version.
- Spooky Colors: Add food coloring to the pudding to create eerie green or orange layers instead of classic chocolate.
- Crunchy Add-Ins: Mix crushed pretzels or chocolate chips into the Oreo layer for added texture.
- Seasonal Flair: Swap the gummy worms for Halloween-themed candies like candy eyeballs or skeleton gummies.
Personally, I’ve tried making a pumpkin spice version of these dirt cups by using pumpkin pudding instead of chocolate. It was a hit at my fall-themed party, and I highly recommend it if you’re looking for a seasonal twist.
Serving & Storage Suggestions
Here’s how to serve and store your spooky Halloween dirt cups:
- Serving: Serve these chilled for the best flavor. Arrange them on a Halloween-themed platter for a festive display. You can even add a drizzle of chocolate syrup on top for extra flair.
- Pairings: Serve alongside a warm cup of apple cider or pumpkin spice latte for the perfect fall treat.
- Storage: Cover the cups with plastic wrap and store them in the refrigerator for up to 3 days. Avoid adding gummy worms or decorations until just before serving to keep them fresh.
- Freezing: These cups don’t freeze well due to the pudding texture, so it’s best to make them fresh.
- Reheating: Not applicable, but you can let them sit at room temperature for 10 minutes before serving if they feel too cold.
The flavors of these dirt cups actually get better after sitting in the fridge for a few hours, so you can make them ahead of time to save yourself some stress on party day!
Nutritional Information & Benefits
While these spooky treats are indulgent, they’re perfect for special occasions. Here’s a quick look at the nutritional highlights:
- Calories: Approximately 250 calories per cup (may vary based on ingredients).
- Key Nutrients: The milk and pudding provide calcium, and the cocoa in the pudding offers antioxidants.
- Dietary Options: Easily adaptable to gluten-free or vegan diets with simple substitutions.
- Allergens: Contains dairy, gluten (unless substitutes are used), and may contain traces of nuts depending on the candy and cookie brands used.
These dirt cups are definitely a treat, but they’re perfect for indulging in moderation, especially during a festive holiday like Halloween!
Conclusion
Spooky Halloween Dirt Cups are the ultimate festive treat that combines fun, creativity, and deliciousness. Whether you’re planning the perfect Halloween party or just want to surprise your family with something unique, this recipe is a total show-stopper. The layers of chocolate pudding, Oreo crumbs, and creepy decorations come together to create a dessert that’s both spine-chilling and satisfying.
I personally adore this recipe because it brings everyone together—young or old, everyone loves making and eating these spooky treats. Plus, the ease of preparation means you’ll have more time to enjoy the festivities rather than being stuck in the kitchen.
So, what are you waiting for? Give these Spooky Halloween Dirt Cups a try and let your creativity shine. Don’t forget to share your spooky creations in the comments below—I can’t wait to see how you make them your own! Happy Halloween and happy haunting!
FAQs
Can I make Halloween Dirt Cups ahead of time?
Yes, you can prepare the pudding and cookie layers up to 2 days in advance. Add the decorations just before serving for the freshest look.
What can I use as a substitute for Oreos?
If you need a gluten-free alternative, try using gluten-free chocolate cookies. For a different flavor, you can use graham crackers or chocolate wafers instead.
How do I make these dirt cups healthier?
You can use sugar-free pudding mix and low-fat milk to reduce the calorie count. Substitute regular Oreos with a healthier cookie option and opt for fruit-based decorations instead of candy.
Can I use homemade pudding instead of instant pudding?
Absolutely! Homemade pudding works just as well, though it may take a little extra time. Make sure it’s properly chilled before layering in your dirt cups.
How can I make the tombstones stand upright in the cup?
Press the cookie tombstones gently into the top layer of pudding and Oreo crumbs. If needed, use a bit of melted chocolate or icing to secure them in place.
Pin This Recipe!

Spooky Halloween Dirt Cups

A fun and festive Halloween dessert featuring layers of chocolate pudding, crushed Oreo ‘dirt,’ and spooky edible decorations. Perfect for parties and loved by kids and adults alike!
- Prep Time: 15 minutes
- Cook Time: 0 minutes
- Total Time: 45 minutes
- Yield: 8 servings 1x
- Category: Dessert
- Cuisine: American
Ingredients
- 2 packs (3.4 ounces each) chocolate pudding mix
- 4 cups cold milk
- 20 Oreo cookies, crushed
- 1/4 cup reserved Oreo crumbs for topping
- Gummy worms
- Chocolate wafer cookies
- Whipped cream
- Candy pumpkins (optional)
- Green shredded coconut (unsweetened coconut mixed with green food coloring)
- Chocolate chips (optional)
Instructions
- Prepare the chocolate pudding by combining the pudding mix with cold milk in a medium-sized mixing bowl. Whisk for 2 minutes until thickened and refrigerate for 10 minutes.
- Crush the Oreo cookies using a food processor or by placing them in a zip-top bag and crushing them with a rolling pin. Reserve 1/4 cup of crumbs for topping.
- Mix shredded coconut with green food coloring to create ‘grass’ and set aside.
- Set up clear serving cups or jars. Spoon a layer of chocolate pudding into the bottom of each cup, filling about 1/3 of the way.
- Sprinkle a layer of crushed Oreos on top of the pudding, covering it completely.
- Repeat the layers: add another layer of pudding, followed by more Oreo crumbs. Top with a final layer of pudding and a thin sprinkle of Oreo crumbs.
- Decorate the cups by creating tombstones with chocolate wafer cookies. Write spooky messages like ‘RIP’ or ‘Boo!’ using edible markers or gel icing. Insert the tombstones into the top layer of dirt.
- Add gummy worms to the surface to make them look like they’re crawling out of the dirt. Sprinkle green coconut ‘grass’ around the tombstones and add candy pumpkins for extra flair.
- Refrigerate the dirt cups for at least 30 minutes to set. Serve cold and enjoy!
Notes
[‘Use room temperature ingredients for the best texture.’, ‘Prepare decorations ahead of time to save time during assembly.’, ‘Experiment with flavors by adding vanilla extract or espresso powder to the pudding.’, ‘Ensure pudding is thick and smooth before layering.’]
Nutrition
- Serving Size: 1 cup
- Calories: 250
- Sugar: 25
- Sodium: 300
- Fat: 8
- Saturated Fat: 4
- Carbohydrates: 38
- Fiber: 2
- Protein: 4
Keywords: Halloween dessert, spooky treats, dirt cups, chocolate pudding, Oreo dessert, Halloween party food


