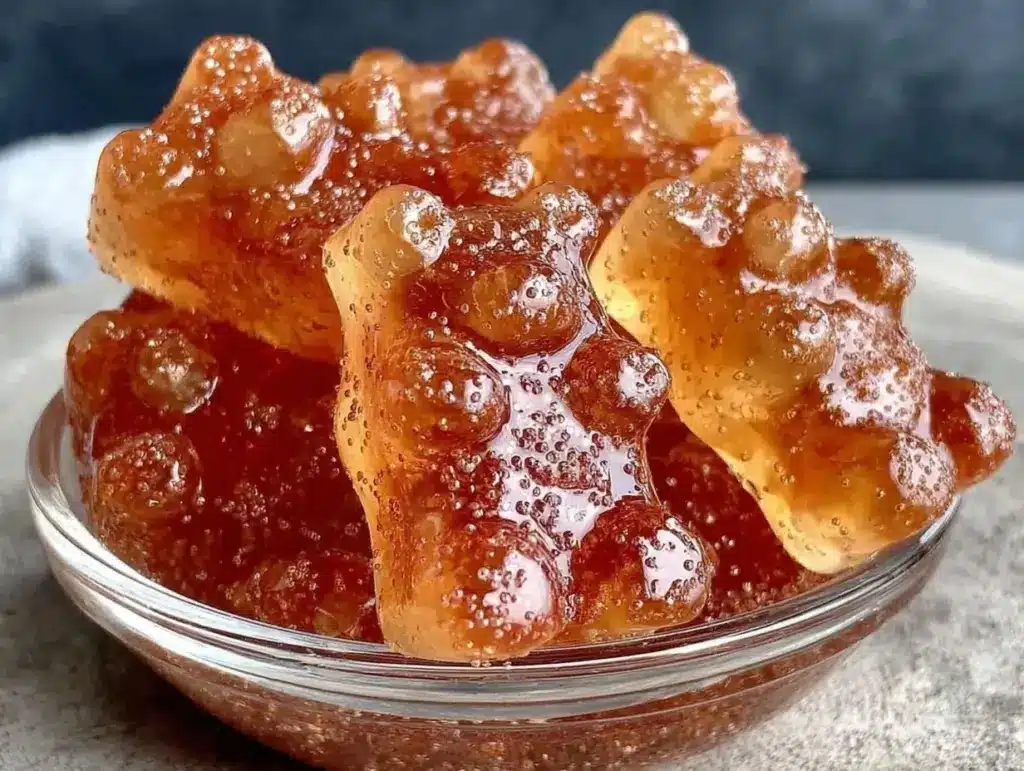
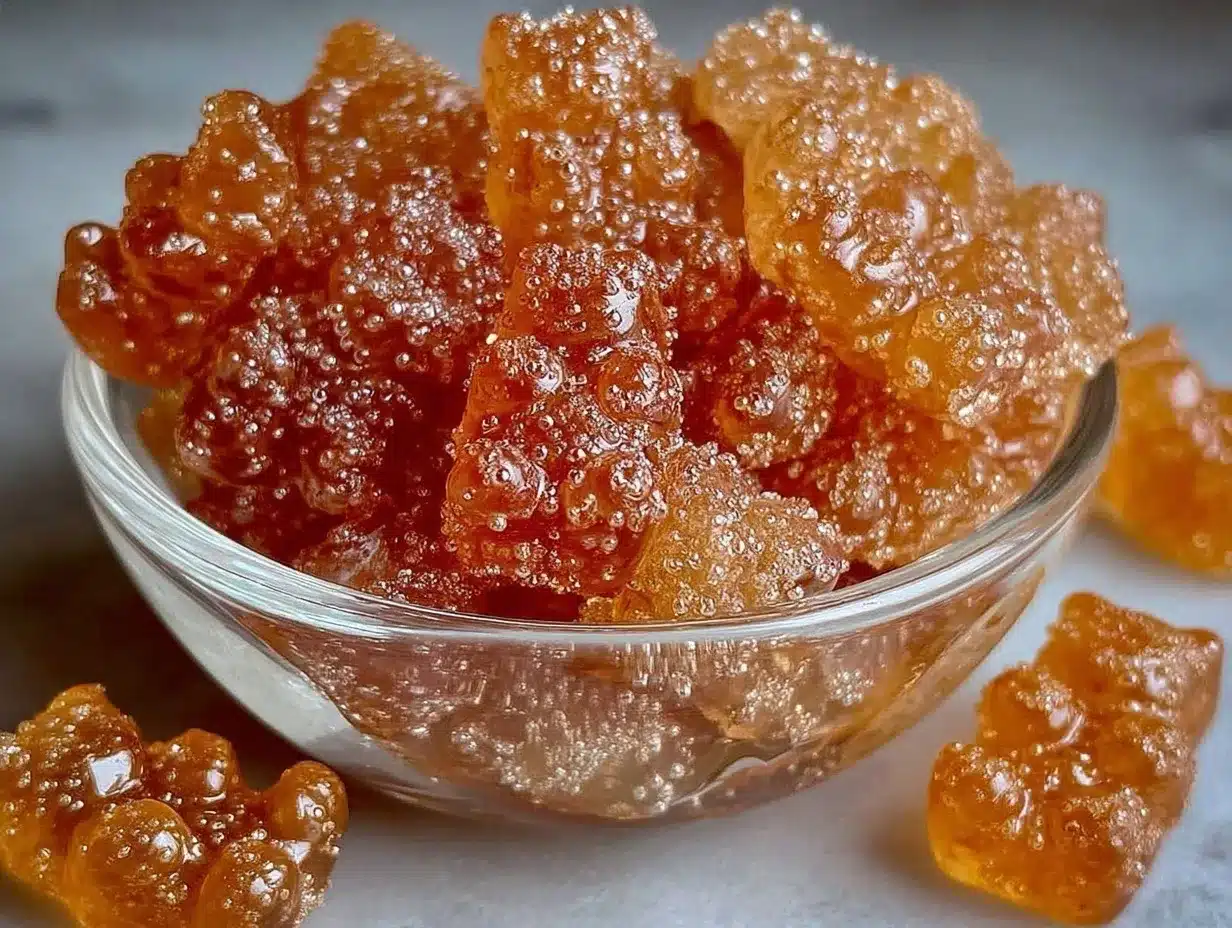
The fizz of champagne captured in a tiny, chewy gummy bear? Yes, please! The first time I made these irresistible champagne gummy bears, I was honestly blown away by how effortlessly luxurious such a simple treat felt. The sparkling bubbles, the subtle fruity sweetness, and that playful chewiness—it’s like a party in your mouth, no glass needed. I first whipped up this recipe for a girls’ night, and it quickly became the star of the evening (okay, maybe after the actual champagne). These gummies bring a fun twist to classic candy, and you know, they’re perfect for celebrations, gifts, or just a cheeky little treat when you want something special but easy. After playing with the recipe several times, tweaking the gelatin bloom and the champagne type, I can confidently say this homemade sparkling treat is a must-try.
What I love most about this champagne gummy bears recipe is how it combines simple ingredients with an unexpected fizz that makes every bite feel festive. Plus, there’s something cozy about making candy from scratch—it’s like crafting a tiny edible memory. If you’re after a unique party favor or a sweet surprise for yourself, these gummies won’t disappoint. You’ll find the recipe straightforward, with handy tips from my own kitchen experiments to help you nail that perfect texture and flavor. Trust me, once you make these, you’ll wonder why you didn’t start sooner!
Whether you’re a bubbly lover or just someone who enjoys a fun twist on candy, these champagne gummy bears are a delightful blend of sophistication and playfulness. Let’s get started and bring a little sparkle into your homemade treats!
Why You’ll Love This Champagne Gummy Bears Recipe
After testing this champagne gummy bears recipe multiple times, I can confidently say it’s a winner for many reasons. Here’s why you’ll be hooked too:
- Quick & Easy: From start to finish, these gummies take under 30 minutes to make, perfect for last-minute party prep or spontaneous fun.
- Simple Ingredients: No fancy stuff needed—champagne, gelatin, sugar, and a bit of lemon juice. You’ve probably got most of it in your pantry or fridge.
- Perfect for Celebrations: Whether it’s New Year’s Eve, bridal showers, or just a chic weekend treat, these sparkling gummies fit the bill.
- Crowd-Pleaser: They’re a hit with both adults and teens (if you want to keep it kid-friendly, swap the champagne with sparkling grape juice).
- Unbelievably Delicious: The combination of bubbly champagne flavor and chewy texture is downright addictive.
What sets this recipe apart is the way it captures champagne’s natural fizz and delicate flavor without any bitterness or overpowering alcohol taste. I learned that gently warming the champagne and carefully blooming the gelatin makes all the difference. Plus, using a silicone gummy bear mold gives you those perfect little shapes that are irresistibly fun to pop. Honestly, these gummies are the kind of treat that makes you close your eyes and smile after the first bite. They bring a little sparkle to your day without the fuss of opening a bottle.
What Ingredients You Will Need
This champagne gummy bears recipe uses simple, wholesome ingredients that come together to create a bold, bubbly flavor and satisfying chew. No complicated shopping trips—just a few staples and your favorite bottle of bubbly.
- Champagne or Sparkling Wine – 1 cup (240 ml) (Choose a brut or demi-sec for balanced sweetness; I prefer Veuve Clicquot for a smooth finish.)
- Unflavored Gelatin Powder – 3 tablespoons (about 24 grams) (Look for Knox or Great Lakes gelatin for the best texture.)
- Granulated Sugar – 2 tablespoons (25 grams) (Adds just the right amount of sweetness without overpowering the champagne flavor.)
- Fresh Lemon Juice – 1 teaspoon (5 ml) (Brightens the flavor and balances the sweetness.)
- Water – 2 tablespoons (30 ml) (Used to bloom the gelatin properly.)
- Optional: Edible Gold Dust or Sparkling Sugar – for decorating (adds a glam touch for special occasions!)
If you want to keep things kid-friendly or alcohol-free, swap the champagne for sparkling white grape juice or any sparkling fruit juice. For a gluten-free version, all these ingredients are naturally gluten-free, so no worries there! Just be sure your gelatin brand is certified gluten-free if you have sensitivities.
Equipment Needed
- Silicone Gummy Bear Mold: Essential for those classic gummy bear shapes. Silicone molds are easy to work with and pop the gummies out effortlessly. I’ve tried cheaper plastic molds before, and they just don’t do the job as smoothly.
- Small Saucepan: For gently warming the champagne and dissolving the sugar and gelatin.
- Mixing Bowl: To bloom the gelatin in water before adding to the warm champagne mixture.
- Whisk or Spoon: For stirring the mixture until smooth and fully combined.
- Dropper or Small Measuring Spoon: Helps fill the tiny gummy bear molds without spills or mess.
If you don’t have a dropper, a small spoon works just fine—just take your time. Also, silicone molds are quite affordable and reusable, so a great investment if you plan to make gummies often. Maintenance is easy—just wash with warm soapy water and let dry completely before storing. Avoid abrasive scrubbers to keep the molds smooth and non-stick.
Detailed Preparation Method
- Bloom the Gelatin: In a small mixing bowl, sprinkle 3 tablespoons (about 24 grams) of unflavored gelatin over 2 tablespoons (30 ml) of cold water. Let it stand for 5 minutes until it swells and becomes jelly-like. This step is crucial for that perfect gummy texture.
- Warm the Champagne: Pour 1 cup (240 ml) of champagne into a small saucepan. Add 2 tablespoons (25 grams) granulated sugar and 1 teaspoon (5 ml) fresh lemon juice. Warm the mixture over low heat, stirring gently until the sugar dissolves. Do not boil—keep it just warm enough to dissolve sugar and gelatin smoothly (about 120°F/49°C).
- Combine Gelatin and Champagne Mixture: Remove the saucepan from heat. Add the bloomed gelatin to the warm champagne mixture. Whisk gently but thoroughly until the gelatin completely dissolves, and the mixture is smooth and glossy. This usually takes about 1-2 minutes.
- Fill the Molds: Using a dropper or small spoon, carefully fill each cavity of your silicone gummy bear mold with the mixture. Work quickly but carefully to avoid bubbles or spills. You’ll get around 50-60 small gummy bears depending on mold size.
- Chill and Set: Place the filled molds in the refrigerator for at least 2 hours, or until the gummies are fully set and springy to the touch. If you’re impatient (I get it!), pop them in the freezer for about 30-45 minutes for faster results, but don’t forget them there!
- Unmold and Store: Gently pop the gummies out of the mold. If you like, toss them lightly in edible gold dust or sparkling sugar for an extra festive look. Store in an airtight container in the fridge; they’ll keep for up to 1 week.
Quick tip: If your gummies feel sticky after unmolding, dust them with a tiny bit of cornstarch or powdered sugar to prevent clumping. Also, avoid overheating the champagne above 140°F (60°C) as it can lose its bubbles and delicate flavor. Patience makes perfect here—letting the gelatin bloom fully and chill properly means those perfect chewy bites you’re craving.
Cooking Tips & Techniques
Making champagne gummy bears is surprisingly straightforward, but a few tricks can make your batch flawless. Here’s what I’ve learned from trial and error:
- Don’t Skip Blooming the Gelatin: This step is non-negotiable. It allows the gelatin to hydrate and swell, ensuring your gummies have the right bounce and chewiness. I’ve tried mixing dry gelatin directly into warm liquid before—results were rubbery and uneven.
- Use Low Heat: Champagne is delicate. Keep the heat low when dissolving sugar, and never let it boil. Overheating kills the bubbles and subtle flavor, making your gummies flat and dull.
- Fill Molds Carefully: Use a dropper or small spoon to avoid bubbles or uneven fills. Bubbles can create holes or rough textures in your gummies. If bubbles appear, tap the mold gently on the counter to release them.
- Chill Long Enough: Be patient and let the gummies fully set in the fridge. Rushing this step leads to gummy bears that are too soft or sticky. Overnight chilling is perfect if you can wait.
- Store Properly: Keep gummies in an airtight container in the fridge to maintain freshness and chew. Room temperature storage leads to stickiness or melting, especially in warmer months.
I once forgot the blooming step and learned the hard way—those gummies never set properly and stuck to everything! Also, using a good quality champagne really makes a difference. The flavor is front and center, so don’t skimp here. If you want more sparkle, try adding a tiny pinch of citric acid or a drop of champagne extract for an extra zing.
Variations & Adaptations
One of the best things about this champagne gummy bears recipe is how easy it is to customize. Here are some fun variations I’ve tried and loved:
- Flavored Gummies: Add a teaspoon of fruit puree like raspberry or peach to the champagne mixture before heating. It adds a new fruity dimension without overpowering the bubbles.
- Alcohol-Free Version: Swap champagne for sparkling white grape juice or sparkling apple cider for a family-friendly treat.
- Vegan Option: Use agar-agar powder instead of gelatin. Note that agar sets firmer and less chewy, so adjust quantities (about 1 tablespoon agar-agar for 1 cup liquid) and follow package instructions.
- Seasonal Twist: In summer, mix in a few drops of fresh mint or basil extract for a refreshing touch, or roll gummies in finely crushed freeze-dried berries for color and tang.
- Different Shapes: Use silicone molds in fun shapes like hearts, stars, or mini champagne bottles for themed parties.
Personally, I love adding a little rose water for a floral hint—just a drop or two goes a long way! If you’re feeling adventurous, try mixing a bit of flavored liqueur like elderflower or peach schnapps with the champagne for a grown-up twist. Just remember to adjust gelatin amounts if you increase liquid volume.
Serving & Storage Suggestions
Serve your champagne gummy bears chilled for the best chew and refreshing taste. They make fantastic party favors—arranged in a cute jar or mini bag with a bow, they’re an instant crowd-pleaser. Pair them with bubbly cocktails or a light dessert platter for an elevated touch.
Store gummies in an airtight container in the refrigerator. They stay fresh for about a week but honestly, they rarely last that long in my house! For longer storage, you can freeze them in a single layer on parchment paper, then transfer to a freezer-safe container for up to 2 months. Thaw in the fridge before serving to avoid condensation making them sticky.
The flavors actually mellow and deepen after a day or two in the fridge, so if you can resist, let them rest a bit before indulging. Just bring them out about 10 minutes before serving to take the chill off slightly, making the texture perfect for popping.
Nutritional Information & Benefits
Each champagne gummy bear is a small indulgence, roughly 10-15 calories per piece depending on size. The recipe is naturally gluten-free and low in fat. Since the primary flavor comes from champagne and sugar, it’s more of a treat than a health food—but hey, treats are part of a balanced life!
Champagne contains antioxidants from grapes, and the gelatin provides collagen, which some folks appreciate for skin and joint health. Of course, these benefits are minor in candy form, but it’s nice knowing your gummies aren’t packed with artificial flavors or preservatives.
If you’re mindful of sugar intake, you can reduce the granulated sugar slightly or try a natural sweetener like erythritol, though this might alter texture a bit. Always consider dietary needs—this recipe does contain alcohol, so it’s not suitable for kids or those avoiding alcohol unless substituted.
Conclusion
Making these irresistible champagne gummy bears is a fun and surprisingly easy way to add sparkle to any celebration or everyday treat moment. With just a handful of ingredients and straightforward steps, you can whip up a batch of chewy, bubbly goodies that impress without stress.
Feel free to customize the flavor, sweetness, and presentation to suit your style—whether you want a kid-friendly version or a sophisticated adult treat. I love this recipe because it brings a little magic to the kitchen and always sparks smiles around the table. Give it a try, experiment a bit, and let me know how your sparkling treats turn out!
Don’t forget to share your photos or any cool twists you come up with—I’m always excited to hear about your kitchen adventures. Happy gummy making!
FAQs About Champagne Gummy Bears
Can I use sparkling wine instead of champagne?
Absolutely! Sparkling wine or prosecco works just as well and might even be more budget-friendly. Just pick one you enjoy drinking for the best flavor.
How long do these gummy bears last?
Stored in an airtight container in the fridge, they stay fresh for up to one week. For longer storage, freeze them and thaw before serving.
Is it possible to make these gummies without alcohol?
Yes. Simply substitute champagne with sparkling white grape juice or another sparkling fruit juice to keep the bubbly flavor without alcohol.
What if my gummies are too sticky?
Dust them with a touch of cornstarch or powdered sugar to reduce stickiness. Also, ensure they fully set in the fridge before unmolding.
Can I make these gummies in different shapes?
Definitely! Silicone molds come in all sorts of fun shapes—hearts, stars, animals—you name it. Just adjust the quantity based on mold size.
Pin This Recipe!
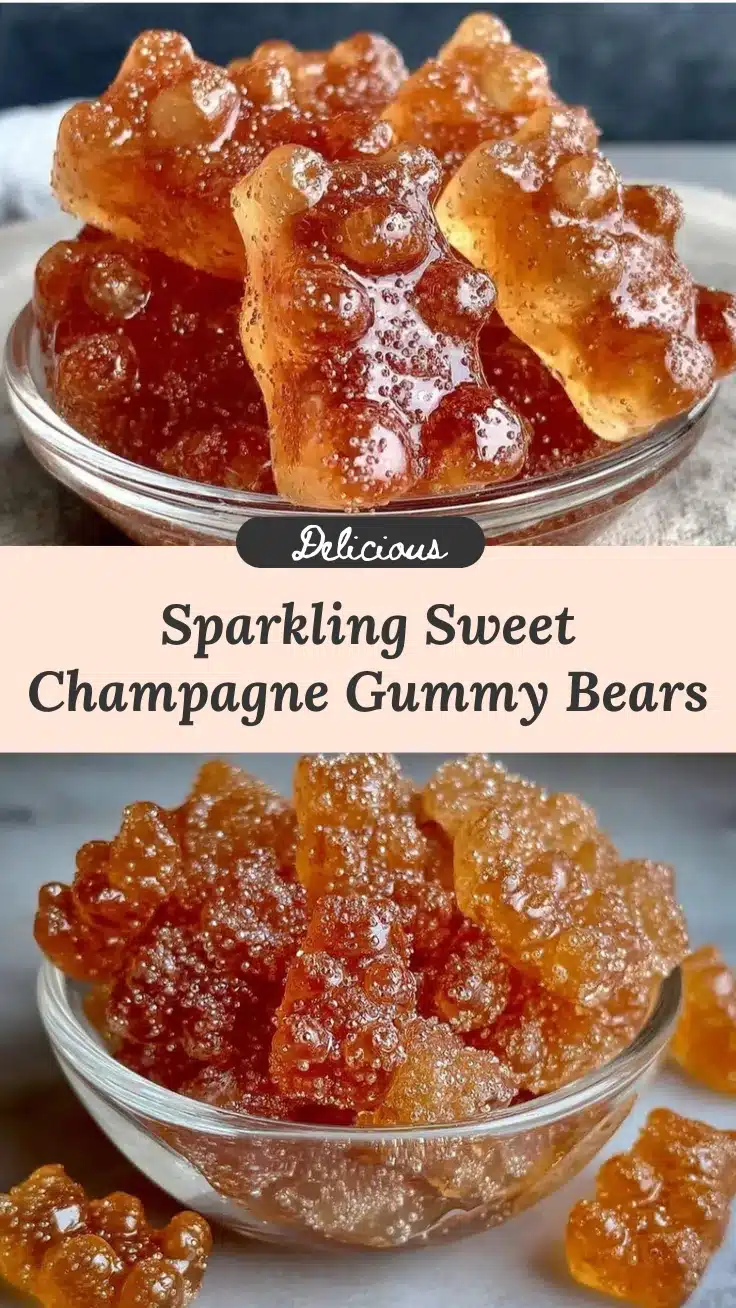
Irresistible Champagne Gummy Bears

These champagne gummy bears are a fun, chewy treat capturing the fizz and subtle sweetness of champagne in a playful candy form. Perfect for celebrations or a chic snack, they are easy to make with simple ingredients.
- Prep Time: 10 minutes
- Cook Time: 10 minutes
- Total Time: 2 hours 20 minutes
- Yield: 50-60 small gummy bears 1x
- Category: Dessert
- Cuisine: American
Ingredients
- 1 cup (240 ml) champagne or sparkling wine (brut or demi-sec recommended)
- 3 tablespoons (about 24 grams) unflavored gelatin powder
- 2 tablespoons (25 grams) granulated sugar
- 1 teaspoon (5 ml) fresh lemon juice
- 2 tablespoons (30 ml) water
- Optional: edible gold dust or sparkling sugar for decorating
Instructions
- Bloom the gelatin: Sprinkle 3 tablespoons of unflavored gelatin over 2 tablespoons of cold water in a small mixing bowl. Let it stand for 5 minutes until it swells and becomes jelly-like.
- Warm the champagne: Pour 1 cup of champagne into a small saucepan. Add 2 tablespoons granulated sugar and 1 teaspoon fresh lemon juice. Warm over low heat, stirring gently until sugar dissolves. Do not boil; keep temperature around 120°F (49°C).
- Combine gelatin and champagne mixture: Remove saucepan from heat. Add bloomed gelatin to the warm champagne mixture. Whisk gently until gelatin dissolves and mixture is smooth and glossy, about 1-2 minutes.
- Fill the molds: Using a dropper or small spoon, carefully fill each cavity of a silicone gummy bear mold with the mixture. Avoid bubbles or spills.
- Chill and set: Place molds in the refrigerator for at least 2 hours until gummies are fully set and springy. For faster setting, freeze for 30-45 minutes but do not forget them there.
- Unmold and store: Gently pop gummies out of the mold. Optionally toss in edible gold dust or sparkling sugar. Store in an airtight container in the refrigerator for up to 1 week.
Notes
Do not boil the champagne mixture to preserve bubbles and flavor. Bloom gelatin properly for the best texture. If gummies are sticky after unmolding, dust with cornstarch or powdered sugar. Store gummies in an airtight container in the fridge to maintain freshness. For alcohol-free version, substitute champagne with sparkling white grape juice or sparkling fruit juice. Agar-agar can be used as a vegan alternative but will yield a firmer texture.
Nutrition
- Serving Size: 1 gummy bear
- Calories: 1015
- Sugar: 3.5
- Carbohydrates: 3.5
- Protein: 0.5
Keywords: champagne gummy bears, homemade gummies, sparkling treats, party favors, easy candy recipe, gelatin candy, champagne candy