Introduction
The first time I bit into a crispy baked taquito, I was hooked. That perfect crunch, paired with a savory, spiced filling, instantly became my go-to snack for gatherings and quick bites. Honestly, the smell of these baking in the oven takes me back to cozy weekend afternoons spent with friends. There’s something so satisfying about homemade taquitos that just can’t be beat by anything store-bought.
I’ve made this irresistible crispy baked taquitos recipe more times than I can count, tweaking the filling and baking time until it was just right. It’s the kind of recipe that’s simple enough for weeknight snacks but impressive enough for parties. Plus, it’s baked—not fried—so you get all the crunch without the grease. Whether you’re feeding a crowd or just craving something crunchy and flavorful, these taquitos deliver every time.
If you’re someone who loves bold flavors and easy-to-make snacks, this crispy baked taquitos recipe is definitely worth trying. Trust me—it’s a winner for busy home cooks who want a little fiesta in every bite.
Why You’ll Love This Recipe
- Quick & Easy: Ready in under 30 minutes, making it perfect for last-minute snack attacks or casual get-togethers.
- Simple Ingredients: No need to hunt down exotic items; most are pantry staples or easy to find at your local store.
- Party-Perfect: These taquitos are a total crowd-pleaser, whether it’s a game day, potluck, or family dinner.
- Crispy, Not Greasy: Baked to golden perfection for that irresistible crunch, without the mess and extra calories of frying.
- Customizable Filling: You can switch up the protein and spices to suit your mood or dietary needs.
What sets this recipe apart is the balance of texture and flavor—it’s the kind of snack that makes you close your eyes to savor each bite. The secret? Rolling the taquitos tightly and giving them a light spray of oil before baking, which locks in the crunch. I’ve tested this recipe multiple times, adjusting the spices and baking times, so you get consistent, delicious results every single time.
What Ingredients You Will Need
This crispy baked taquitos recipe uses straightforward, wholesome ingredients that come together to create bold flavors and satisfying texture without fuss.
- For the Filling:
- Shredded cooked chicken (about 2 cups) – I prefer rotisserie chicken for ease and flavor
- Cream cheese (4 oz / 115g), softened – adds creaminess and binds the filling
- Shredded cheddar or Monterey Jack cheese (1 cup / 100g) – for melty, cheesy goodness
- Green chilies, canned (4 oz / 115g), drained and chopped – gives a mild kick
- Ground cumin (1 tsp) – earthy warmth
- Garlic powder (1/2 tsp) – subtle savory depth
- Onion powder (1/2 tsp) – for sweetness and balance
- Salt and pepper to taste
- For Assembly:
- Small corn or flour tortillas (12 count) – I like using corn for authentic flavor, but flour works great too
- Cooking spray or a light drizzle of olive oil – helps create that crispy crust
- Optional Toppings and Dips:
- Sour cream or Greek yogurt – for cooling creaminess
- Pico de gallo or fresh salsa – adds freshness
- Guacamole – because, well, avocado
- Baking sheet – a rimmed one works best to catch any drips and keep oven clean
- Parchment paper or silicone baking mat – prevents sticking and makes cleanup a breeze
- Mixing bowl – for combining your filling ingredients
- Spatula or spoon – for mixing and spreading the filling evenly
- Aluminum foil (optional) – useful if you want to cover halfway through baking to prevent over-browning
- Preheat your oven to 425°F (220°C). Line a baking sheet with parchment paper or a silicone mat. This helps keep your taquitos from sticking and makes cleanup easier. (5 minutes)
- Prepare the filling. In a mixing bowl, combine 2 cups of shredded cooked chicken, 4 oz (115g) softened cream cheese, 1 cup (100g) shredded cheddar or Monterey Jack, 4 oz (115g) chopped canned green chilies, 1 tsp ground cumin, 1/2 tsp garlic powder, 1/2 tsp onion powder, and salt and pepper to taste. Mix everything until well combined and creamy. The cream cheese acts like glue holding the filling together, so don’t skip it! (5 minutes)
- Warm the tortillas. To make the tortillas pliable and easier to roll, warm them slightly in the microwave for about 20 seconds or on a dry skillet for 10 seconds each side. This keeps them from cracking when you roll the taquitos. (2 minutes)
- Assemble the taquitos. Place about 2 tablespoons of filling near the edge of each tortilla. Roll tightly, folding in the sides as you go to keep the filling inside. Place each rolled taquito seam-side down on your prepared baking sheet. You want them snug but not squished together, so air can circulate for even crisping. (10 minutes)
- Spray or brush the taquitos lightly with cooking spray or olive oil. This step is key to getting that golden, crispy exterior. Bake in the preheated oven for 15-20 minutes, flipping halfway through, until the taquitos are crisp and golden brown. Keep an eye on them; ovens vary, and you don’t want burnt edges! (15-20 minutes)
- Roll tight, but not too tight: Leaving the taquitos too loose means the filling can spill out during baking. I’ve learned that rolling them snugly and placing them seam-side down prevents this mess.
- Don’t skip warming the tortillas: Cold tortillas crack easily. A quick warm-up makes them more flexible and easier to roll without tearing.
- Light oil spray is your friend: The little bit of oil on the outside is what gets these taquitos crispy and golden without frying. I usually use an olive oil spray for even coverage.
- Flip halfway through baking: This guarantees even browning on all sides—plus, it’s a good moment to check the progress and adjust time if needed.
- Watch the edges: If you notice any burning edges, tent the pan loosely with foil for the last 5 minutes to protect them.
- Multitask like a pro: While your taquitos bake, whip up a quick dip or prep a side salad. It saves time and rounds out your snack beautifully.
- Vegetarian version: Swap shredded chicken for black beans, sautéed mushrooms, or roasted veggies. Add a pinch of smoked paprika for a smoky flavor.
- Spicy twist: Add diced jalapeños or a splash of hot sauce to the filling for extra heat. You can also sprinkle cayenne pepper or chili powder into the mix.
- Cheese swap: Try pepper jack for a little kick, or use a blend of mozzarella and parmesan for a more Italian-inspired flavor.
- Gluten-free option: Use corn tortillas labeled gluten-free, ensuring your snack suits sensitive diets.
- Air fryer adaptation: Place taquitos in a single layer in your air fryer basket. Cook at 400°F (200°C) for 10-12 minutes, shaking halfway through for even crisping.
For best results, pick small tortillas that are pliable but not too thick. If you can’t find small ones, just cut larger tortillas in half. If you want to make it vegetarian, swap the chicken for black beans or sautéed veggies—they hold up wonderfully in this recipe.
Equipment Needed

If you don’t have parchment paper, lightly oil your baking sheet instead. I’ve even used a wire rack placed on the sheet to get extra airflow around the taquitos for crispiness. Don’t sweat it if you don’t have fancy gear—this recipe is pretty forgiving and works well with basic kitchen tools.
Detailed Preparation Method
Once baked, let them cool for a couple of minutes before serving. You’ll notice the irresistible crunch that makes these taquitos stand out. If you want, sprinkle a little fresh chopped cilantro or a squeeze of lime for extra zing.
Cooking Tips & Techniques
Variations & Adaptations
I once tried adding a bit of smoked salmon and cream cheese for a brunch version—an unexpected but delicious twist that wowed my guests!
Serving & Storage Suggestions
Serve your crispy baked taquitos warm for the best crunch. They’re fantastic on their own or paired with sour cream, guacamole, or fresh salsa. I like to garnish with chopped cilantro and a squeeze of lime juice for a bright finish.
Leftovers store well in an airtight container in the refrigerator for up to 3 days. To reheat, pop them back in a 375°F (190°C) oven for 5-7 minutes to regain crispiness. Avoid microwaving if you want to keep that crunch—it tends to make the tortilla soggy.
These taquitos also freeze beautifully. Freeze them on a tray first, then transfer to a freezer bag for up to 2 months. Bake from frozen, adding a few extra minutes to the cooking time. Over time, the flavors deepen, making them even more satisfying.
Nutritional Information & Benefits
Each serving of these crispy baked taquitos (about 3 taquitos) contains roughly:
| Calories | 280 |
|---|---|
| Protein | 18g |
| Carbohydrates | 22g |
| Fat | 12g |
| Fiber | 3g |
Thanks to the lean chicken and cheese, this recipe packs a good protein punch that keeps you satisfied. Using baked tortillas keeps fat content moderate, making it a healthier alternative to fried snacks. Plus, ingredients like green chilies provide a small boost of vitamins and antioxidants.
If you’re watching carbs, swap flour tortillas for low-carb or whole wheat versions. This recipe is naturally gluten-free if you choose corn tortillas, making it an easy fit for many diets.
Conclusion
This crispy baked taquitos recipe is a fantastic way to enjoy a crunchy, flavorful snack without the hassle of frying. It’s simple, quick, and customizable, making it a staple in my kitchen for both casual munching and entertaining guests. I love how it brings everyone together—friends, family, even picky eaters—and gets major thumbs up every time.
Give this recipe a try, and don’t be afraid to make it your own. Swap fillings, add spices, or serve it with your favorite dips. I’d love to hear about your versions and any tweaks you try! Drop a comment below or share your photos—I’m always excited to see how you make this recipe your own.
Happy cooking and crunching!
FAQs
Can I use flour tortillas instead of corn for this recipe?
Absolutely! Flour tortillas work well and tend to be more pliable, making rolling easier. Just choose smaller ones for the best results.
How do I keep taquitos from getting soggy after baking?
Make sure to spray the taquitos lightly with oil and bake them on parchment paper or a wire rack to allow air circulation. Reheating in the oven rather than microwave also helps keep them crispy.
Can I prepare these taquitos in advance?
Yes! You can assemble them ahead, store them in the fridge for a few hours, then bake just before serving. They also freeze well for longer storage.
What’s the best way to reheat leftover taquitos?
Reheat in a 375°F (190°C) oven for 5-7 minutes to regain crispiness. Avoid microwaving if you want to keep the crunch.
Can I make these taquitos vegan or dairy-free?
Definitely. Use plant-based cream cheese and cheese substitutes, and swap the chicken for beans or veggies. Choose dairy-free tortillas if needed.
Pin This Recipe!

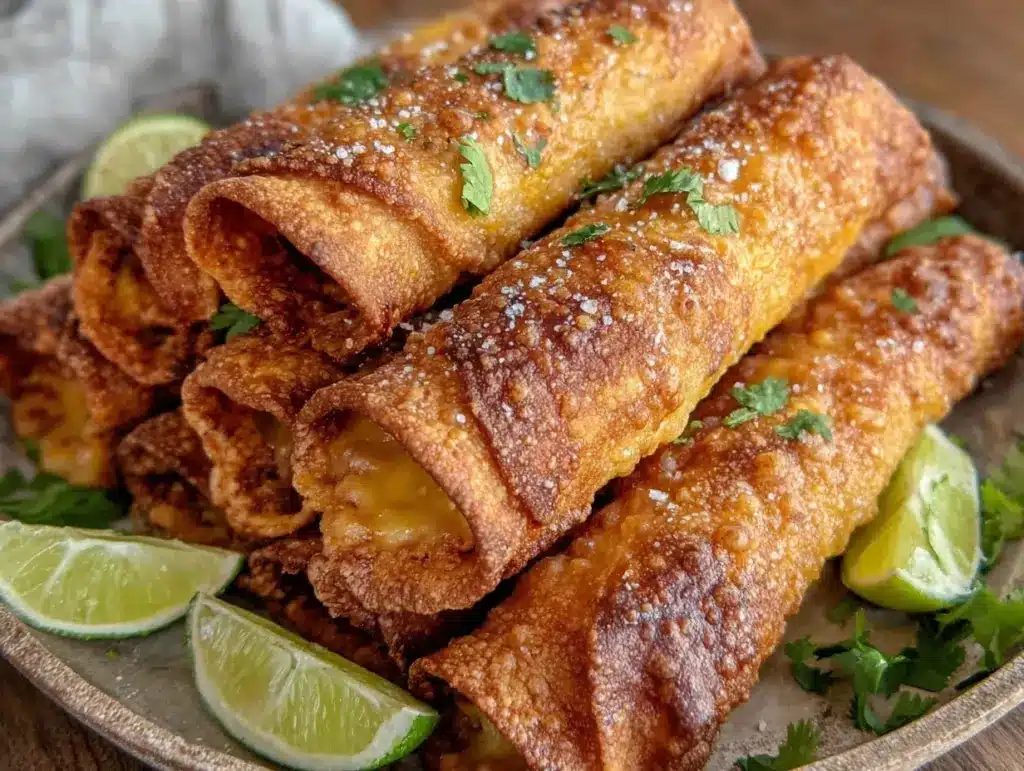
Crispy Baked Taquitos

A quick and easy recipe for crispy baked taquitos with a savory chicken and cheese filling, perfect for snacks or parties. Baked to golden perfection for a crunchy, flavorful bite without the grease of frying.
- Prep Time: 12 minutes
- Cook Time: 15-20 minutes
- Total Time: 27-32 minutes
- Yield: 12 taquitos (about 4 servings) 1x
- Category: Snack
- Cuisine: Mexican
Ingredients
- 2 cups shredded cooked chicken (rotisserie preferred)
- 4 oz (115g) cream cheese, softened
- 1 cup (100g) shredded cheddar or Monterey Jack cheese
- 4 oz (115g) canned green chilies, drained and chopped
- 1 tsp ground cumin
- 1/2 tsp garlic powder
- 1/2 tsp onion powder
- Salt and pepper to taste
- 12 small corn or flour tortillas
- Cooking spray or a light drizzle of olive oil
Instructions
- Preheat your oven to 425°F (220°C). Line a baking sheet with parchment paper or a silicone mat.
- In a mixing bowl, combine shredded chicken, softened cream cheese, shredded cheese, chopped green chilies, ground cumin, garlic powder, onion powder, salt, and pepper. Mix until well combined and creamy.
- Warm the tortillas slightly in the microwave for about 20 seconds or on a dry skillet for 10 seconds each side to make them pliable.
- Place about 2 tablespoons of filling near the edge of each tortilla. Roll tightly, folding in the sides to keep the filling inside. Place each rolled taquito seam-side down on the prepared baking sheet, spaced apart.
- Spray or brush the taquitos lightly with cooking spray or olive oil. Bake for 15-20 minutes, flipping halfway through, until crisp and golden brown. Let cool for a couple of minutes before serving.
Notes
Roll taquitos tightly and place seam-side down to prevent filling from spilling. Warm tortillas before rolling to avoid cracking. Spray lightly with oil for crispiness. Flip halfway through baking for even browning. Tent with foil if edges brown too quickly. Reheat in oven to maintain crunch; avoid microwaving.
Nutrition
- Serving Size: About 3 taquitos per
- Calories: 280
- Fat: 12
- Carbohydrates: 22
- Fiber: 3
- Protein: 18
Keywords: taquitos, baked taquitos, crispy taquitos, chicken taquitos, party snacks, easy snacks, homemade taquitos