“Are you sure this is going to work?” That’s what my husband asked, eyeing the bag of crushed Doritos and the pile of taco ingredients I had spread across the counter. Honestly, I wasn’t entirely convinced either. It started on one of those hectic weeknights when nothing in the fridge screamed “dinner,” but the pantry whispered “something fun.” I’d been craving that nostalgic crunch of walking tacos from our local fair, but who has the patience to assemble tiny bags for everyone on a busy evening?
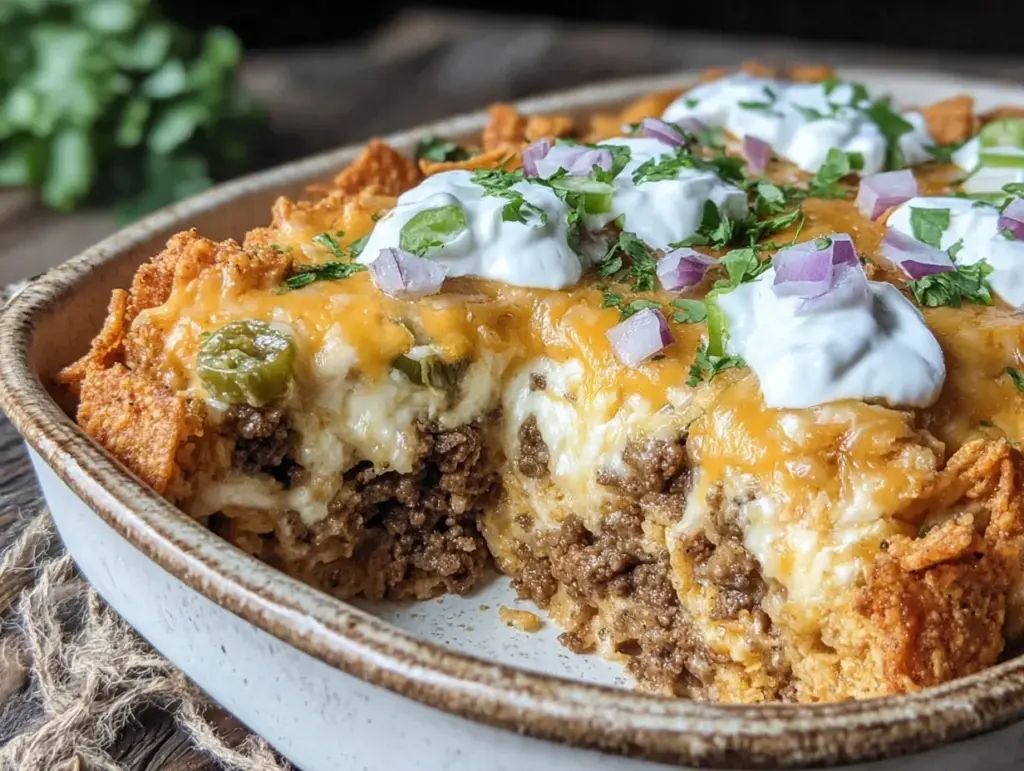
So, I thought, why not mash up all those flavors into one cozy casserole? The idea was half daring, half desperation. The real test came when I pulled the bubbling dish from the oven—topped with a golden, crunchy crust made entirely from crushed Doritos. The smell alone was enough to make the kids drop their devices and circle the kitchen.
Turns out, this Crispy Walking Taco Casserole with Crunchy Doritos Crust quickly became a staple. It’s that kind of recipe that sneaks up on you—comfort food meets snack attack in a way that makes you want to savor every bite slowly, even if you’re starving. It’s perfect for those nights when you want something easy but still crave that bold, cheesy, and crunchy taco vibe. And honestly? I can’t imagine dinner without it now.
What’s really stuck with me about this casserole is how it manages to bring together simplicity and excitement. The familiar taco flavors, but with a crispy Doritos crust that’s not just a topping—it’s the star. It’s like the best parts of a walking taco all in one pan, without the mess or fuss. That crunch, that spice, that cheesy melt—there’s just nothing quite like it. And every time I make it, it feels like a little celebration of everyday flavors, done just right.
Why You’ll Love This Crispy Walking Taco Casserole Recipe
After making this casserole more times than I can count, here’s why it stands out and why it might just become your next go-to:
- Quick & Easy: From pantry to plate in about 30 minutes—perfect for those “I need dinner now” moments.
- Simple Ingredients: No need for fancy or hard-to-find items; chances are you already have ground beef, cheese, and a bag of Doritos on hand.
- Perfect for Casual Gatherings: Whether it’s a game night or a relaxed family dinner, this casserole brings that casual, fun vibe everyone loves.
- Crowd-Pleaser: Kids, teens, adults—everyone asks for seconds. It’s the kind of dish that disappears fast.
- Unbelievably Delicious: That crispy Doritos crust combines with the savory taco filling for a texture and flavor combo that’s downright addictive.
- Unique Twist: Unlike typical taco casseroles, the Doritos crust adds an unexpected crunch and bold flavor that sets this recipe apart.
This isn’t just another taco casserole. The crunchy Doritos crust adds a playful, almost snack-food vibe to the classic layers inside. It’s like a walking taco got cozy in a casserole dish and invited all your favorite taco fixings to the party. Plus, the balance of spicy, cheesy, and crunchy hits all the right notes, making it feel like comfort food without the usual heaviness.
For those nights when you want comfort food that doesn’t feel like a chore to make, this recipe delivers. I’ve even brought it along to potlucks and casual get-togethers, and it’s always the dish people circle around. If you enjoy recipes like the crispy ham and cheese sticks or want a zesty side, pairing this casserole with a fresh salad like the fresh southwest chipotle salad makes the meal feel complete without extra fuss.
What Ingredients You Will Need
This recipe keeps things straightforward but flavorful, using ingredients that build layers of texture and taste. The Doritos crust brings the crunch, while the taco filling offers savory, cheesy goodness. Here’s what you’ll need:
- Ground beef (1 pound / 450g) – lean or regular, browned and seasoned
- Yellow onion (1 medium, diced) – adds sweetness and depth
- Garlic cloves (2, minced) – for that punch of flavor
- Old El Paso taco seasoning (1 packet or homemade equivalent) – classic taco spice blend
- Refried beans (1 cup / 240ml) – creamy base to bind the casserole
- Cheddar cheese (2 cups / 200g, shredded) – sharp and melty, I prefer Cabot for its rich flavor
- Crushed Nacho Cheese Doritos (about 3 cups / 90g) – for the crunchy crust, use your favorite Doritos flavor but nacho cheese is the classic choice
- Green chilies (1 small can, chopped) – optional, adds a mild heat and brightness
- Salsa (1 cup / 240ml) – pick your favorite kind, mild or spicy
- Jalapeños (sliced, optional) – if you like it hotter
- Olive oil or butter (1 tablespoon) – to grease the baking dish and add flavor
For substitutions: Try ground turkey or chicken for a leaner protein. If you want to keep it vegetarian, skip the meat and add extra beans or sautéed veggies like bell peppers and zucchini. You can swap cheddar for pepper jack if you want a little extra kick or use dairy-free cheese for a lactose-free version.
Equipment Needed
- Large skillet or frying pan: For browning the meat and sautéing onions. A heavy-bottom pan works best to prevent burning.
- Mixing bowls: To combine ingredients before layering the casserole.
- 9×13 inch (23×33 cm) baking dish: Standard casserole size, but you can adjust for smaller or larger batches.
- Measuring cups and spoons: For accurate seasoning and layering.
- Wooden spoon or spatula: For stirring and folding ingredients together.
- Oven mitts: Safety first when handling hot dishes!
If you don’t have a 9×13 inch pan, a similar-sized glass or ceramic dish works just as well. I’ve also used disposable aluminum pans when taking this casserole to potlucks — they make cleanup a breeze and are budget-friendly. For crushing the Doritos, a zip-top bag and rolling pin work perfectly if you don’t own a food processor.
Preparation Method
- Preheat your oven to 375°F (190°C). Grease your 9×13 inch baking dish with olive oil or butter to prevent sticking.
- Brown the ground beef: Heat a large skillet over medium-high heat. Add the ground beef and diced onion. Cook, breaking the meat apart with a spatula, until the beef is no longer pink and the onions are translucent, about 7-8 minutes. Drain excess fat if needed.
- Add garlic and seasonings: Stir in the minced garlic and taco seasoning. Cook for another 1-2 minutes until fragrant.
- Mix in refried beans and green chilies: Reduce heat to medium-low and fold in the refried beans and chopped green chilies. This adds creaminess and helps bind the casserole.
- Layer the casserole: Spread half of the beef mixture evenly in the baking dish. Dollop half of the salsa on top, then sprinkle with 1 cup (100g) of shredded cheddar. Repeat with the remaining beef mixture, salsa, and cheese.
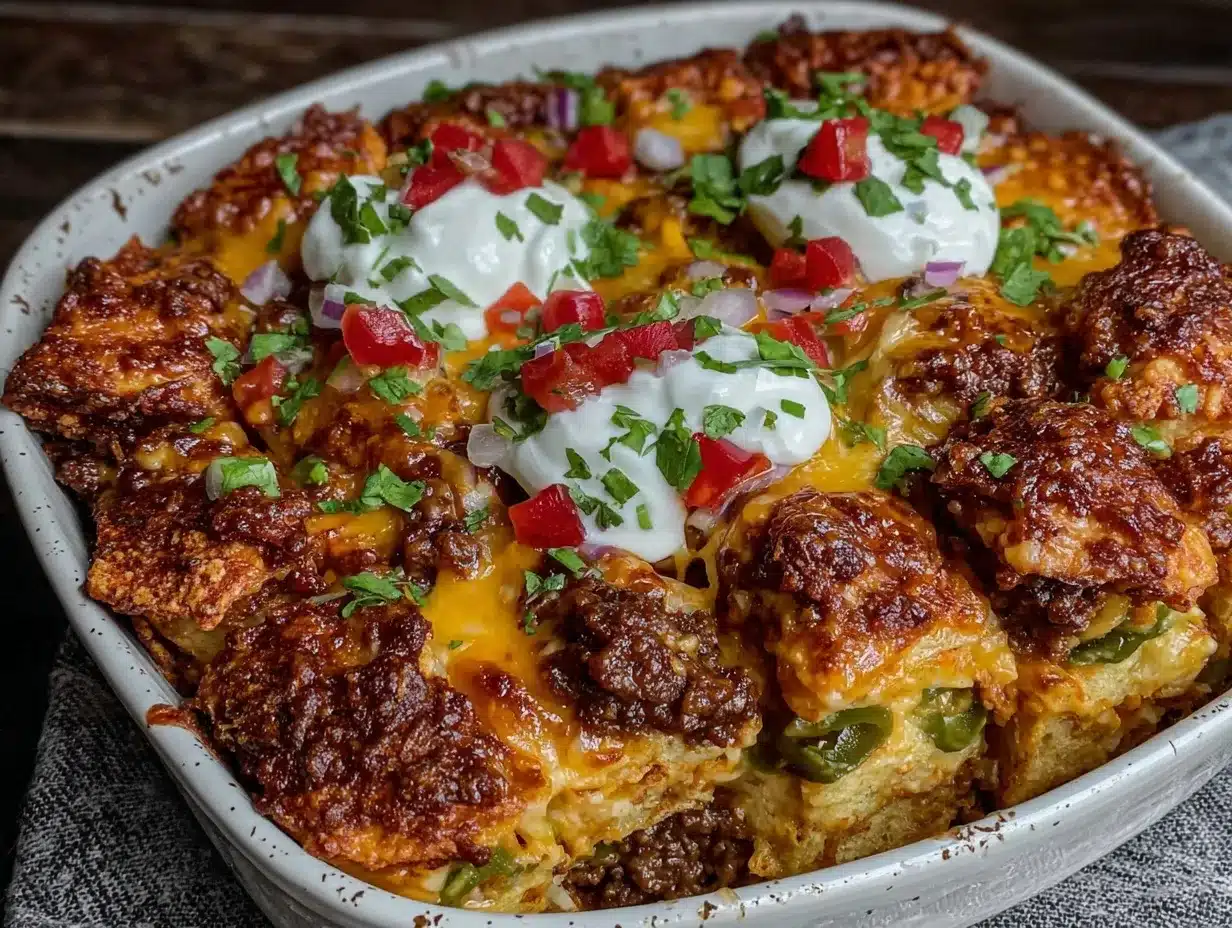
- Prepare the crunchy Doritos crust: Crush the Doritos finely but not to dust — you want some texture. Evenly sprinkle the crushed chips over the cheese layer. This will bake into a crispy, flavorful topping.
- Bake: Place the casserole in the oven and bake for 20-25 minutes until the cheese is bubbly and the Doritos crust is golden and crisp.
- Optional garnish: Remove from oven and let it rest for 5 minutes. Top with sliced jalapeños, chopped cilantro, or a dollop of sour cream if you like.
Keep an eye on the crust near the end of baking—you want it crunchy but not burnt. If it browns too fast, loosely tent with foil. The smell when it’s done is one part cheesy taco, one part buttery chips—honestly irresistible.
Cooking Tips & Techniques
Here’s what I’ve learned from making this Crispy Walking Taco Casserole over and over:
- Don’t skip draining the beef: Too much grease will make the casserole soggy instead of crisp. Drain well after browning.
- Crush Doritos by hand or with a rolling pin: If you pulverize them too much in a food processor, you get dust that burns easily. You want to keep some pieces for texture.
- Use sharp cheddar: It melts beautifully and adds a nice tang that balances the sweetness of the chips.
- Let the casserole rest: Waiting 5-10 minutes after baking helps the layers set and makes it easier to serve without everything collapsing.
- Make it your own with salsa choice: A chunky salsa adds texture; a smoother one blends more. I like a medium heat level, but mild works great too.
- Multitask by prepping toppings while it bakes: Chop jalapeños, slice olives, or get out sour cream and avocado slices so everything’s ready to go when the timer dings.
One time, I forgot to grease the pan and had to do a delicate rescue with a spatula—lesson learned! A well-greased dish ensures effortless serving and cleanup.
Variations & Adaptations
This casserole is pretty flexible, and you can easily twist it to suit different tastes or dietary needs:
- Vegetarian version: Swap ground beef for a plant-based crumble or extra beans and vegetables like corn, bell peppers, and zucchini.
- Spicy kick: Add diced jalapeños or a few dashes of hot sauce to the beef mixture for a fiery version.
- Different chip crust: Use crushed Cool Ranch Doritos or even crushed tortilla chips for a milder crunch. I once tried crushed Fritos for a salty, corn-forward flavor that was a hit.
- Cheese variations: Mix in pepper jack or Monterey jack cheese for a creamier, spicier touch.
- Slow cooker adaptation: Layer all ingredients except the chip crust in a slow cooker on low for 3-4 hours, then add crushed chips and broil for a few minutes to crisp up before serving.
One of my favorite tweaks is folding in some cooked corn kernels and black beans to boost the veggie content—makes it feel a little more wholesome without losing any of that rich taco flavor.
Serving & Storage Suggestions
This casserole is best served warm, fresh from the oven when the Doritos crust is at its crispiest. I like to plate it with a scoop of cool sour cream or guacamole on the side, which balances the spicy, cheesy richness.
It pairs beautifully with a light, crisp salad like the fresh southwest chipotle salad or even a simple side of steamed veggies.
To store leftovers, cover the casserole tightly with foil or plastic wrap and refrigerate for up to 3 days. Reheat in the oven at 350°F (175°C) for 10-15 minutes to bring back some of that crunch. Microwave reheating is quicker but tends to soften the chip crust.
Feel free to freeze individual portions wrapped well in foil and plastic wrap for up to 2 months. Thaw overnight in the fridge before reheating.
Over time, the flavors deepen, especially if you let it rest wrapped in the fridge overnight before reheating. That’s when the beans and spices really mingle, making it even better the next day.
Nutritional Information & Benefits
Here’s an estimate per serving (recipe serves 6):
| Calories | About 450 kcal |
|---|---|
| Protein | 28g |
| Carbohydrates | 30g |
| Fat | 22g |
| Fiber | 5g |
Ground beef provides a good source of protein and iron, while refried beans add fiber and creaminess. The inclusion of green chilies and salsa adds vitamin C and antioxidants. This dish is not gluten-free because of the Doritos, but you can swap to gluten-free tortilla chips if needed.
It’s a satisfying meal that balances indulgence with some nutritional value, especially if paired with a fresh salad or steamed veggies. From a health-conscious perspective, making this at home means you control the seasoning, fat content, and portion size, which beats takeout any day.
Conclusion
The Crispy Walking Taco Casserole with Crunchy Doritos Crust isn’t just a recipe—it’s a little slice of fun, comfort, and practicality baked into one dish. It’s easy enough for busy weeknights, exciting enough to bring to casual gatherings, and just downright delicious every single time.
What I love most is how adaptable it is; you can make it your own with different proteins, spice levels, and toppings. Whether you’re feeding a crowd or cooking for yourself, it’s a recipe that feels like a treat but doesn’t demand hours in the kitchen.
If you try it, I’d love to hear how you make it your own—drop a comment below or share your favorite toppings and variations. Here’s to cozy, crunchy, cheesy dinners that bring a little joy to the everyday table!
FAQs About Crispy Walking Taco Casserole with Crunchy Doritos Crust
Can I make this casserole ahead of time?
Absolutely! You can prepare it up to the point of adding the Doritos crust, cover, and refrigerate overnight. Add the crushed Doritos and bake when ready.
What can I use instead of ground beef?
Ground turkey or chicken work well, or for a vegetarian option, use plant-based crumbles or extra beans and veggies.
How do I keep the Doritos crust from getting soggy?
Make sure to drain any excess liquid from the taco filling before layering and add the Doritos crust just before baking. Also, avoid covering the casserole tightly after baking to keep the crust crisp.
Can I freeze leftovers?
Yes, portion leftovers into airtight containers or foil-wrapped portions and freeze for up to 2 months. Thaw overnight in the fridge before reheating.
Is there a gluten-free version?
Yes, simply swap regular Doritos for a gluten-free corn chip or tortilla chip brand and confirm your taco seasoning is gluten-free.
Pin This Recipe!
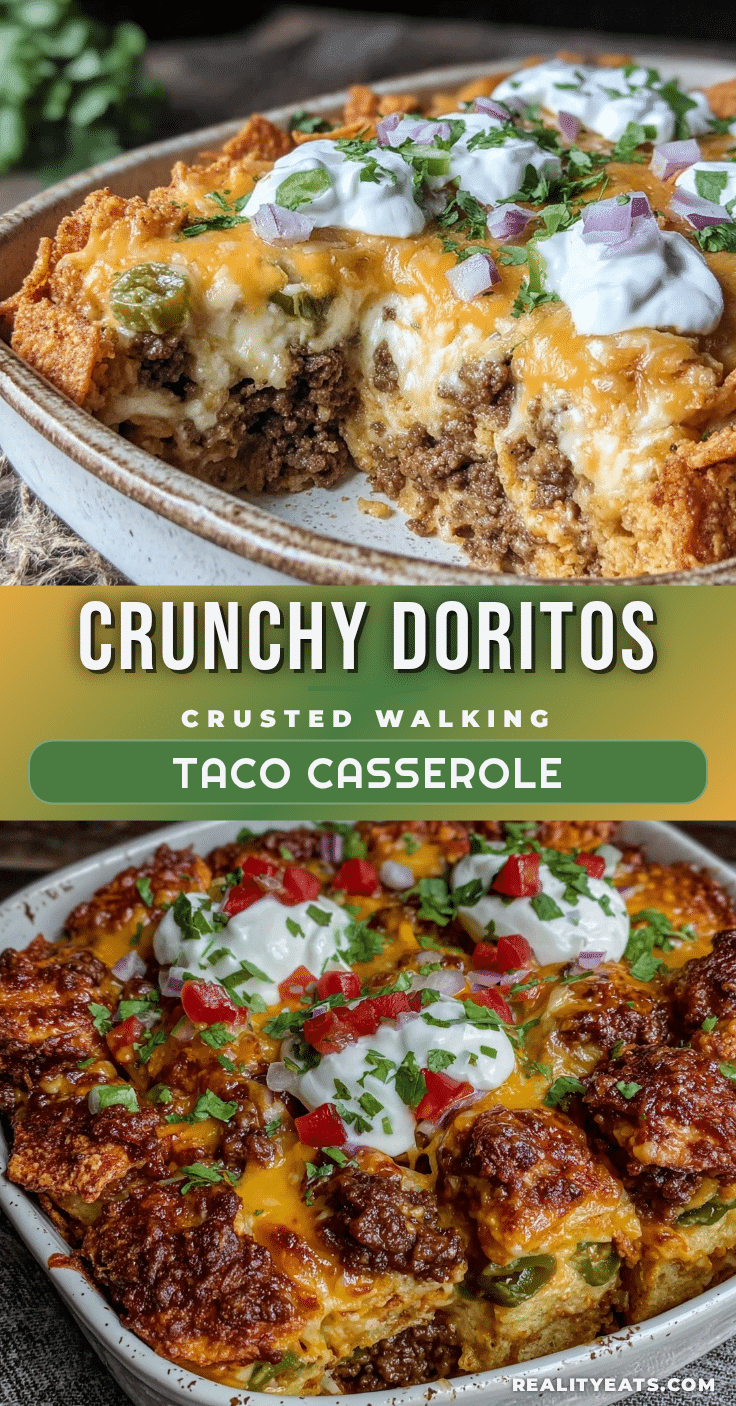
Crispy Walking Taco Casserole Recipe with Crunchy Doritos Crust Easy and Best

A cozy casserole combining the nostalgic flavors of walking tacos with a crunchy Doritos crust, perfect for quick and easy weeknight dinners or casual gatherings.
- Prep Time: 15 minutes
- Cook Time: 25 minutes
- Total Time: 40 minutes
- Yield: 6 servings 1x
- Category: Main Course
- Cuisine: American
Ingredients
- 1 pound ground beef (lean or regular), browned and seasoned
- 1 medium yellow onion, diced
- 2 garlic cloves, minced
- 1 packet Old El Paso taco seasoning or homemade equivalent
- 1 cup refried beans
- 2 cups shredded cheddar cheese (about 200g)
- 3 cups crushed Nacho Cheese Doritos (about 90g)
- 1 small can chopped green chilies (optional)
- 1 cup salsa (mild or spicy)
- Sliced jalapeños (optional)
- 1 tablespoon olive oil or butter (to grease the baking dish)
Instructions
- Preheat your oven to 375°F (190°C). Grease your 9×13 inch baking dish with olive oil or butter to prevent sticking.
- Heat a large skillet over medium-high heat. Add the ground beef and diced onion. Cook, breaking the meat apart with a spatula, until the beef is no longer pink and the onions are translucent, about 7-8 minutes. Drain excess fat if needed.
- Stir in the minced garlic and taco seasoning. Cook for another 1-2 minutes until fragrant.
- Reduce heat to medium-low and fold in the refried beans and chopped green chilies.
- Spread half of the beef mixture evenly in the baking dish. Dollop half of the salsa on top, then sprinkle with 1 cup of shredded cheddar cheese. Repeat with the remaining beef mixture, salsa, and cheese.
- Crush the Doritos finely but keep some texture. Evenly sprinkle the crushed chips over the cheese layer.
- Bake for 20-25 minutes until the cheese is bubbly and the Doritos crust is golden and crisp.
- Remove from oven and let rest for 5 minutes. Optionally, top with sliced jalapeños, chopped cilantro, or a dollop of sour cream.
Notes
[‘Drain excess fat from browned beef to prevent sogginess.’, ‘Crush Doritos by hand or with a rolling pin to keep texture and avoid burning.’, ‘Use sharp cheddar cheese for best melt and flavor.’, ‘Let casserole rest 5-10 minutes after baking to set layers.’, ‘Add Doritos crust just before baking to keep it crispy.’, ‘If crust browns too fast, tent loosely with foil.’, ‘Can prepare ahead up to adding Doritos crust and refrigerate overnight.’, ‘Freeze leftovers in airtight containers for up to 2 months.’]
Nutrition
- Serving Size: 1/6 of casserole
- Calories: 450
- Fat: 22
- Carbohydrates: 30
- Fiber: 5
- Protein: 28
Keywords: walking taco casserole, Doritos crust, taco casserole, easy dinner, ground beef casserole, crunchy taco bake