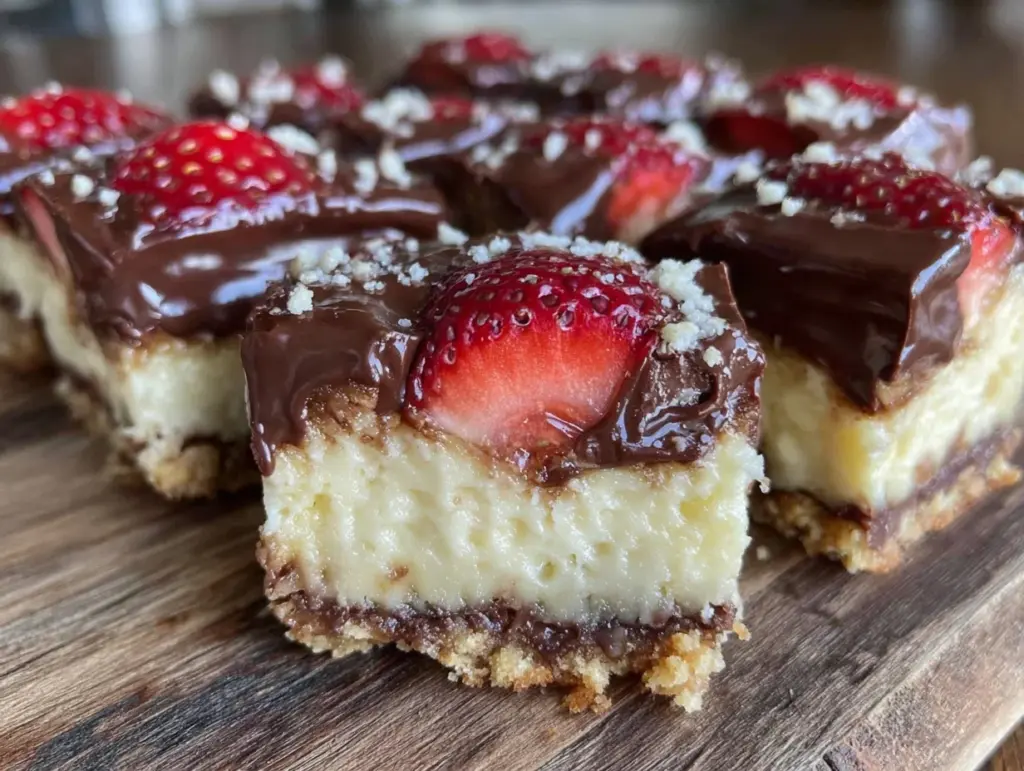
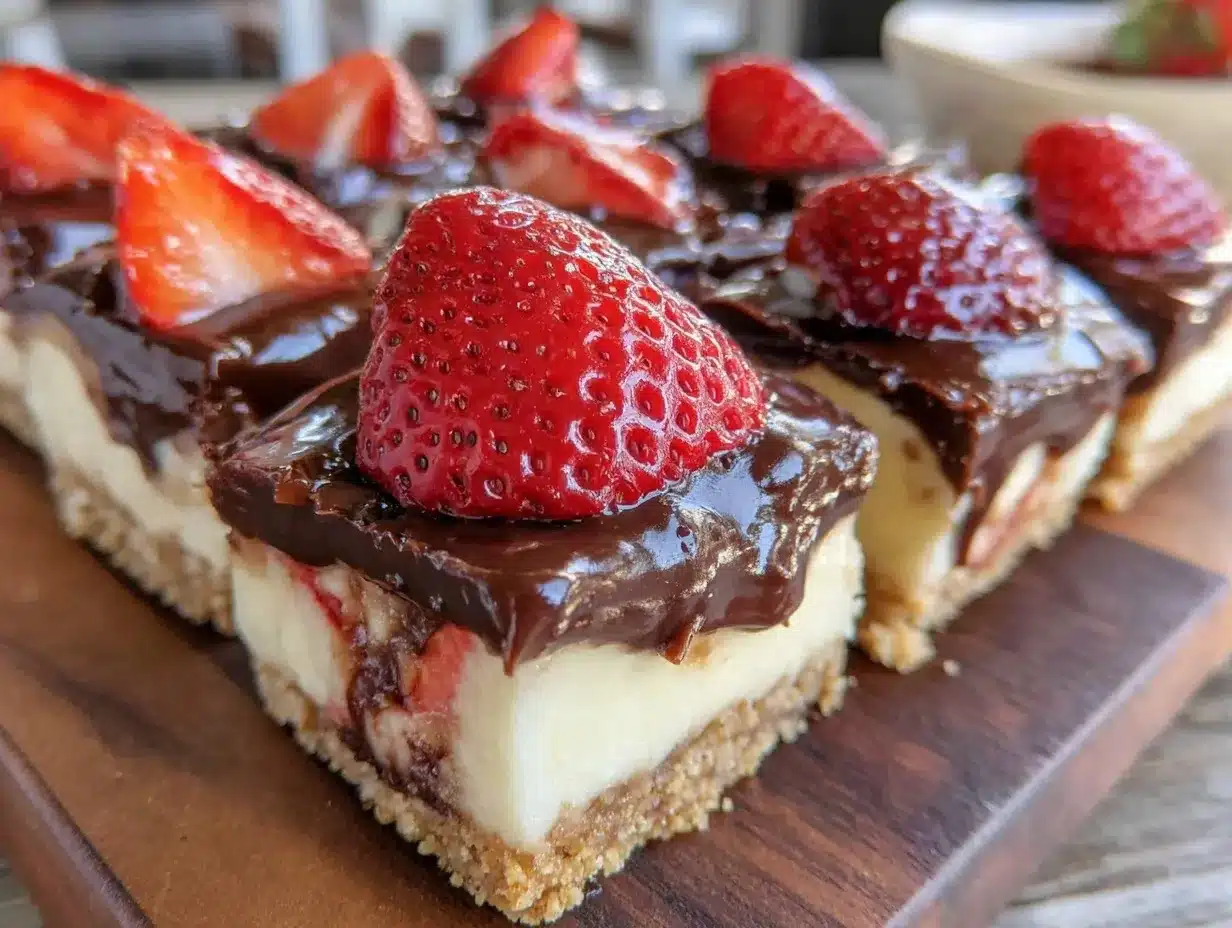
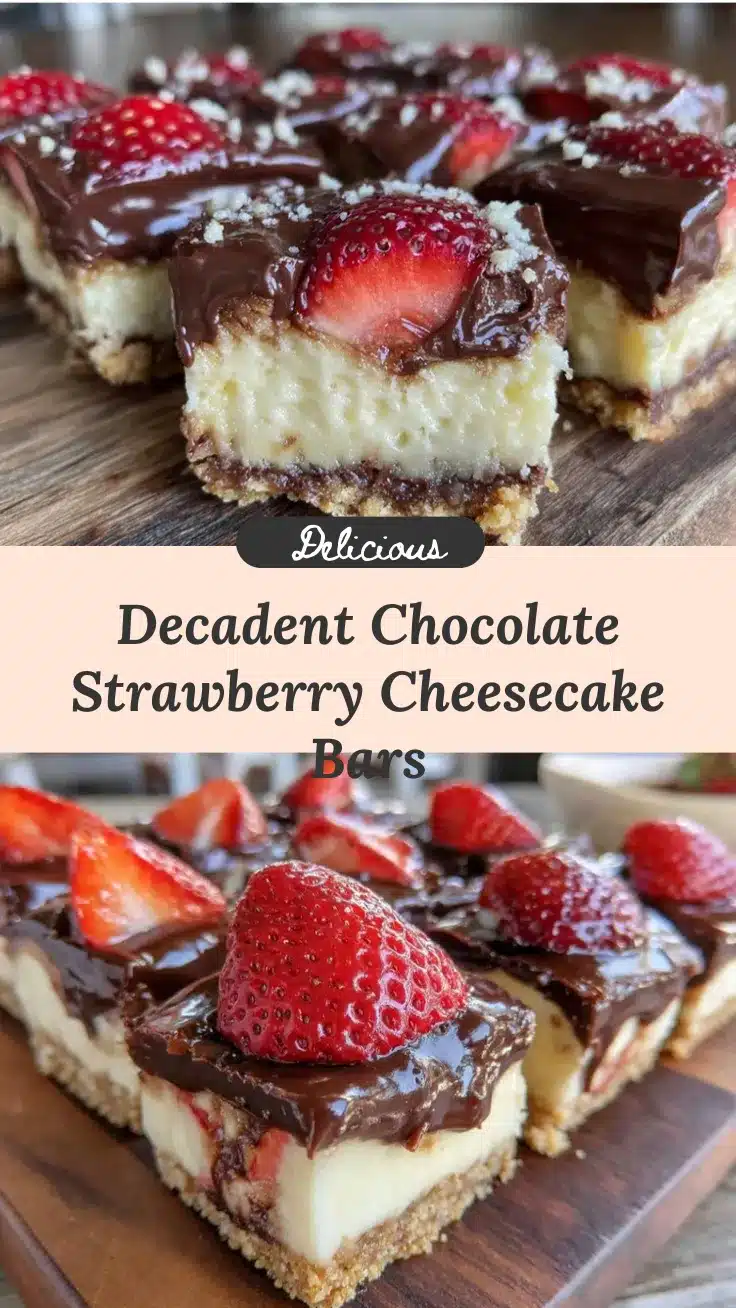
The first time I made these decadent chocolate-covered strawberry cheesecake bars, I honestly couldn’t believe how easy they came together—yet they looked like something straight out of a fancy bakery. There’s something so comforting about the creamy richness of cheesecake paired with juicy strawberries and a luscious chocolate coating that just hits all the right notes. You know, it’s like the perfect balance between indulgence and freshness, which is exactly what I love about this dessert.
I stumbled upon this recipe during a summer party when I wanted to impress guests without spending hours in the kitchen. After baking it several times (and tweaking a few things here and there), it quickly became my go-to treat for celebrations, potlucks, and cozy nights in. The combination of the buttery crust, smooth cheesecake, fresh strawberry bursts, and that silky chocolate shell makes these bars truly unforgettable.
If you’re a fan of desserts that feel both fancy and approachable, and you want something that’s perfect for sharing, these decadent chocolate-covered strawberry cheesecake bars will not disappoint. Plus, I’ve found that even picky eaters and kids can’t resist them—which speaks volumes! So, whether you’re a dessert lover or just looking for a sweet way to brighten up your day, these bars are definitely worth a try.
Why You’ll Love This Recipe
- Quick & Easy: Comes together in under 40 minutes of hands-on time, making it perfect for last-minute parties or sweet cravings.
- Simple Ingredients: No need to hunt for fancy items—most ingredients are pantry staples or fresh market finds.
- Perfect for Parties: These bars are ideal for potlucks, holiday gatherings, or even a casual brunch with friends.
- Crowd-Pleaser: The combo of chocolate, strawberries, and cheesecake is a hit with both kids and adults alike.
- Unbelievably Delicious: The creamy texture paired with the crisp chocolate coating is seriously next-level comfort food.
What sets these cheesecake bars apart is the way the chocolate coating adds a delightful snap that contrasts beautifully with the smooth, tangy cheesecake and the fresh strawberry pieces tucked inside. Instead of just a plain cheesecake bar, this recipe adds that extra layer of decadence without complicating things. Plus, the crust has just the right amount of buttery crunch, and the strawberries bring a juicy brightness that keeps every bite exciting.
Honestly, it feels like dessert magic that’s both indulgent and refreshing. I love how this recipe takes classic cheesecake bars up a notch, making it easy to impress guests without breaking a sweat. It’s the kind of treat you’ll want to make again and again.
What Ingredients You Will Need
This recipe uses straightforward ingredients that combine to create a rich, flavorful dessert with a satisfying texture. Most of these items are easy to find at your local grocery store, and you probably have many of them already on hand.
- For the crust:
- 1 ½ cups graham cracker crumbs (about 10-12 full sheets, crushed)
- 5 tablespoons unsalted butter, melted (I prefer Kerrygold for its rich flavor)
- 2 tablespoons granulated sugar
- For the cheesecake filling:
- 16 ounces (450g) cream cheese, softened (Philadelphia brand works wonderfully)
- ½ cup granulated sugar
- 2 large eggs, room temperature
- 1 teaspoon pure vanilla extract
- ½ cup sour cream (adds creaminess and slight tang)
- 1 cup fresh strawberries, diced (use ripe, juicy berries for the best taste)
- For the chocolate coating:
- 8 ounces (225g) semi-sweet chocolate chips or chopped chocolate (Ghirardelli or Lindt recommended)
- 1 teaspoon coconut oil or vegetable oil (helps the chocolate coat smoothly)
Ingredient notes: If you want a gluten-free option, swap the graham cracker crumbs for gluten-free crumbs or crushed gluten-free cookies. For dairy-free, you can try vegan cream cheese and coconut-based sour cream, though texture might vary slightly. In warmer months, feel free to add a few fresh mint leaves chopped into the filling for a fresh twist.
Equipment Needed
- 9×9-inch (23×23 cm) baking pan – a square glass or metal pan works fine.
- Parchment paper – to line the pan for easy removal of bars.
- Mixing bowls – one large for the crust and one for the cheesecake filling.
- Electric mixer or hand mixer – makes blending the cream cheese smooth a breeze.
- Spatula – for scraping the bowl and spreading the batter evenly.
- Microwave-safe bowl or double boiler – for melting the chocolate.
- Knife and cutting board – to dice the strawberries.
If you don’t have an electric mixer, whisking by hand is possible but expect a bit more elbow grease. I recommend investing in a decent hand mixer—it totally changes the ease and texture of cheesecake fillings. For melting chocolate, a double boiler prevents burning, but if you use a microwave, heat in short bursts (20 seconds), stirring often to avoid scorching.
Detailed Preparation Method
- Preheat your oven to 325°F (160°C). Line your 9×9-inch baking pan with parchment paper, leaving some overhang on the sides for easy lifting later.
- Prepare the crust: In a medium bowl, combine 1 ½ cups graham cracker crumbs, 5 tablespoons melted butter, and 2 tablespoons sugar. Stir until the mixture resembles wet sand. Press this evenly into the bottom of the prepared pan using the back of a spoon or your fingers. Bake for 10 minutes, then remove from oven and let cool slightly while you make the filling.
- Make the cheesecake filling: In a large bowl, beat 16 ounces softened cream cheese with ½ cup sugar until smooth and creamy—this usually takes 2-3 minutes with a mixer. Add 2 room temperature eggs, one at a time, beating well after each addition. Mix in 1 teaspoon vanilla extract and ½ cup sour cream until fully incorporated.
- Fold in the strawberries: Gently fold 1 cup diced fresh strawberries into the cheesecake batter. Be careful not to overmix, or the strawberries might break down too much and make the batter watery.
- Pour the cheesecake batter over the baked crust, spreading it evenly with a spatula. Bake for 35-40 minutes, or until the edges are set but the center still has a slight jiggle. (Overbaking can cause cracks, so keep an eye on it.)
- Cool completely: Remove the pan from the oven and place it on a wire rack. Let it cool to room temperature, then refrigerate for at least 3 hours or overnight to set fully.
- Prepare the chocolate coating: In a microwave-safe bowl, combine 8 ounces semi-sweet chocolate chips and 1 teaspoon coconut oil. Microwave in 20-second intervals, stirring well between each, until smooth and glossy.
- Dip each bar: Once the cheesecake is chilled, lift it out using the parchment overhang and cut into bars (about 12 squares). Using a fork or dipping tool, dip each bar halfway into the melted chocolate, letting excess drip off. Place bars on parchment paper to set. Refrigerate again for 30 minutes to let the chocolate harden.
- Serve and enjoy: These bars are best served chilled but can sit at room temp for 15 minutes before eating for a softer texture. Store leftovers covered in the fridge.
Tip: If your strawberries release too much juice while baking, pat them dry before folding in. Also, if cracks appear on the cheesecake surface, don’t worry—it’s normal and won’t affect taste.
Cooking Tips & Techniques
One key to a smooth cheesecake filling is making sure your cream cheese is completely softened before mixing—cold lumps will ruin the texture. I usually leave mine out for at least an hour or zap it in the microwave for 10 seconds if in a rush. Also, beating the cream cheese and sugar first until fluffy creates a lighter base.
When adding eggs, mix slowly and just until combined to avoid overbeating, which can cause cracks during baking. The gentle fold of strawberries helps keep them intact and prevents the batter from becoming watery.
For the crust, pressing it firmly and evenly ensures a sturdy base that won’t crumble when you cut the bars. Baking it first removes excess moisture from the butter and crumbs, helping it set better.
Melting chocolate with a bit of coconut oil thins it just enough to coat the bars smoothly without being too runny. Stirring frequently during melting prevents burning and keeps the chocolate glossy.
Lastly, chilling the bars thoroughly before dipping in chocolate helps maintain clean edges and prevents the chocolate from melting off. Patience here pays off in presentation and taste.
Variations & Adaptations
- Berry Twist: Swap strawberries for raspberries or blueberries for a different burst of flavor. You can also mix berries for a colorful, fruity surprise.
- Nutty Crunch: Add chopped toasted almonds or pecans to the crust or sprinkle on top of the chocolate coating before it sets for added texture.
- Chocolate Lovers: Use white chocolate or dark chocolate instead of semi-sweet for the coating. You can even drizzle contrasting chocolate over the bars for a pretty finish.
- Diet-Friendly: Use almond flour crust and a sugar substitute like erythritol for a low-carb version. Choose dairy-free cream cheese and coconut yogurt for a vegan adaptation.
- Seasonal Flair: In fall, add a pinch of cinnamon and nutmeg to the crust or filling for a warm twist that feels like autumn in every bite.
One variation I adore is adding a thin layer of strawberry jam between the crust and cheesecake for extra fruity sweetness. It’s a simple tweak but adds a lovely surprise when you bite in.
Serving & Storage Suggestions
These decadent chocolate-covered strawberry cheesecake bars are best served chilled for that perfect creamy texture with a crisp chocolate shell. Arrange them on a pretty platter and garnish with fresh strawberry slices or mint leaves for a festive touch. They pair wonderfully with a cup of fresh coffee, a glass of bubbly, or even a fruity iced tea.
To store, cover the bars tightly with plastic wrap or keep them in an airtight container in the refrigerator for up to 5 days. You can also freeze them—just wrap each bar individually and place in a freezer-safe container. When you’re ready to enjoy, thaw in the fridge overnight.
Reheating isn’t really necessary, but if you prefer a softer chocolate coating, let the bars sit at room temperature for about 15 minutes before serving. Flavors actually deepen after sitting a day or two, so they’re perfect for making ahead of time.
Nutritional Information & Benefits
Each bar (assuming 12 servings) contains approximately 280 calories, 18g fat, 25g carbohydrates, and 5g protein. The cream cheese provides a good amount of calcium and protein, while fresh strawberries add vitamin C, antioxidants, and natural sweetness without extra sugar.
This dessert offers a balanced treat with indulgent flavor but also some fresh fruit benefits. Using real ingredients like fresh strawberries and quality chocolate means you’re enjoying a dessert that feels decadent but isn’t overloaded with artificial additives.
For those with dietary restrictions, the recipe can be easily adjusted to be gluten-free, lower in sugar, or dairy-free, making it accessible to many. Just be mindful of potential allergens like dairy and gluten when serving guests.
Conclusion
These decadent chocolate-covered strawberry cheesecake bars are truly a dessert that hits all the right notes—creamy, rich, fruity, and chocolatey with minimal fuss. I love how they come together with simple ingredients but deliver a wow factor every time. Whether you’re making them for a party, a special occasion, or just because, they’re sure to impress.
Don’t hesitate to play around with flavors and textures to make this recipe your own. Maybe you’ll add a different berry or a sprinkle of nuts like I do sometimes—it’s all part of the fun! I’d love to hear how your cheesecake bars turn out, so please share your thoughts, tips, or tweaks in the comments below.
Happy baking, and remember: life’s too short for boring desserts!
FAQs
Can I make these cheesecake bars ahead of time?
Absolutely! They actually taste better after chilling overnight. Just cover and store in the fridge.
What’s the best way to cut the bars without cracking the chocolate?
Use a sharp knife warmed under hot water, then wiped dry, to slice cleanly through the chocolate and cheesecake.
Can I use frozen strawberries instead of fresh?
It’s possible, but thaw and drain them well first to avoid excess moisture that can affect texture.
How do I prevent cracks in the cheesecake filling?
Don’t overbeat the eggs, bake at a low temperature, and avoid opening the oven door during baking.
Is there a vegan version of this recipe?
Yes! Use vegan cream cheese, a plant-based sour cream, dairy-free chocolate, and a vegan crust alternative like crushed vegan cookies.
Pin This Recipe!
Decadent Chocolate-Covered Strawberry Cheesecake Bars

These cheesecake bars combine a buttery graham cracker crust, creamy cheesecake filling with fresh strawberries, and a luscious chocolate coating, making them perfect for parties and celebrations.
- Prep Time: 15 minutes
- Cook Time: 50 minutes
- Total Time: 4 hours 5 minutes
- Yield: 12 servings 1x
- Category: Dessert
- Cuisine: American
Ingredients
- 1 ½ cups graham cracker crumbs (about 10–12 full sheets, crushed)
- 5 tablespoons unsalted butter, melted
- 2 tablespoons granulated sugar
- 16 ounces cream cheese, softened
- ½ cup granulated sugar
- 2 large eggs, room temperature
- 1 teaspoon pure vanilla extract
- ½ cup sour cream
- 1 cup fresh strawberries, diced
- 8 ounces semi-sweet chocolate chips or chopped chocolate
- 1 teaspoon coconut oil or vegetable oil
Instructions
- Preheat your oven to 325°F (160°C). Line a 9×9-inch baking pan with parchment paper, leaving some overhang for easy removal.
- Prepare the crust: In a medium bowl, combine graham cracker crumbs, melted butter, and sugar. Stir until mixture resembles wet sand. Press evenly into the bottom of the prepared pan. Bake for 10 minutes, then remove and let cool slightly.
- Make the cheesecake filling: In a large bowl, beat softened cream cheese with sugar until smooth and creamy. Add eggs one at a time, beating well after each. Mix in vanilla extract and sour cream until fully incorporated.
- Fold in diced strawberries gently to avoid breaking them down.
- Pour cheesecake batter over the baked crust and spread evenly. Bake for 35-40 minutes until edges are set but center has a slight jiggle.
- Cool completely on a wire rack, then refrigerate for at least 3 hours or overnight to set.
- Prepare the chocolate coating: Melt chocolate chips with coconut oil in 20-second intervals in the microwave, stirring until smooth and glossy.
- Lift cheesecake out using parchment overhang and cut into about 12 bars. Dip each bar halfway into melted chocolate, letting excess drip off. Place on parchment paper to set.
- Refrigerate dipped bars for 30 minutes to let chocolate harden.
- Serve chilled or let sit at room temperature for 15 minutes before serving for a softer texture.
Notes
If strawberries release too much juice, pat dry before folding in. Use a sharp knife warmed under hot water to cut bars cleanly without cracking chocolate. For gluten-free, substitute graham crackers with gluten-free crumbs. For dairy-free, use vegan cream cheese and coconut-based sour cream. Melting chocolate with coconut oil thins it for smooth coating. Chill bars thoroughly before dipping in chocolate for best results.
Nutrition
- Serving Size: 1 bar (1/12th of rec
- Calories: 280
- Fat: 18
- Carbohydrates: 25
- Protein: 5
Keywords: chocolate-covered, strawberry, cheesecake bars, dessert, party recipe, easy cheesecake, chocolate coating, creamy cheesecake