Honestly, I thought making snack bars without baking was just a shortcut that would leave them bland or crumbly—especially a recipe like Easy No-Bake Cookies and Cream Snack Bars for Back to School. I mean, how could something so fuss-free actually taste good enough to satisfy a kid’s picky taste buds and still hold together well enough for a lunchbox? I was stubborn about it because I’ve always leaned toward the traditional baked bars that have that comforting warmth and slightly chewy texture. But one chaotic morning, when the oven was acting up and there was no time for a full bake, I gave this no-bake recipe a reluctant shot.
The texture surprised me first — creamy, crunchy, with just the right amount of sweetness and that unmistakable cookies and cream vibe. And the smell? Well, that’s where the subtle magic began; it wasn’t just sugar and butter; there was this nostalgic hint of childhood treats, the kind you’d trade secretly at recess. The bars stayed firm, didn’t crumble into a mess, and kept their flavor even after sitting in the fridge for a couple of days.
That morning, as I packed the bars into my kid’s lunchbox, I realized this recipe had quietly won me over. It’s not just a quick fix but something that’s genuinely satisfying and fuss-free—perfect for those busy back-to-school days when you want a homemade touch without the stress. It stuck with me because it’s genuinely simple, and frankly, sometimes that’s exactly what you need. No frills, just straightforward goodness you can trust.
Why You’ll Love This Recipe
After testing this Easy No-Bake Cookies and Cream Snack Bars for Back to School recipe more times than I can count, I’m confident it’s one of those rare gems that checks all the boxes. Here’s what makes it stand out:
- Quick & Easy: Ready in under 20 minutes, making it a lifesaver on hectic mornings or last-minute snack preps.
- Simple Ingredients: Uses pantry staples like crushed sandwich cookies and sweetened condensed milk, so no special shopping trips needed.
- Perfect for Back to School: Portable and mess-free, these bars fit perfectly into lunchboxes or afternoon snack bags.
- Crowd-Pleaser: Kids and adults alike rave about the creamy, crunchy texture and familiar cookie flavor.
- Unbelievably Delicious: The combination of crushed cookies and creamy binder is comfort-food meets convenience.
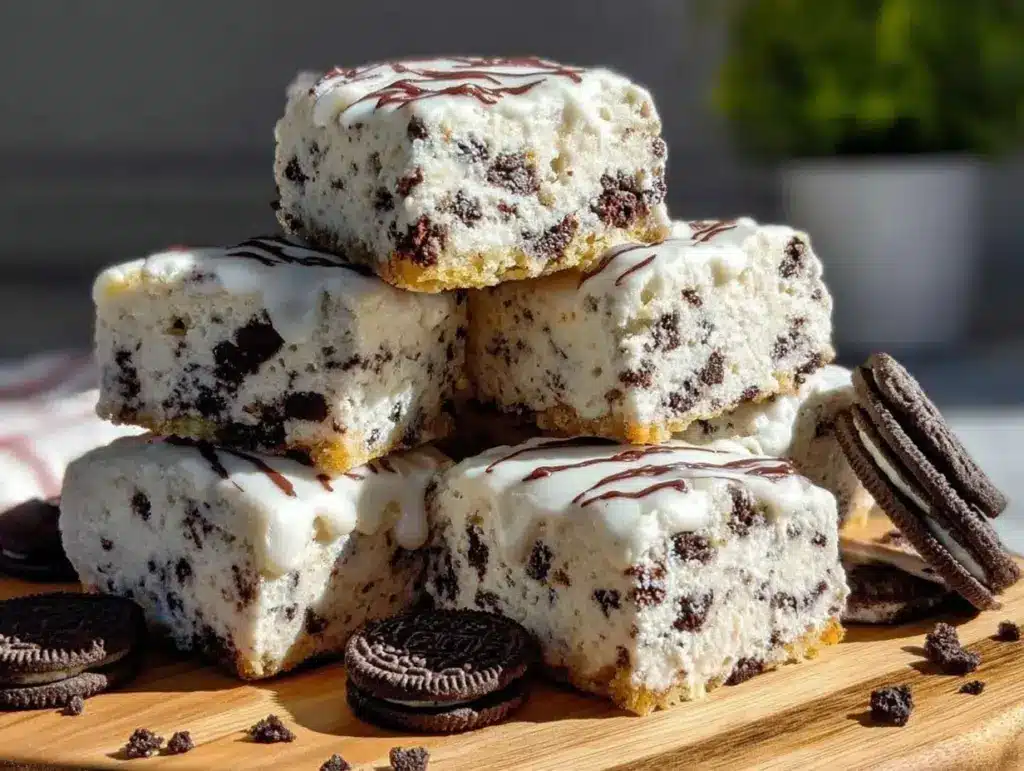
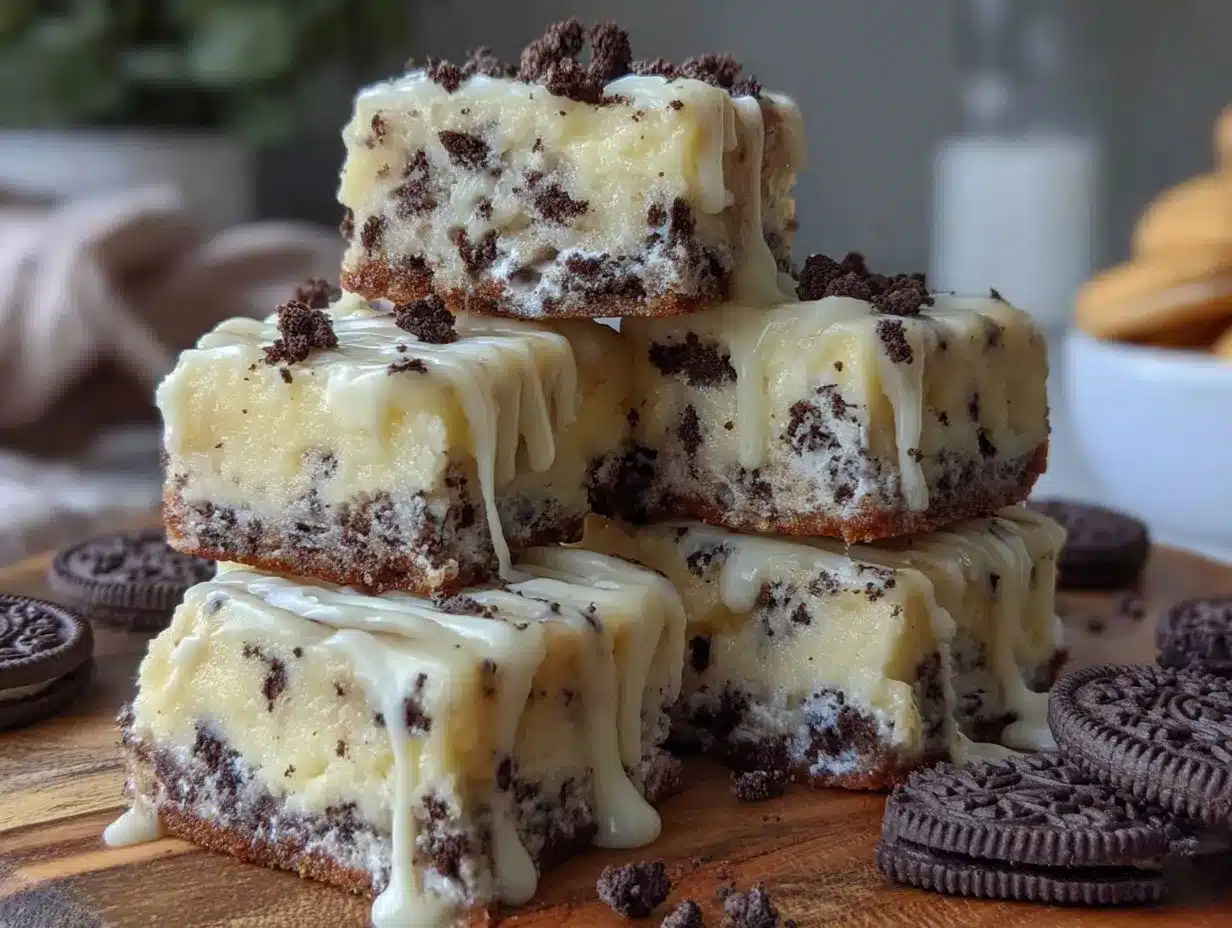
What really sets this recipe apart is the little twist I learned: pressing the bars firmly and chilling them overnight helps them hold together beautifully without baking. Plus, I use a blend of classic sandwich cookies and a sprinkle of mini chocolate chips for extra texture. It’s not just a no-bake cookie bar—it’s the bar that feels homemade and thoughtful without the hassle. For a quick sweet touch in a lunchbox, it’s tough to beat.
It’s the kind of snack that kind of sneaks up on you—the first bite brings a quick smile, and the second makes you wish you made a bigger batch. It’s comfort food for busy days, honest and unpretentious, and it’s stuck around in our routine because it’s just that dependable.
What Ingredients You Will Need
This recipe uses simple, wholesome ingredients to deliver bold flavor and satisfying texture without the fuss. Most of these are pantry staples, and a few are easy to find at any grocery store. Here’s what you’ll gather:
- Crushed sandwich cookies: About 3 cups (approx. 300g), finely crushed but not powdered — Oreo or any cookies and cream style work best.
- Sweetened condensed milk: 1 can (14 oz / 396g) — acts as the glue and adds creamy sweetness.
- Butter: 1/4 cup (56g), unsalted and melted — helps bind and adds richness.
- Mini chocolate chips: 1/2 cup (90g), optional but recommended for added texture and chocolaty bursts.
- Vanilla extract: 1 tsp — enhances the overall flavor profile subtly.
- Salt: A pinch — balances the sweetness and brings out the cookie flavor.
- Optional add-ins: Chopped nuts or shredded coconut for a twist, if you like.
I usually recommend sticking to a trusted cookie brand like Nabisco Oreos for that authentic cookies and cream taste. If you want a gluten-free option, you can swap the cookies for gluten-free sandwich cookies, and for a dairy-free version, try coconut condensed milk and vegan butter alternatives. This recipe is flexible, which makes it a winner for families juggling different dietary needs.
Equipment Needed
One of the perks of this recipe is its minimal equipment list. Here’s what you’ll need:
- Mixing bowl: A large one to combine the crushed cookies and wet ingredients.
- Measuring cups and spoons: For precise ingredient amounts.
- Spatula or wooden spoon: For mixing and pressing the mixture into the pan.
- 8×8-inch baking pan: Or any similar-sized dish lined with parchment paper for easy removal.
- Plastic wrap or lid: To cover the bars while chilling.
No fancy gadgets required, which I appreciate on chaotic mornings! If you want to crush the cookies quickly, a food processor works like a charm, but a sturdy zip-top bag and rolling pin do the job just fine. I like to use parchment paper to make sure the bars lift out cleanly without sticking or breaking apart.
Preparation Method
- Crush the cookies: Place 3 cups (300g) of sandwich cookies into a large zip-top bag. Use a rolling pin or the bottom of a heavy pan to crush the cookies into fine crumbs, but keep some small chunks for texture. This should take about 5 minutes.
- Mix the wet ingredients: In a large bowl, combine 1 can (14 oz / 396g) of sweetened condensed milk, 1/4 cup (56g) melted unsalted butter, 1 tsp vanilla extract, and a pinch of salt. Stir lightly until smooth. This step takes 2-3 minutes.
- Combine cookie crumbs and chocolate chips: Add the crushed cookies and 1/2 cup (90g) mini chocolate chips to the wet mixture. Fold everything together gently until the crumbs are evenly coated. The mixture will be sticky but hold together when pressed. Allow about 3 minutes for this.
- Press into the pan: Line an 8×8-inch pan with parchment paper. Transfer the mixture into the pan, then press firmly and evenly with the back of a spatula or your hands to compact it. This is key for bars that hold well — spend at least 2 minutes here.
- Chill: Cover the pan with plastic wrap and place it in the refrigerator for at least 2 hours, preferably overnight. This chilling step lets the bars set and firm up.
- Slice and serve: Once set, lift the bars out of the pan using the parchment paper edges. Place on a cutting board and slice into 12 bars. Keep refrigerated until serving to maintain firmness.
If you find the mixture too loose or crumbly before pressing, add a few more tablespoons of melted butter or a splash of condensed milk. The texture should be sticky enough to bind but not overly wet. If you want to speed up setting, pop the bars in the freezer for 30 minutes, but don’t forget to bring them back to fridge temp before slicing for the best texture.
Cooking Tips & Techniques
There are a few tricks I picked up through trial and error that make these snack bars stand out:
- Don’t skip chilling: It’s tempting to cut into the bars too soon, but I’ve learned the hard way that patience pays off. Chilling solidifies the bars so they don’t fall apart.
- Press firmly: When pressing the mixture into the pan, really compact it. Loose pressing leads to crumbly bars. I sometimes use the bottom of a glass cup for even pressure.
- Cookie texture matters: Finely crushed cookies help with binding, but leaving a few larger pieces adds a nice bite. Crushing all the way to powder makes the bars too dense.
- Mix gently: Overmixing can crush the cookie crumbs too much and change the texture. Fold ingredients just until combined.
- Storage matters: Keep bars refrigerated in an airtight container to maintain freshness and prevent them from being too sticky or too hard.
One time I forgot the butter and tried just condensed milk as binder — the bars stuck to everything and fell apart. Lesson learned! Also, I like to prepare these bars the night before school so they’re well set and ready to grab in the morning rush.
Variations & Adaptations
This recipe is quite forgiving and easy to tweak for different preferences or dietary needs:
- Peanut Butter Twist: Stir 1/4 cup creamy peanut butter into the wet mixture for an extra nutty flavor that pairs wonderfully with cookies and cream.
- Gluten-Free Option: Use gluten-free sandwich cookies and double-check your chocolate chips to ensure they’re gluten-free certified.
- Vegan Version: Swap sweetened condensed milk with a coconut condensed milk alternative, and use vegan butter. Be sure to pick vegan cookies and dairy-free chocolate chips.
- Seasonal Add-Ins: For fall, add a sprinkle of cinnamon or pumpkin spice into the mix. In summer, fold in some crushed freeze-dried berries for a pop of color and tartness.
- Crunch Factor: Toss in chopped toasted nuts or shredded coconut for added texture and flavor complexity.
Personally, I once tried adding a handful of crushed crispy pepperoni pizza rolls crumbs to a savory batch just for fun—it was weird but surprisingly addictive. Sticking to sweet is usually best, though!
Serving & Storage Suggestions
These Easy No-Bake Cookies and Cream Snack Bars are best served chilled or at room temperature. They hold their shape nicely from the fridge and make for a mess-free treat perfect for on-the-go snacking.
Pair them with a glass of cold milk or a cup of coffee for a satisfying afternoon pick-me-up. For lunchboxes, they go well alongside fresh fruit or a crunchy veggie like baby carrots.
To store, keep the bars in an airtight container in the refrigerator for up to 5 days. For longer storage, wrap each bar individually in plastic wrap and freeze for up to 3 months. To thaw, move them to the fridge overnight.
One nice thing about these bars is that the flavors actually deepen a bit after a day or two in the fridge. The cookies soften slightly, blending even better with the creamy binder, making the bars even more indulgent—without getting soggy.
Nutritional Information & Benefits
Each bar (assuming 12 bars per batch) roughly contains:
| Calories | Fat | Carbohydrates | Protein | Sugar |
|---|---|---|---|---|
| 210 kcal | 10g | 28g | 2g | 18g |
While these are definitely a treat, they contain some calcium and protein from the condensed milk and butter. The cookie crumbs bring in comfort carbs. For a balanced snack, pairing with a protein-rich side like a hard-boiled egg or some yogurt can help.
This recipe is gluten-free adaptable and can be made dairy-free with thoughtful ingredient swaps. It contains common allergens like dairy, gluten (unless swapped), and possibly nuts if you add them. Always check ingredient labels if allergies are a concern.
I appreciate that this recipe lets me feel good about giving my kids a sweet snack that’s homemade, controlled, and free from artificial additives often found in store-bought bars.
Conclusion
Easy No-Bake Cookies and Cream Snack Bars for Back to School have quietly become a staple in my kitchen, especially when mornings get hectic and there’s no time to bake. They’re straightforward, reliable, and bring that familiar cookies and cream flavor we all love without fuss or fancy steps. The best part is how adaptable they are—made just right for your family’s tastes or dietary needs.
Whether you’re packing lunchboxes or need a quick afternoon pick-me-up, these bars fit the bill perfectly. I love that they bring a little homemade care to busy days without adding stress. Try customizing with your favorite mix-ins or pairing them with a refreshing salad like the fresh southwest chipotle salad for a balanced snack or light meal.
Give this recipe a shot and let me know how you tweak it to make it your own. It’s one of those recipes that rewards a little experimentation—and honestly, who doesn’t want a reliable cookies and cream treat that’s ready in minutes?
FAQs
Can I use different types of cookies for this recipe?
Yes! While classic sandwich cookies are best for the authentic cookies and cream flavor, you can experiment with other cookies like chocolate chip or gluten-free options. Just make sure they’re crushed finely.
Do these bars need to be refrigerated?
Yes, refrigeration helps the bars set properly and keeps them firm and fresh. Keep them in an airtight container in the fridge for up to 5 days.
Can I make these bars ahead of time?
Absolutely. In fact, chilling them overnight improves the texture and flavor. You can even freeze the bars wrapped individually for up to 3 months.
What if I don’t have sweetened condensed milk?
Sweetened condensed milk is key for sweetness and binding. You can try making a homemade version or use a vegan condensed milk substitute if needed, but the texture may vary slightly.
Are these bars suitable for school lunches?
Yes, they’re perfect for lunchboxes because they’re portable, mess-free, and satisfying. Just keep them chilled until packed to maintain their shape.
Pin This Recipe!
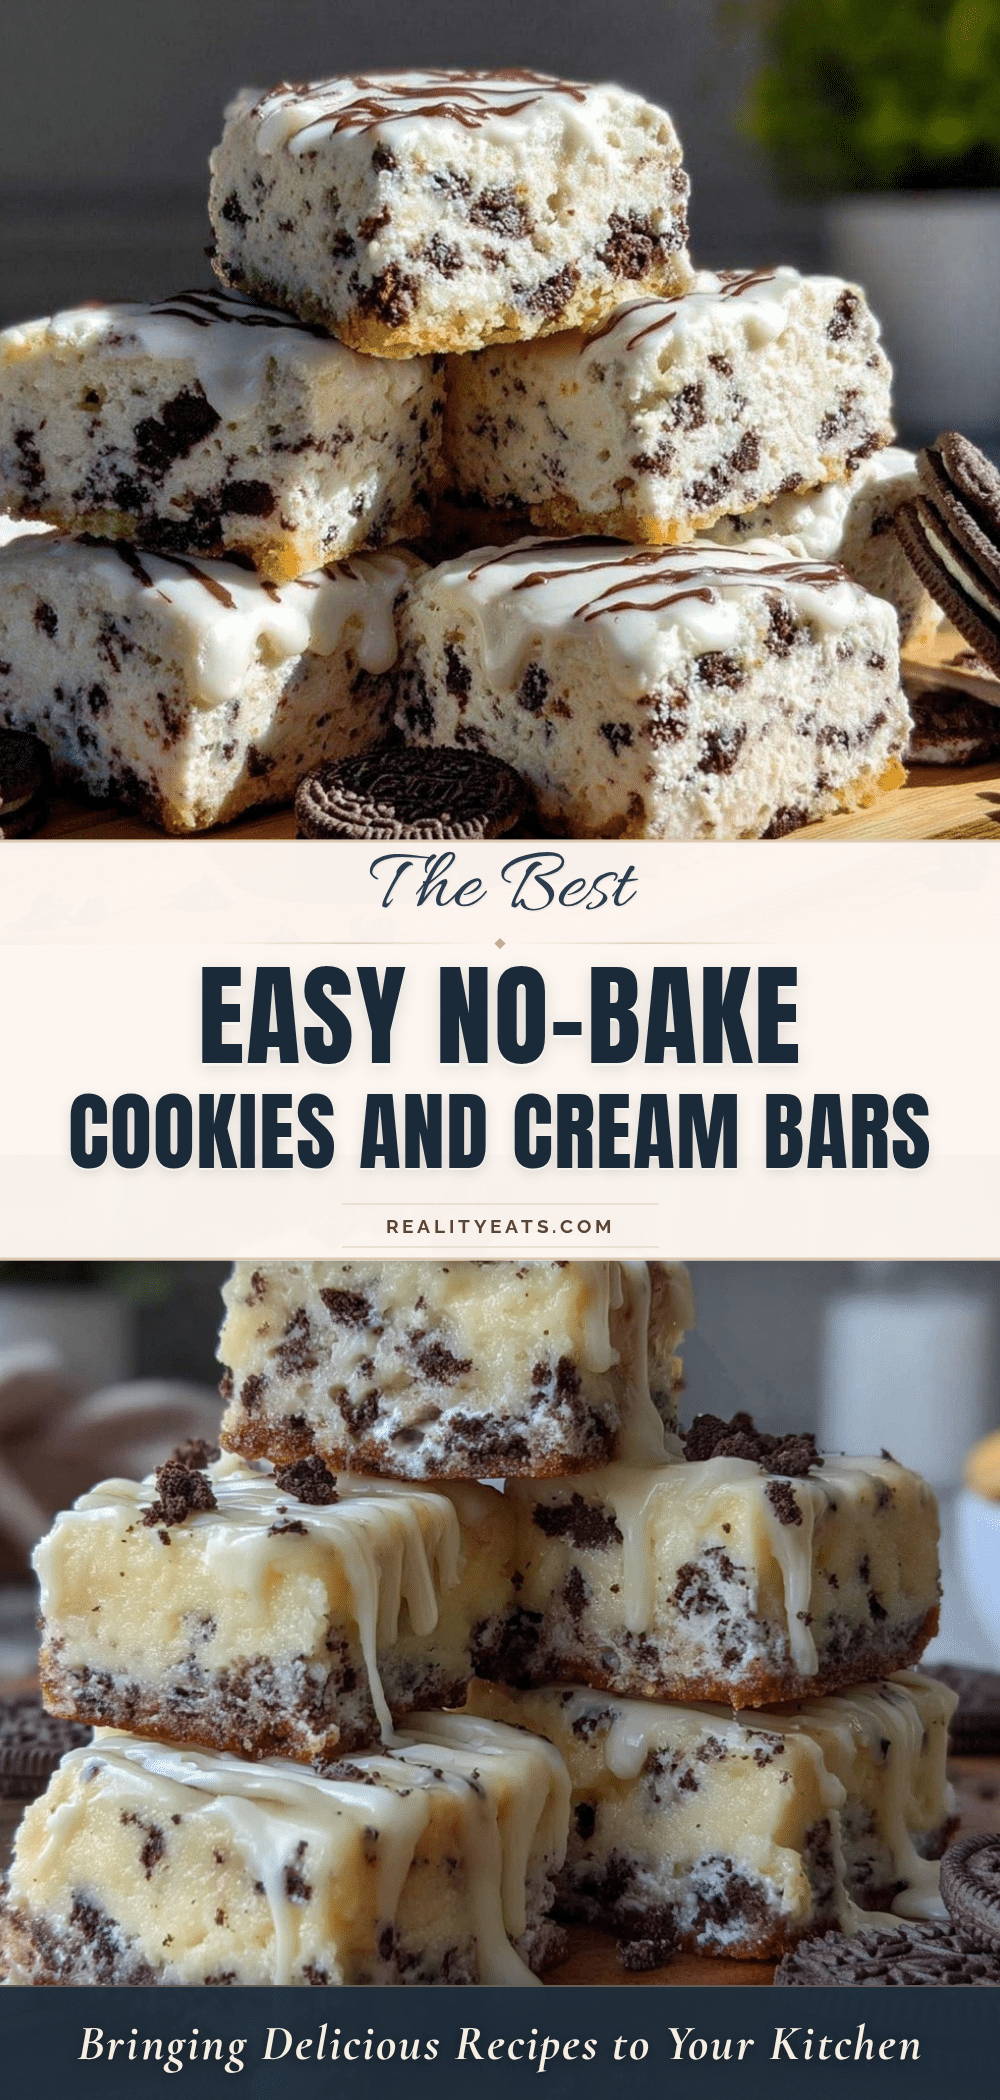
Easy No-Bake Cookies and Cream Snack Bars Perfect for Back to School

These no-bake snack bars combine creamy, crunchy textures with a nostalgic cookies and cream flavor, perfect for quick, mess-free back-to-school snacks.
- Prep Time: 10 minutes
- Cook Time: 0 minutes
- Total Time: 2 hours 10 minutes
- Yield: 12 bars 1x
- Category: Snack
- Cuisine: American
Ingredients
- 3 cups (approx. 300g) crushed sandwich cookies (Oreo or any cookies and cream style)
- 1 can (14 oz / 396g) sweetened condensed milk
- 1/4 cup (56g) unsalted butter, melted
- 1/2 cup (90g) mini chocolate chips (optional)
- 1 tsp vanilla extract
- A pinch of salt
- Optional add-ins: chopped nuts or shredded coconut
Instructions
- Place 3 cups (300g) of sandwich cookies into a large zip-top bag. Use a rolling pin or the bottom of a heavy pan to crush the cookies into fine crumbs, leaving some small chunks for texture (about 5 minutes).
- In a large bowl, combine 1 can (14 oz / 396g) sweetened condensed milk, 1/4 cup (56g) melted unsalted butter, 1 tsp vanilla extract, and a pinch of salt. Stir lightly until smooth (2-3 minutes).
- Add the crushed cookies and 1/2 cup (90g) mini chocolate chips to the wet mixture. Fold gently until crumbs are evenly coated and mixture is sticky but holds together (about 3 minutes).
- Line an 8×8-inch baking pan with parchment paper. Transfer the mixture into the pan and press firmly and evenly with a spatula or hands to compact it (at least 2 minutes).
- Cover the pan with plastic wrap and refrigerate for at least 2 hours, preferably overnight, to let the bars set and firm up.
- Lift the bars out of the pan using the parchment paper edges. Place on a cutting board and slice into 12 bars. Keep refrigerated until serving.
Notes
Press the mixture firmly into the pan to ensure bars hold together well. Chill overnight for best texture. If mixture is too loose, add more melted butter or condensed milk. Store bars refrigerated in an airtight container for up to 5 days or freeze individually wrapped for up to 3 months.
Nutrition
- Serving Size: 1 bar (1/12 of batch
- Calories: 210
- Sugar: 18
- Fat: 10
- Carbohydrates: 28
- Protein: 2
Keywords: no-bake, cookies and cream, snack bars, back to school, easy snack, kid-friendly, lunchbox snack