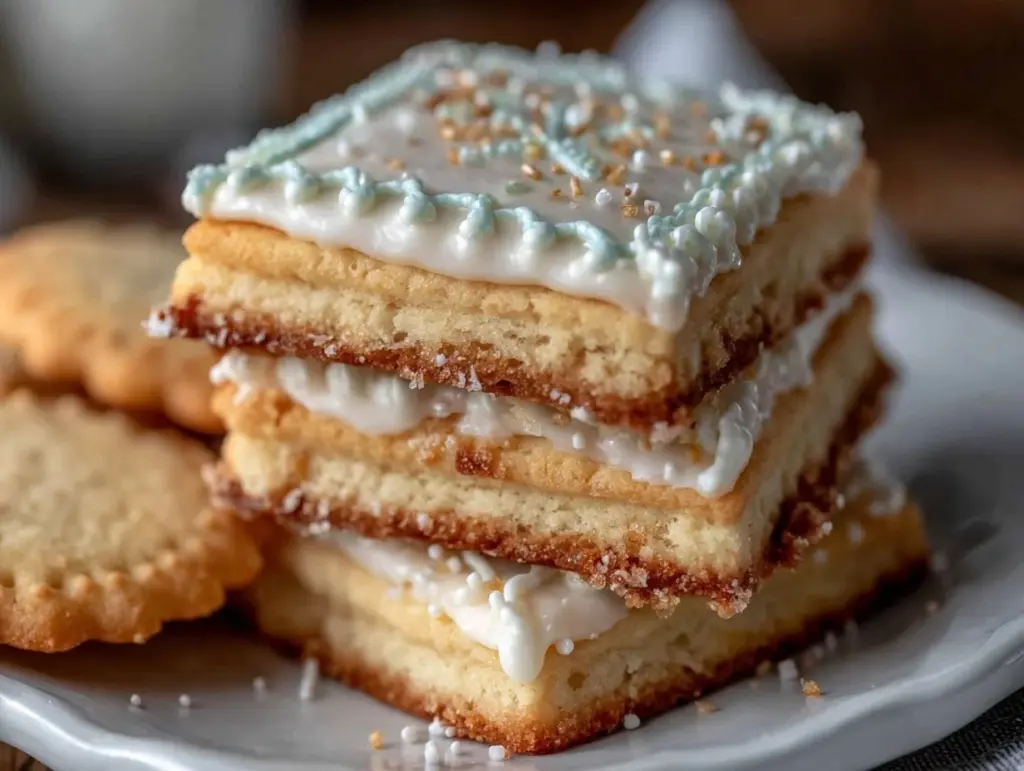
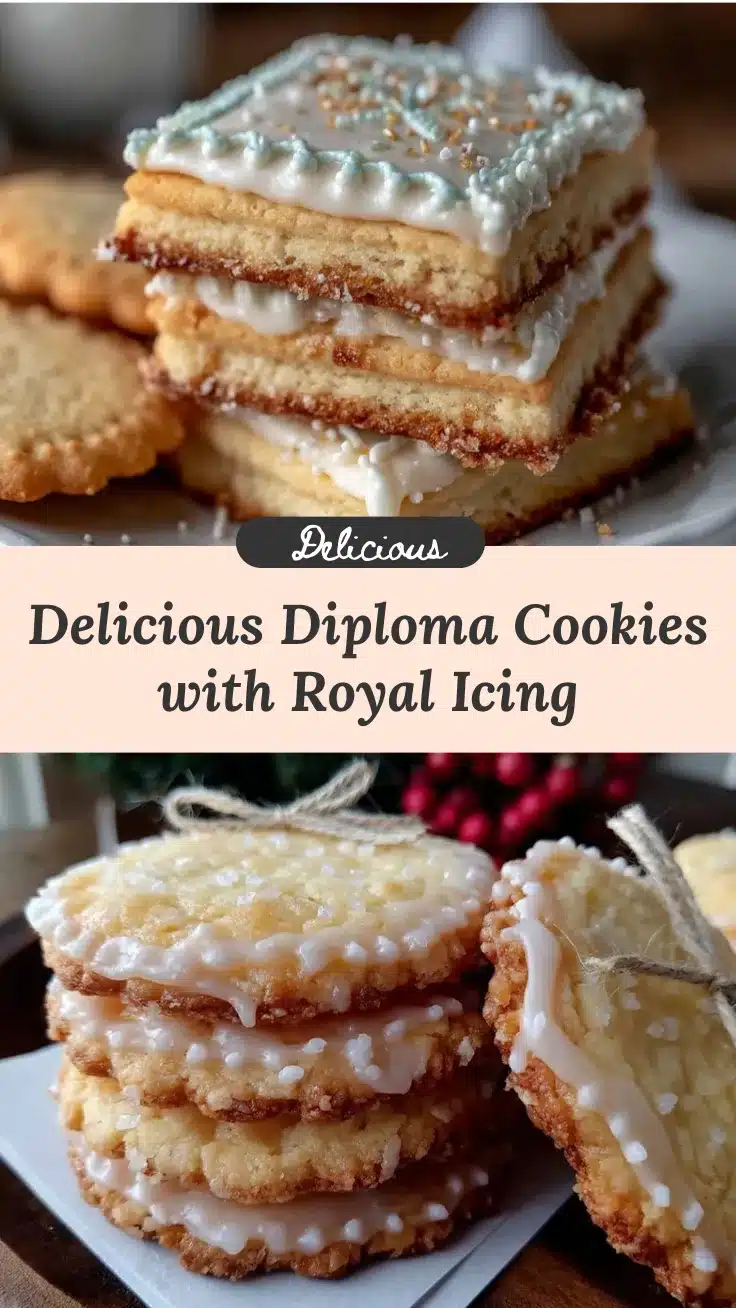
The sight of beautifully decorated diploma cookies always brings a smile to my face. There’s something about those crisp edges, the smooth royal icing, and the tiny details that make them feel like a real celebration in edible form. I first tried making elegant diploma cookies with royal icing when my niece graduated high school—honestly, I was nervous about the icing, but the end result was beyond rewarding. These cookies aren’t just treats; they carry memories, pride, and a touch of sweetness that fits any special occasion.
Over the years, I’ve tweaked this recipe a bit—balancing the dough for that perfect snap and crafting royal icing that’s smooth yet sturdy enough to hold fine details. If you’re looking for a treat that combines charm, taste, and a bit of crafty fun, these elegant diploma cookies with royal icing are for you. They’re great for graduation parties, milestone celebrations, or any time you want to impress without too much fuss.
Plus, the best part? You don’t need to be a professional baker or decorator to pull this off. After making these cookies multiple times, I’ve learned the tricks that make the process straightforward and enjoyable. Trust me, once you get the hang of the royal icing, you’ll be adding your own personal flair to these perfect celebration treats in no time.
Why You’ll Love This Recipe
- Quick & Easy: The dough comes together in under 20 minutes, and the icing sets just right with a bit of patience.
- Simple Ingredients: No need for fancy or hard-to-find items; most of these are pantry staples!
- Perfect for Celebrations: Ideal for graduations, award ceremonies, or any achievement worth celebrating.
- Crowd-Pleaser: Kids love them for their fun shapes, adults appreciate the delicate flavor and elegant look.
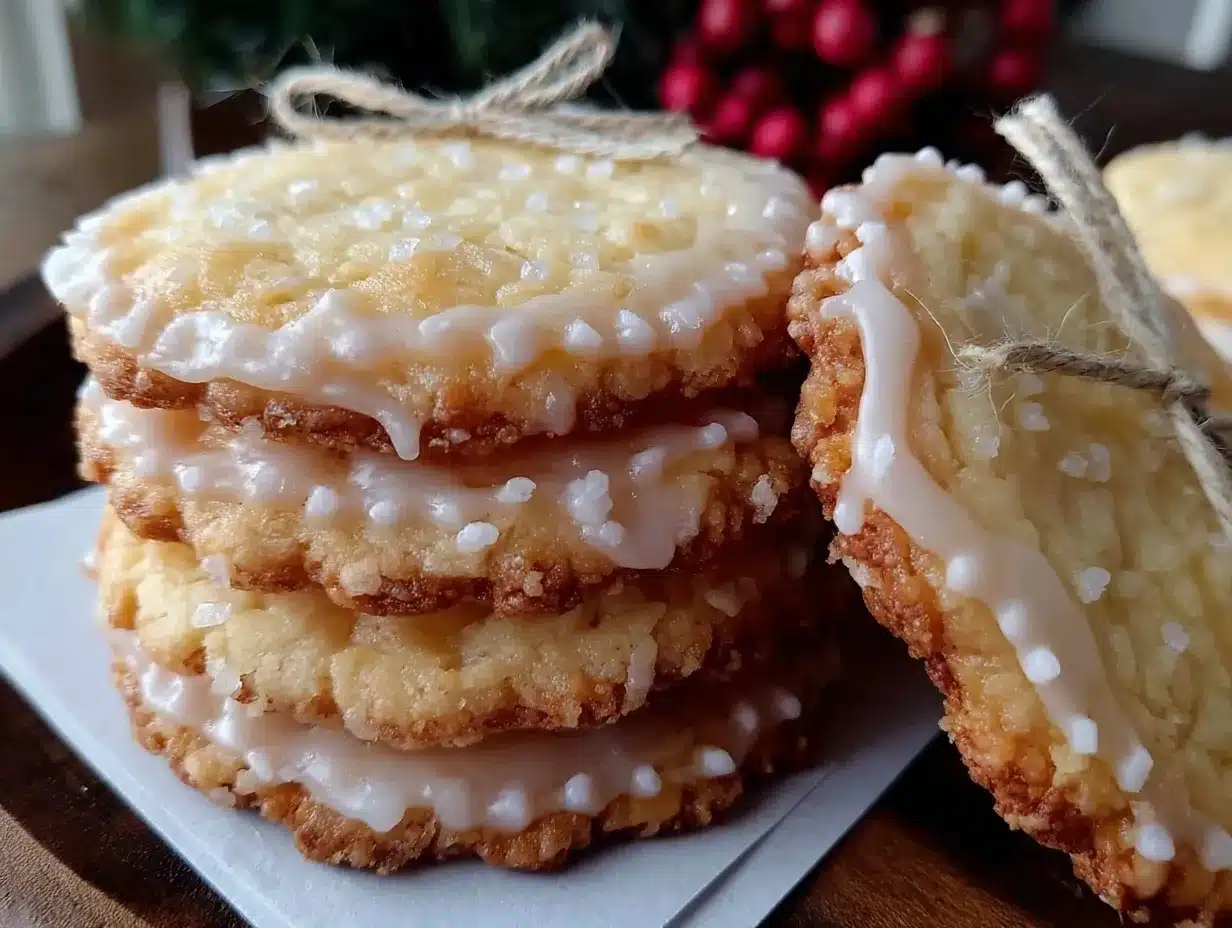
- Unbelievably Delicious: The cookie base is buttery with a subtle vanilla hint, balanced perfectly by the sweet but not overpowering royal icing.
This recipe differs from others because the dough is sturdy enough to hold its shape during baking, which is crucial for the diploma design. The royal icing recipe is also balanced—not too runny or stiff—making it manageable for beginners but versatile enough for more detailed piping. Honestly, these diploma cookies feel like a mini art project that ends with a delicious reward.
It’s not just about the cookie’s look; the blend of buttery crunch and sweet icing hits that comfort food spot. These treats make you pause, smile, and remember the reason for celebration. Whether you’re baking for a big crowd or just a few close friends, these cookies turn any party into a little fancy affair.
What Ingredients You Will Need
This recipe uses straightforward, wholesome ingredients to achieve that classic cookie texture and a smooth royal icing finish. Most are pantry staples, so you might already have them on hand.
- For the Cookie Dough:
- All-purpose flour – 3 cups (360g)
- Unsalted butter, softened – 1 cup (226g) (I recommend plugging in a trusted brand like Kerrygold for richer flavor)
- Granulated sugar – 1 cup (200g)
- Large egg – 1, room temperature
- Pure vanilla extract – 1 teaspoon
- Baking powder – 1 teaspoon
- Salt – ¼ teaspoon
- For the Royal Icing:
- Powdered sugar – 4 cups (480g), sifted for smoothness
- Pasteurized egg whites or meringue powder – 3 tablespoons
- Fresh lemon juice or water – 4-5 tablespoons (adjust for consistency)
- Food coloring gels (optional) – white, black, or any color for details
- Decorative Extras:
- Edible gold dust or shimmer (optional, adds a fancy touch)
- Fine piping tips – size #1 or #2 for outlining and writing
For the best texture, I like to use a firm butter and sift the flour to avoid lumps. The baking powder helps the cookies hold their shape without puffing up too much. When it comes to royal icing, using pasteurized egg whites is a safe bet, but meringue powder works well if you prefer shelf-stable options. If you want to swap flour for a gluten-free option, a one-to-one gluten-free baking flour blend can work, although the texture might be a bit more delicate.
Equipment Needed
- Mixing bowls – medium and large sizes
- Electric mixer or stand mixer – makes creaming butter and mixing dough easier
- Rolling pin – for evenly rolling out the dough
- Diploma-shaped cookie cutters or a sharp knife – I’ve found a diploma-shaped cutter online, but a ruler and knife work if you fancy DIY shapes
- Baking sheets – lined with parchment paper for easy cleanup
- Cooling racks – to cool cookies completely before icing
- Piping bags and fine tips – disposable or reusable, whichever you prefer (I’ve been using reusable silicone bags for years, super eco-friendly)
- Sifter – for powdered sugar and flour
- Small bowls or cups – for mixing different icing colors
If you don’t have a stand mixer, a strong hand with a wooden spoon works too, just takes a bit more elbow grease. For rolling, a non-stick silicone mat can keep things tidy and help roll dough evenly. When it comes to piping, investing in a set of fine tips will really up your decoration game without breaking the bank. After use, a quick rinse and soaking in warm water keeps them in good shape.
Detailed Preparation Method
- Make the Dough: In a large bowl, cream together the softened butter (226g) and granulated sugar (200g) using an electric mixer on medium speed until light and fluffy—about 3-4 minutes. This step is key for tender cookies.
- Add Egg and Vanilla: Beat in 1 large egg and 1 teaspoon pure vanilla extract until fully incorporated. The mixture might look a little loose but that’s perfect.
- Combine Dry Ingredients: In a separate bowl, whisk together 3 cups (360g) all-purpose flour, 1 teaspoon baking powder, and ¼ teaspoon salt. Sifting here helps avoid clumps and keeps dough smooth.
- Mix Dry into Wet: Gradually add the dry ingredients to the butter mixture, mixing on low speed until a dough forms. It should be soft but not sticky. If it feels too sticky, dust your hands with a little flour.
- Chill the Dough: Wrap the dough in plastic wrap and refrigerate for at least 1 hour. This helps prevent spreading during baking and makes rolling easier.
- Roll and Cut: Preheat oven to 350°F (175°C). On a lightly floured surface, roll out the dough to about ¼ inch (6 mm) thickness. Use your diploma-shaped cutter (or carefully cut rectangles with a knife and add details later) to shape cookies.
- Bake: Place cookies on parchment-lined baking sheets about 1 inch (2.5 cm) apart. Bake for 10-12 minutes until edges are just golden. Watch closely—overbaking makes them too hard.
- Cool: Transfer cookies to cooling racks and let cool completely before decorating. This can take 30 minutes or more, but don’t rush it or icing will melt.
- Prepare Royal Icing: In a clean bowl, whisk together 4 cups (480g) powdered sugar and 3 tablespoons pasteurized egg whites (or meringue powder mixed according to package). Add 4-5 tablespoons lemon juice or water gradually until icing reaches a thick but pipeable consistency. Test by dragging a spoon through—it should hold its shape briefly.
- Decorate: Fill piping bags with the white royal icing for the base. Outline the edges of each cookie, then flood the inside with more icing. Use a toothpick to spread evenly if needed. Let this layer dry for at least 1 hour.
- Add Details: Use a stiffer icing (less liquid) in a smaller piping tip to add diploma “text,” borders, or ribbon designs. Black or colored gels work great here. Patience is key—work slowly for neat lines.
- Dry Completely: Let decorated cookies dry at room temperature for 6-8 hours or overnight to harden the royal icing fully.
Pro tip: If your royal icing feels too thick or stiff, add a few drops of lemon juice or water, but be careful not to make it runny. Also, keep unused icing covered with a damp towel to prevent drying out.
Cooking Tips & Techniques
Working with royal icing can be intimidating, but a few tricks make it manageable. First, always sift your powdered sugar thoroughly. Lumps are your enemy here—they’ll clog piping tips and ruin smooth finishes. I’ve messed this up before, and trust me, it’s worth the extra step.
When piping, start with the outline and then flood the interior with thinner icing. This “dam and flood” method helps keep edges tidy and prevents colors from running together. Another tip: use a toothpick to nudge icing into corners or pop tiny air bubbles for a flawless surface.
Don’t rush drying time. I know it’s tempting to gobble up those cookies right away, but royal icing needs proper time to harden. If you try to stack or package too soon, decorations can smudge or crack. I usually leave mine overnight, and the next day they’re perfect.
Finally, maintain consistent icing thickness by adjusting liquid slowly. Too thin, and it drips everywhere; too thick, and it’s tough to pipe smooth lines. It took me a few batches to find my sweet spot, but now I can eyeball it.
Variations & Adaptations
These elegant diploma cookies are a fantastic base for creative spins. Here are a few ways I’ve played with them:
- Dietary Twist: Swap all-purpose flour for a gluten-free blend to make them safe for gluten-sensitive friends. Use meringue powder instead of egg whites for vegan-friendly royal icing.
- Seasonal Flavors: Add a teaspoon of almond extract or lemon zest to the dough for a subtle flavor boost. You can also tint the royal icing in school colors or add edible glitter for extra sparkle.
- Alternative Shapes: Instead of diplomas, make graduation caps, stars, or scrolls to mix up your celebration display. These shapes work well with the same dough and icing technique.
- Filling Option: Spread a thin layer of raspberry jam between two cookies before icing for a surprise fruity center.
Once, I tried piping the diploma “text” with gold edible dust mixed into black icing—it looked stunning and was a big hit at a graduation party. Feel free to experiment with colors and designs—you can make these cookies uniquely yours each time.
Serving & Storage Suggestions
These diploma cookies are best served at room temperature, allowing the royal icing to keep its perfect texture without becoming sticky or soft. Arrange them on a pretty platter or in a decorative box for gifting. They pair wonderfully with a cup of tea or a glass of sparkling lemonade.
For storage, keep cookies in an airtight container at room temperature for up to 5 days. If you’re planning ahead, they freeze well without losing flavor—just layer parchment paper between cookies to prevent sticking, then thaw at room temperature before serving.
Reheating isn’t really necessary here; in fact, it can soften the icing. If you want to refresh the cookie’s crunch, let it sit out a bit after removing from the freezer. Over time, the flavors meld nicely, and the icing hardens even more, making them last longer and look pristine.
Nutritional Information & Benefits
Each elegant diploma cookie (approx. 1 serving) contains roughly 150-180 calories, depending on size and icing thickness. They provide a modest amount of carbohydrates and fats, mainly from butter and sugar.
Key ingredients like butter add richness and fat-soluble vitamins, while egg whites in the royal icing deliver a bit of protein without extra calories. This treat isn’t exactly health food (let’s be honest), but it’s a delightful indulgence perfect for special occasions.
If you want to lighten up, try reducing sugar slightly or swapping butter for a mix with coconut oil. Just keep in mind texture changes. These cookies are gluten-based, so not suitable for gluten-free diets unless modified.
From a wellness perspective, I love that baking my own treats means I control ingredients and avoid preservatives or artificial flavors. It’s a small but meaningful way to celebrate thoughtfully.
Conclusion
Elegant diploma cookies with royal icing aren’t just pretty—they’re a celebration on a plate. Whether you’re marking a graduation, an achievement, or simply want a sweet project, this recipe delivers consistent results with a touch of class. It’s approachable enough for bakers of all skill levels but leaves room to add your own creative stamp.
Personally, I adore the way these cookies bring people together—friends admiring the details, kids excited to eat their “official” diplomas, and that warm feeling of accomplishment baked right in. Give this recipe a try, tweak it to fit your style, and don’t forget to share your successes!
Let me know how your diploma cookies turn out or what variations you tried—I love hearing from you. Happy baking, and here’s to many sweet celebrations ahead!
Frequently Asked Questions
Can I make the cookie dough ahead of time?
Yes! You can prepare the dough and refrigerate it for up to 3 days before rolling and baking. For longer storage, freeze the dough tightly wrapped for up to 1 month.
Is royal icing safe to eat raw?
When made with pasteurized egg whites or meringue powder, royal icing is safe to eat. Avoid using raw egg whites for safety reasons.
How do I fix runny royal icing?
Add more powdered sugar a little at a time until the icing thickens to the desired consistency. Make sure to stir well to avoid lumps.
Can I use store-bought cookie cutters instead of a diploma shape?
Absolutely! You can use any rectangular or scroll-shaped cutter, or even freehand cut the cookies with a knife to mimic diploma shapes.
How long should I let the decorated cookies dry?
Ideally, let the royal icing dry at room temperature for 6-8 hours or overnight to fully harden before stacking or packaging.
Pin This Recipe!
Elegant Diploma Cookies Recipe Easy Homemade Royal Icing Celebration Treats

These elegant diploma cookies feature a buttery, crisp base with smooth royal icing perfect for graduations and celebrations. The recipe balances a sturdy dough with manageable royal icing for beautiful, detailed decorations.
- Prep Time: 20 minutes
- Cook Time: 12 minutes
- Total Time: 8 hours 32 minutes
- Yield: 24 cookies 1x
- Category: Dessert
- Cuisine: American
Ingredients
- 3 cups (360g) all-purpose flour
- 1 cup (226g) unsalted butter, softened
- 1 cup (200g) granulated sugar
- 1 large egg, room temperature
- 1 teaspoon pure vanilla extract
- 1 teaspoon baking powder
- 1/4 teaspoon salt
- 4 cups (480g) powdered sugar, sifted
- 3 tablespoons pasteurized egg whites or meringue powder
- 4–5 tablespoons fresh lemon juice or water
- Food coloring gels (optional) – white, black, or any color
- Edible gold dust or shimmer (optional)
- Fine piping tips – size #1 or #2
Instructions
- In a large bowl, cream together the softened butter and granulated sugar using an electric mixer on medium speed until light and fluffy, about 3-4 minutes.
- Beat in the large egg and pure vanilla extract until fully incorporated.
- In a separate bowl, whisk together the all-purpose flour, baking powder, and salt. Sift to avoid clumps.
- Gradually add the dry ingredients to the butter mixture, mixing on low speed until a soft dough forms. Dust hands with flour if dough is too sticky.
- Wrap the dough in plastic wrap and refrigerate for at least 1 hour.
- Preheat oven to 350°F (175°C). Roll out the dough on a lightly floured surface to about 1/4 inch (6 mm) thickness.
- Use diploma-shaped cookie cutters or a knife to cut shapes.
- Place cookies on parchment-lined baking sheets about 1 inch apart and bake for 10-12 minutes until edges are just golden.
- Transfer cookies to cooling racks and cool completely before decorating, about 30 minutes or more.
- Prepare royal icing by whisking powdered sugar and pasteurized egg whites (or meringue powder). Gradually add lemon juice or water until thick but pipeable consistency is reached.
- Fill piping bags with white royal icing for the base. Outline edges and flood the inside. Use a toothpick to spread evenly. Let dry for at least 1 hour.
- Use stiffer icing with smaller piping tips to add diploma text, borders, or ribbon designs with colored gels if desired.
- Let decorated cookies dry at room temperature for 6-8 hours or overnight to harden the royal icing fully.
Notes
Sift powdered sugar thoroughly to avoid lumps in royal icing. Use the ‘dam and flood’ method for neat icing edges. Let decorated cookies dry overnight to prevent smudging. Adjust icing consistency slowly with lemon juice or water. Dough can be refrigerated up to 3 days or frozen for 1 month before baking.
Nutrition
- Serving Size: 1 cookie
- Calories: 165
- Sugar: 14
- Sodium: 70
- Fat: 8
- Saturated Fat: 5
- Carbohydrates: 22
- Fiber: 0.5
- Protein: 2
Keywords: diploma cookies, royal icing cookies, graduation treats, celebration cookies, homemade cookies, decorated cookies