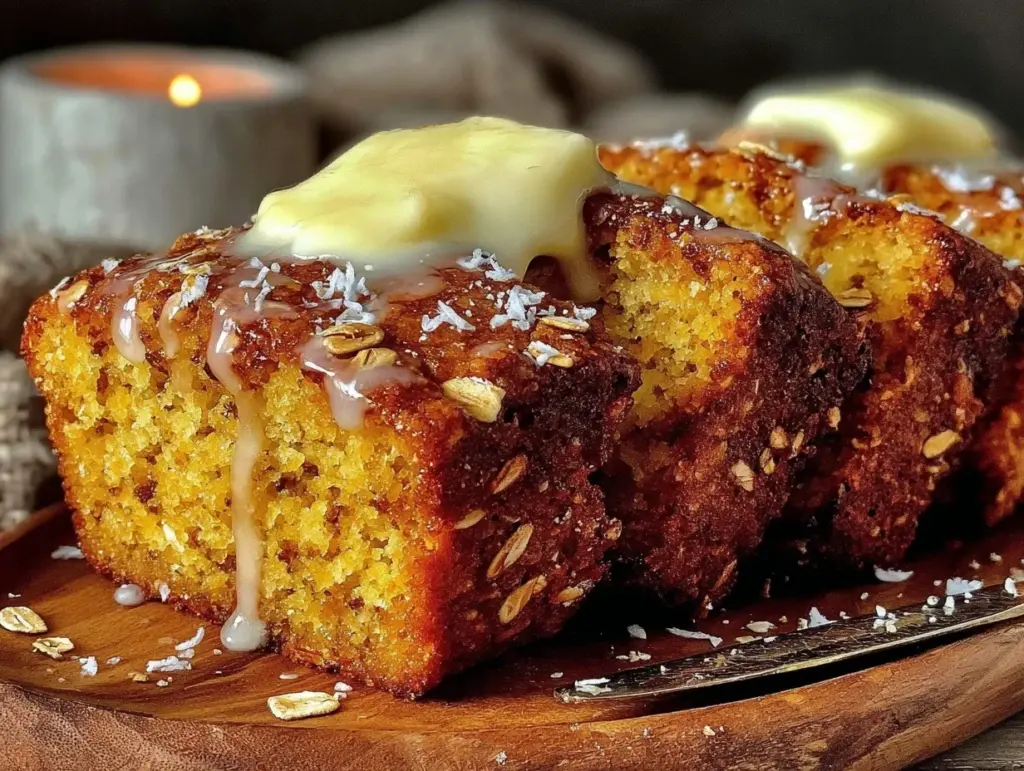
The smell of warm honey oat quick bread fresh out of the oven is honestly one of those simple pleasures that feels like a cozy hug on a plate. I first stumbled upon this recipe on a chilly Sunday morning when I needed something comforting but didn’t want to fuss with complicated baking. This honey oat quick bread with butter quickly became my go-to when I crave something wholesome yet fast to whip up. It’s got that perfect balance of sweet honey, hearty oats, and a tender crumb that’s just begging to be slathered with butter (and maybe a touch of jam, if you’re feeling fancy).
Over the years, I’ve tested this bread multiple times, tweaking the oats-to-flour ratio and the amount of honey to get it just right. The result? A loaf that’s moist, subtly sweet, and packed with texture. Whether you’re new to bread baking or a seasoned kitchen wizard, this recipe is a keeper. Plus, it’s perfect for busy mornings, afternoon tea, or a quick snack that feels a little indulgent but is still wholesome. If you’ve been searching for a quick bread recipe that’s easy, delicious, and downright addictive, you’ll find that this honey oat quick bread with butter ticks all the boxes.
So grab your mixing bowl and let’s get baking — you’re about to make one of the easiest, tastiest homemade breads around.
Why You’ll Love This Recipe
After baking this honey oat quick bread more times than I can count, I can say it’s a recipe that truly stands out. Here’s why you’ll be reaching for it again and again:
- Quick & Easy: Ready to enjoy in under an hour, this bread fits perfectly into busy schedules or last-minute cravings.
- Simple Ingredients: No weird or hard-to-find items here — just pantry staples like oats, flour, honey, and butter.
- Perfect for Any Occasion: Whether it’s a casual breakfast, a cozy snack, or a simple dessert, this bread hits the spot.
- Crowd-Pleaser: Everyone from kids to adults raves about the moist crumb and subtle sweetness.
- Unbelievably Delicious: The combo of honey and oats creates a comforting, slightly nutty flavor that keeps you coming back.
This isn’t just any quick bread. What makes it special is the way the oats lend a lovely texture without making it heavy, while the honey adds just the right touch of natural sweetness. I like to think of it as comfort food that’s also a bit wholesome — the kind that makes you close your eyes and savor every bite. Plus, the butter melting on a warm slice? Pure bliss. It’s my favorite way to enjoy this quick bread, and I bet you’ll agree.
What Ingredients You Will Need
This honey oat quick bread recipe calls for simple, wholesome ingredients that work together to create a moist and flavorful loaf. Most of these are kitchen staples, so no need for a special trip to the store. Here’s the rundown:
- Rolled oats (1 cup / 90g) — I prefer old-fashioned oats for their hearty texture; quick oats work too but change the crumb slightly.
- All-purpose flour (1 1/2 cups / 190g) — Provides structure; you can swap half for whole wheat flour for a nuttier flavor.
- Baking powder (1 1/2 teaspoons) — Helps the bread rise quickly and stay fluffy.
- Baking soda (1/2 teaspoon) — Works with honey’s acidity for leavening.
- Salt (1/2 teaspoon) — Balances the sweetness.
- Honey (1/3 cup / 113g) — Use your favorite variety; wildflower honey adds a floral note.
- Butter (1/4 cup / 57g), melted — Adds richness; unsalted butter is best so you can control saltiness.
- Egg (1 large, room temperature) — Binds the ingredients together.
- Milk (3/4 cup / 180ml), room temperature — Any kind works; whole milk gives a richer crumb, but plant-based milks are fine.
Optional additions:
- Chopped nuts (1/4 cup / 30g) — Walnuts or pecans add a nice crunch.
- Cinnamon (1/2 teaspoon) — For a warm spice note.
- Vanilla extract (1 teaspoon) — Enhances the sweetness and aroma.
When picking oats, look for rolled oats labeled “old-fashioned” rather than instant for the best texture. I usually use local honey from my farmer’s market — it’s fresher and adds a depth of flavor you don’t get from store-bought stuff. If you want a gluten-free option, swapping all-purpose flour for a gluten-free blend works well here.
Equipment Needed
This recipe is straightforward and doesn’t call for fancy gadgets. Here’s what you’ll need:
- Mixing bowls: A large bowl for dry ingredients and a medium one for wet ingredients.
- Measuring cups & spoons: Accuracy matters, especially for leavening agents.
- Loaf pan: A 9×5-inch (23×13 cm) loaf pan works perfectly. You can use a silicone or metal pan — I prefer metal for a crisper crust.
- Whisk and spatula: For mixing and folding the batter gently.
- Cooling rack: To let the bread cool evenly and keep that crust crisp.
If you don’t have a loaf pan, a round cake pan or even muffin tins can work — just adjust baking time accordingly. I once baked this in a cast-iron skillet when my pan was dirty, and it came out surprisingly good! For budget-friendly loaf pans, thrift stores often carry perfectly good ones. And a quick tip: line your pan with parchment paper for easy removal and less sticking.
Detailed Preparation Method

- Preheat your oven to 350°F (175°C). Grease your 9×5-inch loaf pan or line it with parchment paper. This step is crucial—prepping ahead prevents sticking and ensures even baking.
- Toast the oats (optional but recommended): Spread the rolled oats on a baking sheet and toast in the oven for 5-7 minutes until fragrant and lightly golden. This deepens the oat flavor. Let cool slightly.
- Mix dry ingredients: In a large bowl, whisk together the toasted oats, all-purpose flour, baking powder, baking soda, salt, and cinnamon if using. This helps distribute the leavening agents evenly.
- Combine wet ingredients: In a separate bowl, whisk the egg lightly. Add melted butter (make sure it’s cooled a bit so it doesn’t cook the egg), honey, milk, and vanilla extract if using. Mix until smooth and well combined.
- Make the batter: Pour the wet ingredients into the dry mixture. Use a spatula to fold everything together gently until just combined. Don’t overmix — a few lumps are fine! Overmixing can make the bread tough.
- Add nuts or extras: If using chopped nuts or dried fruit, fold them in here. I love adding walnuts for crunch.
- Transfer to pan: Pour the batter into your prepared loaf pan, smoothing the top with a spatula. The batter will be thick but spreadable.
- Bake: Place the pan in the oven and bake for 45-50 minutes, or until a toothpick inserted in the center comes out clean or with just a few moist crumbs. If the top browns too fast, tent with foil halfway through.
- Cool: Let the bread cool in the pan for about 10 minutes, then transfer to a wire rack to cool completely. This prevents sogginess on the bottom.
- Serve: Slice thick and slather with butter (honestly, it’s the best way). Enjoy warm or at room temperature.
Pro tip: If you find the bread is dense, it might be due to overmixing or packed flour. Measure your flour by spooning into the cup and leveling off rather than scooping directly. That little trick makes a big difference.
Cooking Tips & Techniques
Making quick bread might seem straightforward, but a few tips from my kitchen mishaps can save you trouble:
- Don’t overmix: This is the classic quick bread pitfall. Stir just until the wet and dry ingredients are combined — overmixing develops gluten and leads to a tough loaf.
- Use room temperature ingredients: Eggs and milk at room temp mix better and help the bread rise evenly.
- Toast the oats: It’s optional but really adds a nutty depth that’s worth the extra step.
- Check oven temperature: I learned the hard way that ovens can run hot or cold. An oven thermometer can prevent underbaked or burnt bread.
- Don’t skip the cooling: Cutting into the bread too soon can make it gummy. Patience pays off for the best texture.
- Multitasking: While the bread bakes, clean up your prep area or prep toppings — it’s a time-saver.
One time I tried using honey straight from the fridge, and it didn’t blend well, leaving clumps. Warming it slightly in a double boiler fixes that easily. Also, I’ve found that using melted butter instead of softened makes mixing smoother and the bread richer. These small tweaks add up!
Variations & Adaptations
If you want to mix things up or adjust to your dietary needs, this honey oat quick bread is pretty versatile. Here are some ideas I’ve tried or heard rave reviews about:
- Gluten-Free: Swap the all-purpose flour with a gluten-free blend (like Bob’s Red Mill 1-to-1). Add an extra 1/4 teaspoon baking powder to help lift.
- Vegan Version: Replace the egg with a flaxseed egg (1 tablespoon ground flaxseed + 3 tablespoons water, let sit 5 mins). Use plant-based milk and vegan butter.
- Flavor Twists: Add orange zest and a handful of dried cranberries for a festive touch. Or stir in shredded apple and cinnamon for autumn vibes.
- Cooking Method: You can bake this as muffins for portion control and a cute presentation. Bake at 350°F (175°C) for 20-25 minutes.
- Sweetness Level: Feel free to reduce honey by a tablespoon or two if you prefer less sweet bread. It still tastes great!
My personal favorite variation is adding a sprinkle of rolled oats and a drizzle of honey on top before baking. It makes for a pretty, rustic crust that’s irresistible. Don’t be afraid to experiment — this recipe welcomes your creativity.
Serving & Storage Suggestions
This quick bread is best enjoyed warm, straight from the oven, with a generous pat of butter melting into every nook and cranny. But honestly, it tastes great at room temperature too — perfect for a grab-and-go breakfast or an afternoon snack.
Pair it with a cup of tea or coffee for a simple but satisfying treat. For a heartier meal, serve alongside soup or a fresh salad. I’ve even used it to make breakfast sandwiches with eggs and bacon — talk about versatile!
To store, wrap the bread tightly in plastic wrap or keep it in an airtight container at room temperature for up to 3 days. For longer storage, slice and freeze in a resealable bag for up to 3 months. When you want a slice, toast it straight from the freezer — the butter melts beautifully and revives that fresh-baked feeling.
Over time, the flavors mellow and the bread becomes more tender, so a day-old slice is still quite enjoyable. Just avoid refrigeration as it tends to dry out quick breads.
Nutritional Information & Benefits
This honey oat quick bread is more than just tasty — it brings some nutritional perks too. Each slice (about 1/10th of the loaf) contains roughly:
| Calories | 180 kcal |
|---|---|
| Carbohydrates | 28g |
| Protein | 4g |
| Fat | 6g |
| Fiber | 2g |
The rolled oats provide heart-healthy fiber and minerals like iron and magnesium. Honey adds natural sweetness and trace antioxidants, while butter contributes fat-soluble vitamins. This bread is a nice balance of carbs and protein, making it a satisfying snack that keeps hunger at bay. It’s not low-calorie, but it’s a wholesome treat compared to many baked goods.
If you’re watching gluten, swap in a gluten-free flour blend. For dairy-free needs, plant-based milk and coconut or vegan butter work well here, too. Just note that texture might shift slightly.
Conclusion
So there you have it — a honey oat quick bread recipe that’s easy, reliable, and downright delicious. It’s one of those recipes that feels like a warm kitchen story every time you make it, whether it’s your first or your tenth loaf. You’ll love how simple ingredients come together for a bread that’s moist, tender, and perfect with a slather of butter.
Don’t hesitate to play with the flavors or try one of the variations I shared. This bread is forgiving and welcoming to tweaks, just like a good friend in the kitchen. Honestly, I keep this recipe in my regular rotation because it satisfies that craving for something homemade without the fuss.
If you try it, I’d love to hear how it goes! Drop a comment, share your own spin, or tell me how you like yours served. Here’s to many cozy moments with warm slices of honey oat quick bread and butter — happy baking!
FAQs
Can I make this quick bread ahead of time?
Absolutely! You can bake it the day before and store it wrapped at room temperature. It tastes great the next day, especially when toasted.
What’s the best way to store leftover bread?
Keep it in an airtight container or wrapped tightly in plastic wrap at room temperature for up to 3 days. For longer storage, freeze sliced bread in a resealable bag.
Can I use honey substitutes in this recipe?
Yes, maple syrup or agave nectar work well as substitutes. Just remember they’re a bit thinner, so the texture may be slightly different.
Is this bread suitable for kids?
Definitely! The natural sweetness and soft texture make it a kid-friendly snack or breakfast option.
Can I add fruits or nuts to the batter?
Yes, adding chopped nuts, dried fruits, or even fresh berries can add extra flavor and texture. Just fold them in gently before baking.
Pin This Recipe!

Honey Oat Quick Bread Recipe Easy Homemade Bread with Butter

A quick and easy honey oat quick bread with a moist, tender crumb and subtle sweetness, perfect for breakfast, snacks, or a simple dessert.
- Prep Time: 15 minutes
- Cook Time: 45-50 minutes
- Total Time: 60-65 minutes
- Yield: 10 servings 1x
- Category: Quick Bread
- Cuisine: American
Ingredients
- 1 cup (90g) rolled oats (old-fashioned preferred)
- 1 1/2 cups (190g) all-purpose flour (can substitute half with whole wheat flour)
- 1 1/2 teaspoons baking powder
- 1/2 teaspoon baking soda
- 1/2 teaspoon salt
- 1/3 cup (113g) honey
- 1/4 cup (57g) unsalted butter, melted
- 1 large egg, room temperature
- 3/4 cup (180ml) milk, room temperature (any kind)
- Optional: 1/4 cup (30g) chopped nuts (walnuts or pecans)
- Optional: 1/2 teaspoon cinnamon
- Optional: 1 teaspoon vanilla extract
Instructions
- Preheat your oven to 350°F (175°C). Grease a 9×5-inch loaf pan or line it with parchment paper.
- Optional: Toast the rolled oats on a baking sheet in the oven for 5-7 minutes until fragrant and lightly golden. Let cool slightly.
- In a large bowl, whisk together the toasted oats, all-purpose flour, baking powder, baking soda, salt, and cinnamon if using.
- In a separate bowl, whisk the egg lightly. Add melted butter (cooled), honey, milk, and vanilla extract if using. Mix until smooth and well combined.
- Pour the wet ingredients into the dry mixture. Fold gently with a spatula until just combined; do not overmix.
- Fold in chopped nuts or dried fruit if using.
- Pour the batter into the prepared loaf pan and smooth the top with a spatula.
- Bake for 45-50 minutes, or until a toothpick inserted in the center comes out clean or with a few moist crumbs. Tent with foil halfway through if the top browns too fast.
- Let the bread cool in the pan for about 10 minutes, then transfer to a wire rack to cool completely.
- Slice thick and serve warm or at room temperature, ideally with butter.
Notes
Do not overmix the batter to avoid a tough loaf. Use room temperature ingredients for best rise. Toasting oats is optional but enhances flavor. Line the pan with parchment paper for easy removal. If the top browns too quickly, tent with foil halfway through baking. For gluten-free, substitute flour with a gluten-free blend and add extra baking powder. For vegan, replace egg with flaxseed egg and use plant-based milk and butter.
Nutrition
- Serving Size: 1 slice (1/10th of t
- Calories: 180
- Fat: 6
- Carbohydrates: 28
- Fiber: 2
- Protein: 4
Keywords: honey oat bread, quick bread, homemade bread, easy bread recipe, oat bread, honey bread, breakfast bread, snack bread