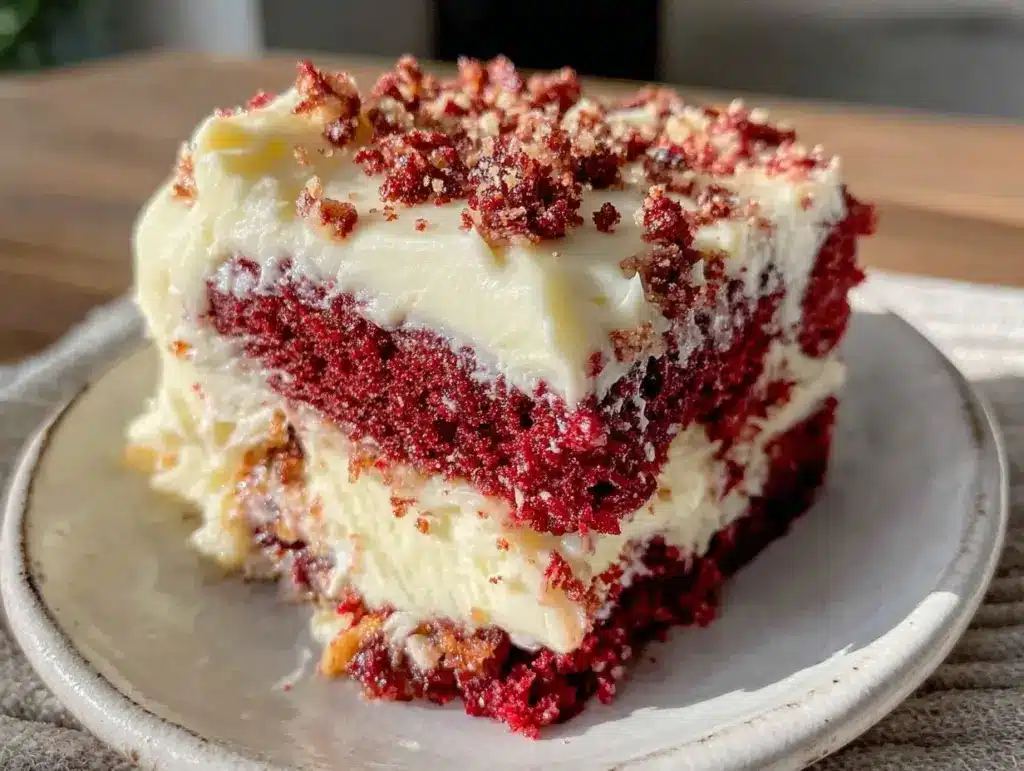
The rich, velvety texture of red velvet cake paired with its striking crimson hue is something that always gets me excited in the kitchen. Honestly, the first time I baked this irresistible red velvet cake recipe, I was amazed at how a few simple ingredients could come together to create such a show-stopping dessert. It’s not just any cake — it’s that perfect balance of moist crumb and tangy cream cheese frosting that makes you want to savor every bite.
I’ve whipped up this easy homemade 3-layer delight countless times for birthdays, cozy gatherings, and even just because I craved something special. It’s a recipe that’s become a family favorite, passing around smiles and second helpings. This red velvet cake recipe is one of those classics with a bit of a twist, giving you a bakery-worthy result without the fuss.
Whether you’re a seasoned baker or just starting out, you’ll love how approachable this recipe is. The layers bake up evenly, the flavors are spot-on, and the vibrant color turns heads every time. Plus, it’s perfect for those moments when you want to impress but don’t want to spend the whole day in the kitchen. Let me share with you why this irresistible red velvet cake recipe deserves a spot in your recipe box.
Why You’ll Love This Recipe
- Quick & Easy: Comes together in under 90 minutes, perfect for last-minute celebrations or weekend baking.
- Simple Ingredients: Uses pantry staples and common baking essentials — no complicated shopping trips needed.
- Perfect for Any Occasion: Whether it’s a birthday, Valentine’s Day, or just because, this cake fits the bill.
- Always a Crowd-Pleaser: Kids and adults alike rave about the moist crumb and luscious cream cheese frosting.
- Unbelievably Delicious: The subtle cocoa undertone blends beautifully with the tangy frosting, creating that signature red velvet flavor.
This red velvet cake recipe stands out because of the balance it strikes. I use buttermilk and vinegar to get that tender crumb, and a touch of cocoa powder for depth — but not so much that it overpowers the cake’s signature flavor. The triple layers make it feel luxurious without being intimidating. I also found that using natural red food coloring gives the cake a vibrant color without tasting artificial, a little trick I swear by after many trials.
Honestly, every time I serve this cake, I watch my guests close their eyes and smile after the first bite — it’s comfort food with a touch of elegance. This recipe has become my go-to when I want to impress without the stress, turning ordinary moments into something memorable.
What Ingredients You Will Need
This recipe uses simple, wholesome ingredients to deliver bold flavor and satisfyingly smooth texture without the fuss. Most of these you probably have in your pantry or fridge already.
- All-purpose flour (2 ½ cups / 315g) – provides the perfect structure for the cake.
- Cocoa powder (2 tablespoons / 15g) – use unsweetened for that subtle chocolate note.
- Baking soda (1 teaspoon) – helps the cake rise beautifully.
- Salt (½ teaspoon) – balances the sweetness.
- Granulated sugar (1 ½ cups / 300g) – adds sweetness and tenderness.
- Vegetable oil (1 cup / 240ml) – keeps the cake moist (I like using neutral oils like canola).
- Large eggs (2, room temperature) – bind everything together.
- Buttermilk (1 cup / 240ml, room temperature) – tenderizes and adds that classic tangy flavor.
- White vinegar (1 tablespoon) – reacts with baking soda for rise and flavor.
- Vanilla extract (1 teaspoon) – enhances the overall flavor.
- Red food coloring (2 tablespoons) – I prefer natural or gel-based for vibrant color without altering taste.
For the frosting:
- Cream cheese (16 ounces / 450g, softened) – the star of the frosting, rich and tangy.
- Unsalted butter (½ cup / 115g, softened) – adds creaminess and smooth texture.
- Powdered sugar (4 cups / 480g) – sweetens and thickens the frosting.
- Vanilla extract (1 teaspoon) – a little flavor boost.
- Pinch of salt – balances the sweetness.
If you want to swap out buttermilk, mix 1 cup of milk with 1 tablespoon of lemon juice or vinegar and let it sit for 5 minutes. For gluten-free options, almond or oat flour can work but expect a slightly different texture. I always recommend using full-fat cream cheese for the frosting – trust me, it makes a huge difference in flavor and stability.
Equipment Needed
- Three 8-inch round cake pans – I find these perfect for even layers; if you don’t have three, bake in batches.
- Mixing bowls – one large for the batter and one medium for the frosting.
- Electric mixer or stand mixer – a hand mixer works fine but a stand mixer makes frosting smoother and faster.
- Sifter or fine mesh sieve – to sift dry ingredients, avoiding lumps.
- Rubber spatula – great for folding and scraping bowls clean.
- Measuring cups and spoons – accuracy matters for baking.
- Cooling racks – essential for letting cakes cool evenly and preventing sogginess.
If you don’t have a sifter, whisking the dry ingredients well works almost as well. For cake pans, if you only have one or two, bake layers one at a time but watch the baking times carefully. I’ve used inexpensive pans with great results; just make sure to grease and line them well to avoid sticking.
Detailed Preparation Method

- Preheat your oven to 350°F (175°C). Grease and line three 8-inch round cake pans with parchment paper for easy release. This step saves you a headache later.
- Combine the dry ingredients: In a large bowl, sift together 2 ½ cups (315g) all-purpose flour, 2 tablespoons (15g) cocoa powder, 1 teaspoon baking soda, and ½ teaspoon salt. Whisk them to blend evenly. This ensures no lumps and even rise.
- Mix the wet ingredients: In another bowl, beat 1 ½ cups (300g) granulated sugar with 1 cup (240ml) vegetable oil until smooth. Add 2 large eggs, one at a time, beating well after each addition. Stir in 1 tablespoon white vinegar, 1 teaspoon vanilla extract, and 2 tablespoons red food coloring.
- Add the buttermilk: Pour 1 cup (240ml) of room temperature buttermilk into the wet mix. Stir gently to combine; don’t overmix as it can toughen the cake.
- Combine wet and dry: Gradually add the dry ingredients to the wet bowl, folding carefully with a spatula until you have a smooth batter. It should be thick but pourable. If it feels too stiff, add a splash more buttermilk.
- Divide batter evenly: Pour the batter evenly into the prepared pans. I like to weigh the pans to be sure the layers are equal thickness for that perfect 3-layer look.
- Bake for 25-30 minutes: Place pans in the oven and bake until a toothpick inserted into the center comes out clean or with just a few crumbs. Avoid overbaking to keep the cake moist.
- Cool completely: Let the cakes cool in the pans for 10 minutes, then turn out onto wire racks to cool fully. Don’t frost warm cake or the frosting will melt.
- Prepare the frosting: Beat 16 ounces (450g) softened cream cheese and ½ cup (115g) softened unsalted butter together until creamy. Gradually add 4 cups (480g) powdered sugar, beating until smooth. Mix in 1 teaspoon vanilla extract and a pinch of salt.
- Assemble the cake: Place one cake layer on a serving plate. Spread a thick layer of frosting on top. Repeat with remaining layers. Frost the top and sides evenly. For a clean look, chill the cake for 30 minutes before serving.
Pro tip: If your frosting feels too soft, pop it into the fridge for 15 minutes before assembling. Also, when mixing, scraping down the bowl often ensures everything blends well. This method has never failed me to get that smooth, creamy frosting that holds up beautifully.
Cooking Tips & Techniques
One key to this red velvet cake’s success is measuring ingredients precisely. Baking soda and vinegar react to give the cake its tender crumb, so don’t skip or eyeball those!
When mixing, I recommend folding the dry into the wet ingredients gently rather than vigorous stirring. It keeps the crumb light and prevents toughness. Also, using room temperature eggs and buttermilk helps the batter come together smoothly.
Don’t forget to sift the cocoa powder and flour — lumps can create dense pockets that ruin the texture. I’ve learned this after a few cakes with weird texture surprises.
For frosting, make sure both cream cheese and butter are softened but not melting. If they’re too cold, you’ll get lumps. If too warm, the frosting can be runny. When in doubt, a quick chill helps.
Lastly, cake layers cool best on wire racks, not plates. Trapped steam can make the bottom soggy. Patience here pays off with a cleaner, sturdier cake for stacking.
Variations & Adaptations
- Chocolate Lovers’ Version: Add an extra tablespoon of cocoa powder for a richer chocolate flavor.
- Gluten-Free Red Velvet: Swap all-purpose flour for a gluten-free blend (1:1 substitution). Expect a slightly different crumb but equally delicious.
- Vegan Adaptation: Use flax eggs (2 tablespoons ground flaxseed + 6 tablespoons water), coconut oil in place of vegetable oil, plant-based buttermilk, and vegan cream cheese for frosting.
If you want to try a different frosting, whipped coconut cream with a hint of vanilla is a lovely dairy-free alternative that pairs well with the red velvet flavor. For a seasonal twist, sprinkle crushed peppermint candy on the frosting around the holidays.
Personally, I once added a thin layer of raspberry jam between the cake layers for a fruity surprise — it was a hit! Adapting this recipe for different tastes or dietary needs is easy and fun.
Serving & Storage Suggestions
This cake is best served at room temperature, allowing the frosting to be creamy and the cake moist. For presentation, garnish with a few fresh berries or a dusting of cocoa powder for that elegant touch.
Pair it with a cup of strong coffee or a glass of cold milk — that combination is pure bliss. It also works beautifully as a festive dessert for holidays or parties.
Store leftover cake covered in the refrigerator for up to 4 days. To keep it fresh, wrap the cake or use an airtight cake container. You can also freeze slices wrapped tightly in plastic wrap and foil for up to 2 months. Thaw in the fridge overnight before serving.
When reheating, let the cake come to room temperature naturally; microwaving can dry out the crumb or melt the frosting. Over time, the flavors meld and the cake becomes even more tender, though it’s so good fresh you might not have leftovers!
Nutritional Information & Benefits
This irresistible red velvet cake recipe provides approximately 350 calories per slice (1/12th of the cake), with 15g fat, 50g carbohydrates, and 3g protein. The cream cheese frosting adds richness but also protein and calcium.
Key ingredients like buttermilk and cream cheese contribute beneficial probiotics and calcium, supporting digestion and bone health. While this isn’t a low-calorie treat, the wholesome ingredients make it a more balanced dessert option than some heavily processed cakes.
For those watching gluten or dairy, the recipe adapts well as noted. It’s a festive indulgence that fits nicely into a balanced diet when enjoyed in moderation.
Conclusion
This irresistible red velvet cake recipe is a real gem to have in your baking repertoire. It’s easy enough for weeknight baking but impressive enough for special occasions. The moist layers, vibrant color, and tangy cream cheese frosting come together in a way that feels both classic and fresh.
Don’t hesitate to make it your own by adjusting flavors or trying the variations. I love this cake because it’s the kind of treat that brings people together — whether it’s family, friends, or just a quiet moment with a slice and a cup of tea.
Give this homemade 3-layer delight a try, and I’d love to hear how you make it yours! Drop a comment, share your photos, or tell me your favorite tweaks. Happy baking and enjoy every bite!
Frequently Asked Questions
Can I make this red velvet cake in a different size pan?
Yes! You can use 9-inch pans for slightly thinner layers or a 9×13-inch pan for a single-layer cake. Adjust baking time accordingly — thinner layers bake faster, so keep an eye on it.
What can I use if I don’t have buttermilk?
Simply mix 1 cup of milk with 1 tablespoon of lemon juice or white vinegar and let it sit for 5 minutes. This homemade buttermilk substitute works just as well.
Can I prepare the cake layers ahead of time?
Absolutely. You can bake the layers a day ahead, wrap them tightly in plastic wrap, and store them at room temperature or in the fridge. Just bring them to room temp before frosting.
Is there a way to make the frosting less sweet?
Try reducing the powdered sugar by ½ cup and add a tiny bit more cream cheese or a splash of lemon juice to balance the sweetness.
Can I freeze the assembled cake?
Yes, but it’s best to freeze unfrosted layers for quality. If freezing the whole cake, wrap it well and thaw in the fridge overnight to prevent sogginess.
Pin This Recipe!

Irresistible Red Velvet Cake Recipe Easy Homemade 3-Layer Delight

A rich, moist red velvet cake with a tangy cream cheese frosting, perfect for any occasion. This easy homemade 3-layer cake delivers bakery-worthy results with simple ingredients and minimal fuss.
- Prep Time: 20 minutes
- Cook Time: 30 minutes
- Total Time: 50 minutes
- Yield: 12 servings 1x
- Category: Dessert
- Cuisine: American
Ingredients
- 2 ½ cups (315g) all-purpose flour
- 2 tablespoons (15g) unsweetened cocoa powder
- 1 teaspoon baking soda
- ½ teaspoon salt
- 1 ½ cups (300g) granulated sugar
- 1 cup (240ml) vegetable oil (neutral oils like canola preferred)
- 2 large eggs, room temperature
- 1 cup (240ml) buttermilk, room temperature
- 1 tablespoon white vinegar
- 1 teaspoon vanilla extract
- 2 tablespoons red food coloring (natural or gel-based preferred)
- For the frosting:
- 16 ounces (450g) cream cheese, softened
- ½ cup (115g) unsalted butter, softened
- 4 cups (480g) powdered sugar
- 1 teaspoon vanilla extract
- Pinch of salt
Instructions
- Preheat your oven to 350°F (175°C). Grease and line three 8-inch round cake pans with parchment paper.
- In a large bowl, sift together the flour, cocoa powder, baking soda, and salt. Whisk to blend evenly.
- In another bowl, beat the granulated sugar with vegetable oil until smooth. Add eggs one at a time, beating well after each addition.
- Stir in white vinegar, vanilla extract, and red food coloring.
- Pour in the buttermilk and stir gently to combine; avoid overmixing.
- Gradually fold the dry ingredients into the wet mixture with a spatula until smooth and thick but pourable.
- Divide the batter evenly among the prepared pans.
- Bake for 25-30 minutes or until a toothpick inserted in the center comes out clean or with a few crumbs.
- Cool cakes in pans for 10 minutes, then turn out onto wire racks to cool completely.
- For the frosting, beat cream cheese and butter together until creamy. Gradually add powdered sugar, beating until smooth.
- Mix in vanilla extract and a pinch of salt.
- Assemble the cake by placing one layer on a serving plate, spreading frosting on top, and repeating with remaining layers.
- Frost the top and sides evenly. Chill the cake for 30 minutes before serving for a clean finish.
Notes
Use room temperature eggs and buttermilk for smooth batter. Sift dry ingredients to avoid lumps. If frosting is too soft, chill for 15 minutes before assembling. For gluten-free, substitute flour with gluten-free blend. Vegan adaptations include flax eggs, coconut oil, plant-based buttermilk, and vegan cream cheese.
Nutrition
- Serving Size: 1 slice (1/12th of c
- Calories: 350
- Sugar: 35
- Sodium: 250
- Fat: 15
- Saturated Fat: 6
- Carbohydrates: 50
- Fiber: 1
- Protein: 3
Keywords: red velvet cake, cream cheese frosting, 3-layer cake, easy red velvet, homemade cake, birthday cake, moist cake