“You better make sure you have enough of those cap-shaped cookies,” my sister joked on the phone, her voice buzzing with excitement. It was the week before graduation, and I was juggling a million last-minute tasks — invitations, decorations, and the looming question of what sweet treats would make the party feel special. Honestly, I wasn’t sure if I had the patience for fancy baking, but those sugar cookies kept calling me back. I remember staring at a plain batch I’d rushed through earlier that day, thinking, “Could these really turn into something festive and fun?”
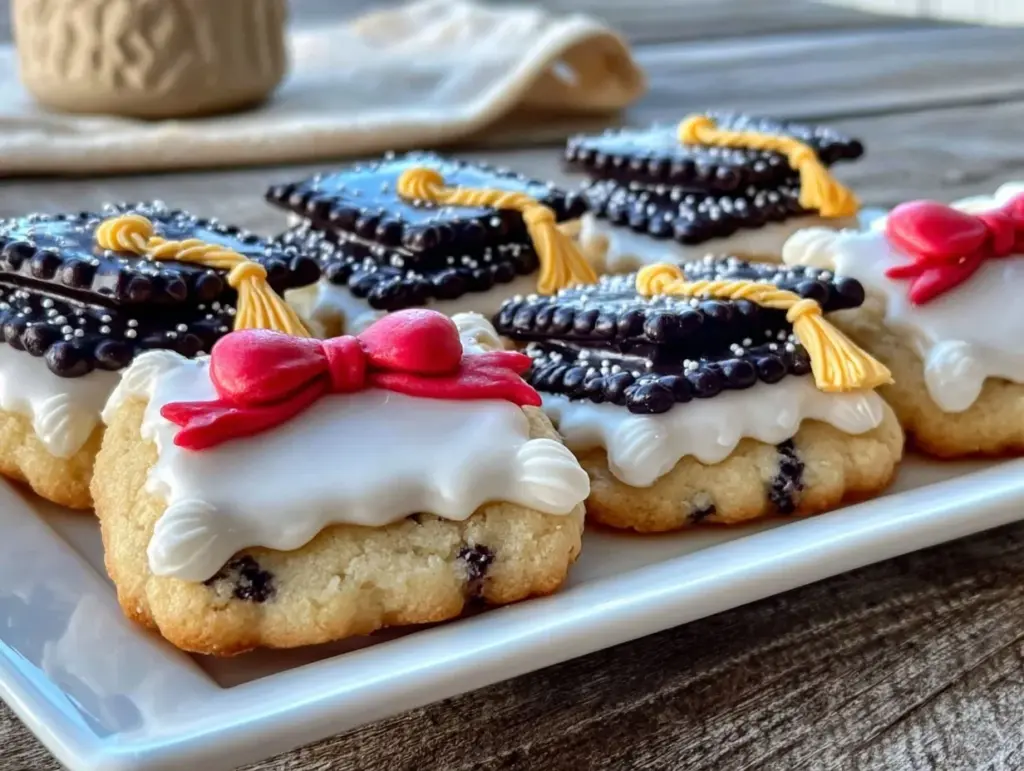
Turns out, they did. After tweaking the icing just right and carefully piping little diplomas and mortarboards, I found myself hooked. I ended up making these perfect decorated cap and diploma sugar cookies four times that week for friends, neighbors, and even my kid’s teacher. They weren’t just cute—they brought that little spark of celebration to the table, you know? The best part was how simple they were to make, despite their fancy look.
These cookies became a quiet reminder that even in the chaos, small moments of joy can be handmade. I’m sharing this recipe because it’s the kind of treat that feels personal, festive, and doable—even if you’re wrapping up a hectic week like I was. Plus, they’re the perfect way to say congrats without saying a word.
Why You’ll Love This Recipe
From my kitchen trials to graduation parties, these decorated cap and diploma sugar cookies have earned their place as a go-to celebration treat. Here’s why you might find yourself baking them over and over, too:
- Quick & Easy: Comes together in under 90 minutes, including decorating time—ideal for last-minute plans or busy days.
- Simple Ingredients: Uses pantry staples like butter, sugar, and flour, so you probably won’t need a special grocery run.
- Perfect for Graduation Parties: These cookies capture the spirit of the day with playful shapes and colors, making any celebration instantly festive.
- Crowd-Pleaser: Kids and adults alike love these sweet bites, and they always spark conversations around the dessert table.
- Unbelievably Delicious: The soft, buttery cookie pairs beautifully with smooth, creamy royal icing that hardens just right—not too crunchy, not too soft.
What sets this recipe apart? I’ve fine-tuned the dough to hold its shape without spreading too much, which means those caps and diplomas come out sharp and neat every time. Plus, the royal icing recipe here dries perfectly matte for decorating details that last through party chaos. Honestly, it’s the kind of cookie that makes you close your eyes after the first bite—comfort food dressed up for a proud moment.
Whether you’re impressing guests or just craving something sweet to honor the grad in your life, these cookies bring that special touch without stress. They’re a celebration in every crumb.
What Ingredients You Will Need
This recipe uses simple, wholesome ingredients to deliver bold flavor and satisfying texture without the fuss. Most of these are pantry staples, and where substitutions work, I’ll mention them.
- For the Sugar Cookie Dough:
- 2 ½ cups (312g) all-purpose flour (I like King Arthur for consistent results)
- 1 teaspoon baking powder
- ½ teaspoon salt
- ¾ cup (170g) unsalted butter, softened (room temperature is best)
- 1 cup (200g) granulated sugar
- 1 large egg, room temperature
- 1 teaspoon vanilla extract (pure vanilla makes a difference)
- 1 tablespoon milk (dairy or almond milk works fine)
- For the Royal Icing:
- 3 cups (360g) powdered sugar, sifted
- 2 tablespoons meringue powder (for stability)
- 5–6 tablespoons water (adjust for consistency)
- Food coloring gels (black for caps, white for diplomas, and optional accent colors like gold or school colors)
- Additional Decorating Tools and Supplies:
- Edible gold dust or glitter (optional for diploma ribbons)
- Fine-tipped piping bags or squeeze bottles
Note: If you want a gluten-free version, substitute the flour with a 1-to-1 gluten-free baking flour blend. For a dairy-free option, swap the butter for a plant-based margarine and use non-dairy milk.
Seasonal tip: If you’re baking in summer when fresh flavors shine, a touch of lemon zest in the dough adds a subtle brightness that pairs well with the sweet icing.
Equipment Needed
- Mixing bowls (medium and large)
- Electric mixer (stand or handheld) — I’ve tried whisking by hand, but the mixer saves serious time and effort
- Rolling pin (a basic wooden one works great; silicone keeps dough from sticking if dusted lightly with flour)
- Graduation-themed cookie cutters (cap and diploma shapes) — if you can’t find these, a sharp knife and a printed template can work too
- Baking sheets lined with parchment paper or silicone mats (prevents sticking and browning)
- Piping bags with assorted fine tips or small squeeze bottles for icing detail (you can also use zip-top bags with a tiny corner snipped)
- Cooling racks for cookies
Pro tip: If you don’t have meringue powder for the royal icing, pasteurized egg whites are an alternative, but meringue powder is easier and safer for beginners. For budget-friendly cookie cutters, check dollar stores or online sets that include multiple shapes.
Preparation Method

- Mix Dry Ingredients: In a medium bowl, whisk together 2 ½ cups (312g) flour, 1 teaspoon baking powder, and ½ teaspoon salt. Set aside. This keeps the rising agents and salt evenly distributed.
- Cream Butter and Sugar: Using an electric mixer, beat ¾ cup (170g) softened butter with 1 cup (200g) granulated sugar on medium speed until light and fluffy—about 3 minutes. This step is key for tender cookies.
- Add Egg, Vanilla, and Milk: Beat in 1 large egg, 1 teaspoon vanilla extract, and 1 tablespoon milk until fully combined. The dough will look smooth and creamy here.
- Combine Wet and Dry: Gradually add the flour mixture, mixing on low speed just until incorporated. Avoid overmixing to keep cookies tender.
- Chill the Dough: Wrap the dough in plastic wrap and refrigerate for at least 1 hour (or up to overnight). This step prevents spreading and helps hold the cookie shapes.
- Preheat Oven and Prep Baking Sheets: Set oven to 350°F (175°C) and line baking sheets with parchment paper.
- Roll Out Dough: On a lightly floured surface, roll dough to about ¼ inch (6mm) thickness. Keep the dough cool—if it softens too much, pop it back in the fridge for 10 minutes.
- Cut Shapes: Use graduation cap and diploma cookie cutters to cut shapes. Transfer carefully to baking sheets, spacing 1 inch (2.5cm) apart.
- Bake: Bake for 8–10 minutes until edges are just starting to turn golden. Watch closely—they can overbake quickly and become too crisp.
- Cool Completely: Let cookies cool on the baking sheet 5 minutes before moving to a wire rack. Full cooling is essential before decorating.
- Prepare Royal Icing: In a bowl, combine 3 cups (360g) powdered sugar, 2 tablespoons meringue powder, and 5 tablespoons water. Beat on high until stiff peaks form (about 5 minutes). Adjust water by teaspoons if icing is too thick or thin.
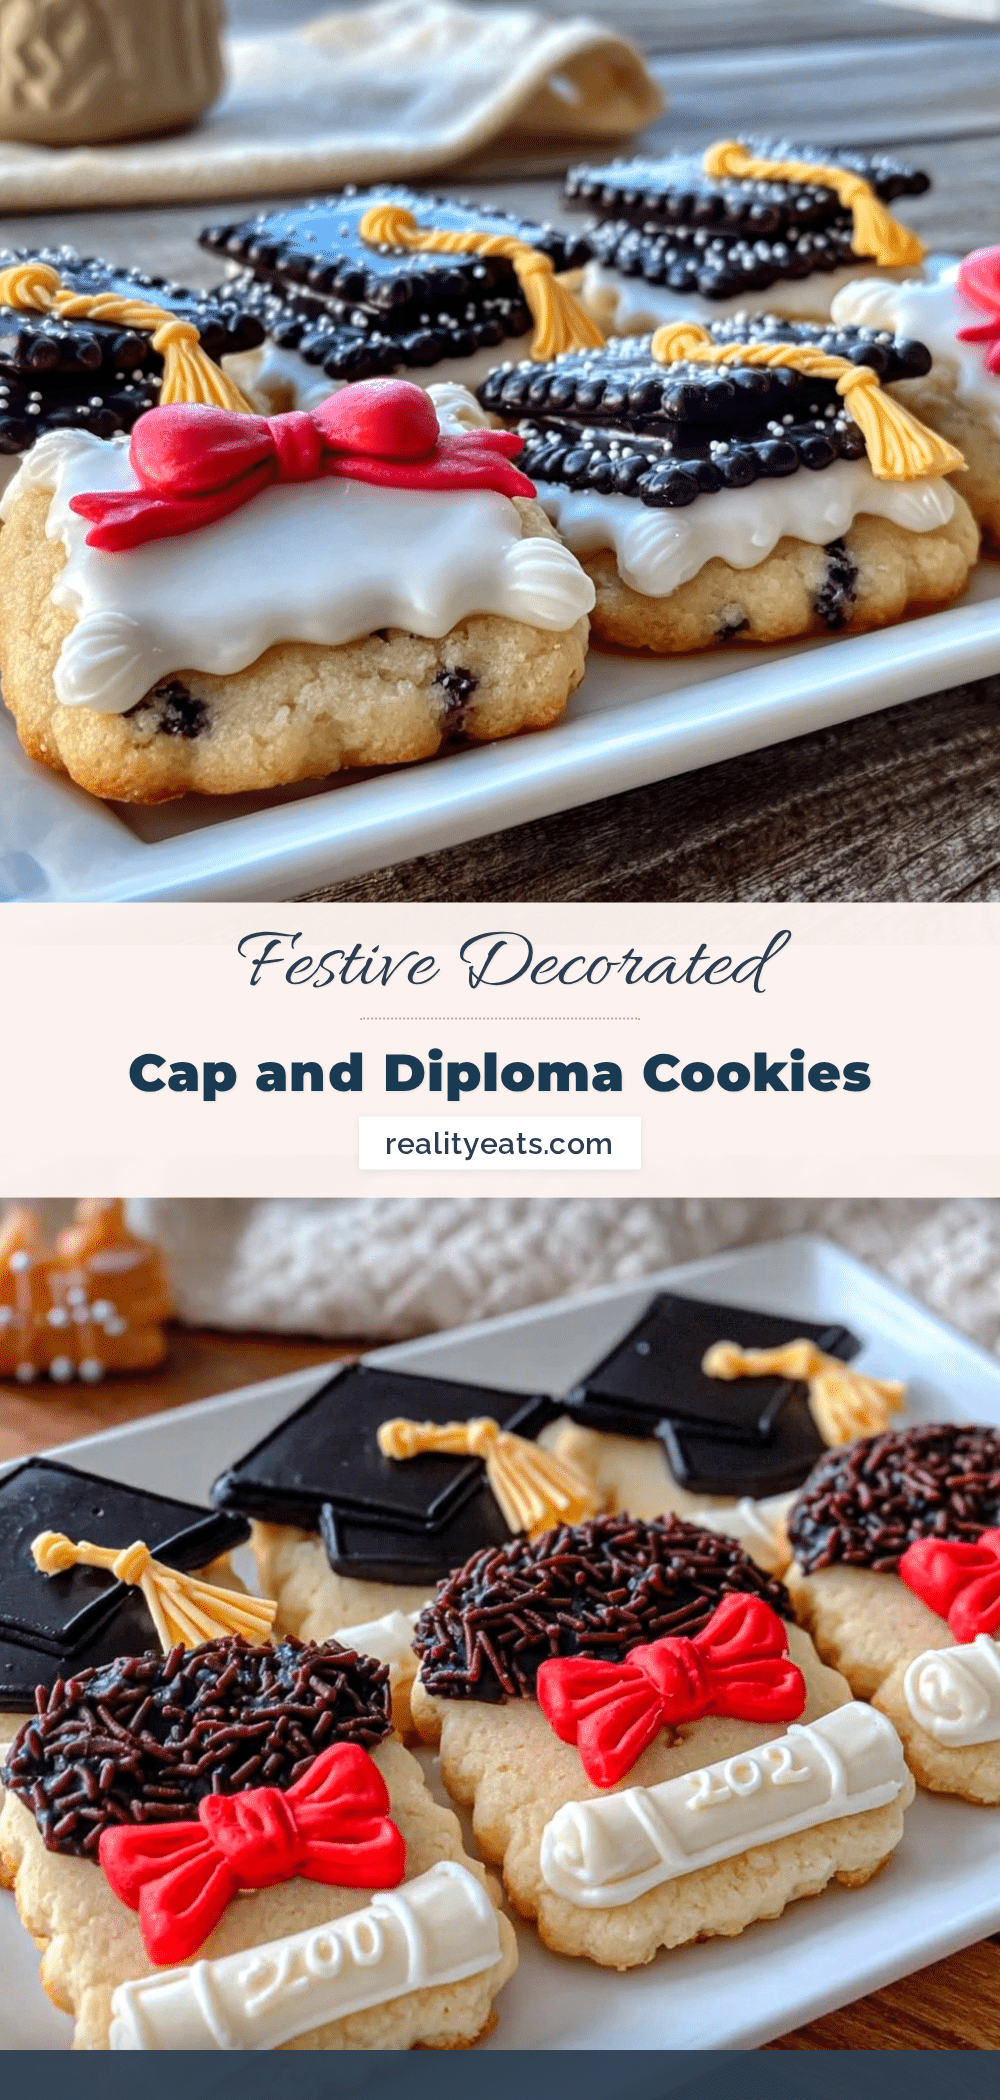
- Color and Decorate: Divide icing into small bowls, tint with gel food coloring. Use black icing for caps, white for diplomas, and accent colors for tassels or ribbons. Pipe details carefully with fine tips. Let dry 4 hours or overnight for best results.
Pro tip: For smooth edges, outline the cookie with a slightly thicker icing, then flood the center with a thinner consistency. If you mess up a line, use a toothpick to gently nudge the icing back—practice makes perfect!
Cooking Tips & Techniques
One trick I learned the hard way is chilling the dough before rolling—it’s a game-changer for keeping those cap and diploma shapes crisp. If you skip this, your cookies might puff or spread, and those pretty edges get lost. Also, don’t rush the icing drying time; it’s tempting to pack up the cookies right after decorating, but the icing needs time to harden so it doesn’t smudge.
When piping, steady your hand by resting your elbow on the table. It’s honestly the best way to keep lines neat. I’ve found that squeezing a little less icing out at once helps control the flow. And if you’re new to royal icing, start with simple designs—once you get comfortable, adding tassels or scrolls becomes easier.
Keep a damp cloth nearby to wipe the piping tips between colors, especially when switching from black to lighter hues. This prevents color contamination. Also, if your icing seems too stiff, add water one teaspoon at a time; too thin and it’ll run off the cookie.
Lastly, multitasking is doable here—while cookies bake, prep your icing. It keeps the process moving and lets you decorate fresh-baked cookies without delay. Trust me, nothing beats the smell of warm sugar cookies with the sight of colorful caps and diplomas ready to celebrate.
Variations & Adaptations
This recipe is flexible, so you can tweak it to match your graduation theme or dietary needs:
- Flavor Variations: Add ½ teaspoon almond extract or lemon zest to the dough for a subtle twist. I once did a chocolate dough version for a friend’s graduation and it was a delicious surprise.
- Dietary Adjustments: Use gluten-free flour blends for gluten sensitivity, or swap butter with coconut oil for dairy-free cookies. Royal icing can be made vegan by using aquafaba instead of meringue powder.
- Decorating Styles: Instead of royal icing, try colored fondant cutouts for a smooth, matte finish. Or add edible pearls and sprinkles for a bit of glam.
- Alternate Shapes: If you don’t have graduation cookie cutters, stars, hearts, or simple circles decorated like caps and diplomas work well. It’s the message, not just the shape, that counts.
For a handheld party snack, these cookies pair perfectly with savory bites like the crispy ham and cheese sticks I made last year. The sweet and salty balance is unbeatable for celebrations.
Serving & Storage Suggestions
Serve these decorated cap and diploma sugar cookies at room temperature for the best texture and flavor. They look fantastic when arranged on a tiered platter or wrapped individually in clear cellophane tied with a ribbon matching the school colors—makes a great party favor or gift!
If you want to round out your graduation spread, pairing these cookies with a fresh salad like the fresh southwest chipotle salad adds a lively counterpoint to the sweets.
For storage, keep the cookies in an airtight container at room temperature for up to 5 days. Avoid stacking them until the icing is fully dry to prevent sticking. They freeze well, too—place a sheet of parchment between layers and freeze for up to 3 months.
Reheat by letting frozen cookies thaw at room temperature. The icing may soften slightly but will firm back up. Over time, these cookies develop a tender crumb and mellow flavor, making leftovers just as enjoyable as fresh ones.
Nutritional Information & Benefits
Each decorated sugar cookie (about 3 inches/7.5 cm in diameter) contains roughly 150–180 calories, depending on icing thickness. Key ingredients like butter provide richness and fat for satiety, while eggs offer protein.
Though these are indulgent treats, they can be part of balanced celebrations when enjoyed in moderation. The simple, whole ingredients make them a better choice than many store-bought options filled with preservatives and artificial colors.
For those managing allergies, this recipe’s flexibility with gluten-free and dairy-free swaps means most everyone can enjoy them. Baking homemade also cuts back on hidden sugars and additives.
Conclusion
These perfect decorated cap and diploma sugar cookies aren’t just another sweet—they’re a way to mark big moments with a personal touch. Whether you’re hosting a graduation party or just want to surprise the grad in your life, this recipe makes the process easy and rewarding.
Feel free to play with the decorations and flavors to suit your style. I love how these cookies bring people together, sparking smiles and memories one bite at a time. If you try making them, I’d love to hear how your decorating went or any fun twists you added.
Here’s to celebrating milestones with sweetness and a little bit of homemade magic!
FAQs
Can I prepare the dough ahead of time?
Yes! You can make the dough up to 2 days in advance and keep it wrapped in the fridge. Just let it sit at room temperature for 10 minutes before rolling out.
How long does royal icing take to dry completely?
Royal icing usually dries to the touch within 1–2 hours, but for best results (especially if stacking), let it dry overnight.
What if I don’t have graduation cookie cutters?
You can use a sharp knife and printed templates to cut shapes, or decorate simple circles or squares to mimic caps and diplomas.
Can these cookies be made gluten-free or dairy-free?
Absolutely! Use gluten-free flour blends and substitute butter with plant-based alternatives. For dairy-free milk, almond or oat milk works well in the dough.
How should I store decorated sugar cookies to keep them fresh?
Store in an airtight container at room temperature for up to 5 days. Avoid stacking cookies if the icing isn’t fully dry to prevent sticking. For longer storage, freeze with parchment paper between layers.
Pin This Recipe!
Perfect Decorated Cap and Diploma Sugar Cookies Easy Graduation Treats

These decorated cap and diploma sugar cookies are a festive and easy treat perfect for graduation parties. They feature a soft, buttery cookie paired with smooth royal icing that hardens just right for detailed decoration.
- Prep Time: 20 minutes
- Cook Time: 10 minutes
- Total Time: 1 hour 30 minutes
- Yield: 24 cookies 1x
- Category: Dessert
- Cuisine: American
Ingredients
- 2 ½ cups (312g) all-purpose flour
- 1 teaspoon baking powder
- ½ teaspoon salt
- ¾ cup (170g) unsalted butter, softened
- 1 cup (200g) granulated sugar
- 1 large egg, room temperature
- 1 teaspoon vanilla extract
- 1 tablespoon milk (dairy or almond milk)
- 3 cups (360g) powdered sugar, sifted
- 2 tablespoons meringue powder
- 5–6 tablespoons water
- Food coloring gels (black, white, optional accent colors like gold or school colors)
- Edible gold dust or glitter (optional)
- Fine-tipped piping bags or squeeze bottles
Instructions
- Mix dry ingredients: whisk together flour, baking powder, and salt in a medium bowl; set aside.
- Cream butter and sugar: beat softened butter with granulated sugar on medium speed until light and fluffy, about 3 minutes.
- Add egg, vanilla, and milk: beat in egg, vanilla extract, and milk until fully combined.
- Combine wet and dry ingredients: gradually add flour mixture, mixing on low speed just until incorporated; avoid overmixing.
- Chill dough: wrap dough in plastic wrap and refrigerate for at least 1 hour or up to overnight.
- Preheat oven to 350°F (175°C) and line baking sheets with parchment paper.
- Roll out dough on lightly floured surface to about ¼ inch (6mm) thickness; keep dough cool.
- Cut shapes using graduation cap and diploma cookie cutters; transfer to baking sheets spaced 1 inch apart.
- Bake for 8–10 minutes until edges just start to turn golden; watch closely to avoid overbaking.
- Cool cookies on baking sheet for 5 minutes, then transfer to wire rack to cool completely.
- Prepare royal icing: combine powdered sugar, meringue powder, and water; beat on high until stiff peaks form (about 5 minutes); adjust water for consistency.
- Color and decorate: divide icing into bowls, tint with gel food coloring; pipe details using fine tips; let dry 4 hours or overnight for best results.
Notes
Chill dough before rolling to prevent spreading and keep shapes crisp. Let royal icing dry fully (preferably overnight) to avoid smudging. Use a toothpick to fix icing lines if needed. For gluten-free, substitute flour with gluten-free blend; for dairy-free, use plant-based margarine and non-dairy milk. Meringue powder can be replaced with pasteurized egg whites but is easier and safer for beginners.
Nutrition
- Serving Size: 1 cookie (about 3 in
- Calories: 165
- Sugar: 15
- Sodium: 90
- Fat: 7
- Saturated Fat: 4.5
- Carbohydrates: 25
- Fiber: 0.5
- Protein: 2
Keywords: graduation cookies, sugar cookies, decorated cookies, royal icing, graduation treats, easy cookies, party cookies