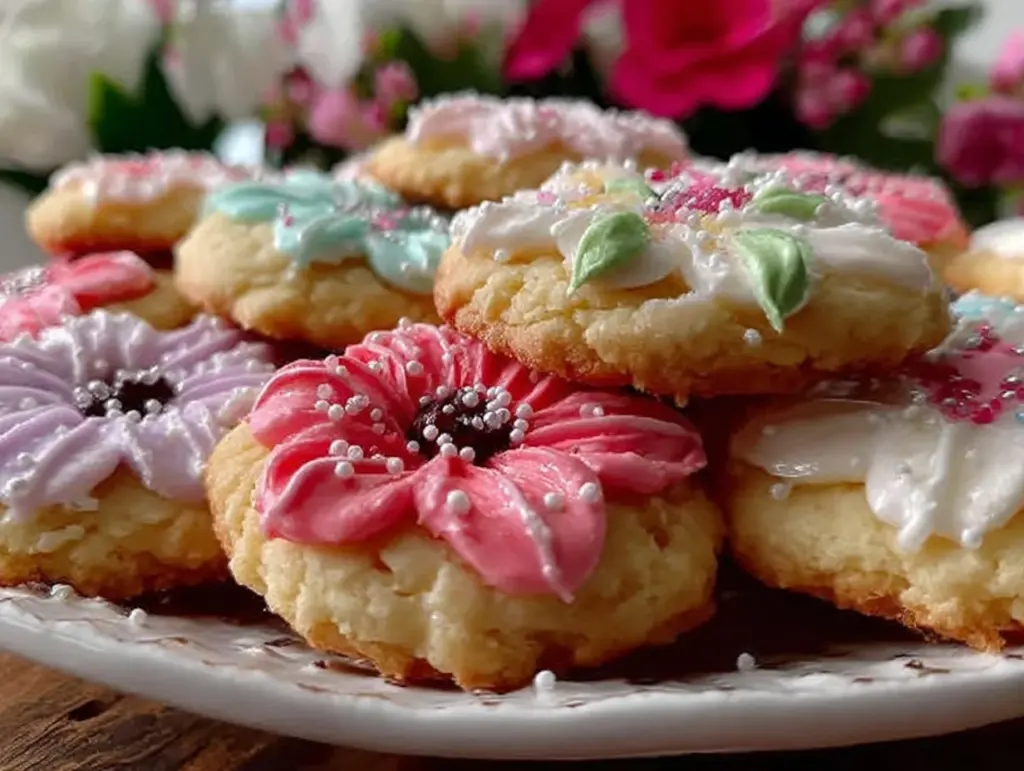
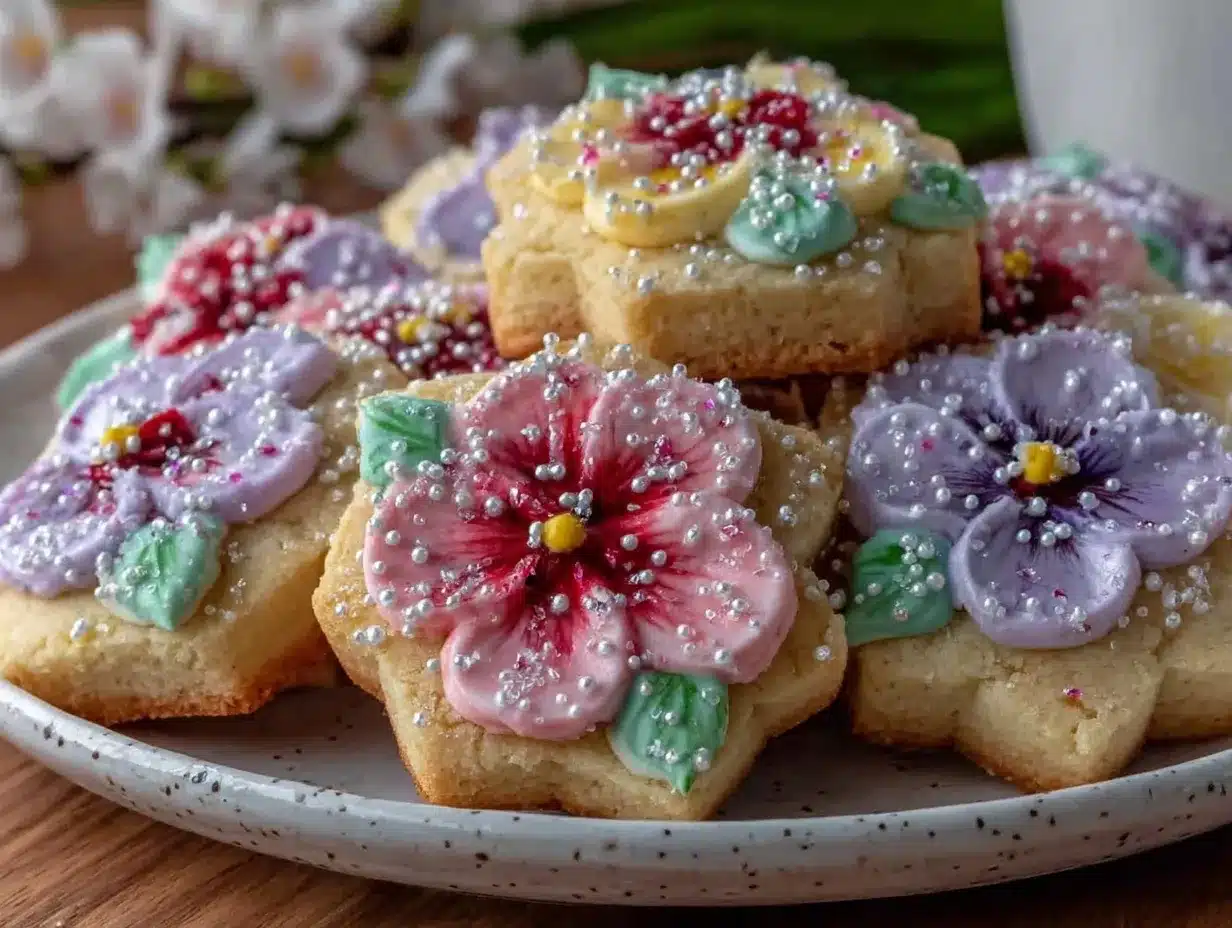
“Are you sure these are just sugar cookies?” my friend asked, eyeing the delicate floral shapes on the platter. Honestly, I had been skeptical myself when I first tried making these Perfect Spring Flower Sugar Cookies with Royal Icing. It all started one rainy afternoon when I was craving something cheerful but simple—something that could brighten up the kitchen and maybe the mood too.
I wasn’t aiming for anything fancy, just a quick batch of sugar cookies to go with afternoon tea. But as I mixed the dough and rolled it out, the idea of spring flowers popped into my head. I grabbed my cookie cutters and started cutting shapes, then whipped up a batch of royal icing. At first, I thought the icing might be too tricky to get just right, but after a few tries, it clicked. The cookies came out soft, buttery, and beautifully decorated with icing that hardened just enough to hold the shape and vibrant colors.
Over the next week, I ended up making these cookies multiple times—sometimes playing with colors, sometimes just baking a plain batch—and they quickly became my go-to treat for gifts, tiny celebrations, or when I just wanted a little creative break. It’s funny how a simple cookie recipe can turn into such a satisfying, almost meditative pastime.
These Perfect Spring Flower Sugar Cookies with Royal Icing stuck with me not just because they taste good, but because they bring a bit of springtime joy inside—no matter the weather outside. They’re the kind of treat that makes you pause, smile, and maybe even share a cookie with someone who needs a little pick-me-up. And that’s exactly why I keep coming back to this recipe.
Why You’ll Love This Recipe
This Perfect Spring Flower Sugar Cookies recipe isn’t just any cookie recipe. It’s been tested multiple times in my kitchen—sometimes under the pressure of last-minute party prep, other times as a slow, calming project on a quiet afternoon. I’ve learned a lot through trial and error, and here’s why I trust this recipe and think you will too:
- Quick & Easy: The dough mixes up in about 15 minutes, and chilling time aside, you can have cookies baked and iced in under an hour. Perfect for those spontaneous baking urges.
- Simple Ingredients: You likely have all these staples in your pantry—no need to hunt down specialty flours or exotic extracts.
- Perfect for Spring Gatherings: Whether it’s a garden party, a baby shower, or just a casual weekend, these floral cookies add a sweet, seasonal charm.
- Crowd-Pleaser: Kids and adults alike love these. The subtle sweetness and fun shapes make them irresistible.
- Unbelievably Delicious: The buttery, tender cookie base paired with smooth royal icing gives a delightful texture and flavor combo you won’t forget.
What sets this apart? The royal icing tutorial I include is designed to be beginner-friendly but yields professional-looking results. The icing dries to a perfect shell, allowing you to create crisp edges and vibrant, lasting colors. Plus, the cookie dough is soft and chewy, not rock-hard or crumbly, which is a balance I’ve never quite found in other recipes.
Honestly, these cookies are like a little slice of spring on your plate—fresh, pretty, and somehow comforting all at once. Plus, if you love decorating cookies but get intimidated by royal icing, this recipe will gently guide you through it, making the whole process less daunting and more fun.
What Ingredients You Will Need
This recipe uses simple, wholesome ingredients to deliver bold flavor and satisfying texture without any fuss. Most of these are pantry staples, and if you’re like me, you probably have them on hand already.
- All-purpose flour (2 ¾ cups / 345 grams) – The base of the dough, providing structure.
- Baking powder (1 teaspoon) – Helps the cookies rise just enough for a tender crumb.
- Salt (½ teaspoon) – Balances sweetness and enhances flavor.
- Unsalted butter, softened (1 cup / 227 grams) – Adds richness and tenderness. I recommend using a good quality brand like KerryGold for best flavor.
- Granulated sugar (1 cup / 200 grams) – Sweetens the dough.
- Large egg, room temperature (1) – Binds ingredients and adds moisture.
- Pure vanilla extract (1 teaspoon) – For classic flavor; you can swap with almond extract for a different twist.
- Milk (2 tablespoons) – Adds moisture and softens the dough.
For the royal icing:
- Powdered sugar (4 cups / 480 grams) – The sweet base of the icing.
- Pasteurized egg whites (3 tablespoons) or meringue powder equivalent – Provides structure and dries hard.
- Fresh lemon juice (1 tablespoon) or water – Adds a slight tang and thins consistency.
- Food coloring gels – For vibrant, detailed flower decorations. Brands like AmeriColor or Wilton work well without altering icing texture.
If you want a gluten-free option, replace all-purpose flour with a 1:1 gluten-free baking flour blend. For dairy-free, swap butter for a vegan margarine or coconut oil, but be mindful that texture may vary slightly.
Equipment Needed
Here’s what you’ll want handy to make these Perfect Spring Flower Sugar Cookies with Royal Icing:
- Mixing bowls: At least two, one for the dough and one for the icing.
- Electric mixer: A handheld or stand mixer helps cream butter and sugar smoothly.
- Measuring cups and spoons: For precise ingredient amounts.
- Rolling pin: Essential for rolling dough evenly to about ¼-inch thickness.
- Spring flower cookie cutters: Various sizes and shapes to create a garden-like assortment.
- Baking sheets: Preferably non-stick or lined with parchment paper to prevent sticking.
- Cooling racks: To let cookies cool completely before decorating.
- Mixing spoons and spatulas: For scraping bowls and mixing icing.
- Piping bags and tips: Small round tips (sizes #1 or #2) for outlining and flooding, plus leaf tips if you want to add extra floral details.
If you don’t have piping bags, you can use zip-top bags with a tiny corner snipped off. I’ve done this many times when in a pinch—it works just fine! Also, investing in a good quality rolling pin makes a surprising difference in dough thickness consistency, which affects baking evenness.
Preparation Method
- Mix dry ingredients: In a medium bowl, whisk together 2 ¾ cups (345 g) all-purpose flour, 1 teaspoon baking powder, and ½ teaspoon salt. Set aside. This step ensures your leavening is evenly distributed.
- Cream butter and sugar: Using an electric mixer, beat 1 cup (227 g) softened unsalted butter and 1 cup (200 g) granulated sugar until light and fluffy, about 3-4 minutes. This aerates the butter, giving cookies a tender crumb.
- Add egg and vanilla: Beat in 1 large egg and 1 teaspoon pure vanilla extract until fully combined. The mixture might look a bit loose—that’s okay.
- Combine wet and dry: Gradually add the dry flour mixture to the wet, alternating with 2 tablespoons of milk. Mix on low speed just until incorporated. Be careful not to overmix, or the cookies might turn tough.
- Chill the dough: Flatten dough into a disk, wrap in plastic wrap, and chill for at least 1 hour. This rests the gluten and prevents spreading during baking.
- Preheat the oven: Set to 350°F (175°C). Line baking sheets with parchment paper.
- Roll and cut cookies: On a lightly floured surface, roll dough to about ¼-inch (6 mm) thickness. Use your spring flower cookie cutters to cut shapes. Transfer cookies to baking sheets, spacing about 1 inch (2.5 cm) apart.
- Bake: Bake for 8-10 minutes, or until edges just start to turn golden. Keep a close eye—overbaking dries them out.
- Cool: Let cookies cool completely on wire racks before decorating. Warm cookies will melt the icing.
- Prepare royal icing: In a large bowl, beat 4 cups (480 g) powdered sugar with 3 tablespoons pasteurized egg whites and 1 tablespoon fresh lemon juice until smooth and stiff peaks form (about 5-7 minutes). Divide into smaller bowls and tint with food coloring gels as desired.
- Decorate: Use piping bags fitted with small round tips to outline cookies first, then flood with thinned icing to fill. Use a toothpick to gently spread icing if needed. Allow to dry for several hours or overnight for best results.
Pro tip: If you find your icing too thick to flood, add a few drops of water at a time until it reaches the consistency of honey. If it’s too runny, add a little more powdered sugar. Patience is key here—the icing should flow easily but not run off the cookie edges.
Cooking Tips & Techniques
Making sugar cookies with royal icing can feel intimidating, but a few tips make all the difference:
- Don’t skip chilling the dough: It’s tempting to bake right away, but chilling helps prevent cookies from spreading and keeps the shapes crisp.
- Roll dough evenly: Use rolling pin guides or place wooden dowels on each side to keep thickness uniform. This ensures cookies bake evenly and look professional.
- Use good quality extracts: Pure vanilla or almond really lifts the flavor compared to imitation extracts.
- Practice piping with royal icing: Before decorating, try piping on parchment paper. This helps you control pressure and flow, reducing “flooding” accidents.
- Let outlines dry before flooding: This prevents colors from bleeding and helps keep details crisp.
- Store decorated cookies properly: Allow icing to harden fully, then store in airtight containers layered with parchment. This keeps them fresh and prevents smudges.
One thing I learned the hard way is not to overbake. Those extra few minutes in the oven can turn a soft, tender cookie into something more like a cracker. Also, don’t rush the icing drying stage—even if you’re impatient, it’s worth the wait for that perfect finish.
Variations & Adaptations
These Perfect Spring Flower Sugar Cookies are wonderfully versatile. Here are some ways you can tailor them:
- Flavor twists: Add a teaspoon of lemon or orange zest to the dough for a fresh citrus note that complements the floral shapes beautifully.
- Dietary adaptations: Swap all-purpose flour for a gluten-free blend to accommodate gluten sensitivity. Use dairy-free butter and coconut milk for a vegan version.
- Decorating styles: Try simple powdered sugar dusting instead of royal icing for a rustic look, or use colored sanding sugar for quick sparkle.
- Seasonal motifs: For other holidays, swap flower cutters for themed shapes like hearts or stars and adjust icing colors accordingly.
Personally, I once made a batch using lavender-infused royal icing—just steep dried lavender buds in the lemon juice for a subtle floral flavor. It was a hit at a spring brunch! For a faster option, you can skip the intricate icing and dip half the cookie in melted chocolate for a sweet contrast.
Serving & Storage Suggestions
These sugar cookies are best served at room temperature, allowing the buttery dough and royal icing to shine. Present them on a pretty platter or tiered stand to showcase the colorful flower designs—perfect for spring tea parties or festive gatherings.
They pair wonderfully with light beverages like herbal teas, lemonade, or even a mild coffee. If you’re planning a brunch spread, these cookies would complement a fresh fruit salad or a creamy Southwest chipotle salad beautifully.
For storage, keep the cookies in an airtight container layered with parchment paper at room temperature for up to 5 days. They also freeze well—just thaw completely before serving to avoid condensation affecting the icing.
If you want to refresh slightly stale cookies, warm them in a low oven (250°F / 120°C) for 5 minutes, but be cautious not to melt the icing.
Nutritional Information & Benefits
Each cookie is roughly 120-140 calories depending on size and icing amount. They contain moderate amounts of fat and sugar, making them a treat best enjoyed in moderation.
The butter provides some vitamin A and essential fatty acids, while the egg adds protein. Using real vanilla extract means you get those natural flavor compounds without artificial additives.
For those tracking carbs, the sugar content is notable, but you can experiment with sugar substitutes in the dough and icing to make a lower-sugar version. Keep in mind that royal icing texture might slightly change with alternative sweeteners.
Conclusion
These Perfect Spring Flower Sugar Cookies with Royal Icing have a way of making any day feel a little brighter. The balance of buttery softness and sweet, crisp icing is simply delightful. Plus, the floral shapes and colorful decorating make baking feel like a mini celebration every time.
Feel free to make the recipe your own—whether by tweaking flavors, trying new decorating styles, or pairing them with your favorite drinks. I love how these cookies bring a bit of whimsy and warmth into the kitchen, and I hope you find the same joy in baking and sharing them.
When you make these, I’d love to hear what variations you try or any decorating tips you discover. Baking is always better when shared, even if it’s just through stories and photos!
FAQs About Perfect Spring Flower Sugar Cookies with Royal Icing
How long do these sugar cookies stay fresh?
Stored in an airtight container at room temperature, they stay fresh for about 5 days. For longer storage, freeze them and thaw before serving.
Can I make the dough ahead of time?
Yes! The dough can be made and chilled up to 3 days in advance. Just wrap it tightly in plastic wrap to prevent drying out.
What if I don’t have royal icing ingredients?
You can use store-bought royal icing mix or substitute with a simple glaze made from powdered sugar and milk, though it won’t harden as firmly.
How do I fix runny royal icing?
Add more powdered sugar a tablespoon at a time until it thickens to the desired consistency. If too thick, add a few drops of water.
Can I use this recipe for other cookie shapes?
Absolutely! This dough holds its shape well and works for any cutout cookie shapes you like, from holiday themes to everyday favorites.
Pin This Recipe!
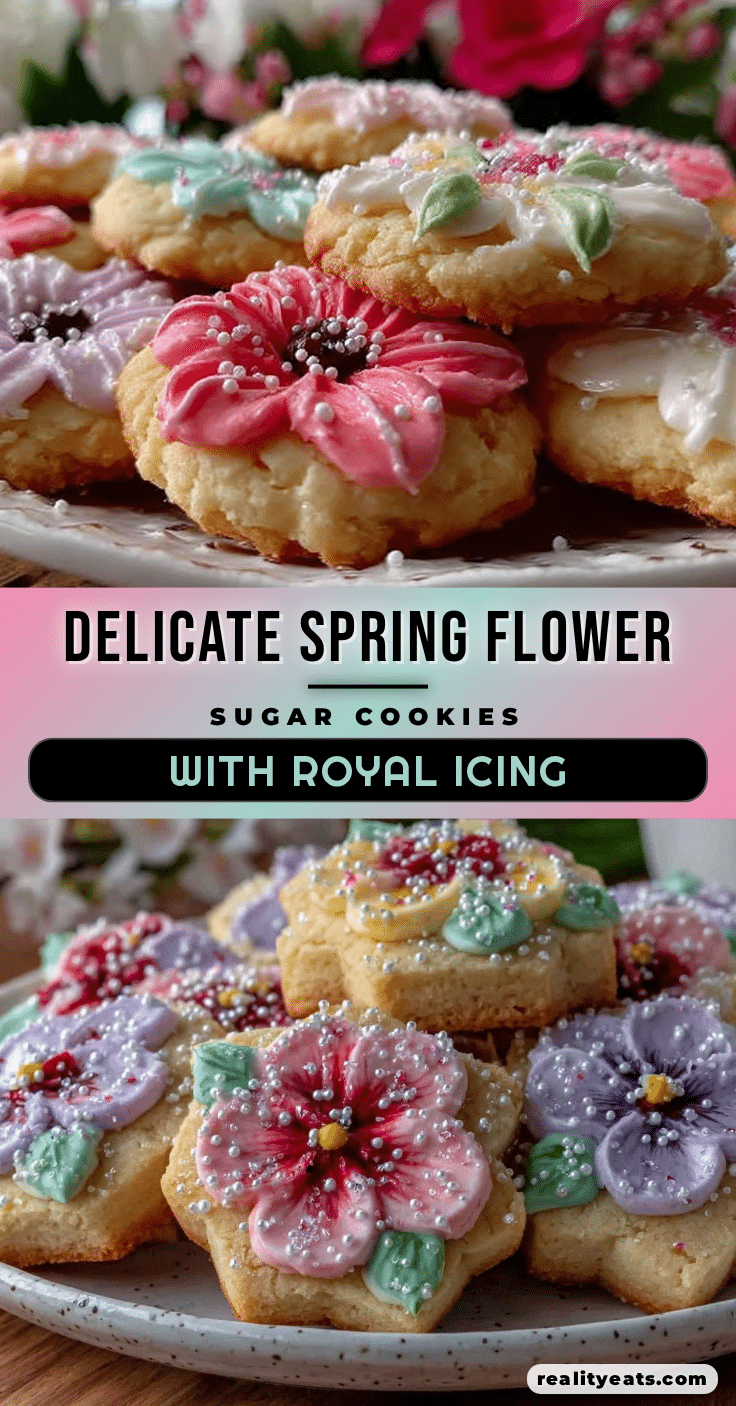
Perfect Spring Flower Sugar Cookies with Royal Icing

Soft, buttery sugar cookies decorated with vibrant royal icing in delicate spring flower shapes. A quick and easy recipe perfect for gatherings and gifts.
- Prep Time: 15 minutes
- Cook Time: 10 minutes
- Total Time: 1 hour 25 minutes
- Yield: 24 cookies 1x
- Category: Dessert
- Cuisine: American
Ingredients
- 2 ¾ cups (345 grams) all-purpose flour
- 1 teaspoon baking powder
- ½ teaspoon salt
- 1 cup (227 grams) unsalted butter, softened
- 1 cup (200 grams) granulated sugar
- 1 large egg, room temperature
- 1 teaspoon pure vanilla extract
- 2 tablespoons milk
- 4 cups (480 grams) powdered sugar (for royal icing)
- 3 tablespoons pasteurized egg whites or meringue powder equivalent (for royal icing)
- 1 tablespoon fresh lemon juice or water (for royal icing)
- Food coloring gels (for decorating)
Instructions
- In a medium bowl, whisk together flour, baking powder, and salt. Set aside.
- Using an electric mixer, beat softened butter and granulated sugar until light and fluffy, about 3-4 minutes.
- Beat in the egg and vanilla extract until fully combined.
- Gradually add the dry flour mixture to the wet ingredients, alternating with milk. Mix on low speed just until incorporated.
- Flatten dough into a disk, wrap in plastic wrap, and chill for at least 1 hour.
- Preheat oven to 350°F (175°C). Line baking sheets with parchment paper.
- Roll dough on a lightly floured surface to about ¼-inch thickness. Cut shapes using spring flower cookie cutters.
- Place cookies on baking sheets about 1 inch apart.
- Bake for 8-10 minutes until edges just start to turn golden. Avoid overbaking.
- Cool cookies completely on wire racks before decorating.
- For royal icing, beat powdered sugar, egg whites, and lemon juice until smooth and stiff peaks form (5-7 minutes). Divide and tint with food coloring gels.
- Use piping bags with small round tips to outline cookies, then flood with thinned icing. Use a toothpick to spread icing if needed.
- Allow icing to dry for several hours or overnight before storing or serving.
Notes
Chill dough for at least 1 hour to prevent spreading. Use rolling pin guides for even thickness. Practice piping on parchment paper before decorating cookies. Let outlines dry before flooding to prevent color bleeding. Store decorated cookies in airtight containers layered with parchment paper. Warm slightly stale cookies in a low oven (250°F) for 5 minutes without melting icing.
Nutrition
- Serving Size: 1 cookie
- Calories: 130
- Sugar: 12
- Sodium: 70
- Fat: 6
- Saturated Fat: 4
- Carbohydrates: 20
- Fiber: 0.5
- Protein: 1
Keywords: sugar cookies, royal icing, spring cookies, flower cookies, easy cookie recipe, homemade cookies, decorated cookies