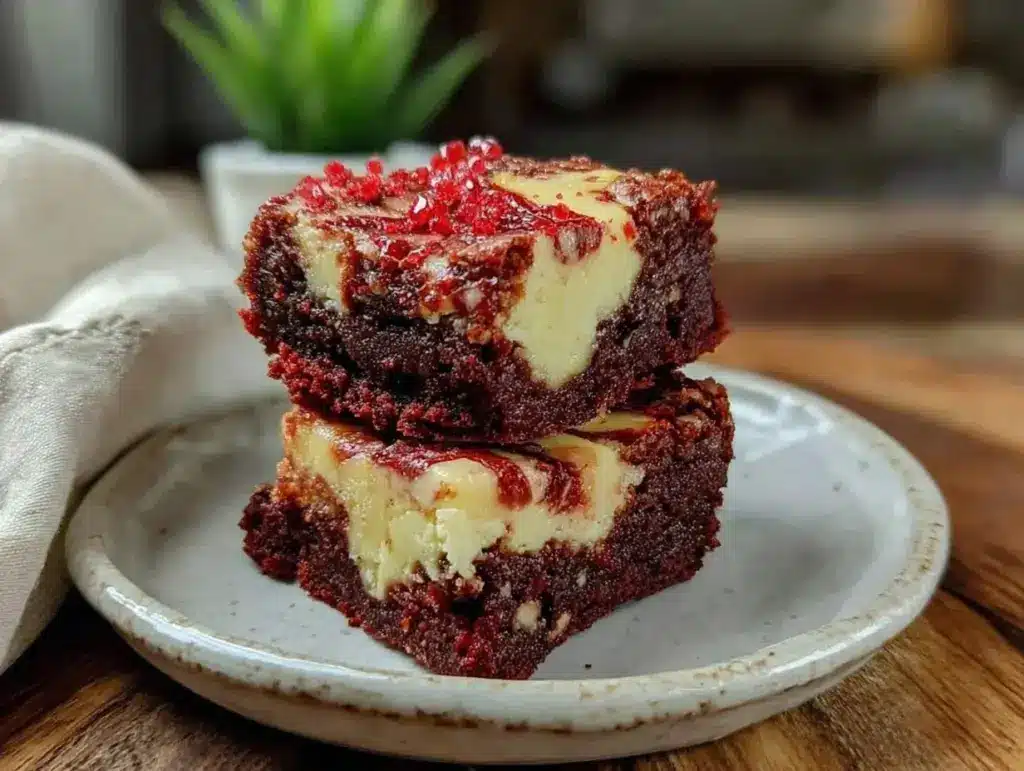
The moment you pull these red velvet cheesecake swirl brownies out of the oven, your kitchen fills with the rich scent of cocoa mingled with creamy sweetness. Honestly, it’s hard not to get excited about a dessert that feels like a celebration in every bite. I first whipped up this red velvet cheesecake swirl brownies recipe on a chilly Sunday afternoon when I craved something both chocolatey and velvety smooth. It quickly became my go-to treat for parties and cozy nights.
What makes these brownies truly stand out is the luscious swirl of cheesecake that cuts through the dense red velvet base. It’s like getting the best of two worlds—moist, tender brownie and silky cheesecake in one glorious dessert. I’ve baked this recipe multiple times, tweaking the balance until it was just right, and my family keeps asking for it again and again.
If you’re looking for a dessert that’s easy to make yet feels like a special occasion, this red velvet cheesecake swirl brownies recipe is your answer. It’s perfect for impressing guests, satisfying sweet cravings, or just treating yourself (because, you know, you deserve it). Plus, it’s one of those recipes that’s forgiving and flexible, so even if you’re not a baking whiz, you’ll still end up with something spectacular.
Why You’ll Love This Recipe
- Quick & Easy: Comes together in about 45 minutes, including baking time—great for last-minute dessert plans.
- Simple Ingredients: No need for specialty items; most are pantry staples like cocoa powder, cream cheese, and basic baking essentials.
- Perfect for Any Occasion: Whether it’s a birthday, holiday gathering, or casual weekend treat, these brownies fit the bill.
- Crowd-Pleaser: Friends and family rave about the creamy cheesecake swirl paired with the rich red velvet flavor—it’s a guaranteed hit.
- Unbelievably Delicious: The texture combo of fudgy brownie and smooth cheesecake is just next-level comfort food.
This isn’t just another brownie recipe. What sets it apart is the way the cheesecake layer lightly tangs against the sweet red velvet, creating a balanced flavor profile that’s both rich and refreshing. I love how the red velvet batter is dense but still tender, and the swirl effect adds a gorgeous marbled look that’s fancy enough for company yet totally doable for a weekday treat. It’s honestly one of those recipes where the first bite makes you close your eyes and smile—pure dessert bliss.
What Ingredients You Will Need
This recipe uses straightforward ingredients that work together to create layers of flavor and texture without any fuss. Most of these are likely already in your kitchen, so no extra trips to specialty stores.
- For the Red Velvet Brownie Batter:
- 1 cup (225g) unsalted butter, melted (adds richness and moisture)
- 2 cups (400g) granulated sugar
- 4 large eggs, room temperature
- 1 teaspoon pure vanilla extract
- 2 cups (250g) all-purpose flour
- 3/4 cup (75g) unsweetened cocoa powder (I prefer Dutch-processed for smoother flavor)
- 1 teaspoon baking powder
- 1/2 teaspoon salt
- 2 tablespoons red food coloring (gel works best for vibrant color without adding liquid)
- For the Cheesecake Swirl:
- 16 ounces (450g) cream cheese, softened (full-fat for best texture)
- 2/3 cup (135g) granulated sugar
- 2 large eggs, room temperature
- 1 teaspoon pure vanilla extract
Pro tip: Using room temperature eggs helps everything blend smoothly. Also, if you’re feeling adventurous, swapping half the all-purpose flour with almond flour gives a subtle nutty undertone (plus it’s gluten-free!). For the cream cheese, brands like Philadelphia deliver consistently creamy results, but any good quality block will do.
Equipment Needed
- 9×13 inch (23×33 cm) baking pan – a classic size that bakes brownies evenly
- Mixing bowls – one large for batter and one medium for cheesecake mixture
- Electric mixer or stand mixer – essential for smooth cheesecake batter
- Spatula – for folding and spreading the batter
- Whisk – handy for beating eggs and sugar
- Measuring cups and spoons – for precision
- Toothpick or skewer – to test doneness
If you don’t have a stand mixer, a hand mixer works just fine. When spreading the batter, I like using an offset spatula to get an even layer without tearing the pan lining. Baking pans with a non-stick coating or silicone liners make cleanup easier, but parchment paper will also do the trick. I’ve found that investing in a good quality rubber spatula really makes mixing and scraping a breeze.
Detailed Preparation Method

- Preheat your oven to 350°F (175°C). Line your 9×13 inch pan with parchment paper, leaving a bit hanging over the sides for easy removal later. This step saves a lot of hassle!
- Make the red velvet brownie batter: In a large bowl, whisk together the melted butter and sugar until combined (about 1-2 minutes). Add the eggs one at a time, mixing well after each addition, then stir in the vanilla extract.
- Sift together the flour, cocoa powder, baking powder, and salt into the wet mixture. Gently fold everything until just combined—don’t overmix or you’ll lose that tender texture.
- Stir in the red food coloring until the batter reaches a deep, vibrant red. If you want a darker hue, add a little more gel color, but beware of adding too much liquid.
- Prepare the cheesecake swirl: In a separate bowl, beat the softened cream cheese with sugar until smooth and creamy using your mixer (about 2-3 minutes). Add eggs one at a time, mixing well, then stir in the vanilla extract.
- Pour half of the red velvet batter into the prepared pan and spread it evenly with a spatula.
- Drop spoonfuls of the cheesecake batter over the red velvet layer, then top with the remaining red velvet batter. Use a knife or skewer to gently swirl the layers together for that classic marbled effect.
- Bake for 35-40 minutes. Check doneness by inserting a toothpick; it should come out with a few moist crumbs but no wet batter. The cheesecake topping will be set and lightly golden on the edges.
- Cool completely. Let the brownies cool in the pan on a wire rack for at least an hour before slicing. This step is key for clean edges and perfect slices.
One time, I forgot to let mine cool and ended up with a gooey mess—lesson learned! Also, if your cream cheese feels too firm, a quick zap in the microwave (10-15 seconds) softens it just right for mixing.
Cooking Tips & Techniques
Getting that perfect red velvet cheesecake swirl brownies texture is all about balance and timing. Here are some tips I picked up along the way:
- Softened cream cheese is a must. Cold cream cheese will clump and make your swirl lumpy, so let it sit out for 30 minutes or microwave briefly.
- Don’t skip sifting dry ingredients. Cocoa powder and flour can have lumps, and sifting helps keep the batter smooth and airy.
- Be gentle when folding. Overmixing the batter can result in tough brownies, so fold just until combined.
- Create the swirl carefully. Too much swirling blends the layers together and loses the visual effect; a few gentle twists with a knife work best.
- Watch your bake time. Overbaking dries out the brownies, while underbaking leaves them gooey and unstable. Start checking at 35 minutes.
- Let the brownies cool completely. This solidifies the cheesecake layer and makes slicing clean and easy.
Once, I used a metal pan that heated unevenly, and the edges got crispy before the center was done. Switching to an aluminum pan gave me evenly baked, soft brownies every time after that.
Variations & Adaptations
Want to mix things up? These brownies are super versatile and can be adapted for different preferences and occasions.
- Gluten-Free Version: Swap the all-purpose flour for a 1-to-1 gluten-free baking flour blend. The texture stays fudgy and delicious.
- Vegan Twist: Use dairy-free cream cheese and substitute eggs with flax eggs (1 tbsp ground flaxseed + 3 tbsp water per egg). Baking time might be a bit longer.
- Flavor Boosters: Add 1 teaspoon of espresso powder to the brownie batter to deepen the chocolate flavor, or sprinkle white chocolate chips on top before baking.
- Seasonal Swaps: In fall, stir in a teaspoon of pumpkin pie spice into the cheesecake layer for a festive touch.
- Personal Favorite: I once added a handful of chopped pecans between the layers for a delightful crunch that contrasted with the creamy swirl.
Serving & Storage Suggestions
These red velvet cheesecake swirl brownies are best served at room temperature when the cheesecake layer is creamy and the brownie tender. You can also enjoy them slightly chilled for a firmer, cooler bite—perfect on a warm day.
For a simple presentation, dust with powdered sugar or add a dollop of whipped cream. They pair wonderfully with a cup of coffee, hot chocolate, or even a glass of cold milk (classic combo, right?).
Store leftovers in an airtight container in the refrigerator for up to 5 days. The flavors actually mellow and deepen after a day or two. If you want to freeze them, wrap tightly in plastic wrap and foil and freeze for up to 3 months. Thaw overnight in the fridge and bring to room temperature before serving.
Reheating in the microwave for about 15 seconds can bring back that fresh-baked softness, but don’t overdo it, or the cheesecake might get rubbery.
Nutritional Information & Benefits
Each serving of these red velvet cheesecake swirl brownies packs approximately:
| Calories | Fat | Carbohydrates | Protein |
|---|---|---|---|
| 320 | 18g | 36g | 5g |
While these brownies are an indulgence, they offer some nutritional perks thanks to the cream cheese, which provides calcium and protein. Using real butter and eggs adds wholesome fats and essential nutrients. For those watching carbs, swapping sugar for a natural sweetener like erythritol can lower the glycemic impact.
Keep in mind this dessert contains dairy, eggs, and gluten (unless adapted). I always recommend enjoying treats like this as part of a balanced lifestyle—because life’s too short to skip dessert!
Conclusion
Making these red velvet cheesecake swirl brownies is honestly one of my favorite baking adventures. They’re straightforward enough for a beginner but impressive enough to serve at any gathering. The creamy tang of cheesecake combined with rich, fudgy red velvet brownie creates a dessert that’s truly memorable.
Feel free to tweak the ingredients or swirl pattern to match your style—it’s a forgiving recipe that loves your personal touch. I hope you have as much fun making and eating these as I do!
If you try this recipe, please drop a comment below or share your variations—I’d love to hear your thoughts and tips. Happy baking, friends!
FAQs About Red Velvet Cheesecake Swirl Brownies
Can I make these brownies ahead of time?
Absolutely! They can be baked a day in advance and stored in the fridge. The flavors actually develop nicely overnight.
What if I don’t have red food coloring?
You can skip it or use a natural beet powder for a subtle red tint, but the classic bright red comes from food coloring.
How do I know when the brownies are done?
A toothpick inserted should come out with a few moist crumbs but no wet batter, especially around the cheesecake swirl.
Can I freeze leftover brownies?
Yes! Wrap tightly and freeze for up to 3 months. Thaw in the fridge overnight before enjoying.
What’s the best way to get a clean swirl effect?
Drop spoonfuls of cheesecake batter over the brownie layer and then gently swirl using a knife without overmixing to keep the marbled look.
Pin This Recipe!
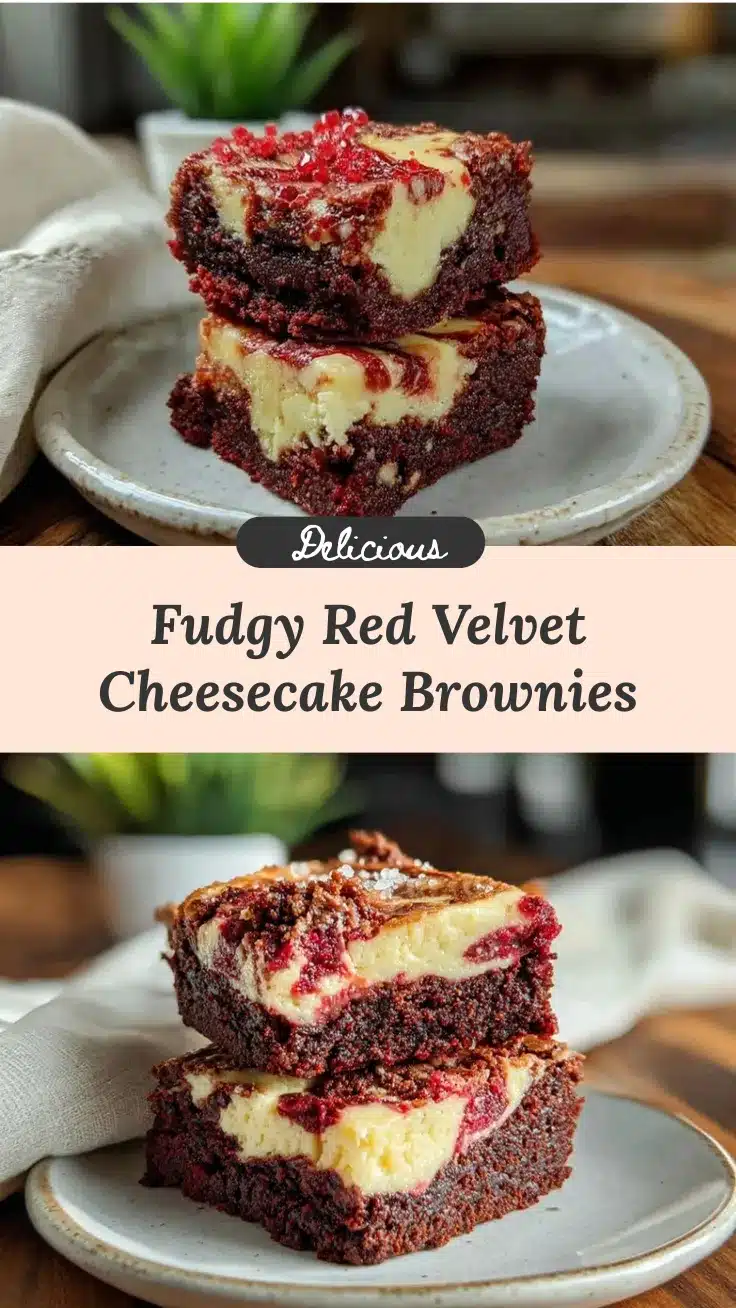
Red Velvet Cheesecake Swirl Brownies

These red velvet cheesecake swirl brownies combine a moist, tender red velvet brownie base with a luscious, creamy cheesecake swirl for a rich and indulgent dessert perfect for any occasion.
- Prep Time: 15 minutes
- Cook Time: 35-40 minutes
- Total Time: 50-55 minutes
- Yield: 12 servings 1x
- Category: Dessert
- Cuisine: American
Ingredients
- 1 cup (225g) unsalted butter, melted
- 2 cups (400g) granulated sugar
- 4 large eggs, room temperature
- 1 teaspoon pure vanilla extract
- 2 cups (250g) all-purpose flour
- 3/4 cup (75g) unsweetened cocoa powder (preferably Dutch-processed)
- 1 teaspoon baking powder
- 1/2 teaspoon salt
- 2 tablespoons red food coloring (gel preferred)
- 16 ounces (450g) cream cheese, softened (full-fat)
- 2/3 cup (135g) granulated sugar
- 2 large eggs, room temperature
- 1 teaspoon pure vanilla extract
Instructions
- Preheat your oven to 350°F (175°C). Line a 9×13 inch baking pan with parchment paper, leaving some overhang for easy removal.
- In a large bowl, whisk together the melted butter and sugar until combined (about 1-2 minutes). Add the eggs one at a time, mixing well after each addition, then stir in the vanilla extract.
- Sift together the flour, cocoa powder, baking powder, and salt into the wet mixture. Gently fold until just combined, being careful not to overmix.
- Stir in the red food coloring until the batter reaches a deep, vibrant red.
- In a separate bowl, beat the softened cream cheese with sugar until smooth and creamy using a mixer (about 2-3 minutes). Add eggs one at a time, mixing well, then stir in the vanilla extract.
- Pour half of the red velvet batter into the prepared pan and spread evenly with a spatula.
- Drop spoonfuls of the cheesecake batter over the red velvet layer, then top with the remaining red velvet batter. Use a knife or skewer to gently swirl the layers together to create a marbled effect.
- Bake for 35-40 minutes. Check doneness by inserting a toothpick; it should come out with a few moist crumbs but no wet batter. The cheesecake topping should be set and lightly golden on the edges.
- Cool completely in the pan on a wire rack for at least one hour before slicing.
Notes
Use room temperature eggs for smooth blending. Softened cream cheese is essential to avoid lumps in the swirl. Be gentle when folding the batter to keep brownies tender. Let brownies cool completely before slicing for clean edges. For a gluten-free version, substitute all-purpose flour with a gluten-free baking flour blend. For a vegan twist, use dairy-free cream cheese and flax eggs. Avoid overbaking to prevent dryness.
Nutrition
- Serving Size: 1 brownie (approxima
- Calories: 320
- Sugar: 28
- Sodium: 250
- Fat: 18
- Saturated Fat: 10
- Carbohydrates: 36
- Fiber: 2
- Protein: 5
Keywords: red velvet brownies, cheesecake swirl, dessert, easy brownies, chocolate dessert, party dessert, creamy cheesecake, fudgy brownies