That first bitter-sweet pop of dark purple syrup hitting my tongue — the kind that stains your lips and makes you pucker just a little — still takes me straight to my grandma’s tiny kitchen in the middle of January. She wasn’t a hugger, but she’d press a little glass jar of homemade elderberry syrup into my hands every time I left her house during cold season. “This will keep you out of trouble,” she’d say, with that sideways smile that meant she knew something I didn’t. I never really questioned it back then. I just took my spoonful every morning like it was part of the routine, like brushing my teeth or feeding the cat.
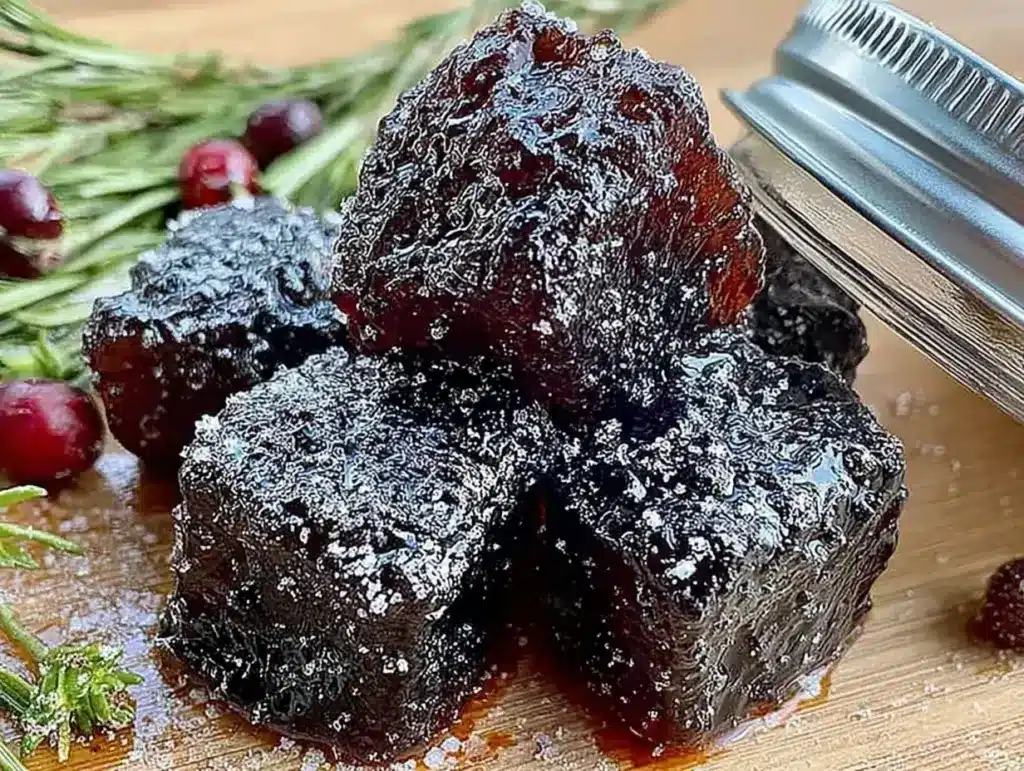
It wasn’t until years later, after I’d moved out and started navigating my own bouts of winter sniffles and scratchy throats, that I realized how much I missed that little ritual. The store-bought stuff never hit the same. It was either too sweet, too syrupy, or loaded with stuff I couldn’t pronounce. So I did what any stubborn home cook would do — I called my grandma, dug out her stained recipe card, and started experimenting. And somewhere along the way, I realized that turning that potent syrup into Healthy Homemade Elderberry Gummies for Immune Support was the best decision I ever made.
Honestly, it changed everything. No more sticky spoons, no more measuring out doses. Just a handful of chewy, tart-sweet little gems that somehow make you feel like you’re eating candy while actually doing something good for your body. And the best part? They’re ridiculously simple to make. You don’t need a fancy kitchen or a degree in herbalism. You just need a few ingredients, a little patience, and the willingness to let your kitchen smell like a cozy winter apothecary for an hour. Trust me, once you make these, you’ll never go back to the store-bought version.
Why You’ll Love This Recipe
I’ve tested this recipe at least a dozen times — tweaking the gelatin ratio, adjusting the sweetness, and even messing up a batch or two (the first time I used too much honey, the gummies never set properly). But every failure taught me something. And now, I can confidently say this version is the one. Here’s why it works:
- Quick & Easy: These come together in under 20 minutes of active time. The hardest part is waiting for them to set in the fridge.
- Simple Ingredients: You probably already have most of these in your pantry. No weird additives or obscure health store finds.
- Perfect for Cold Season: Whether you’re fighting off a scratchy throat or just want to give your immune system a little backup, these are your new best friend.
- Crowd-Pleaser: Kids actually ask for these. Adults sneak them from the jar. They taste like a treat, not a chore.
- Unbelievably Delicious: The balance of tart elderberry with a hint of honey and lemon is just right. Not too sweet, not too medicinal.
What makes this recipe different from all the other gummy recipes out there? It’s the texture. I spent a long time figuring out how to get that perfect, bouncy, not-too-firm chew without using excessive gelatin. The secret? Blooming the gelatin properly and using a low, slow heat when dissolving it. It sounds fussy, but it’s really not. And the result is a gummy that feels like it came from a fancy health food store — but costs a fraction of the price.
This isn’t just a recipe. It’s the kind of thing that makes you feel good about what you’re putting into your body. It’s comfort food reimagined — healthier, faster, but with the same soul-soothing satisfaction. Perfect for impressing your wellness-conscious friends without any stress, or turning a simple daily habit into something you actually look forward to.
What Ingredients You Will Need
This recipe uses simple, wholesome ingredients to deliver bold flavor and satisfying texture without the fuss. Most of these are pantry staples or easy to find at your local grocery store or online.
- Dried Elderberries (½ cup): The star of the show. Look for organic dried elderberries from a reputable brand like Frontier Co-op or Starwest Botanicals. They should be deep purple-black and smell slightly floral. Avoid any that look dusty or faded.
- Water (2 cups): Filtered water is best, but tap works fine. We’ll use this to make the concentrated elderberry syrup.
- Raw Honey (3 tablespoons): Adds natural sweetness and has its own immune-supporting properties. Use a mild honey like clover or orange blossom so it doesn’t overpower the elderberry. (Vegan option: use maple syrup or agave nectar, though the texture may be slightly softer.)
- Fresh Lemon Juice (2 tablespoons): Brightens the flavor and helps preserve the gummies naturally. Freshly squeezed is non-negotiable here — bottled lemon juice just doesn’t have the same zing.
- Grass-Fed Beef Gelatin (¼ cup / about 4 tablespoons): This is what gives the gummies their structure. I recommend Vital Proteins or Great Lakes gelatin for the best results. Do not substitute with collagen peptides — they won’t set properly. (Vegetarian option: you can use agar agar powder, but the texture will be much firmer and less bouncy.)
- Optional Add-Ins: A pinch of cinnamon or ginger powder adds warmth and extra immune benefits. You can also add a teaspoon of vitamin C powder (ascorbic acid) for an extra boost — just stir it in after removing the mixture from heat.
I personally prefer using raw honey from a local beekeeper when I can find it. It adds a subtle floral note that changes slightly with each batch, which I kind of love. And for the elderberries, I’ve tried a few different brands, and I always come back to Frontier Co-op — they’re consistently potent and flavorful.
Equipment Needed
You don’t need a lot of fancy equipment for this recipe, which is part of the beauty of it. Here’s what you’ll need:
- Small Saucepan: For simmering the elderberries and making the syrup. A 2-quart saucepan works perfectly.
- Fine-Mesh Strainer or Cheesecloth: To strain out the cooked berries. A fine-mesh strainer gives you a clear syrup without any grit. A nut milk bag works too.
- Measuring Cups and Spoons: Accuracy matters with gelatin, so use proper measuring tools.
- Whisk: For dissolving the gelatin smoothly. A small silicone whisk is my favorite — it doesn’t scratch your pans.
- Silicone Gummy Molds: These are essential for getting that cute gummy shape. I use bear-shaped molds because they’re fun, but you can use any shape you like. Silicone is non-stick and makes popping the gummies out a breeze.
- Liquid Dropper or Small Spouted Measuring Cup: Makes filling the molds much easier and less messy. A glass measuring cup with a spout works in a pinch.
- Baking Sheet or Plate: To hold the filled molds while they set in the fridge.
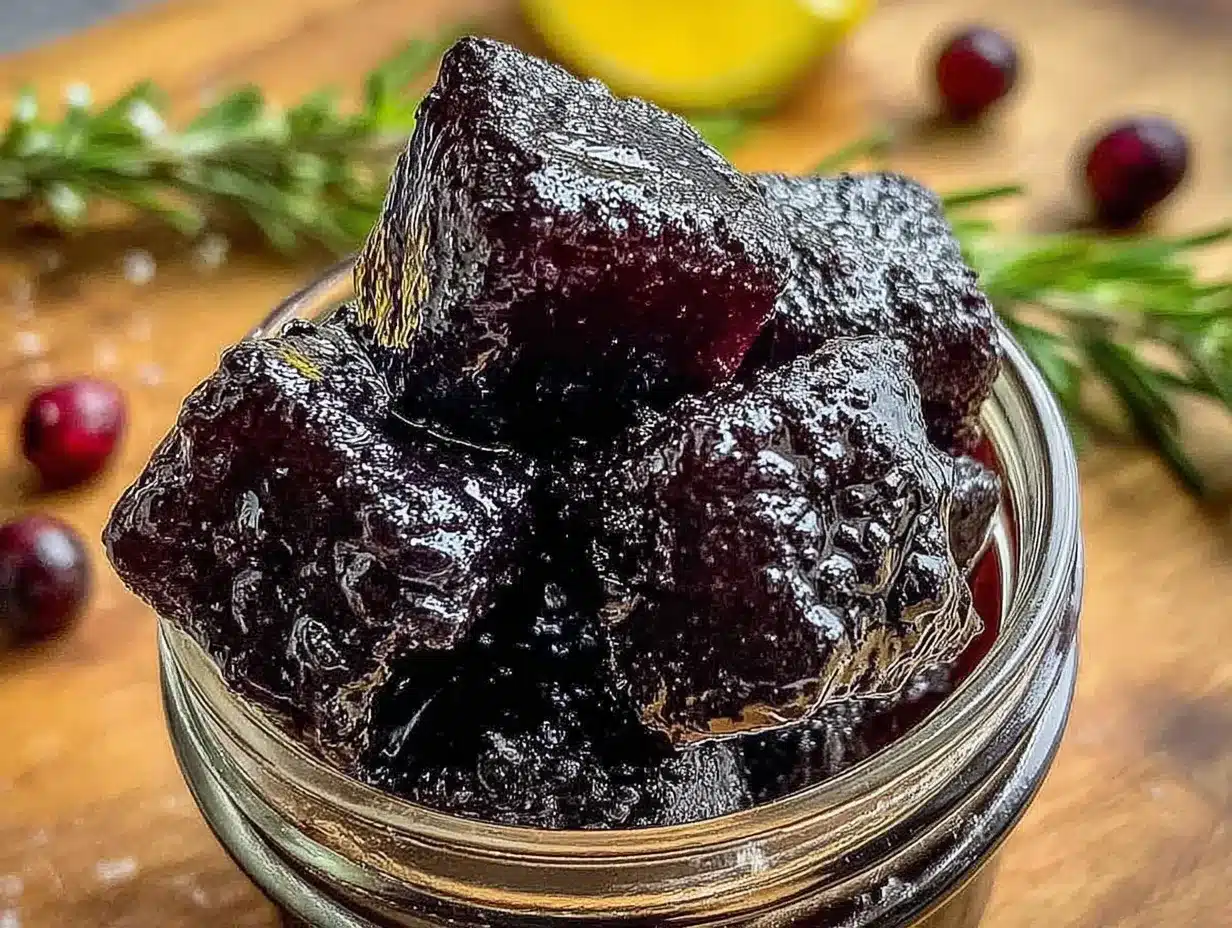
If you don’t have silicone molds, you can pour the mixture into a small glass dish (like an 8×8 inch pan) and cut it into squares once set. They won’t look as cute, but they’ll taste just as good. I’ve done it both ways, and honestly, the squares are easier to store.
Preparation Method
Let’s get into the actual making of these gummies. I’ll walk you through every step so you feel confident, even if this is your first time working with gelatin.
- Make the Elderberry Syrup: In a small saucepan, combine the dried elderberries and 2 cups of water. Bring to a boil over medium-high heat, then reduce the heat to low and let it simmer, uncovered, for about 20-25 minutes. You’ll know it’s ready when the liquid has reduced by about half and the berries look plump and slightly broken down. The kitchen will smell amazing — like a cross between black tea and dark berries.
- Strain the Berries: Place your fine-mesh strainer over a large bowl or glass measuring cup. Pour the mixture through the strainer, pressing gently on the berries with the back of a spoon to extract as much liquid as possible. Discard the spent berries (they’ve given you all their goodness). You should have about 1 cup of concentrated elderberry syrup. Let it cool for 5-10 minutes until it’s warm but not hot.
- Bloom the Gelatin: In a separate small bowl, add ¼ cup of the warm elderberry syrup and sprinkle the gelatin powder evenly over the top. Do not stir yet. Let it sit for 5 minutes. This is called blooming, and it’s the most important step for smooth, lump-free gummies. The gelatin will absorb the liquid and look like a firm, jiggly mass. Don’t panic — that’s exactly what you want.
- Combine Everything: Pour the remaining elderberry syrup back into the saucepan. Add the honey and lemon juice. Warm over low heat, stirring gently, until the honey dissolves completely. Do not let it boil — high heat can damage the gelatin’s setting power. Once the honey is incorporated, add the bloomed gelatin mixture and whisk continuously until it’s fully dissolved and the liquid is smooth. This takes about 2-3 minutes. You shouldn’t see any lumps or streaks.
- Fill the Molds: Remove the saucepan from heat. If you’re adding any optional ingredients like vitamin C powder or spices, stir them in now. Let the mixture cool for another 2-3 minutes — it should be warm but not hot to the touch. Using your dropper or spouted cup, carefully fill each cavity of your silicone molds. Work quickly but steadily, as the mixture will start to thicken as it cools. If it gets too thick, just reheat it gently over low heat for a few seconds.
- Set the Gummies: Place the filled molds on a baking sheet (this makes them easier to move) and transfer to the refrigerator. Let them set for at least 4 hours, but overnight is even better. They should be firm to the touch and pop out of the molds easily when ready.
- Pop and Store: Gently flex the silicone molds to release the gummies. If they stick, place them in the freezer for 5 minutes — that usually does the trick. Transfer the gummies to an airtight glass jar and store in the refrigerator.
A quick tip from someone who learned the hard way: don’t skip the blooming step. I did once when I was in a rush, and my gummies came out with weird, grainy bits of undissolved gelatin. Not a disaster, but definitely not as pleasant. Also, if you’re using a dropper, keep a small bowl of hot water nearby to rinse the tip if it gets clogged.
Cooking Tips & Techniques
Making gummies at home is pretty forgiving, but a few small tricks can make the difference between good and great. Here’s what I’ve learned from my own kitchen experiments.
Temperature control is everything. Gelatin is a protein, and like any protein, it doesn’t like extreme heat. If you boil the mixture after adding the gelatin, it can lose its setting power and leave you with a sticky, syrup-like mess. Keep the heat low and steady. I use the lowest setting on my stove and stir constantly once the gelatin goes in.
Don’t overfill the molds. It’s tempting to fill them right to the brim, but a tiny bit of space at the top makes them easier to remove and gives them a cleaner shape. Aim for about 90% full. Also, if you get a few air bubbles, don’t worry — they’ll settle as the mixture sets. You can also tap the mold gently on the counter to release them.
If your gummies don’t set properly, don’t panic. This happened to me the first time I used a different brand of gelatin. The issue was that I didn’t bloom it long enough. You can always remelt the mixture by gently reheating it in a saucepan, adding a little more gelatin (about 1 tablespoon), and pouring it back into the molds. It works like a charm.
Timing is key for multitasking. While the elderberries are simmering, I use that time to set up my molds and measure out the gelatin and honey. That way, when the syrup is ready, I can move through the remaining steps without stopping. It makes the whole process feel faster and less chaotic.
For consistent results, use a kitchen scale. I know, I know — I said this was simple. But if you make these regularly, weighing your ingredients (especially the gelatin) gives you perfectly repeatable results every time. Gelatin can be finicky with volume measurements because it settles differently in the spoon.
Variations & Adaptations
One of the best things about this recipe is how easy it is to adapt. Here are a few ways I’ve tweaked it over the years.
- Berry Medley Gummies: Swap half the elderberries for dried hibiscus flowers or dried rose hips. It changes the flavor profile to something more floral and slightly tart. I did this once when I ran out of elderberries, and it turned out surprisingly delicious.
- Spiced Immune Boost: Add a cinnamon stick and a few slices of fresh ginger to the pot while simmering the elderberries. Strain them out with the berries. The resulting gummies have a warm, cozy kick that’s perfect for winter months.
- Vegan Agar Agar Version: Replace the gelatin with 2 tablespoons of agar agar powder. Dissolve it in the cold elderberry syrup first, then bring to a boil for 2 minutes while stirring constantly. Pour into molds and let set at room temperature. The texture is firmer and less bouncy, but still satisfying.
- Low-Sugar Option: Use monk fruit sweetener or stevia instead of honey. Start with 1 teaspoon and adjust to taste. Keep in mind that these sweeteners don’t have the same preservative qualities as honey, so the gummies won’t last as long in the fridge.
- Citrus Elderberry Gummies: Replace the lemon juice with an equal amount of fresh orange juice and add a teaspoon of orange zest. The citrus notes brighten the elderberry flavor beautifully.
I personally love the spiced version during the colder months. It feels like a warm hug in gummy form. And if you’re making these for kids, the berry medley version is usually a hit — it’s a little sweeter and less intense.
Serving & Storage Suggestions
These gummies are best served cold, straight from the fridge. The texture is firmer and more satisfying when they’re chilled. I like to keep a small jar on my kitchen counter for the day’s serving, but store the rest in the refrigerator.
Serving size: For adults, 2-4 gummies per day is a good maintenance dose. For kids, start with 1-2 gummies daily. They’re potent, so you don’t need a lot.
Storage: Keep your gummies in an airtight glass jar in the refrigerator. They’ll stay fresh for up to 3 weeks. I don’t recommend freezing them — the texture changes and becomes watery when thawed. If you need to store them longer, make a fresh batch instead.
Reheating note: These aren’t meant to be reheated. If they get too warm, they’ll melt. So keep them chilled until you’re ready to eat them.
Flavor development: Interestingly, the flavor of these gummies actually mellows and deepens after a day or two in the fridge. The honey and elderberry flavors marry together, and the tartness softens. I actually prefer them on day two or three.
They pair beautifully with a warm cup of ginger tea or as a little afternoon pick-me-up. And if you’re feeling fancy, you can roll them in a little powdered sugar or coconut flakes before serving — though that’s definitely more for presentation than anything else.
Nutritional Information & Benefits
Please note that these values are estimates and can vary based on the specific brands and quantities you use.
| Nutrient | Per Serving (4 gummies) |
|---|---|
| Calories | 45-55 |
| Total Carbohydrates | 10-12g |
| Sugars | 8-10g (from honey and natural fruit sugars) |
| Protein | 4-5g |
| Vitamin C | 2-4mg (from lemon juice and optional vitamin C powder) |
Health Benefits: Elderberries are packed with antioxidants and flavonoids that support immune function. They’ve been used for centuries in traditional medicine to help shorten the duration of colds and flu. Honey adds antimicrobial properties and soothes sore throats. Gelatin provides collagen, which supports joint health, skin elasticity, and gut health. It’s a powerhouse in a tiny, chewy package.
Dietary Considerations: This recipe is naturally gluten-free, dairy-free, and soy-free. It can be made vegan with agar agar. It is not keto-friendly due to the honey, but you can substitute with a low-carb sweetener if needed.
Potential Allergens: Some people may be sensitive to gelatin (derived from animal collagen). If you have a known allergy, stick with the agar agar version. Also, note that honey is not recommended for infants under 1 year old.
I personally love that these gummies let me feel proactive about my health without feeling like I’m taking medicine. It’s a small, daily ritual that adds up to something meaningful over time.
Conclusion
These Healthy Homemade Elderberry Gummies for Immune Support have become a staple in my kitchen, and I honestly can’t imagine going through another cold season without them. They’re simple to make, endlessly customizable, and they actually taste good — which is more than I can say for most wellness products. Whether you’re a seasoned home cook or someone who’s never worked with gelatin before, I promise you can make these. And once you do, you’ll wonder why you ever bought the store-bought stuff.
I’d love to hear how yours turn out. Did you try a fun variation? Did your kids love them? Drop a comment below and let me know — I read every single one. And if you found this helpful, share it with a friend who could use a little immune boost this season. We’re all in this together, right?
Until next time, stay cozy and keep cooking with love.
Frequently Asked Questions
Can I use fresh elderberries instead of dried?
Yes, but you’ll need to adjust the quantity. Use about 1 cup of fresh elderberries and reduce the water to 1 ½ cups since fresh berries contain more moisture. Also, make sure to cook them thoroughly — raw elderberries can be mildly toxic and should always be cooked before consumption.
Why didn’t my gummies set?
This usually happens for one of three reasons: the mixture was too hot when you added the gelatin (which damaged its setting power), you didn’t bloom the gelatin long enough, or you used collagen peptides instead of gelatin. Collagen peptides won’t set into a firm gel. If your mixture didn’t set, you can gently reheat it, add another tablespoon of gelatin, and try again.
How long do these gummies last?
Stored in an airtight container in the refrigerator, they’ll stay fresh for up to 3 weeks. I don’t recommend storing them at room temperature — they’ll get soft and sticky. If you notice any mold or off smell, toss them and make a fresh batch.
Can I make these without a gummy mold?
Absolutely. Pour the mixture into a small glass dish (like an 8×8 inch pan) and let it set. Once firm, cut it into small squares with a sharp knife or a cookie cutter. They won’t look as cute, but they’ll taste exactly the same. You can even roll the squares in a little coconut flour to keep them from sticking together.
Are these safe for kids?
Yes, but with a couple of caveats. For children under 1 year old, skip the honey due to the risk of botulism — use maple syrup instead. For older kids, start with 1-2 gummies per day. The texture is soft and easy to chew, but always supervise young children when they’re eating anything chewy. My own kids love them, and I feel good knowing they’re getting a little immune support with their “candy.”
Pin This Recipe!
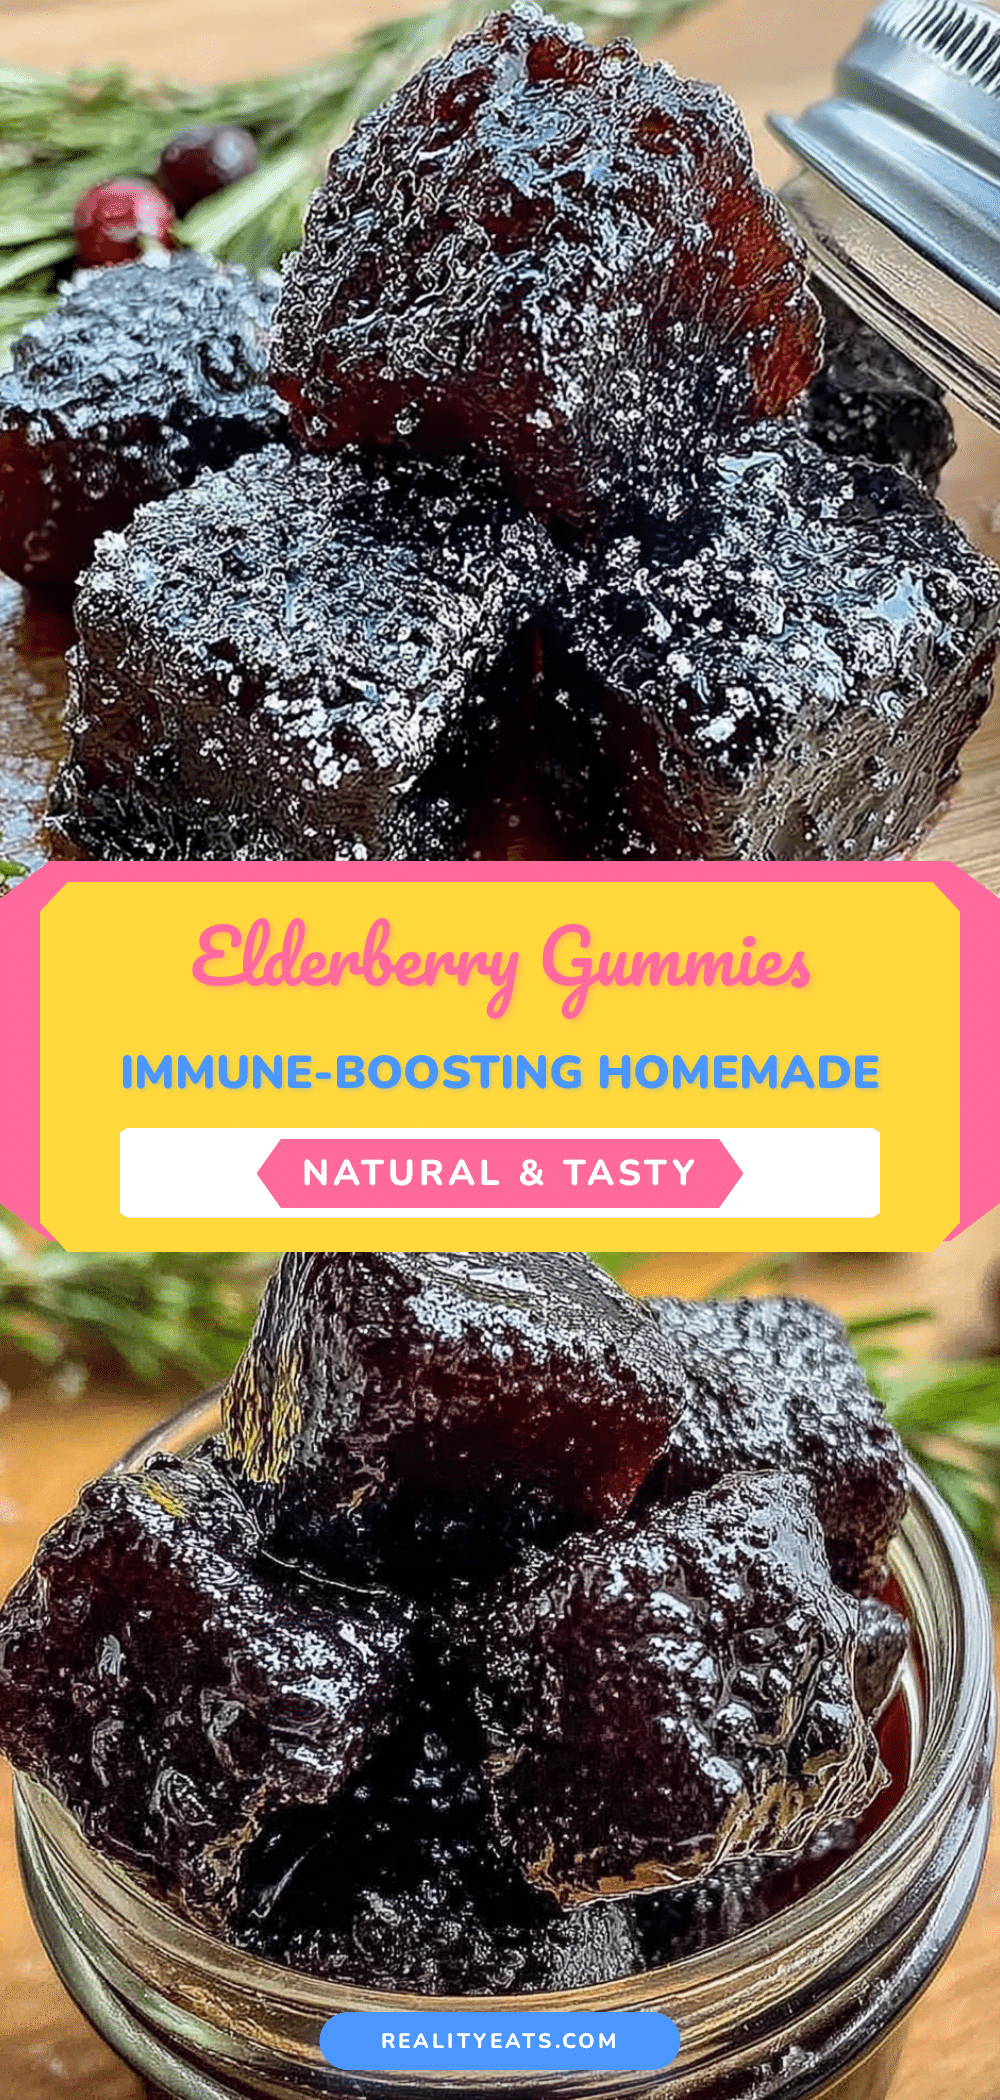
Easy Homemade Elderberry Gummies for Immune Support

These healthy homemade elderberry gummies are a simple, delicious way to support your immune system. Made with real elderberries, honey, and gelatin, they taste like candy but are packed with immune-boosting goodness.
- Prep Time: 15 minutes
- Cook Time: 25 minutes
- Total Time: 4 hours 40 minutes (includes setting time)
- Yield: 4 servings 1x
- Category: Snack
- Cuisine: American
Ingredients
- ½ cup dried elderberries
- 2 cups water
- 3 tablespoons raw honey (or maple syrup for vegan)
- 2 tablespoons fresh lemon juice
- ¼ cup (about 4 tablespoons) grass-fed beef gelatin (or 2 tablespoons agar agar powder for vegan)
- Optional: pinch of cinnamon or ginger powder
- Optional: 1 teaspoon vitamin C powder (ascorbic acid)
Instructions
- Make the Elderberry Syrup: In a small saucepan, combine the dried elderberries and 2 cups of water. Bring to a boil over medium-high heat, then reduce the heat to low and let it simmer, uncovered, for about 20-25 minutes until the liquid has reduced by about half and the berries look plump.
- Strain the Berries: Place a fine-mesh strainer over a large bowl or glass measuring cup. Pour the mixture through the strainer, pressing gently on the berries with the back of a spoon to extract as much liquid as possible. Discard the spent berries. You should have about 1 cup of concentrated elderberry syrup. Let it cool for 5-10 minutes until warm but not hot.
- Bloom the Gelatin: In a separate small bowl, add ¼ cup of the warm elderberry syrup and sprinkle the gelatin powder evenly over the top. Do not stir yet. Let it sit for 5 minutes until it looks like a firm, jiggly mass.
- Combine Everything: Pour the remaining elderberry syrup back into the saucepan. Add the honey and lemon juice. Warm over low heat, stirring gently, until the honey dissolves completely. Do not let it boil. Once the honey is incorporated, add the bloomed gelatin mixture and whisk continuously until fully dissolved and smooth, about 2-3 minutes.
- Fill the Molds: Remove the saucepan from heat. If adding optional ingredients like vitamin C powder or spices, stir them in now. Let the mixture cool for 2-3 minutes. Using a dropper or spouted cup, carefully fill each cavity of your silicone molds. Work quickly but steadily.
- Set the Gummies: Place the filled molds on a baking sheet and transfer to the refrigerator. Let them set for at least 4 hours, but overnight is even better. They should be firm to the touch and pop out easily when ready.
- Pop and Store: Gently flex the silicone molds to release the gummies. If they stick, place them in the freezer for 5 minutes. Transfer the gummies to an airtight glass jar and store in the refrigerator.
Notes
Don’t skip the blooming step for smooth gummies. Keep heat low after adding gelatin to preserve its setting power. If gummies don’t set, gently reheat and add more gelatin. Store in refrigerator for up to 3 weeks. For kids under 1 year, use maple syrup instead of honey.
Nutrition
- Serving Size: 4 gummies
- Calories: 4555
- Sugar: 810
- Sodium: 5
- Carbohydrates: 1012
- Protein: 45
Keywords: elderberry gummies, immune support, homemade gummies, elderberry recipe, healthy snacks, gelatin gummies, natural immune booster