I pickled green tomatoes for five years before I realized I was doing it wrong. Not inedible wrong, just… disappointing wrong. My jars would sit in the fridge, taking up space, while I reached for store-bought pickles instead. The brine was too sharp, the spices too muted, and the texture turned to mush by week two. Honestly, I kept making them because I had a garden full of end-of-season green tomatoes and felt obligated. But I never actually craved them.
Then last September, I had about six pounds of green tomatoes left on the vine and a frost warning on my phone. I grabbed a basket, pulled them all off, and stood in my kitchen feeling annoyed. I almost tossed them in the compost. Instead, I decided to try something different. I scaled down the recipe to a single pint jar, adjusted the vinegar ratio, and added a smashed garlic clove because I was out of dill seed. That little jar sat in my fridge for two weeks while I ignored it. When I finally pulled it out and bit into a cold, crunchy slice, I actually said “oh” out loud.
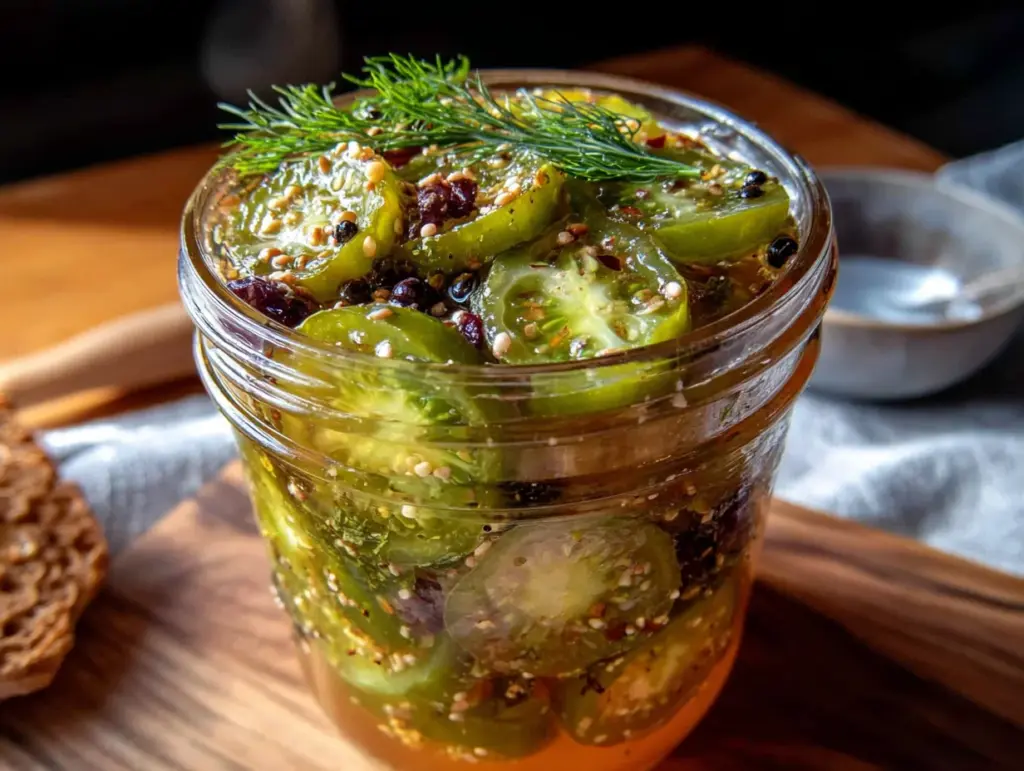
That is the recipe I am sharing today. This easy small-batch pickled green tomatoes recipe makes exactly one pint jar, uses simple pantry ingredients, and delivers that perfect balance of tangy, salty, and garlicky without any canning equipment. It is the kind of recipe you make on a Tuesday night when you have a few green tomatoes and no plan. And honestly, it tastes better than anything I have ever bought.
Why You’ll Love This Recipe
I have tested this recipe more times than I care to count, and here is what I have learned. Most pickled green tomato recipes are designed for canning, which means they use a high vinegar-to-water ratio that can taste harsh. This is a refrigerator pickle, which lets you use a gentler brine that actually lets the tomato flavor come through.
- Quick & Easy : From start to finish, this takes about 15 minutes of active time. No water bath canning, no sterilizing jars, no complicated steps.
- Simple Ingredients : You probably have white vinegar, salt, sugar, and garlic in your kitchen right now. The only special ingredient is the green tomatoes.
- Perfect for Garden Cleanup : If you grow tomatoes, you know the end-of-season panic. This recipe turns those hard green orbs into something you actually look forward to eating.
- Crowd-Pleaser : I brought a jar to a potluck last month, and three people asked for the recipe. Non-pickle-people even liked them.
- Unbelievably Crunchy : The texture stays firm for weeks because of the low-temperature brine method. No mushy pickles here.
What makes this different from every other recipe out there is the ratio. Most recipes use equal parts vinegar and water, which creates a sharp brine that overpowers the tomatoes. I use a 2:1 water-to-vinegar ratio with a touch of sugar to balance the acidity. It sounds small, but it changes everything. The tomatoes taste like themselves, just better.
This is the kind of recipe that makes you feel like you actually know what you are doing in the kitchen. It is forgiving, adaptable, and deeply satisfying in a way that store-bought pickles just are not.
What Ingredients You Will Need
This recipe uses simple, everyday ingredients to create a bright, tangy pickle that lets the green tomatoes shine. Most of these are pantry staples, so you likely already have them on hand.
- Green tomatoes, 2-3 medium : Firm, unripe tomatoes are essential. They should be hard with no give when you squeeze them. Avoid any that are starting to turn pink or yellow, as they will be too soft. I prefer medium-sized tomatoes because they fit nicely into the jar without needing to be chopped too small.
- White vinegar, 1/3 cup : Standard white vinegar gives the cleanest, brightest flavor. Do not use apple cider vinegar here; it is too fruity and will muddy the taste. I use Heinz because it is consistent, but any brand works.
- Water, 2/3 cup : Tap water is fine unless yours has a strong chlorine taste. If so, use filtered.
- Kosher salt, 1 tablespoon : Use Diamond Crystal if you have it. If using Morton’s, use a scant tablespoon because it is denser and saltier. Do not use table salt; it contains anti-caking agents that can make the brine cloudy.
- Granulated sugar, 1 teaspoon : Just enough to balance the acidity without making the pickles sweet. You can omit this if you prefer a sharper brine.
- Garlic, 2 cloves, smashed : Smashing releases the oils without turning the garlic into tiny pieces that get lost in the jar. Use fresh garlic, not pre-minced.
- Dill seed, 1/2 teaspoon : Dill seed has a more concentrated flavor than fresh dill and holds up better in brine. If you only have fresh dill, use one large sprig.
- Black peppercorns, 1/2 teaspoon : Whole peppercorns add warmth without making the pickles spicy. Do not use ground pepper; it will make the brine gritty.
- Mustard seeds, 1/2 teaspoon (optional) : These add a mild, earthy bitterness that pairs well with the tomatoes. I use them about half the time, depending on my mood.
- Red pepper flakes, 1/4 teaspoon (optional) : For a little heat. I add these when I plan to use the pickles on sandwiches or tacos.
Equipment Needed
You do not need any special equipment for this recipe, which is part of why I love it. You probably already own everything listed here.
- 1 pint-sized mason jar with lid : A wide-mouth jar is easier to pack with tomato slices. I use Ball or Kerr jars because the lids are reliable, but any glass jar with a tight-fitting lid works. Save your pasta sauce jars if they are the right size.
- Small saucepan : For heating the brine. Any small pot works; I use a 1-quart saucepan.
- Sharp knife and cutting board : A serrated knife actually works best for slicing tomatoes without crushing them.
- Measuring cups and spoons : Accuracy matters with brine ratios, so use proper measuring tools, not random spoons.
- Small bowl : For mixing the brine before pouring it into the jar.
- Funnel (optional but helpful) : A small funnel makes pouring the hot brine into the jar much less messy. I bought a set of three on Amazon for eight dollars, and they get used constantly.
If you do not have a funnel, you can pour the brine carefully from the saucepan, just go slow and wipe up any spills before sealing the jar.
Preparation Method
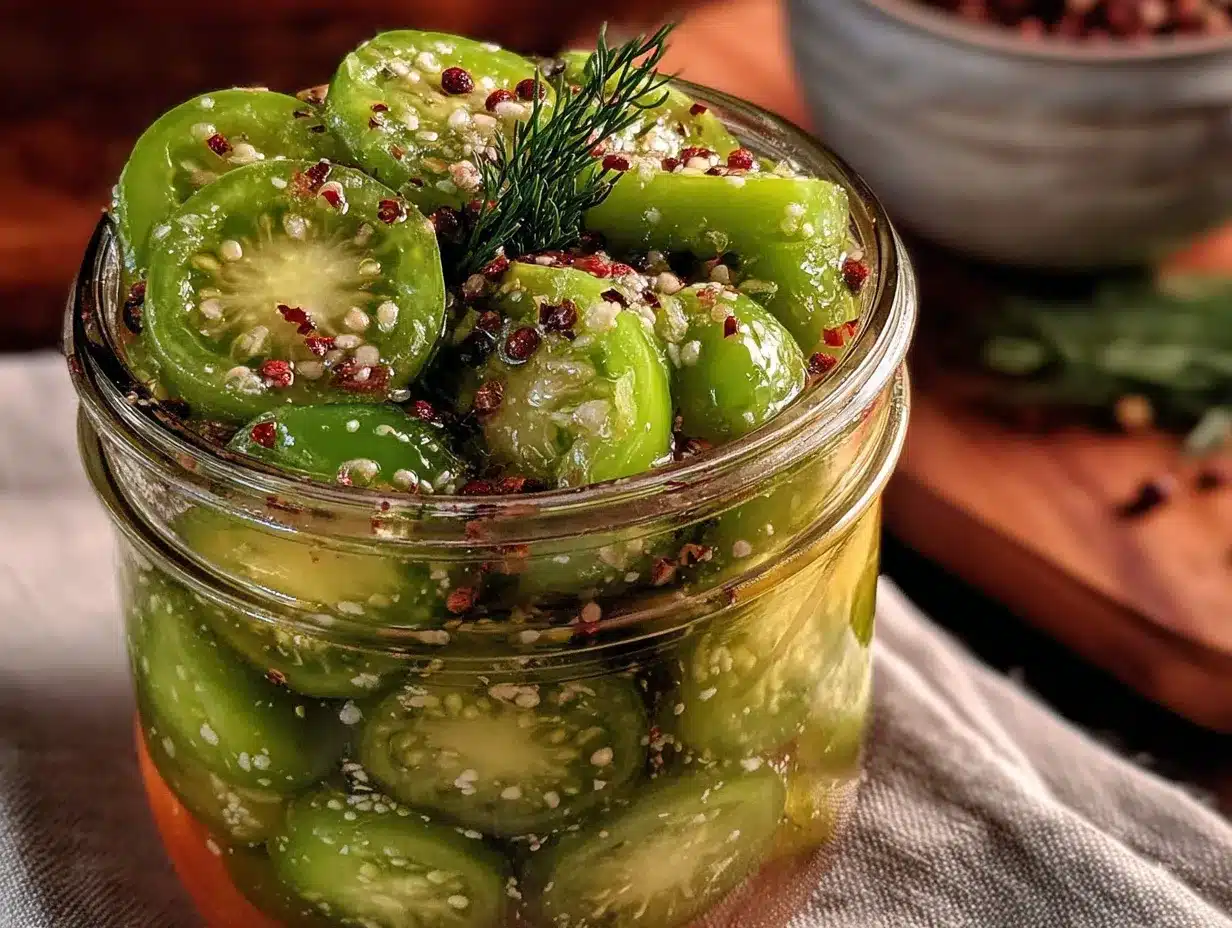
This recipe comes together quickly, so I recommend reading through all the steps before you start. The active time is about 15 minutes, and the waiting time is at least 24 hours.
- Wash and slice the tomatoes : Rinse your green tomatoes under cool water and pat them dry. Slice off the stem end and a thin sliver from the bottom. Cut the tomatoes into 1/4-inch thick rounds. If you have larger tomatoes, you can cut the rounds in half so they fit neatly into the jar. Aim for uniform thickness so they pickle evenly.
- Prepare the jar : Wash your pint jar and lid with hot, soapy water and rinse thoroughly. You do not need to sterilize it since this is a refrigerator pickle, but it should be clean. Pack the tomato slices into the jar as tightly as you can without crushing them. Leave about 1/2 inch of headspace at the top.
- Add the aromatics : Tuck the smashed garlic cloves, dill seed, black peppercorns, mustard seeds, and red pepper flakes (if using) into the jar, distributing them between the tomato slices. I like to put some near the bottom and some near the top so the flavor spreads evenly.
- Make the brine : In a small saucepan, combine the water, white vinegar, kosher salt, and sugar. Stir to combine. Bring the mixture to a boil over medium-high heat, stirring occasionally to help the salt and sugar dissolve. Once it reaches a rolling boil, remove it from the heat immediately. Do not let it boil for more than a few seconds or some of the vinegar will evaporate.
- Pour the brine : Carefully pour the hot brine over the tomatoes in the jar, using a funnel if you have one. Fill the jar to within 1/4 inch of the top. The tomatoes should be fully submerged. If they are not, press them down gently with a clean spoon. Tap the jar on the counter a few times to release any air bubbles.
- Seal and cool : Screw the lid on until it is fingertip-tight. Do not overtighten. Let the jar cool on the counter for about 30 minutes. You will hear the lid pop as it seals from the heat, but do not worry if it does not; this is a refrigerator pickle, not a shelf-stable one.
- Refrigerate and wait : Once the jar is cool enough to handle, transfer it to the refrigerator. Let it sit for at least 24 hours before tasting. The flavor improves significantly after 48 hours, and it peaks around day 5. I know waiting is hard, but trust me on this.
A quick note: the brine will look cloudy at first because of the salt dissolving and the natural starches from the tomatoes. This is normal. It will clear up as the pickles chill.
Cooking Tips & Techniques
I have made this recipe about twenty times now, and I have made every mistake you can imagine. Here is what I have learned so you do not have to repeat my errors.
Slice thickness matters more than you think. I used to slice my tomatoes too thin, about 1/8 inch, thinking they would pickle faster. They did, but they also turned soft within a week. Slices that are 1/4 inch thick hold their crunch for much longer. If you want even thicker pickles, go for 1/2 inch slices, just know they will need an extra day or two in the brine.
Do not skip the sugar. I know it seems counterintuitive to add sugar to a savory pickle, but that tiny teaspoon makes a huge difference. It rounds out the sharp edges of the vinegar without making the pickles taste sweet. I skipped it once because I was out, and the result was aggressively sour in a way that was not pleasant.
Temperature control is key. When you pour the hot brine over the tomatoes, you want it hot enough to dissolve the salt and sugar but not so hot that it cooks the tomatoes. If the brine is boiling vigorously when you pour it, it will soften the tomatoes. Let it come to a boil, then take it off the heat and let it sit for about 30 seconds before pouring.
Pack the jar tightly. I cannot overstate this. The tomatoes will shrink slightly as they pickle, and if you leave too much space, they will float above the brine line. Anything above the brine will discolor and lose its crunch. I pack the slices in so snugly that I have to wiggle the last few in.
Label your jar. This sounds silly, but if you have multiple jars of pickles in your fridge, they all start to look the same. I write the date on the lid with a sharpie so I know when they are ready and when they need to be eaten.
Variations & Adaptations
This recipe is a starting point, not a rulebook. Here are some variations I have tried and loved.
Spicy Pickled Green Tomatoes : Add 1 whole dried chili (like a cayenne or arbol) along with the red pepper flakes. The heat builds over time, so taste one after 48 hours to see if it is enough. I made a batch with habanero once, and it was almost too spicy to eat on its own, but amazing on nachos.
Herb-Infused Version : Replace the dill seed with 1 teaspoon of dried oregano or thyme. This gives the pickles a Mediterranean flavor that works beautifully on sandwiches or in salads. I also add a bay leaf to the jar for extra depth.
Sweet and Tangy : Increase the sugar to 1 tablespoon for a bread-and-butter style pickle. This is my husband’s favorite version. He eats them straight out of the jar as a snack.
Low-Sodium Option : Reduce the salt to 1 1/2 teaspoons. The pickles will not be as shelf-stable (not that these last long anyway), but they will still taste great. Just make sure to eat them within two weeks.
Add Other Vegetables : This brine works beautifully with other firm vegetables. I have added sliced red onion, carrot coins, and even cauliflower florets to the jar along with the tomatoes. Just make sure everything is cut to a similar size so it pickles evenly.
If you enjoy experimenting with pickled flavors, you might also like our crispy pepperoni pizza rolls for another tangy, snackable treat.
Serving & Storage Suggestions
These pickled green tomatoes are incredibly versatile. Here is how I use them in my kitchen.
Serving temperature : Serve them cold, straight from the fridge. The chill enhances the crunch. I sometimes let them sit at room temperature for about 10 minutes before serving to take the edge off, but that is a personal preference.
Ways to use them : Chop them up and add them to tuna salad or egg salad for a tangy crunch. Layer them on a creamy chicken Caesar pasta salad for extra brightness. Serve them alongside grilled cheese sandwiches or burgers. Use them as a garnish for Bloody Marys. Or just eat them out of the jar with a fork, which is what I do most often.
Storage : Keep the jar sealed in the refrigerator at all times. These are not shelf-stable and must be refrigerated. They will keep for up to 3 months, but the texture is best within the first month. After that, they start to soften gradually.
Reheating : Do not heat these pickles. They are meant to be eaten cold. If you want warm pickled tomatoes, fry them in a little oil until golden, but that is a completely different recipe.
Flavor development : The flavor changes over time. At day 1, they taste mostly like vinegar and salt. By day 5, the garlic and dill have mellowed into the background, and the tomato flavor becomes more prominent. Around week 3, the pickles develop a deeper, almost fermented complexity. I personally prefer them around day 7.
Nutritional Information & Benefits
These pickled green tomatoes are naturally low in calories and fat-free. Here is the approximate nutritional breakdown for a serving of about 4 slices (roughly 1/4 of the jar).
- Calories: 15
- Fat: 0g
- Sodium: 290mg
- Carbohydrates: 3g
- Fiber: 1g
- Sugar: 2g
- Protein: 1g
Green tomatoes are a good source of vitamin C, vitamin K, and potassium. They also contain tomatine, a compound that some studies suggest may have anti-inflammatory properties. The fermentation-adjacent process of pickling also introduces beneficial bacteria, though the vinegar brine means this is not a true fermented pickle.
This recipe is naturally gluten-free, dairy-free, and vegan. If you are watching your sodium intake, use the low-sodium variation mentioned above. The main allergen concern is none; these pickles are free of the top allergens.
I like having a jar of these in the fridge because they add flavor and crunch to meals without adding many calories or processed ingredients. It is a small habit that makes a big difference in how I eat during the week.
Conclusion
This easy small-batch pickled green tomatoes recipe is the kind of kitchen project that rewards you far more than the effort you put in. Fifteen minutes of work gives you weeks of crunchy, tangy, flavorful pickles that cost pennies to make and taste like something you would pay eight dollars for at a farmers market.
I love this recipe because it turns a garden problem into a kitchen win. Those hard green tomatoes that seem like a disappointment at the end of the season become something you actually look forward to. And because it is a small batch, there is no pressure. If you mess it up, you have only wasted a few tomatoes. If you love it, you can make another jar tomorrow.
I encourage you to play with the aromatics, adjust the spice level, and make this recipe your own. That is the beauty of small-batch cooking. There is no risk, only reward.
Have you tried making pickled green tomatoes before? What is your favorite way to use them? Drop a comment below and let me know. I love hearing about your kitchen experiments, and your ideas might inspire someone else to try something new.
Frequently Asked Questions
Can I use ripe red tomatoes instead of green ones?
Technically yes, but the texture will be completely different. Ripe tomatoes are much softer and will turn mushy in the brine within a day or two. Green tomatoes have a firm, almost apple-like texture that holds up beautifully. Stick with green for the best results.
Do I need to peel the tomatoes first?
No. The skin helps the slices hold their shape during pickling. If you peel them, they will fall apart. Just wash them well and slice them with the skin on.
Why are my pickles cloudy?
Cloudy brine is usually caused by one of three things: using table salt with anti-caking agents, not dissolving the salt completely before pouring, or natural starches from the tomatoes. None of these affect the safety or taste of the pickles. The cloudiness often clears up after a day or two in the fridge.
Can I double this recipe?
Absolutely. Just double all the ingredients and use a quart-sized jar instead of a pint. The brine ratio stays the same, and the pickling time does not change. I make a double batch every time I have more than a pound of green tomatoes.
How do I know if my pickles have gone bad?
Trust your senses. If the pickles develop an off smell (like rotten eggs or something sour in a bad way), if you see mold on the surface, or if the texture becomes slimy, throw them out. Properly refrigerated pickles are very safe, but nothing lasts forever. When in doubt, toss it out.
Pin This Recipe!
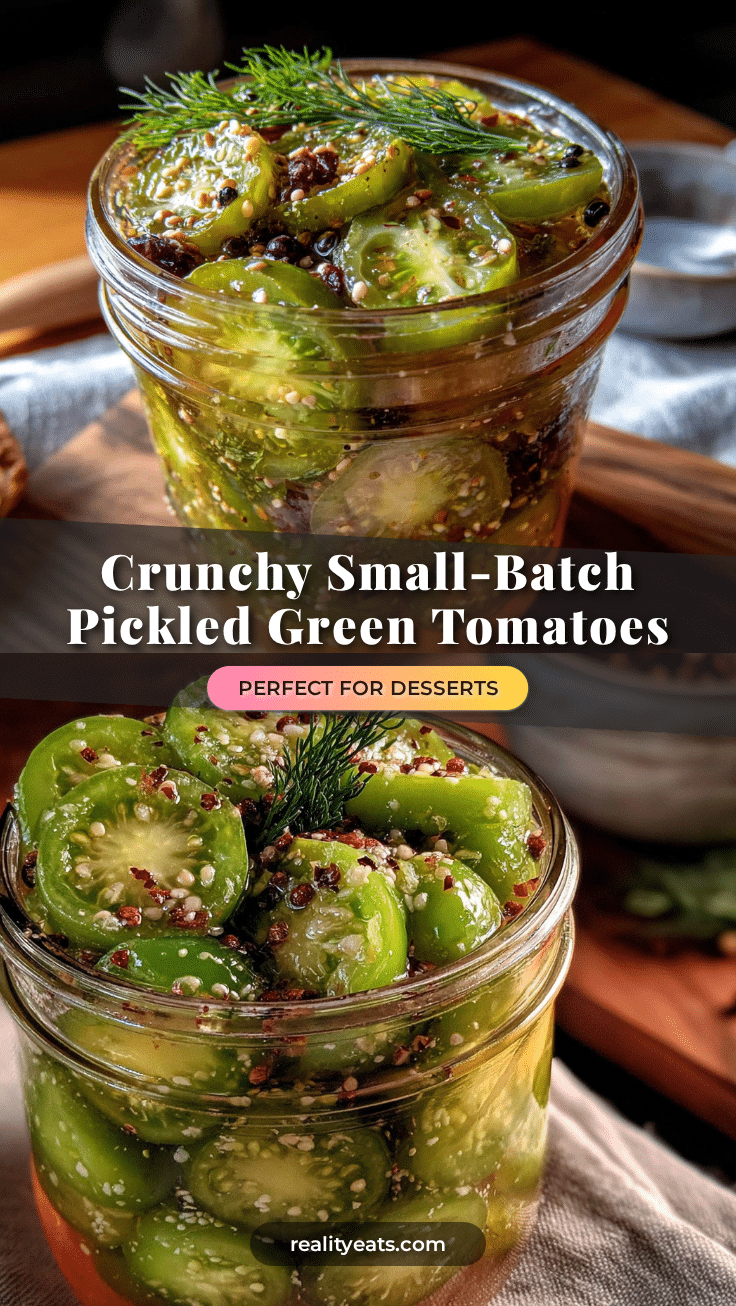
Easy Small-Batch Pickled Green Tomatoes: Perfect Beginner Recipe

This easy small-batch pickled green tomatoes recipe makes exactly one pint jar, uses simple pantry ingredients, and delivers that perfect balance of tangy, salty, and garlicky without any canning equipment. It is the kind of recipe you make on a Tuesday night when you have a few green tomatoes and no plan.
- Prep Time: 15 minutes
- Cook Time: 5 minutes
- Total Time: 20 minutes (plus 24 hours refrigeration)
- Yield: 1 pint jar (about 4 servings) 1x
- Category: Appetizer, Side Dish
- Cuisine: American
Ingredients
- 2–3 medium green tomatoes, firm and unripe
- 1/3 cup white vinegar
- 2/3 cup water
- 1 tablespoon kosher salt (Diamond Crystal preferred; use scant tablespoon if Morton’s)
- 1 teaspoon granulated sugar
- 2 cloves garlic, smashed
- 1/2 teaspoon dill seed
- 1/2 teaspoon black peppercorns
- 1/2 teaspoon mustard seeds (optional)
- 1/4 teaspoon red pepper flakes (optional)
Instructions
- Wash and slice the tomatoes: Rinse green tomatoes under cool water and pat dry. Slice off the stem end and a thin sliver from the bottom. Cut into 1/4-inch thick rounds. If using larger tomatoes, cut rounds in half to fit neatly into the jar.
- Prepare the jar: Wash a pint jar and lid with hot, soapy water and rinse thoroughly. Pack tomato slices into the jar as tightly as possible without crushing, leaving about 1/2 inch of headspace.
- Add the aromatics: Tuck smashed garlic cloves, dill seed, black peppercorns, mustard seeds, and red pepper flakes (if using) into the jar, distributing between tomato slices.
- Make the brine: In a small saucepan, combine water, white vinegar, kosher salt, and sugar. Bring to a boil over medium-high heat, stirring occasionally until salt and sugar dissolve. Once it reaches a rolling boil, remove from heat immediately.
- Pour the brine: Carefully pour hot brine over tomatoes in the jar, using a funnel if available. Fill to within 1/4 inch of the top. Ensure tomatoes are fully submerged; press down gently with a clean spoon if needed. Tap jar on counter to release air bubbles.
- Seal and cool: Screw lid on until fingertip-tight. Let jar cool on counter for about 30 minutes.
- Refrigerate and wait: Once cool, transfer to refrigerator. Let sit for at least 24 hours before tasting. Flavor improves after 48 hours and peaks around day 5.
Notes
Slice thickness matters: 1/4-inch slices hold crunch best. Do not skip the sugar; it balances acidity without making pickles sweet. Pour brine hot but not boiling vigorously to avoid softening tomatoes. Pack jar tightly to prevent tomatoes from floating above brine. Label jar with date. Pickles keep up to 3 months refrigerated, best within first month. Brine may look cloudy at first; this is normal and will clear.
Nutrition
- Serving Size: 4 slices (about 1/4
- Calories: 15
- Sugar: 2
- Sodium: 290
- Carbohydrates: 3
- Fiber: 1
- Protein: 1
Keywords: pickled green tomatoes, small batch, refrigerator pickles, easy pickling recipe, beginner pickling, green tomato recipe, crunchy pickles