The moment the scent of cinnamon-spiced apples and bubbling caramel fills my kitchen, I know it’s officially fall (and honestly, that’s my favorite signal to break out all things cozy). The first time I whipped up these caramel apple pie crumble bars, my house smelled like an orchard and a bakery had a delicious little baby—no joke, folks were lining up in the hallway for a taste before the bars even cooled.
I stumbled on this recipe during a rainy October weekend when I wanted apple pie but didn’t feel like fussing with a crust. You know those days when you crave something comforting but just don’t have the patience for rolling dough? That’s when these bars became my go-to autumn dessert. The gooey caramel, tart apples, and buttery crumble topping all layer together so perfectly, it’s like apple pie—only easier, hand-held, and honestly, way more fun to share at potlucks or with your favorite people over coffee.
Caramel apple pie crumble bars are simply irresistible. They hit that sweet spot between cozy nostalgia and modern convenience. Whether you’re baking for a crowd or just want a treat to pair with your afternoon tea, these bars deliver big flavor with minimal effort. If you love classic apple pie, you’ll be obsessed with this twist. I’ve tested, tweaked, and made these bars at least a dozen times (always with rave reviews), so you can trust they’ll turn out delicious—every single batch. Let’s face it, nothing says autumn quite like apples and caramel, and this recipe is packed with both.
Why You’ll Love This Caramel Apple Pie Crumble Bars Recipe
- Quick & Easy: No pie crust drama here! These bars come together in under an hour, making them perfect for busy weeknights, spontaneous get-togethers, or when you just need dessert—fast.
- Simple Ingredients: No specialty store runs required. You probably have everything in your pantry right now (flour, oats, butter, apples, caramel—done!).
- Perfect for Autumn Gatherings: These bars are the ultimate fall dessert—ideal for Halloween parties, Thanksgiving potlucks, or a cozy Sunday brunch with friends.
- Crowd-Pleaser: I’ve never had leftovers when I bring these out. Kids love them, adults sneak second helpings, and even picky eaters ask for the recipe.
- Unbelievably Delicious: Gooey caramel, tender apples, and a crunchy oat crumble—every bite is pure autumn comfort food magic.
What makes these caramel apple pie crumble bars stand out? For starters, you’re getting the classic pie flavors without the hassle. The crumble topping adds texture and buttery richness, while the caramel layer brings gooey sweetness that’s downright dreamy. I use fresh apples for that perfect tart-sweet balance, and a pinch of cinnamon warms everything up. My favorite trick is drizzling extra caramel on top just before serving—trust me, folks go wild for that sticky-sweet finish.
This recipe isn’t just delicious—it’s the kind that makes you pause and savor the moment. It’s comfort food, but faster and more fun. The bars are sturdy enough to travel, easy to slice, and perfect for sharing with loved ones. Whether you’re a baking newbie or a seasoned dessert fanatic, these bars are a surefire winner. I’ve made them in my tiny apartment kitchen and at big family gatherings—they shine every time. If you want a dessert that feels like autumn in every bite, caramel apple pie crumble bars are the answer.
What Ingredients You Will Need
This recipe uses simple, wholesome ingredients to deliver bold flavor and satisfying texture—no fuss, just classic autumn goodness. Most of these are pantry staples, and you can easily swap or adjust based on what you have on hand.
For the Crust & Crumble
- 2 cups (250g) all-purpose flour
- 1 cup (90g) old-fashioned rolled oats (adds crunch and nutty flavor)
- 3/4 cup (150g) light brown sugar, packed
- 1/2 teaspoon ground cinnamon
- 1/4 teaspoon salt
- 1 cup (226g) unsalted butter, melted (use vegan butter for dairy-free)
- 1 teaspoon pure vanilla extract
For the Apple Filling

- 3 medium tart apples (about 1 pound/450g), peeled, cored, and diced (I love Granny Smith for their tang)
- 2 tablespoons (25g) granulated sugar
- 1 tablespoon (8g) all-purpose flour
- 1/2 teaspoon ground cinnamon
- 1 tablespoon fresh lemon juice (keeps apples bright and fresh)
For the Caramel Layer
- 1/2 cup (120ml) thick caramel sauce (store-bought or homemade—see tip below)
- Pinch of sea salt (optional, for that salted caramel vibe)
Optional Toppings
- Extra caramel sauce for drizzling
- Chopped toasted pecans or walnuts (adds crunch and richness)
Ingredient Tips:
For the apples, I stick with Granny Smith or Honeycrisp—they hold up well and don’t get mushy. If you don’t have rolled oats, quick oats work (but the crumble will be a bit softer). For the caramel, I use Trader Joe’s Fleur de Sel Caramel Sauce when I’m short on time, but homemade caramel is next-level if you’ve got the patience.
Substitutions:
Need gluten-free? Swap the all-purpose flour for a 1-to-1 GF blend and use certified gluten-free oats. Dairy-free? Use vegan butter and coconut caramel sauce. No apples? Try pears or even frozen mixed berries in a pinch!
Equipment Needed
- 8×8-inch (20x20cm) baking pan: The perfect size for thick, gooey bars. If you only have a 9×9, just shorten bake time by a few minutes.
- Mixing bowls: At least two—one for crumble, one for apples. I use glass because it’s easy to see mixing progress.
- Whisk & spatula: Whisk for combining dry ingredients, spatula for folding and spreading. Silicone spatulas make scraping caramel a breeze.
- Sharp knife & cutting board: For prepping apples. If you hate peeling, invest in a good peeler—it’s worth it.
- Parchment paper: Optional but highly recommended for easy removal and cleanup.
Personal Tip: I’ve baked these bars in everything from glass pans to old metal ones. Metal pans brown the edges nicely, but glass keeps the caramel gooier. If you’re on a budget, dollar store pans work just fine—just grease well and watch for sticking.
Maintenance tip? Always line your pan with parchment or foil for easy lifting and less scrubbing. Trust me, caramel can be a beast to clean off bare metal.
Preparation Method
- Preheat & Prepare:
Preheat your oven to 350°F (175°C). Line an 8×8-inch (20x20cm) baking pan with parchment paper, leaving a little overhang for easy bar removal. Lightly grease.
Time: 5 minutes - Make the Crust & Crumble:
In a large mixing bowl, whisk together 2 cups flour, 1 cup oats, 3/4 cup brown sugar, 1/2 teaspoon cinnamon, and 1/4 teaspoon salt. Pour in 1 cup melted butter and 1 teaspoon vanilla. Stir until the mixture forms moist, clumpy crumbs—like wet sand but chunkier.
Time: 5 minutes
Personal note: If the mix feels too dry, add another tablespoon of melted butter. Too wet? Sprinkle in a tablespoon of oats. - Press & Bake Base:
Reserve 1 cup of the crumble for topping. Press the remaining mixture firmly into the bottom of your prepared pan. Use the back of a spoon or your fingers—the base should be even but not packed too tightly.
Bake for 12-15 minutes, until just set and lightly golden.
Time: 15 minutes
Tip: If you see bubbles, don’t panic! That’s just the butter doing its thing. - Prepare Apple Filling:
While the base bakes, toss diced apples with 2 tablespoons sugar, 1 tablespoon flour, 1/2 teaspoon cinnamon, and 1 tablespoon lemon juice. Mix until apples are evenly coated and slightly sticky.
Time: 5 minutes
Troubleshooting: If your apples seem dry, add a splash more lemon juice. Too wet? Sprinkle a bit more flour. - Layer Apples & Caramel:
Once the base is baked, scatter the apple mixture evenly over it. Drizzle 1/2 cup caramel sauce over the apples. Sprinkle a pinch of sea salt if you like that salty-sweet vibe.
Time: 5 minutes
Note: Warm caramel is easiest to drizzle. If it’s super thick, microwave for 10 seconds. - Add Crumble Topping:
Sprinkle reserved crumble over the apple-caramel layer. If using nuts, add them now—just a handful is perfect.
Time: 2 minutes
Efficiency: Use your hands to distribute the crumble for an even layer. - Bake:
Bake for 30-35 minutes, until the topping is golden brown and apples are bubbling. Your kitchen should smell amazing—like fall itself.
Warning: Don’t overbake. If edges get too dark, cover loosely with foil. - Cool & Slice:
Let bars cool in the pan for at least 1 hour—caramel sets as it cools. Lift out using parchment, then slice into 12 squares.
Time: 1 hour (hands-off)
Sensory cue: Bars are ready when the crumble feels crisp and the caramel is sticky but not runny. - Serve:
Drizzle extra caramel on top and add a dollop of whipped cream or vanilla ice cream if you’re feeling fancy.
Cooking Tips & Techniques
After making caramel apple pie crumble bars too many times to count, I’ve picked up a few tricks that guarantee great results (plus, I’ve learned the hard way what not to do—hello, soggy bottoms!).
- Don’t Overwork the Crumble: Just mix until combined. If you press too hard, the base gets dense instead of tender.
- Apple Choice Matters: Use firm, tart apples like Granny Smith. Softer apples turn mushy and won’t hold their shape.
- Caramel Consistency: If your caramel is too runny, chill it before drizzling. Too thick? Microwave for a few seconds.
- Prevent Soggy Bars: Toss apples in flour—this absorbs excess juices and keeps the base crisp.
- Multitasking: Prep the filling while the base bakes, and keep your caramel ready to go for quick assembly.
- Even Baking: Rotate your pan halfway through if your oven has hot spots. If crumble starts to brown too quickly, tent with foil.
I once forgot to toss the apples with flour and ended up with caramel apple soup—still tasty, just not sliceable! Now I always double-check. Also, don’t skip cooling time. Warm bars will fall apart (trust me, I’ve tried to cheat). For consistent results, measure ingredients carefully—especially the butter and oats, which can change the texture.
Want a picture-perfect finish? Reserve a tablespoon of crumble for sprinkling after baking for a fresh look. If you’re making these for a crowd, slice while cold for clean edges, and serve at room temp for the best flavor.
Variations & Adaptations
These caramel apple pie crumble bars are endlessly flexible! Here are some favorite twists I’ve tried:
- Gluten-Free: Swap all-purpose flour for a certified gluten-free blend and use gluten-free oats. The texture stays spot-on!
- Dairy-Free: Use vegan butter and coconut caramel sauce. It’s rich and still gives that gooey finish.
- Berry Bars: Replace apples with fresh or frozen mixed berries—blueberry and raspberry are awesome. Add a little extra flour to absorb the juices.
- Nutty Crunch: Fold toasted pecans or walnuts into the crumble for extra richness.
- Spiced Up: Add a pinch of ground ginger or nutmeg to the apple filling for deeper flavor.
- Hand-Held Treats: Bake in muffin tins for individual crumble cups—great for parties!
If allergies are a concern, just skip nuts and double-check all packaged caramel sauces for dairy and gluten. For a personal twist, I sometimes add a layer of dried cranberries with the apples for a tart-sweet pop. If you’re feeling adventurous, drizzle dark chocolate over the cooled bars—my kids call this the “candy bar version.”
Honestly, don’t be afraid to experiment. These bars are forgiving and fun to customize for any season or dietary need!
Serving & Storage Suggestions
For peak flavor, serve caramel apple pie crumble bars slightly warm or at room temperature. I love plating them with a scoop of vanilla ice cream or a spoonful of whipped cream—makes them feel extra special for guests (or just for yourself on a chilly night!).
If you want a festive touch, sprinkle cinnamon sugar or drizzle more caramel right before serving. Pair with hot spiced cider, strong coffee, or even a glass of cold milk for the ultimate comfort experience.
Storage:
Store leftover bars in an airtight container in the refrigerator for up to 5 days. They’ll stay moist and flavorful. To freeze, wrap tightly in foil or parchment and place in a zip-top bag—good for up to 2 months. Thaw overnight in the fridge and warm gently in the oven or microwave before serving.
Reheating tip: Microwave bars for 10-15 seconds to bring out the gooey caramel and soften the crumble. The flavors deepen as they sit, so don’t be surprised if day-two bars taste even better—sometimes I think the apples and spices mingle overnight for maximum autumn magic!
Nutritional Information & Benefits
Each caramel apple pie crumble bar (serving size: 1/12th of recipe) is estimated to provide:
- Calories: 260
- Fat: 11g
- Carbohydrates: 40g
- Protein: 3g
- Fiber: 2g
- Sugar: 22g
Tart apples pack vitamin C and natural fiber, oats offer whole-grain goodness, and even a little butter gives satisfying richness (hey, balance is key!). You can adjust sugar and butter to suit your health needs, or opt for a lighter caramel sauce. These bars can be made gluten-free and dairy-free with simple swaps.
Allergens: Contains wheat, dairy, and possibly nuts if added. Always double-check caramel for hidden allergens.
Personally, I love serving these as a treat after a brisk autumn walk—they feel indulgent but still have fruit and oats, so I never feel guilty enjoying a square (or two)!
Conclusion
Caramel apple pie crumble bars are the ultimate easy fall dessert—bursting with flavor, simple to make, and guaranteed to bring smiles. Whether you’re baking for a crowd, a holiday, or just because you need something sweet, this recipe delivers classic autumn comfort in every bite.
Feel free to play with the ingredients and make these bars your own—swap apples for pears, add berries, or try dairy-free caramel. The beauty of this recipe is how adaptable (and forgiving) it is. I keep coming back to these bars every fall, and they never disappoint.
If you try this recipe, let me know in the comments—share your favorite twists or tell me if you served them at a party! You’ll want to save and pin this for every cozy season ahead. Happy baking, and may your kitchen always smell like cinnamon and caramel!
FAQs
How do I keep my caramel apple pie crumble bars from getting soggy?
Toss the apples with flour before layering—this absorbs extra juice and keeps the base crisp. Bake until the topping is golden and apples bubble.
Can I make these bars gluten-free?
Absolutely! Substitute the all-purpose flour with a gluten-free baking blend and use certified gluten-free oats. The texture stays delicious.
What apples work best for caramel apple pie crumble bars?
Granny Smith and Honeycrisp are my top picks—they’re firm and tart, which balances the sweet caramel perfectly.
How do I store and reheat leftovers?
Store bars in an airtight container in the fridge for up to 5 days. To reheat, microwave for 10-15 seconds or warm in a low oven for gooey caramel.
Can I freeze caramel apple pie crumble bars?
Yes! Wrap tightly and freeze for up to 2 months. Thaw overnight in the fridge, then warm before serving for best flavor and texture.
PrintCaramel Apple Pie Crumble Bars

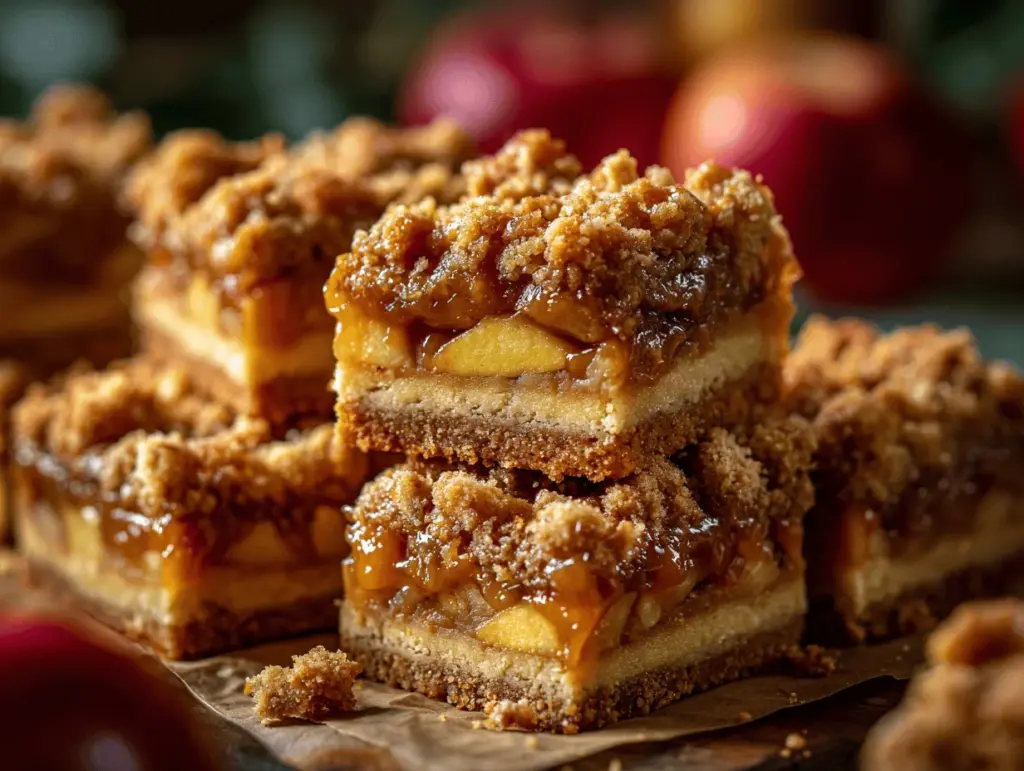
These easy caramel apple pie crumble bars combine gooey caramel, tart apples, and a buttery oat crumble for the ultimate handheld fall dessert. Perfect for potlucks, gatherings, or cozy afternoons with coffee.
- Prep Time: 20 minutes
- Cook Time: 45 minutes
- Total Time: 1 hour 5 minutes
- Yield: 12 bars 1x
- Category: Dessert
- Cuisine: American
Ingredients
- 2 cups all-purpose flour
- 1 cup old-fashioned rolled oats
- 3/4 cup light brown sugar, packed
- 1/2 teaspoon ground cinnamon
- 1/4 teaspoon salt
- 1 cup unsalted butter, melted
- 1 teaspoon pure vanilla extract
- 3 medium tart apples (about 1 pound), peeled, cored, and diced (Granny Smith or Honeycrisp recommended)
- 2 tablespoons granulated sugar
- 1 tablespoon all-purpose flour
- 1/2 teaspoon ground cinnamon
- 1 tablespoon fresh lemon juice
- 1/2 cup thick caramel sauce (store-bought or homemade)
- Pinch of sea salt (optional)
- Extra caramel sauce for drizzling (optional)
- Chopped toasted pecans or walnuts (optional, for topping)
Instructions
- Preheat oven to 350°F (175°C). Line an 8×8-inch baking pan with parchment paper, leaving overhang for easy removal. Lightly grease.
- In a large mixing bowl, whisk together flour, oats, brown sugar, cinnamon, and salt. Pour in melted butter and vanilla. Stir until mixture forms moist, clumpy crumbs.
- Reserve 1 cup of crumble for topping. Press remaining mixture firmly into the bottom of the prepared pan for the base.
- Bake base for 12-15 minutes, until just set and lightly golden.
- While base bakes, toss diced apples with granulated sugar, flour, cinnamon, and lemon juice until evenly coated.
- Scatter apple mixture evenly over baked base. Drizzle caramel sauce over apples. Sprinkle with sea salt if desired.
- Sprinkle reserved crumble over apple-caramel layer. Add nuts if using.
- Bake for 30-35 minutes, until topping is golden brown and apples are bubbling.
- Cool bars in pan for at least 1 hour. Lift out using parchment and slice into 12 squares.
- Serve with extra caramel drizzle and a dollop of whipped cream or vanilla ice cream if desired.
Notes
For best results, use tart apples like Granny Smith or Honeycrisp. Toss apples with flour to prevent soggy bars. Cool completely before slicing for clean edges. Bars can be made gluten-free or dairy-free with simple swaps. Store in an airtight container in the fridge for up to 5 days or freeze for up to 2 months.
Nutrition
- Serving Size: 1 bar (1/12th of recipe)
- Calories: 260
- Sugar: 22
- Sodium: 90
- Fat: 11
- Saturated Fat: 7
- Carbohydrates: 40
- Fiber: 2
- Protein: 3
Keywords: caramel apple bars, apple pie bars, fall dessert, crumble bars, easy apple dessert, autumn baking, handheld dessert, potluck dessert


