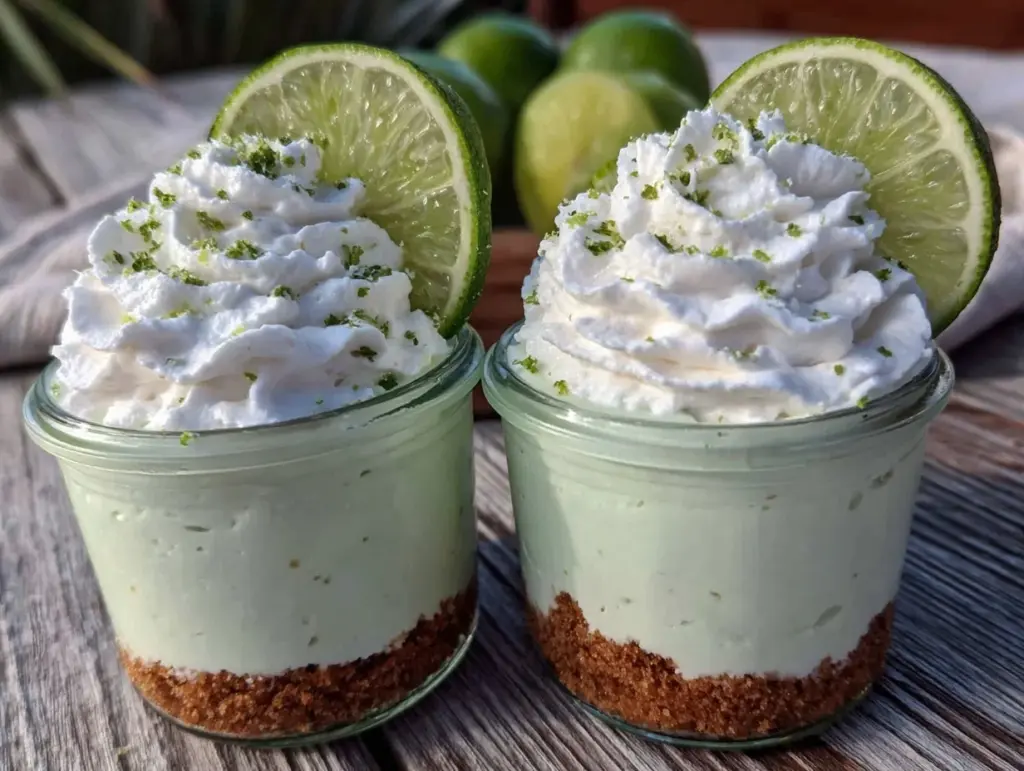
My mouth is watering for something tangy and sweet, creamy but with a little zing, and honestly, I have all the ingredients except the usual oven time that I just don’t feel like fussing over. So, I’m thinking, why not whip up these Creamy No-Bake Key Lime Cheesecake Cups? It’s that kind of dessert that feels like a little tropical vacation for your taste buds without any unnecessary heat or sweat (because who actually enjoys turning on the oven when it’s already hot?). The cool, velvety cheesecake filling with a sharp key lime punch layered over a crumbly base—yeah, that’s exactly what I need right now. And the way the zest sneaks in with just enough sweetness to balance, well, it’s a quiet reminder that sometimes the simplest recipes sneak up and become your favorites for good.
There’s something about no-bake cheesecakes that always feels a bit indulgent but approachable, like a secret weapon when you want to impress but keep it chill. These cups are my go-to when I want dessert that’s fuss-free but still has that homemade charm. Plus, they’re perfect for when unexpected guests drop by or when you just want a little treat that won’t weigh you down. This recipe stuck with me because it’s refreshing, creamy, and honestly, it feels like a hug in dessert form after a long day.
Why You’ll Love This Recipe
Making the Creamy No-Bake Key Lime Cheesecake Cups has been a bit of a revelation in my kitchen. This recipe isn’t just a quick fix; it’s one I’ve tweaked over time, and it always delivers that perfect balance of tangy and sweet with zero stress. Here’s why it’s such a winner:
- Quick & Easy: You can have these done in under 20 minutes, plus chilling time, which is a lifesaver when dessert has to happen fast.
- Simple Ingredients: No obscure items here—just basics you likely have, like cream cheese, key lime juice, and graham crackers, so no last-minute runs to the store.
- Perfect for Summer or Any Occasion: Whether it’s a casual family night or a warm-weather gathering, these cups bring that perfect fresh and zesty vibe.
- Crowd-Pleaser: Everyone from kids to adults loves these—probably because they’re creamy but not too heavy, with just the right tartness.
- Unbelievably Delicious: The texture is silky, and the flavor combo is spot on. I usually get that satisfied, “wow, this is really good” kind of sigh from people.
This isn’t your run-of-the-mill cheesecake. The trick? Blending the cream cheese super smooth and folding in freshly squeezed key lime juice and zest for a bright, natural flavor burst. It’s a little bit tangier and fresher than the usual lime recipes, which often rely too much on bottled juice. Also, serving them in individual cups keeps things neat and perfect for portion control (and presentation). Honestly, these cheesecake cups have become my secret weapon for easy entertaining, especially when I’m pairing them with a refreshing fresh southwest chipotle salad or after something savory like those crispy ham and cheese sticks.
What Ingredients You Will Need
This recipe uses simple, wholesome ingredients to deliver a bold lime flavor and satisfyingly creamy texture without any fuss. Most are pantry staples, which makes this a perfect last-minute dessert.
- For the Crust:
- Graham cracker crumbs (about 1 ½ cups / 150 g) – I like using Honey Maid for that perfect crunch and just the right sweetness
- Unsalted butter, melted (6 tablespoons / 85 g) – helps bind the crumbs and adds richness
- Granulated sugar (2 tablespoons / 25 g) – balances the butter and crumbs
- For the Cheesecake Filling:
- Cream cheese, softened (8 oz / 225 g) – full-fat for the creamiest texture
- Sweetened condensed milk (1 can, 14 oz / 396 g) – the secret to that luscious, no-bake set without gelatin
- Fresh key lime juice (⅓ cup / 80 ml) – freshly squeezed is key for that bright, tangy punch
- Key lime zest (1 teaspoon) – adds extra zing and a lovely aroma
- Vanilla extract (1 teaspoon) – rounds out the flavor
- For Garnish (optional):
- Whipped cream – store-bought or homemade, whichever you prefer
- Thin lime slices or extra zest – for that pretty finishing touch
- Fresh mint leaves – adds color and a fresh herbal note
If you want to keep it dairy-free, swapping the cream cheese for a vegan version or using coconut cream instead of sweetened condensed milk works well—just keep in mind the flavor will shift slightly. Also, during summer, I sometimes swap key limes for fresh regular limes if key limes aren’t available, but the tartness does change a bit.
Equipment Needed
- Mixing bowls: At least two – one for crust and one for filling. Glass or stainless steel works great.
- Electric mixer or hand mixer: Makes the cream cheese super smooth and easy to fold ingredients together. You can use a whisk if you’re feeling strong, but the mixer saves time.
- Measuring cups and spoons: Accuracy matters here, especially for the lime juice and zest.
- Spatula: For scraping down the sides and folding ingredients without losing air.
- Serving cups or small jars: I usually use 6-ounce (180 ml) clear cups for lovely layering and portion control.
- Optional: Zester or microplane for zesting limes. I swear by a fine microplane—it gives the best zest texture without lumps.
No fancy equipment needed, really. If you don’t have a mixer, just give the cream cheese a good long whisk to avoid lumps. And if you want to get creative, little mini mason jars or even small dessert bowls work perfectly for serving these cheesecake cups.
Preparation Method
- Prepare the crust: Combine 1 ½ cups (150 g) graham cracker crumbs, 6 tablespoons (85 g) melted unsalted butter, and 2 tablespoons (25 g) granulated sugar in a bowl. Mix until the crumbs are evenly coated and look like wet sand. This usually takes about 2-3 minutes by hand.
- Assemble the crust layer: Spoon about 2 tablespoons (30 g) of the crumb mixture into each serving cup. Press down firmly using the back of a spoon or your fingers to form a compact base. This step is crucial—press enough so the crust holds together but don’t overdo it and make it too dense. Chill the cups in the fridge while you prepare the filling (about 10 minutes).
- Prepare the filling: In a large mixing bowl, beat 8 oz (225 g) softened cream cheese with an electric mixer on medium speed until smooth and creamy. This takes about 2 minutes. Make sure there are no lumps; scrape down the sides as needed.
- Add the condensed milk: Pour in the entire 14 oz (396 g) can of sweetened condensed milk. Beat on low speed until fully combined and silky smooth, about 1-2 minutes.
- Incorporate the lime: Add ⅓ cup (80 ml) fresh key lime juice, 1 teaspoon key lime zest, and 1 teaspoon vanilla extract. Gently mix on low speed until everything is evenly blended, about 30 seconds. You should notice the filling thicken slightly and smell that bright lime aroma right away.
- Assemble the cheesecake cups: Spoon the filling over the chilled crust in each cup, filling almost to the top. Smooth the surface gently with the back of a spoon or an offset spatula.
- Chill thoroughly: Place the cups in the refrigerator for at least 3 hours, preferably overnight. This allows the filling to set to that perfect creamy, sliceable texture without baking.
- Garnish and serve: Just before serving, add a dollop of whipped cream, a thin slice of lime, and a mint leaf for that fresh, inviting look.
If the filling looks a bit runny after mixing, don’t panic—it firms up beautifully with chilling. And if you’re in a rush, a few hours in the freezer wrapped loosely can help speed things up, but keep an eye so the texture doesn’t get icy.
Cooking Tips & Techniques
Getting that smooth, creamy texture without baking is all about how you handle the cream cheese and mixing process. Letting the cream cheese soften completely at room temperature is a game-changer; cold cream cheese just won’t blend well and leaves lumps. I’ve learned this the hard way after a couple of frustrating batches.
When mixing the condensed milk in, keep the mixer on low to avoid incorporating too much air, which can create bubbles in the filling that show up when chilled. Slow, steady mixing keeps the texture silky.
Pressing the crust firmly but gently is another trick. Too loose, and it falls apart when you dig in; too hard, and it’s like eating a crumbly brick. I like to press it just until I feel resistance but it’s still delicate—kind of like packing a sandcastle.
Lastly, chilling time is non-negotiable. I’ve learned that rushing this step just leads to a sad, runny mess. If you forget and try to serve early, the texture won’t be right, and the flavor doesn’t have time to meld. So plan ahead if you can.
Variations & Adaptations
- Dietary Adaptation: Swap graham crackers for gluten-free cookies or crushed nuts for a gluten-free crust. Use dairy-free cream cheese and coconut condensed milk for a vegan version.
- Flavor Twist: Add a teaspoon of lime cordial or a splash of coconut rum to the filling for an adult party version. You can also mix in a handful of finely chopped fresh strawberries for a fruity surprise.
- Seasonal Swap: In fall, try using Meyer lemon juice instead of key lime for a sweeter, more floral note. Or top with a homemade cranberry sauce to echo the flavors in cranberry orange pecan crisp.
One time, I swapped the graham cracker crust for crushed pretzels—it gave a salty crunch that was surprisingly addictive. It’s not traditional but definitely worth a try if you’re in the mood for something a little different.
Serving & Storage Suggestions
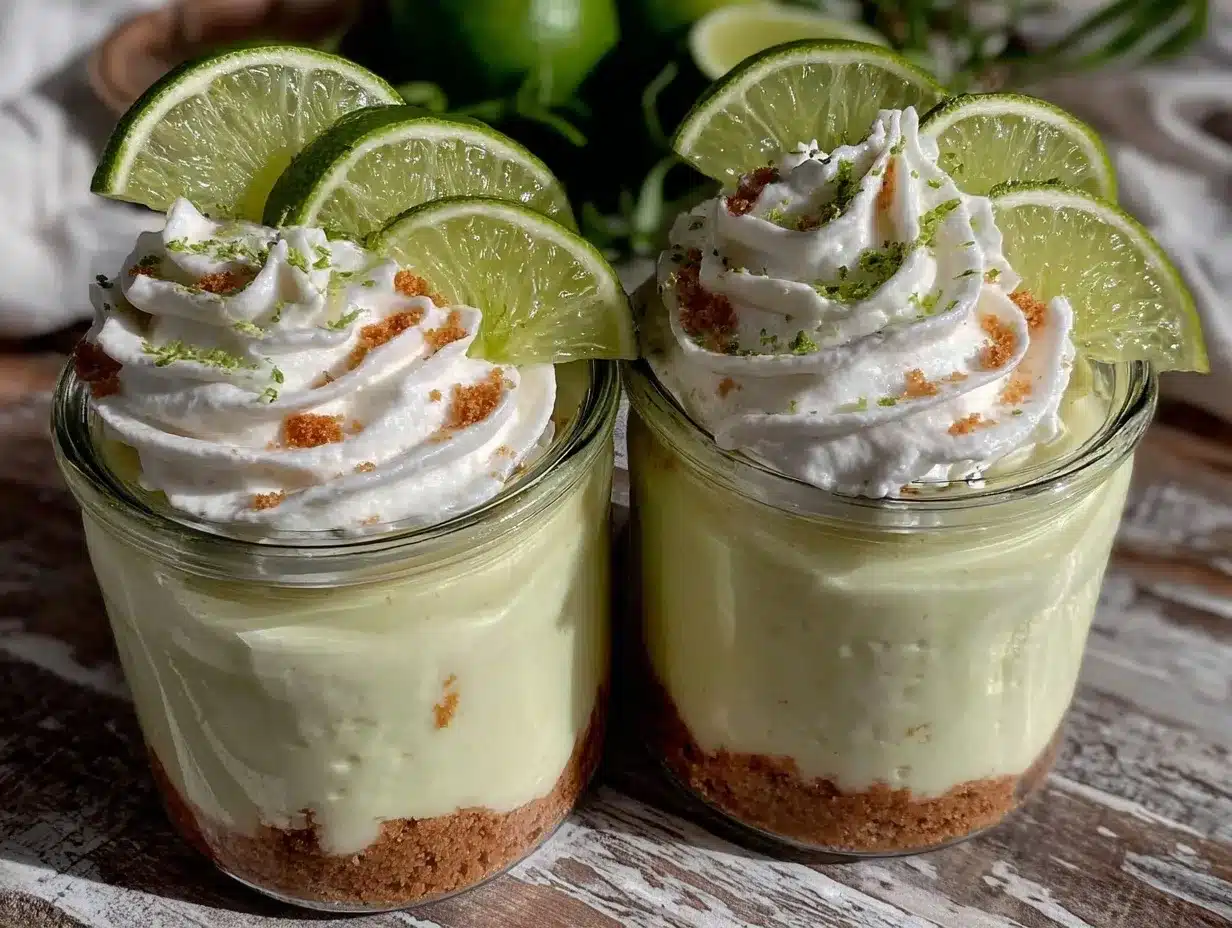
These cheesecake cups are best served chilled straight from the fridge. If you want to add a bit of theatrics, dollop some whipped cream on top and garnish with a thin lime wheel and fresh mint leaves. The contrast of creamy, tangy, and fresh green makes for a pretty presentation that’s great for Instagram-worthy dessert tables.
They pair beautifully with light, zesty dishes—think a crisp summer salad or even alongside a savory bite like those creamy chicken caesar pasta salad. The citrus notes help cut through richer flavors nicely.
Store leftovers covered tightly in the refrigerator for up to 3 days. The flavor actually deepens overnight, so if you can wait, it tastes even better the next day. Avoid freezing if you want to keep the perfect creamy texture, as it can become grainy when thawed.
Reheating isn’t recommended—these are definitely best cold. But if you want to soften them slightly before eating, just let the cups sit at room temperature for 10 minutes.
Nutritional Information & Benefits
Each serving of these Creamy No-Bake Key Lime Cheesecake Cups provides a satisfying balance of fats and sugars, with approximately 320 calories, 20 grams of fat, and 30 grams of carbs per cup (depending on portion size). The cream cheese contributes protein and calcium, while the key lime juice offers a good dose of vitamin C.
This dessert is gluten-containing because of the graham cracker crust, but swapping in gluten-free crumbs can easily make it suitable for those with sensitivities. It’s not low-carb, but the portion-controlled cups help keep indulgence in check.
From a wellness perspective, using fresh key lime juice adds antioxidants and a natural tang without relying on artificial flavorings or excess sugar. The sweetened condensed milk is the main sugar source, so if you want to reduce sugar, try mixing half sweetened condensed milk with plain Greek yogurt for a tangier, lighter option.
Conclusion
The Creamy No-Bake Key Lime Cheesecake Cups have become one of my favorite quick desserts that never disappoint. They’re simple, fresh, and just the right amount of indulgent without any oven drama. What I love most is how easy it is to tweak and make your own, whether that means switching up the crust or adding a little extra zest in the filling.
Feel free to customize the recipe to suit your taste or dietary needs—it’s forgiving and fun to play with. And if you give this a try, I’d love to hear how you make it your own, or if you found any cool twists. There’s something so satisfying about sharing a recipe that’s both delicious and approachable, don’t you think?
Happy no-bake cheesecake making!
FAQs
Can I use regular lime instead of key lime?
Yes, regular lime works fine, though the flavor will be a bit less tart and aromatic. Key limes have a unique fragrance that really shines in this recipe.
How long do these cheesecake cups need to chill?
At least 3 hours in the fridge to set properly, but overnight chilling gives the best texture and flavor.
Can I prepare these in advance for a party?
Absolutely! They keep well for up to 3 days refrigerated and actually taste better after the flavors meld.
Is it possible to make this recipe dairy-free?
Yes, use dairy-free cream cheese and coconut condensed milk alternatives. The texture may be slightly different but still delicious.
What if I don’t have graham crackers for the crust?
You can substitute with digestive biscuits, crushed pretzels, or even crushed nuts for a unique twist.
Pin This Recipe!
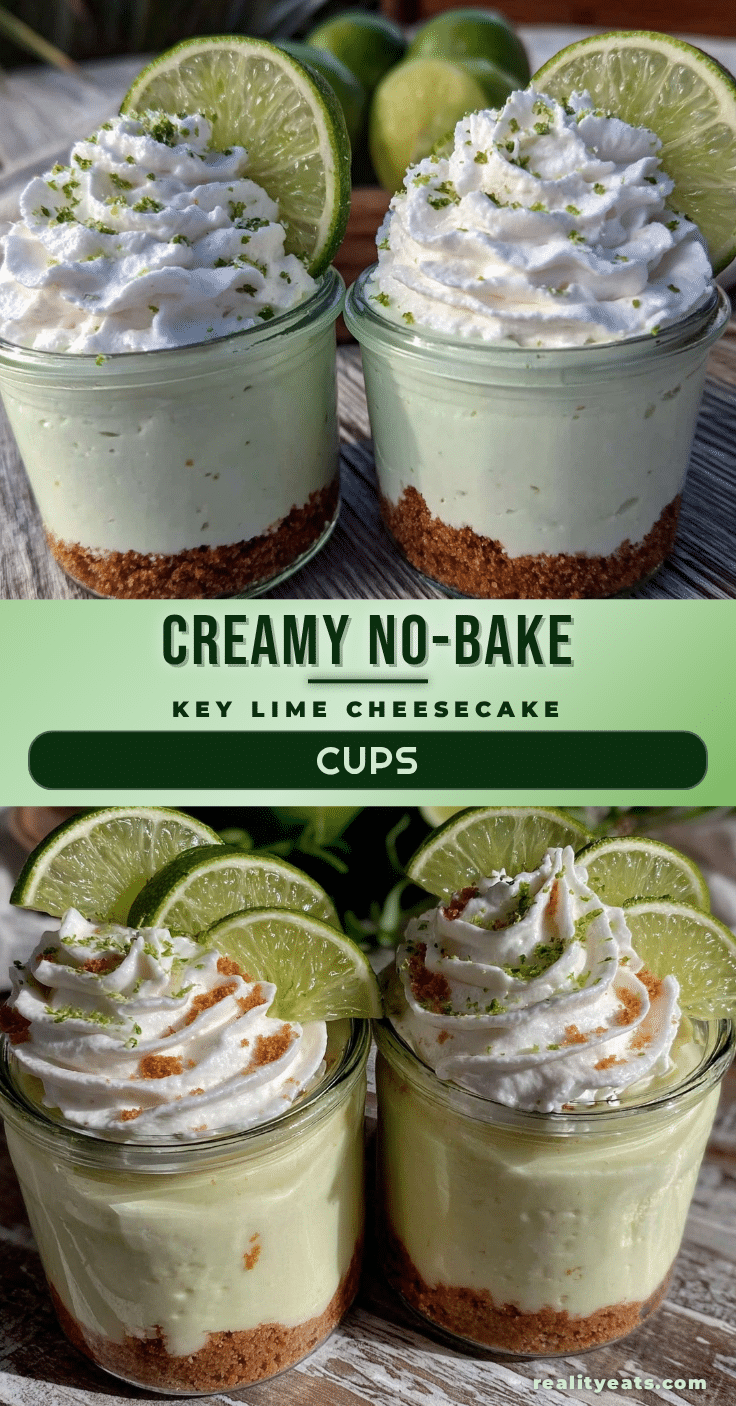
Creamy No-Bake Key Lime Cheesecake Cups

A quick and easy no-bake dessert featuring a tangy and sweet creamy key lime cheesecake filling over a crunchy graham cracker crust, perfect for summer or any occasion.
- Prep Time: 15 minutes
- Cook Time: 0 minutes
- Total Time: 3 hours 15 minutes
- Yield: 6 servings 1x
- Category: Dessert
- Cuisine: American
Ingredients
- 1 ½ cups (150 g) graham cracker crumbs
- 6 tablespoons (85 g) unsalted butter, melted
- 2 tablespoons (25 g) granulated sugar
- 8 oz (225 g) cream cheese, softened
- 1 can (14 oz / 396 g) sweetened condensed milk
- ⅓ cup (80 ml) fresh key lime juice
- 1 teaspoon key lime zest
- 1 teaspoon vanilla extract
- Whipped cream (optional, for garnish)
- Thin lime slices or extra zest (optional, for garnish)
- Fresh mint leaves (optional, for garnish)
Instructions
- Combine graham cracker crumbs, melted unsalted butter, and granulated sugar in a bowl. Mix until crumbs are evenly coated and look like wet sand (about 2-3 minutes by hand).
- Spoon about 2 tablespoons (30 g) of the crumb mixture into each serving cup. Press down firmly to form a compact base. Chill the cups in the fridge for about 10 minutes.
- In a large mixing bowl, beat softened cream cheese with an electric mixer on medium speed until smooth and creamy (about 2 minutes). Scrape down sides as needed.
- Pour in the sweetened condensed milk and beat on low speed until fully combined and silky smooth (about 1-2 minutes).
- Add fresh key lime juice, key lime zest, and vanilla extract. Gently mix on low speed until evenly blended (about 30 seconds).
- Spoon the filling over the chilled crust in each cup, filling almost to the top. Smooth the surface gently.
- Place the cups in the refrigerator for at least 3 hours, preferably overnight, to allow the filling to set.
- Just before serving, garnish with whipped cream, a thin slice of lime, and a mint leaf if desired.
Notes
Let cream cheese soften completely at room temperature to avoid lumps. Mix condensed milk on low speed to prevent air bubbles. Press crust firmly but gently to hold together without becoming too dense. Chill at least 3 hours or overnight for best texture. Can speed chill in freezer but watch to avoid icy texture. For dairy-free, use vegan cream cheese and coconut condensed milk. Graham cracker crust can be substituted with gluten-free cookies, crushed nuts, or pretzels.
Nutrition
- Serving Size: 1 cheesecake cup (ab
- Calories: 320
- Fat: 20
- Carbohydrates: 30
Keywords: no-bake cheesecake, key lime cheesecake, easy dessert, summer dessert, creamy cheesecake cups, no oven dessert


