“You sure this will work without an ice cream maker?” my friend asked, eyebrows raised as I pulled out a jar of homemade salted caramel. Honestly, I wasn’t completely convinced myself. That evening was the kind of day where cooking felt more like a chore than a joy, and I just wanted something sweet to calm the chaos swirling in my head. So, I grabbed what I had—heavy cream, sweetened condensed milk, and that sticky-smooth caramel—and threw it all together, hoping for the best.
As the mixture whipped and thickened, the kitchen filled with the warm scent of caramel and sea salt. The anticipation grew, but I kept my expectations low. Then came the swirl—drizzling that golden ribbon through the creamy base, folding it gently so it didn’t lose its marbled charm. After freezing overnight, I hesitated before the first bite, thinking maybe it’d be just okay.
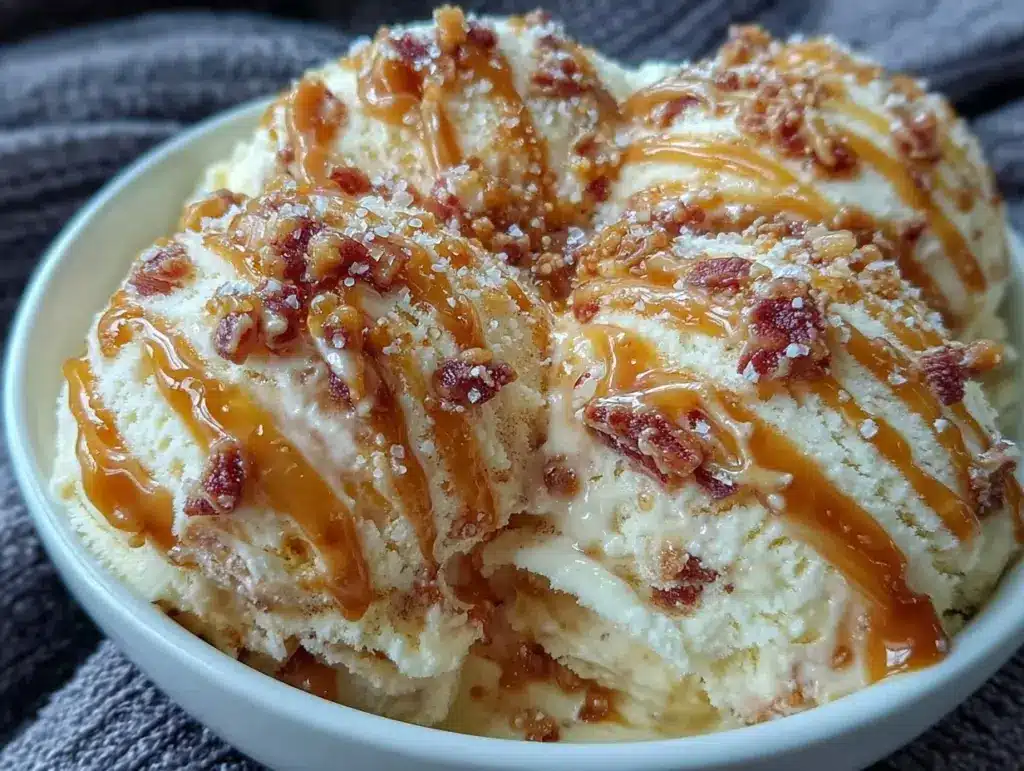
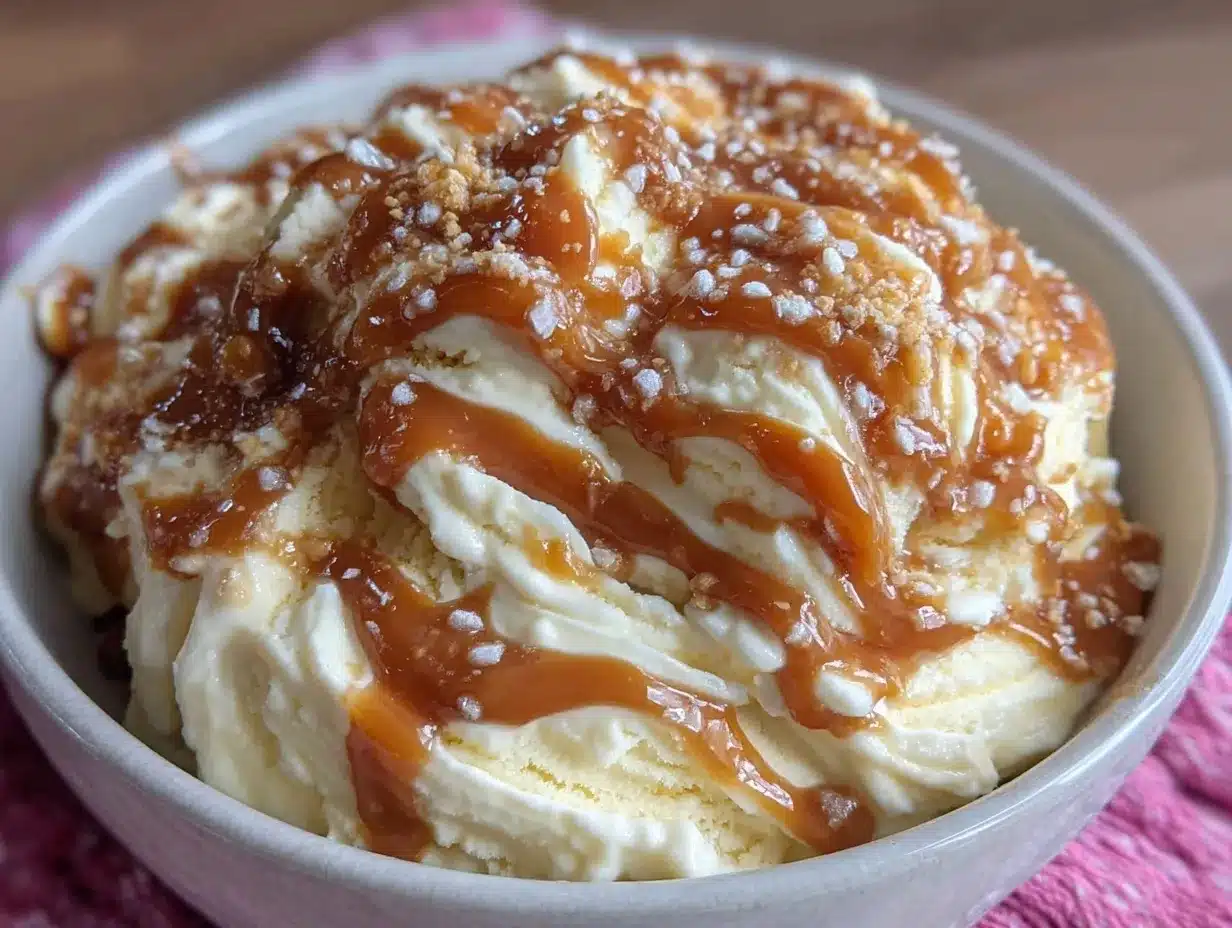
But wow. The texture was so rich and velvety, and that salty-sweet swirl? It pierced through the creaminess like a little burst of magic. It wasn’t just dessert; it felt like a balm for the soul after a hectic day. Since then, I’ve made this no-churn salted caramel swirl ice cream more times than I can count (probably more than a dozen in the last month alone), each batch a comforting ritual and a sweet reset. It’s that kind of recipe that sticks with you—not because it’s fancy, but because it’s honest, simple, and downright delicious.
Maybe that’s why this recipe found its way into my kitchen and my heart. It’s creamy, dreamy, and just salty enough to keep you coming back for more. No fancy gadgets, no complicated steps—just a few ingredients and a bit of patience. If you’re ever in need of a sweet escape that’s easy to make, this one’s got your back.
Why You’ll Love This Creamy No-Churn Salted Caramel Swirl Ice Cream Recipe
Having whipped up this homemade salted caramel swirl ice cream repeatedly, I can say it’s truly one of those recipes that feels like a little treat every time you make it. Here’s why it stands out, based on my kitchen tests and taste bud trials:
- Quick & Easy: This recipe comes together in under 15 minutes, making it perfect for busy weeknights or last-minute dessert cravings.
- Simple Ingredients: No fancy, hard-to-find stuff here—just staples like heavy cream, sweetened condensed milk, and homemade or store-bought salted caramel sauce.
- Perfect for Any Occasion: Whether it’s a casual family dinner, a backyard barbecue, or a cozy night in with a warm dessert, this ice cream fits right in.
- Crowd-Pleaser: Kids, adults, even the pickiest eaters seem to love this creamy treat. The salted caramel swirl adds just the right amount of flair without being overwhelming.
- Unbelievably Delicious: The texture is ultra-smooth thanks to the no-churn method, and the salted caramel adds a rich, buttery pop of flavor that’s hard to beat.
What really sets this recipe apart is the technique of folding the salted caramel swirl gently into the whipped cream and sweetened condensed milk base. It keeps the caramel ribbons distinct and visually appealing—plus, each bite is a perfect balance of sweet and salty. This isn’t just any no-churn ice cream; it’s the one I trust to impress without any stress.
Honestly, after making this a few times, I can say it’s the kind of dessert you’ll want to serve straight from the freezer, eyes closed, savoring that creamy caramel goodness. It’s comforting, indulgent, but still refreshingly simple. And if you’re a fan of salted caramel desserts, this ice cream will definitely become your new go-to.
What Ingredients You Will Need
This recipe uses simple, wholesome ingredients to deliver bold flavor and a satisfying creamy texture without any fuss. Most are pantry staples or easy to find in your local grocery store. Here’s what you’ll need:
- Heavy Cream (2 cups / 480 ml) – Use good quality for the creamiest results. I like Organic Valley heavy cream for its richness.
- Sweetened Condensed Milk (1 can / 14 oz / 396 g) – This adds sweetness and body without needing extra sugar.
- Vanilla Extract (1 teaspoon) – Pure vanilla extract adds depth and warmth to the base.
- Salted Caramel Sauce (½ cup / 120 ml) – Homemade or store-bought works. For a quick homemade version, simmer sugar, butter, and cream with a pinch of sea salt until golden and thickened.
- Sea Salt (a pinch) – Enhances the caramel’s flavor and balances the sweetness.
Optional but recommended:
- Flaky Sea Salt for sprinkling on top before serving – Adds a delightful crunch and extra salty kick.
If you want to switch things up, almond milk whipped cream can replace heavy cream for a dairy-free version, but the texture will be lighter and less creamy. Also, I’ve played around with swapping in coconut caramel for a tropical twist—definitely worth trying! When using store-bought caramel sauce, check the label for quality ingredients (I usually reach for Trader Joe’s or Bonne Maman brands).
Equipment Needed
Luckily, this no-churn salted caramel swirl ice cream recipe doesn’t call for any fancy kitchen gadgets. Here’s what you’ll want handy:
- Mixing Bowl: A large bowl for whipping the cream. Glass or metal bowls work best because they keep the cream cold longer.
- Electric Hand Mixer or Stand Mixer: Essential for whipping the heavy cream to soft peaks. While you can do it by hand, it’s quite the arm workout!
- Spatula or Spoon: For folding in the caramel and mixing ingredients gently.
- Freezer-Safe Container: A loaf pan or plastic container with a lid works well for freezing the ice cream.
- Measuring Cups and Spoons: For accurate ingredient amounts.
If you don’t have an electric mixer, no worries—grab a sturdy whisk and take your time. Just make sure your cream is very cold to get the best volume. I’ve also found that chilling the mixing bowl and beaters in the freezer for 10 minutes before whipping helps a lot. For storage, reusable silicone containers are a budget-friendly, eco-conscious option that keep the ice cream airtight and fresh.
Preparation Method
- Chill your equipment: Pop your mixing bowl and beaters in the freezer for about 10-15 minutes. Cold tools help the cream whip faster and firmer.
- Whip the heavy cream: Pour the 2 cups (480 ml) of heavy cream into the chilled bowl. Using your electric mixer, beat on medium-high speed until soft peaks form—this usually takes 3-4 minutes. The cream should look thick and billowy but still soft enough to fold easily.
- Combine the base: In a separate bowl, stir together the sweetened condensed milk (14 oz / 396 g) and 1 teaspoon of vanilla extract until smooth. This mixture is the sweet, creamy heart of your ice cream.
- Fold the whipped cream into the condensed milk: Using a spatula, gently fold the whipped cream into the condensed milk mixture. Do this slowly to keep the air in; you want a light, fluffy base.
- Add the salted caramel: Pour half of your salted caramel sauce (about ½ cup / 120 ml) into the ice cream base. Stir just a bit to distribute some caramel, but don’t mix it all in.
- Layer and swirl: Transfer half of the ice cream mixture into your freezer-safe container. Drizzle half of the remaining caramel on top. Then add the rest of the ice cream mixture, followed by the rest of the caramel sauce. Use a knife or skewer to gently swirl the caramel through the ice cream base, creating lovely ribbons.
- Freeze: Cover the container with a lid or plastic wrap and freeze for at least 6 hours, ideally overnight. The ice cream will firm up beautifully without needing an ice cream maker.
- Serve: Before scooping, let the ice cream sit at room temperature for 5-10 minutes to soften slightly. Sprinkle with flaky sea salt if desired for an extra flavor punch.
Pro tip: When swirling the caramel, less is more. Over-mixing will blend the caramel completely, losing those pretty ribbons and the contrast of flavor. Also, if your caramel sauce is very thick, warm it slightly to make swirling easier.
Cooking Tips & Techniques for Best Results
Making no-churn salted caramel swirl ice cream is pretty straightforward, but a few tricks I’ve learned make all the difference:
- Cold is key: Keep your cream, bowl, and beaters chilled. Warm cream won’t whip properly, which can leave the ice cream dense rather than fluffy.
- Don’t overwhip: Stop whipping as soon as soft peaks form. Overwhipping turns cream grainy and can ruin the smooth texture.
- Gentle folding: When mixing whipped cream into condensed milk, fold gently to keep the base airy. No one wants flat, heavy ice cream!
- Caramel consistency: If your caramel is too runny, it’ll bleed too much into the ice cream. Too thick, and it won’t swirl well. I usually simmer my caramel sauce just until it coats the back of a spoon.
- Freezing time matters: Don’t rush the freezing process. Overnight freeze assures the best scoopable texture without icy bits.
- Multi-tasking: While the ice cream is freezing, try prepping a zesty salad like the Fresh Southwest Chipotle Salad to balance the indulgence with fresh flavors.
I once forgot to chill my bowl and ended up with a sad, runny mess. Learned my lesson the hard way! Also, if you want a little extra flair, sprinkle a few toasted pecans on top before serving for crunch and nuttiness.
Variations & Adaptations
This no-churn salted caramel swirl ice cream recipe is a fantastic base for customization. Here are some ways to make it your own:
- Vegan Version: Swap heavy cream for full-fat coconut cream and use vegan caramel sauce. The texture will be slightly different but still creamy and delicious.
- Nutty Caramel: Stir in chopped toasted pecans or walnuts into the ice cream base before freezing. Adds a lovely crunch and depth.
- Chocolate-Caramel Swirl: Add a layer of chocolate fudge sauce along with the caramel for a salted caramel chocolate swirl experience.
- Fruit Twist: Try swirling in a raspberry or blackberry puree with the caramel for a fruity contrast that’s surprisingly wonderful.
- Spiced Caramel: Add a pinch of cinnamon or chili powder to the caramel sauce for a warm or spicy kick.
Personally, I once made a batch with baked apple pie bombs on the side and tossed in some cinnamon-spiced caramel. It was a cozy fall treat that vanished in minutes. Feel free to experiment—this recipe is forgiving and fun to tweak.
Serving & Storage Suggestions
This salted caramel swirl ice cream is best served cold but not rock hard. Let it sit at room temperature for about 5-10 minutes before scooping to get that perfect creamy softness. Presentation-wise, a simple bowl with a sprinkle of flaky sea salt or a drizzle of extra caramel sauce looks inviting and tastes amazing.
Pair it with warm desserts like apple crisps or brownies for a decadent combo. It’s also fantastic alongside a crisp salad like the Classic Creamy Church Salad to balance richness with fresh crunch.
For storage, keep the ice cream tightly covered in an airtight container to prevent freezer burn. It keeps well for up to two weeks. When reheating or softening, avoid microwaving—just let it thaw naturally at room temperature for a few minutes.
Over time, the salted caramel flavor actually deepens, so leftovers taste even better after a day or two in the freezer.
Nutritional Information & Benefits
Here’s an approximate nutritional breakdown per ½ cup (120 ml) serving:
| Calories | Fat | Carbohydrates | Protein |
|---|---|---|---|
| 250 kcal | 15 g (mostly from heavy cream) | 28 g (from sugars in caramel and condensed milk) | 3 g |
This recipe is a treat and rich in fats and sugars, so enjoy it mindfully. Key ingredients like heavy cream provide calcium and fat-soluble vitamins, while sea salt adds trace minerals. Using homemade caramel means you control the quality and avoid preservatives.
It’s gluten-free by nature, and with substitutions like coconut cream, it can be adapted for dairy-free diets. Just be mindful of allergens if adding nuts or other mix-ins.
For me, this ice cream hits that sweet spot between indulgence and simplicity—perfect for treating yourself without overcomplicating things.
Conclusion
This creamy no-churn salted caramel swirl ice cream recipe is exactly the kind of dessert that feels like a hug on a plate—comforting, indulgent, and surprisingly simple. Whether you’re a seasoned ice cream maker or someone who just wants a fuss-free homemade treat, this one won’t disappoint.
Feel free to tweak it to your tastes—add nuts, spice it up, or mix in some chocolate. The base is forgiving and ready for your creativity. Personally, I love it just as it is, especially after a long day when only something sweet and creamy will do.
Give this recipe a try and let the creamy caramel goodness remind you that some of the best desserts come from the simplest ideas. I’d love to hear how you make it your own—drop a comment and share your swirl stories!
Frequently Asked Questions About Creamy No-Churn Salted Caramel Swirl Ice Cream
Can I use store-bought caramel sauce for this recipe?
Absolutely! Just pick a high-quality caramel sauce without too many preservatives or artificial ingredients for the best flavor and texture.
How long does this ice cream keep in the freezer?
Stored properly in an airtight container, it stays delicious for up to two weeks. After that, texture and flavor may start to decline.
Can I make this recipe dairy-free?
Yes! Replace heavy cream with full-fat coconut cream and use a dairy-free caramel sauce to keep it creamy and delicious.
Why is my ice cream icy or hard instead of creamy?
This usually happens if the cream wasn’t whipped properly or if the ice cream wasn’t covered tightly. Make sure to whip the cream to soft peaks and use a sealed container for freezing.
Can I add mix-ins like nuts or chocolate chips?
Definitely! Fold in your favorite crunchy or chocolatey bits just before freezing for extra texture and flavor.
Pin This Recipe!
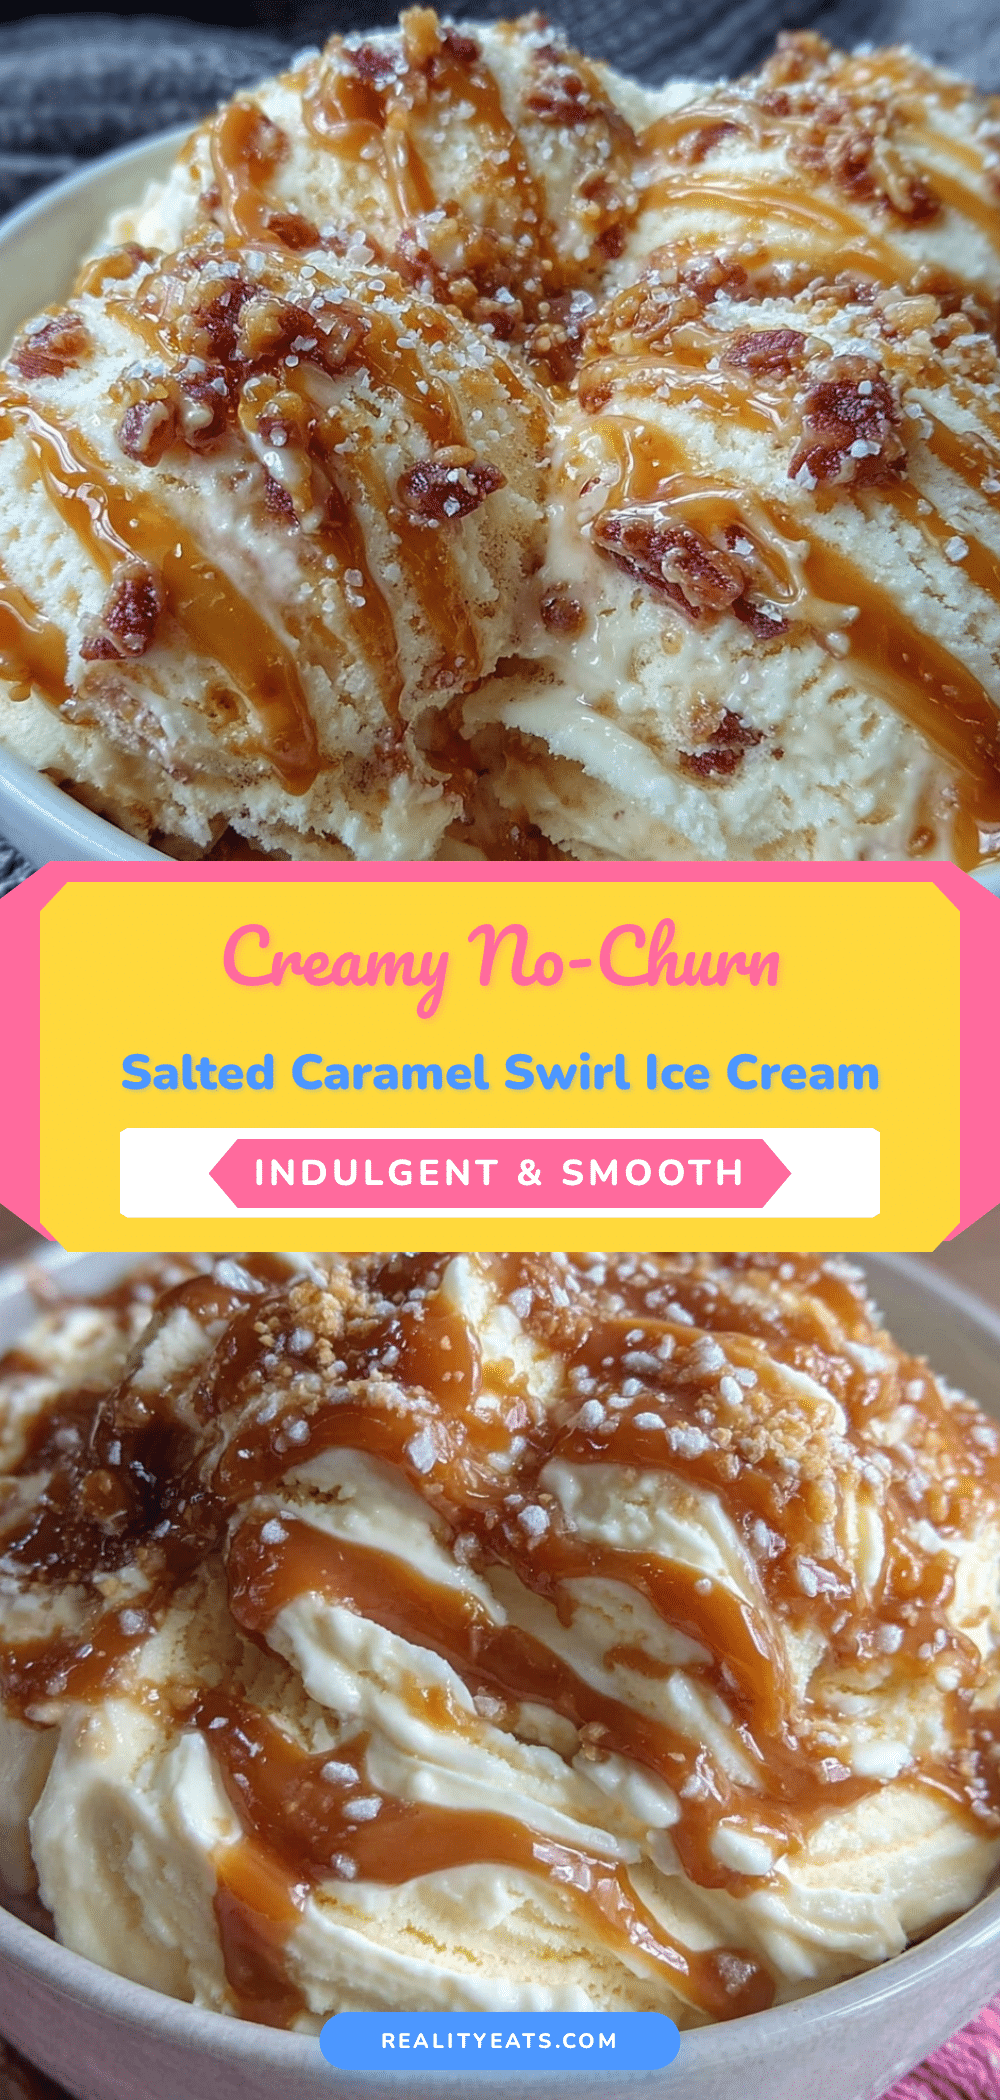
Creamy No-Churn Salted Caramel Swirl Ice Cream

A rich and velvety no-churn ice cream featuring a salty-sweet caramel swirl, made easily at home without an ice cream maker.
- Prep Time: 15 minutes
- Cook Time: 0 minutes
- Total Time: 6 hours 15 minutes
- Yield: 8 servings 1x
- Category: Dessert
- Cuisine: American
Ingredients
- 2 cups (480 ml) heavy cream
- 1 can (14 oz / 396 g) sweetened condensed milk
- 1 teaspoon vanilla extract
- ½ cup (120 ml) salted caramel sauce (homemade or store-bought)
- Pinch of sea salt
- Optional: flaky sea salt for sprinkling on top
Instructions
- Chill your mixing bowl and beaters in the freezer for 10-15 minutes.
- Pour the heavy cream into the chilled bowl and whip with an electric mixer on medium-high speed until soft peaks form, about 3-4 minutes.
- In a separate bowl, stir together the sweetened condensed milk and vanilla extract until smooth.
- Gently fold the whipped cream into the condensed milk mixture to keep the base light and fluffy.
- Pour half of the salted caramel sauce into the ice cream base and stir lightly to distribute some caramel without fully mixing.
- Transfer half of the ice cream mixture into a freezer-safe container. Drizzle half of the remaining caramel on top.
- Add the rest of the ice cream mixture, then the remaining caramel sauce. Use a knife or skewer to gently swirl the caramel through the ice cream base.
- Cover the container and freeze for at least 6 hours or overnight until firm.
- Before serving, let the ice cream sit at room temperature for 5-10 minutes to soften slightly. Sprinkle with flaky sea salt if desired.
Notes
Chill your bowl and beaters before whipping cream for best volume. Fold ingredients gently to keep the base airy. Warm caramel slightly if too thick for easier swirling. Let ice cream soften 5-10 minutes before scooping. Store in airtight container up to two weeks. Optional add-ins include toasted nuts or chocolate chips.
Nutrition
- Serving Size: ½ cup (120 ml)
- Calories: 250
- Fat: 15
- Carbohydrates: 28
- Protein: 3
Keywords: no-churn ice cream, salted caramel, homemade ice cream, easy dessert, caramel swirl, no ice cream maker


