“You’ve got to try this—it’s spooky but actually really good,” my nephew whispered one evening as he handed me a plastic cup filled with an odd mix of chocolate crumbs and creamy pudding. Honestly, I was skeptical at first. A dessert that looks like dirt? For Halloween? But then, that first bite caught me off guard. It was creamy, chocolaty, and weirdly comforting in that kid-friendly way that only Halloween treats can manage.
That night, I found myself making these creepy and creamy graveyard dirt pudding cups over and over—tweaking the layers, adding little candy tombstones, and even sneaking in some extra cream cheese for richness. It turned into this unexpected obsession, the kind where you make the recipe three times in a week because it’s just too fun and ridiculously delicious to resist. There’s something about the way the chocolate cookie crumbs mimic dirt and the smooth pudding melts on your tongue that makes it a perfect Halloween indulgence.
I remember sitting in the quiet kitchen, the lights dimmed except for the flicker of orange candles, thinking how this isn’t just a kid’s party treat—it’s a little moment of joy, a playful pause from the usual hustle. And that’s why this recipe stuck with me. It’s simple, a little silly, and yet surprisingly satisfying. Plus, it’s the kind of dessert that gets people talking—and asking for seconds—which, as you know, is the real win.
Why You’ll Love This Recipe
Honestly, after making these graveyard dirt pudding cups several times, I’m convinced they’re one of the easiest and most fun Halloween treats out there. Whether you’re throwing a last-minute party or just want to surprise the family with something playful, this recipe delivers.
- Quick & Easy: Ready in about 15 minutes, perfect when you’re juggling a million things and need a no-fuss dessert that still wows.
- Simple Ingredients: Uses pantry staples like chocolate pudding, crushed cookies, and a few candies—no special trips required.
- Perfect for Halloween Parties: The spooky “dirt” look fits right in with festive decorations and gets everyone excited to dig in.
- Crowd-Pleaser: Kids and grown-ups both love the creamy texture combined with the crunchy cookie crumbs.
- Unbelievably Delicious: What sets this apart is the creamy pudding mixed with a hint of cream cheese, which adds a subtle tang that balances the sweetness.
Unlike other versions that can feel too sweet or one-note, this recipe layers flavors and textures just right. The crushed cookies aren’t just thrown on top—they create a realistic dirt effect while adding crunch. Plus, the little candy decorations give it that eerie graveyard vibe without being over the top. It’s a recipe I trust to impress without stressing me out, and I bet it’ll become a favorite for your Halloween celebrations, too.
What Ingredients You Will Need
This recipe keeps things straightforward, focusing on ingredients that bring texture, flavor, and that unmistakable “graveyard” aesthetic. Most of these are probably already in your kitchen, which makes it even better when you’re pressed for time.
- Chocolate pudding mix (instant, 3.9 oz box or homemade if you prefer) – the creamy base that makes these cups irresistible
- Milk (2 cups / 480 ml) – for mixing the pudding
- Cream cheese (4 oz / 115 g, softened) – adds a slight tang and richness to the pudding layer
- Powdered sugar (1/4 cup / 30 g) – balances the cream cheese with a touch of sweetness
- Whipped topping (1 cup / 240 ml, like Cool Whip or homemade whipped cream) – lightens the pudding mixture for a fluffy texture
- Oreos (about 15 cookies) – crushed into crumbs to create the “dirt” layer; I prefer regular Oreos for their classic flavor, but chocolate wafer cookies work too
- Gummy worms (a handful) – for the creepy crawlies effect, optional but highly recommended
- Halloween candy tombstones or mini candy pumpkins – these little touches bring the graveyard to life and make the cups extra festive
- Chocolate chips or candy eyes (optional) – for decoration or to add little “graves” or “eyes” peeking out of the dirt
If you want a dairy-free alternative, swap the cream cheese and whipped topping with coconut-based versions—you’ll still get creamy texture and a touch of tang. For gluten-free, use gluten-free chocolate sandwich cookies instead of Oreos. These swaps keep the integrity of the recipe intact without sacrificing flavor.
Equipment Needed
- Mixing bowls: A medium and a large bowl for preparing pudding and cream cheese layers separately.
- Electric mixer or whisk: For beating the cream cheese and powdered sugar smooth, and folding in the whipped topping.
- Measuring cups and spoons: Accuracy matters for the pudding texture, especially with the milk and sugar.
- Food processor or plastic bag + rolling pin: To crush the Oreos into fine “dirt” crumbs. I’ve found a food processor gives the best, even crumb texture, but smashing with a rolling pin works fine too.
- Clear plastic cups or small mason jars: For layering the pudding and dirt; clear containers show off the spooky dirt layers beautifully.
- Spatula: For folding whipped topping and scraping bowls clean.
I like using small mason jars for serving because they feel a little more special and are reusable. If you’re making these for a crowd, disposable clear cups make cleanup easy, and you can still see all the layers. Plus, the layering is the fun part, so picking the right container helps sell the whole creepy-creamy vibe.
Preparation Method
- Make the pudding: In a medium bowl, whisk together the instant chocolate pudding mix and 2 cups (480 ml) cold milk. Whisk for about 2 minutes until it thickens. Set aside for 5 minutes to fully set.
- Prepare the cream cheese layer: Using an electric mixer, beat 4 oz (115 g) softened cream cheese and 1/4 cup (30 g) powdered sugar until smooth and creamy, about 2-3 minutes. If lumps remain, keep mixing; it should be silky.
- Fold in whipped topping: Gently fold 1 cup (240 ml) whipped topping into the cream cheese mixture until combined, being careful not to deflate it. This makes the layer light and fluffy.
- Combine layers: Fold the prepared chocolate pudding into the cream cheese mixture. The result should be creamy, smooth, and slightly dense but fluffy.
- Crush the cookies: Place Oreos in a food processor and pulse until fine crumbs form. If you don’t have a processor, put cookies in a sealed plastic bag and crush with a rolling pin until crumbly but not powdery.
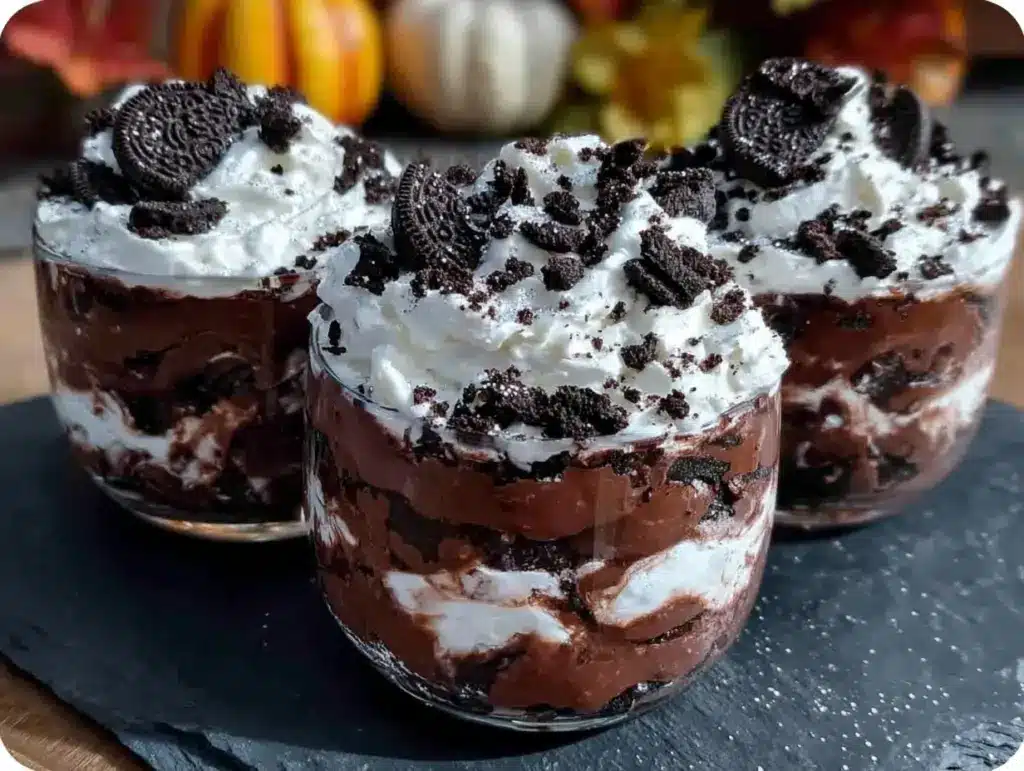
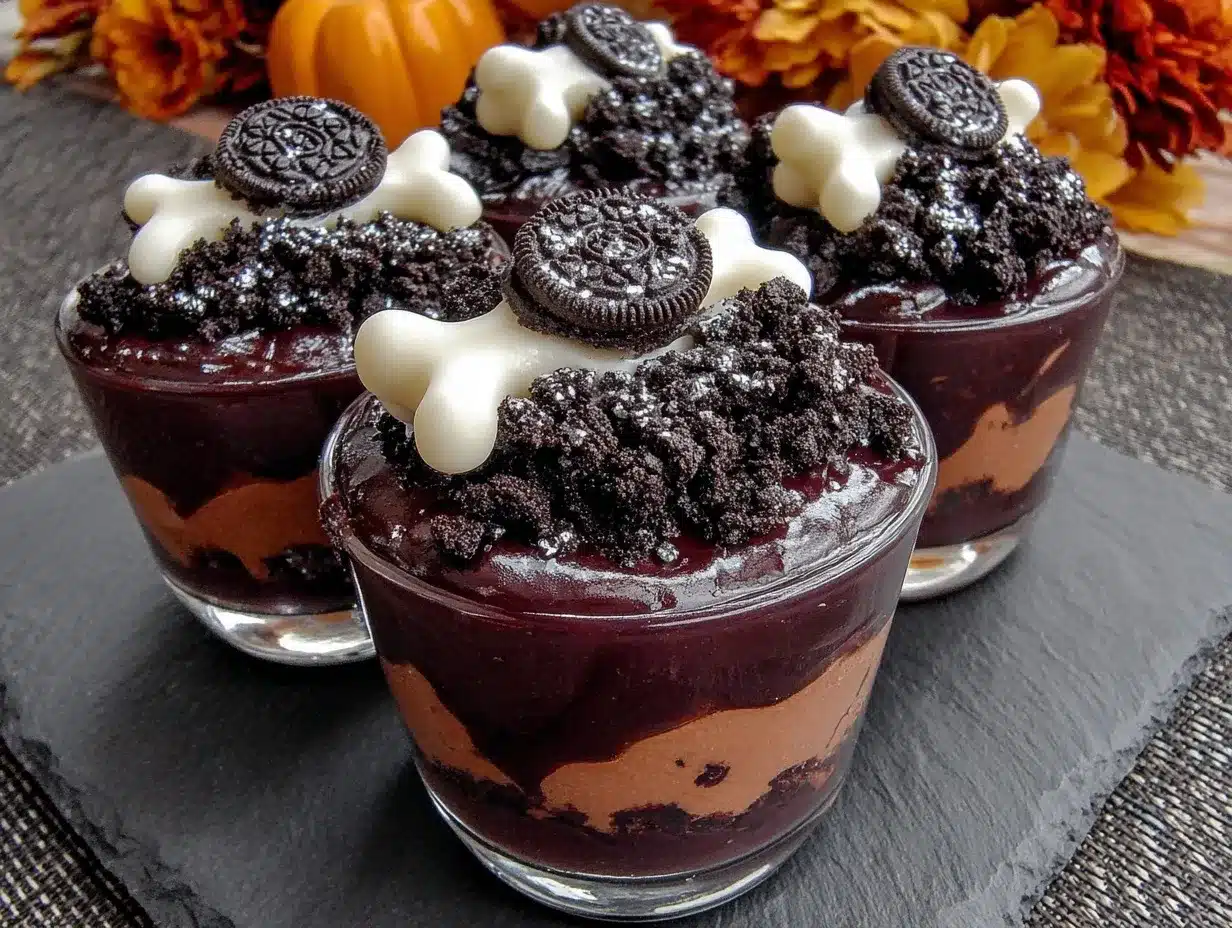
- Layer the cups: Spoon a couple of tablespoons of cookie crumbs into the bottom of each cup. Add a layer of the pudding mixture (about 1/3 cup / 80 ml), then top with more cookie crumbs. Repeat layering until the cup is nearly full, ending with a cookie crumb layer for that “dirt” finish.
- Add decorations: Press gummy worms into the top “dirt” layer and place candy tombstones or mini pumpkins for a spooky graveyard scene. Scatter chocolate chips or candy eyes if you want extra creepiness.
- Chill: Refrigerate for at least 1 hour before serving. This helps the flavors meld and the pudding set fully.
Heads up: If your pudding feels too runny, let it sit a little longer before folding in the cream cheese. Also, don’t overmix when folding in the whipped topping—you want to keep it light, not dense. The cookie crumbs should be fine enough to resemble dirt but with a little texture; avoid crushing into powder.
Cooking Tips & Techniques
One trick I learned the hard way is to really soften the cream cheese before mixing. If it’s too cold, you’ll end up with lumps that are tough to smooth out. I usually leave mine on the counter for about 30 minutes before starting.
When folding in the whipped topping, use a gentle hand. You want to combine without losing that airy texture. This keeps the pudding cups from feeling heavy or overly rich. If you just stir vigorously, the mixture can become dense, and that’s not the creamy experience you’re looking for.
Crushing Oreos to the right consistency is key. Too chunky and it doesn’t look like dirt; too fine and it feels like powder in your mouth. Pulse in short bursts if using a food processor to keep some texture. If you’re smashing manually, try to leave some smaller bits mixed in for crunch.
Multitasking tip: while the pudding sets, prep your decorations and crush cookies, so when the layers are ready, you can assemble quickly and keep everything fresh. And if you want to add a subtle flavor twist, a teaspoon of espresso powder in the pudding mix can deepen the chocolate flavor without making it taste like coffee.
Variations & Adaptations
- Peanut Butter Graveyard: Mix a spoonful of creamy peanut butter into the pudding layer for a nutty twist. Top with chopped peanuts or Reese’s Pieces for extra texture.
- Vegan Version: Use dairy-free chocolate pudding, coconut cream cheese, and crushed vegan cookies. Swap gummy worms for fruit leather strips cut into worms.
- Pumpkin Spice Dirt Cups: Add 1/2 teaspoon pumpkin pie spice to the pudding mixture and swap Oreos for ginger snap crumbs. Top with mini candy pumpkins for fall vibes.
- Adult-Friendly Version: Stir in a tablespoon of your favorite liqueur—think Kahlúa or Baileys—into the pudding for a grown-up treat.
- Frozen Dirt Cups: Freeze the assembled cups for about an hour to create a slightly firmer texture that’s perfect for hot fall days or outdoor parties.
Personally, I made a batch with crushed crispy ham and cheese sticks on the side for a savory balance at a Halloween potluck. It was unexpected but worked really well! Also, swapping gummy worms for sour belts can add a tangy punch if you want to mix up the candy profile.
Serving & Storage Suggestions
These pudding cups are best served chilled. I like to pull them out of the fridge about 10 minutes before eating—this softens the “dirt” crumbs just enough to blend with the creamy pudding without getting soggy. Presentation-wise, clear cups let the layers shine, and adding those cute candy tombstones on top makes the whole thing feel like a tiny Halloween scene.
They pair nicely with a warm drink like spiced cider or a simple hot chocolate, making them a perfect finish for a spooky-themed dinner. For a party spread, you can line up a tray of these alongside some savory bites, like the fresh southwest chipotle salad, to balance flavors.
Store leftover pudding cups covered in the refrigerator for up to 3 days. The cookie crumbs might soften a bit over time, but the flavors actually deepen, making the dessert taste even better the next day. Reheat is not recommended, but if you want a softer texture, letting them sit at room temperature for about 15 minutes before eating works wonders.
Nutritional Information & Benefits
Each serving of these graveyard dirt pudding cups clocks in around 250-300 calories, depending on candy additions. They provide a decent dose of calcium from the milk and cream cheese, along with some antioxidants from the cocoa in the pudding and cookie crumbs.
This treat isn’t meant to be a health food, but it’s a fun way to enjoy Halloween without going overboard. Using real cream cheese gives a bit of protein and richness without heavy cream. Plus, you can always lighten it up by using sugar-free pudding mixes or low-fat cream cheese.
Be mindful of allergens: contains dairy and gluten (unless swapped). Candy decorations may have additional allergens, so check labels if serving to sensitive guests. Overall, it’s a festive treat that fits well into a balanced seasonal diet when enjoyed in moderation.
Conclusion
These creepy and creamy graveyard dirt pudding cups have become my go-to Halloween dessert for all the right reasons: they’re simple, fun, and surprisingly delicious. You can easily tweak the layers or decorations to fit your style, making them perfect for any spooky gathering.
I love how they bring together that playful Halloween spirit with a creamy texture that feels like a little indulgence without fuss. Whether you’re making them for kids, friends, or yourself, these pudding cups deliver a sweet moment that’s just a bit creepy and totally memorable.
Give it a try, and if you do, I’d love to hear how you customized your graveyard cups! Share your spooky twists or questions below—let’s keep the Halloween magic going.
Frequently Asked Questions
Can I make these pudding cups ahead of time?
Absolutely! Prepare and assemble them up to 24 hours in advance. Just keep them covered and chilled in the refrigerator. The flavors get better overnight, though cookie crumbs may soften slightly.
What can I use instead of Oreos for the “dirt” layer?
Chocolate wafer cookies or even crushed chocolate graham crackers work well. For a gluten-free option, use gluten-free chocolate sandwich cookies.
Can I make these without cream cheese?
Yes, but cream cheese adds a nice tang and richness. You can skip it and just use whipped topping folded into the pudding, but the texture and flavor might be less creamy and more sweet.
Are gummy worms necessary?
Not at all! They’re a fun touch but feel free to omit them or swap with other Halloween candies like candy eyes, mini pumpkins, or sour belts.
How should I serve these at a party?
Serve chilled in clear cups or small jars so guests can see the layers. Add spoons and arrange them on a spooky tray alongside other treats like soft sugar cookies with creamy icing for a festive spread.
Pin This Recipe!
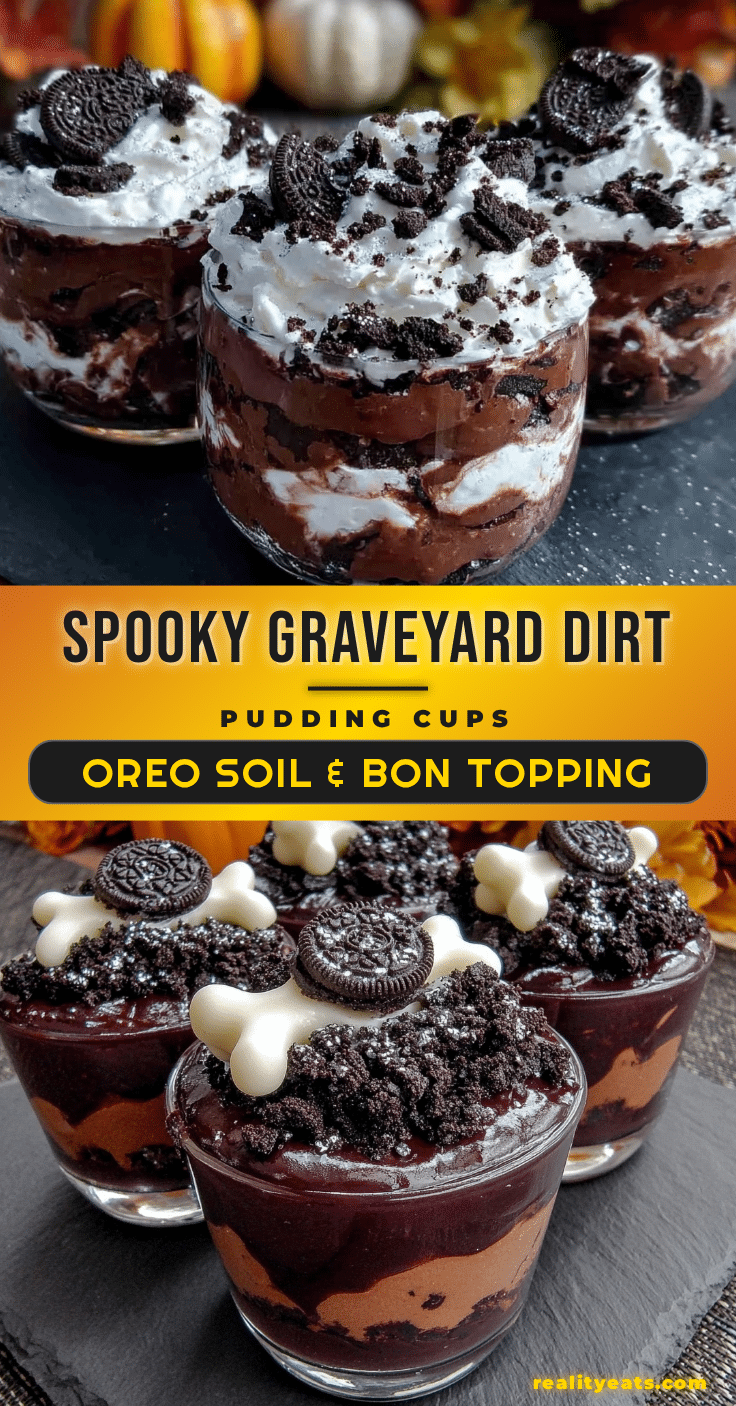
Creepy and Creamy Graveyard Dirt Pudding Cups

A fun and easy Halloween treat featuring layers of creamy chocolate pudding, cream cheese, whipped topping, and crushed cookies that mimic dirt, topped with spooky candy decorations.
- Prep Time: 15 minutes
- Cook Time: 0 minutes
- Total Time: 1 hour 15 minutes
- Yield: 6 servings 1x
- Category: Dessert
- Cuisine: American
Ingredients
- 1 box instant chocolate pudding mix (3.9 oz)
- 2 cups milk (480 ml)
- 4 oz cream cheese, softened (115 g)
- 1/4 cup powdered sugar (30 g)
- 1 cup whipped topping (240 ml), like Cool Whip or homemade whipped cream
- About 15 Oreos, crushed into crumbs
- A handful of gummy worms (optional)
- Halloween candy tombstones or mini candy pumpkins
- Chocolate chips or candy eyes (optional)
Instructions
- In a medium bowl, whisk together the instant chocolate pudding mix and 2 cups cold milk for about 2 minutes until it thickens. Set aside for 5 minutes to fully set.
- Using an electric mixer, beat 4 oz softened cream cheese and 1/4 cup powdered sugar until smooth and creamy, about 2-3 minutes.
- Gently fold 1 cup whipped topping into the cream cheese mixture until combined, being careful not to deflate it.
- Fold the prepared chocolate pudding into the cream cheese mixture until creamy and smooth.
- Crush Oreos into fine crumbs using a food processor or by placing them in a sealed plastic bag and crushing with a rolling pin.
- Spoon a couple tablespoons of cookie crumbs into the bottom of each cup. Add about 1/3 cup pudding mixture, then top with more cookie crumbs. Repeat layering until the cup is nearly full, ending with a cookie crumb layer.
- Press gummy worms into the top cookie crumb layer and add candy tombstones or mini pumpkins. Scatter chocolate chips or candy eyes if desired.
- Refrigerate for at least 1 hour before serving to allow flavors to meld and pudding to set.
Notes
Soften cream cheese before mixing to avoid lumps. Fold whipped topping gently to keep mixture light and fluffy. Crush Oreos to a fine crumb with some texture, not powder. Chill at least 1 hour before serving. For dairy-free, use coconut-based cream cheese and whipped topping. For gluten-free, use gluten-free chocolate sandwich cookies.
Nutrition
- Serving Size: 1 pudding cup (about
- Calories: 275
- Sugar: 25
- Sodium: 180
- Fat: 15
- Saturated Fat: 7
- Carbohydrates: 35
- Fiber: 2
- Protein: 4
Keywords: Halloween dessert, pudding cups, graveyard dirt pudding, creamy pudding, Oreo dessert, spooky treats, easy Halloween recipe


