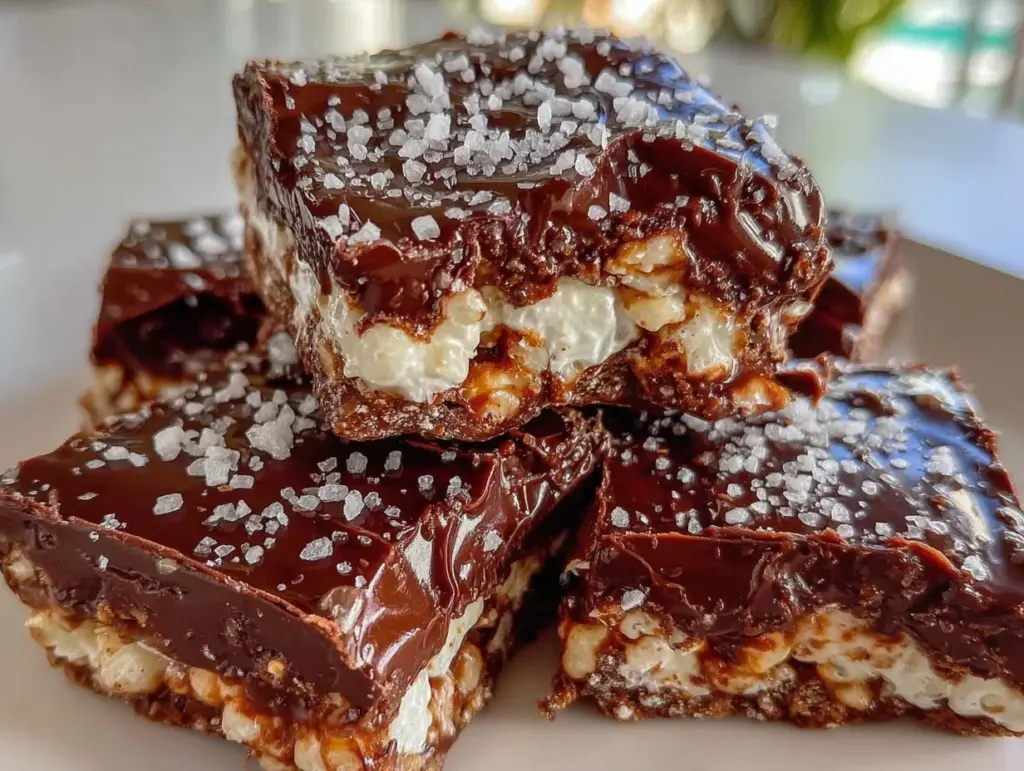
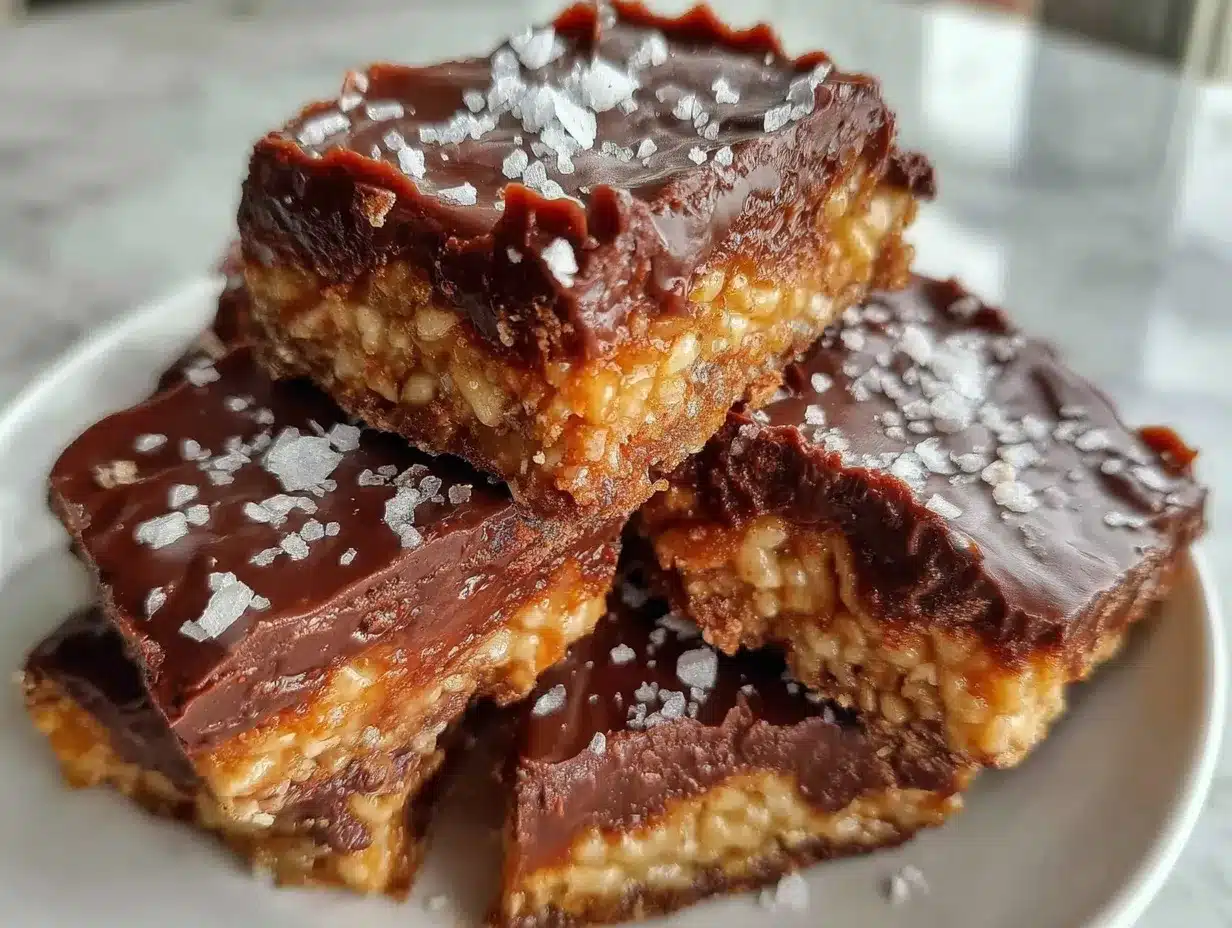
Imagine biting into a rich, chocolatey bar with a satisfying crunch that melts in your mouth – that’s exactly what these homemade crunch bars deliver. They’re ridiculously simple to make, requiring only four ingredients and no fancy equipment. These bars are perfect for satisfying your sweet cravings, impressing guests at a party, or even as a thoughtful homemade gift. Trust me, once you make these, your store-bought candy bar days will be behind you!
I first stumbled upon this recipe during a lazy weekend when I was looking for a quick treat that didn’t require a trip to the store. It’s amazing how a few basic pantry staples can transform into something so delicious. These crunch bars are perfect for beginners or anyone who loves a no-bake dessert with minimal fuss. Plus, they’re a hit with kids and adults alike!
Why You’ll Love This Recipe
- Quick & Easy: With just 4 ingredients and no baking involved, these crunch bars come together in under 20 minutes.
- Minimal Ingredients: You probably already have everything you need in your pantry!
- Customizable: Add your favorite mix-ins or toppings to make these bars your own.
- Perfect for Any Occasion: Great for holiday parties, potlucks, school lunches, or simply curling up on the couch with a tasty treat.
- Unbelievably Delicious: The combination of creamy chocolate and crispy cereal is just so satisfying.
What sets this recipe apart is its simplicity. Unlike other recipes that require tempering chocolate or fancy techniques, these homemade crunch bars are foolproof. It’s the kind of recipe that makes you smile after the first bite – nostalgic, comforting, and oh-so-good. Whether you’re making them for yourself or to share with loved ones, these crunch bars are guaranteed to bring joy. Plus, they’re a fun activity to do with kids – who doesn’t love working with melted chocolate?
What Ingredients You Will Need
This recipe uses just four simple ingredients that you probably already have in your kitchen. Each one plays a key role in creating the perfect crunch bar texture and flavor:
- Milk Chocolate Chips: Choose high-quality chocolate for the best flavor. You can also use semi-sweet or dark chocolate if you prefer a less sweet treat.
- Peanut Butter: Creamy peanut butter works best for a smooth texture. If you have allergies, feel free to swap with almond butter or sunflower seed butter.
- Butter: Unsalted butter helps create a silky consistency in the melted chocolate mixture.
- Crispy Rice Cereal: This is where the crunch comes in! Any brand of crispy rice cereal will work, but try to use fresh cereal for maximum crispiness.
Optional Add-Ins:
- Chopped nuts for extra crunch
- Dried fruit for a chewy twist
- Sea salt flakes for a sweet-and-salty combo
Feel free to experiment with flavors. For example, you could use white chocolate instead of milk chocolate or add a teaspoon of vanilla extract to amplify the taste. This recipe is all about making it your own!
Equipment Needed
You don’t need much to whip up these crunch bars. Here’s what you’ll need:
- Microwave-safe bowl: Perfect for melting the chocolate and peanut butter.
- Spatula: For mixing everything together smoothly.
- 8×8-inch baking pan: Line it with parchment paper for easy removal.
- Refrigerator: To chill the bars until they set.
If you don’t have a microwave, you can melt the chocolate and peanut butter over a double boiler on the stovetop. Trust me, both methods work beautifully!
Preparation Method
Making these homemade crunch bars is so simple, you’ll wonder why you didn’t try it sooner. Follow these easy steps:
- Melt the ingredients: In a microwave-safe bowl, combine 2 cups (340g) of milk chocolate chips, 1/2 cup (125g) of peanut butter, and 2 tablespoons (30g) of unsalted butter. Microwave in 30-second intervals, stirring between each, until the mixture is smooth and fully melted. This should take about 1-2 minutes.
- Add the crunch: Stir in 3 cups (75g) of crispy rice cereal. Make sure every piece of cereal is coated evenly with the chocolate mixture.
- Transfer to the pan: Pour the mixture into a parchment-lined 8×8-inch baking pan. Use a spatula to spread it evenly and press it down gently to compact the bars.
- Chill: Place the pan in the refrigerator and let the bars chill for at least 1 hour, or until they are firm and set.
- Slice and serve: Once the bars are set, lift them out of the pan using the parchment paper. Use a sharp knife to cut them into squares or rectangles. Enjoy!
Pro Tip: For cleaner slices, run your knife under hot water, dry it, and then cut through the bars. This will help you achieve smooth edges without crumbling.
Cooking Tips & Techniques
- Don’t overheat the chocolate: Chocolate can burn easily, so use short microwave intervals and stir frequently.
- Work quickly: Once the cereal is mixed in, transfer the mixture to the pan immediately before it starts to set.
- Use fresh cereal: Stale cereal will result in less crunchy bars, so make sure your crispy rice is fresh.
- Customize the sweetness: If you’re using dark chocolate, you may want to add a little honey or sugar to balance the bitterness.
- Experiment with toppings: Sprinkle crushed pretzels, shredded coconut, or colorful sprinkles on top before chilling for added flair.
I’ve learned these tips through trial and error – trust me, they make all the difference in creating the perfect crunch bars!
Variations & Adaptations
One of the best things about this recipe is how adaptable it is. Here are a few variations to try:
- Gluten-Free Option: Use certified gluten-free crispy rice cereal to make this recipe suitable for gluten-sensitive diets.
- Seasonal Twist: Add crushed candy canes during the holidays or dried cranberries for a fall-inspired treat.
- Nut-Free Option: Swap peanut butter for sunflower seed butter or tahini for a nut-free alternative.
- Healthier Version: Use dark chocolate and almond butter for a lower-sugar, protein-packed treat.
My personal favorite? Adding a sprinkle of flaky sea salt on top – it’s the perfect balance of sweet and salty!
Serving & Storage Suggestions
These homemade crunch bars are best served chilled or at room temperature. Here are a few serving and storage tips:
- Serving: Arrange the bars on a pretty platter for parties or wrap them individually in parchment paper as gifts.
- Pairings: Serve with a glass of cold milk, hot coffee, or even a scoop of vanilla ice cream for a decadent dessert.
- Storage: Store the bars in an airtight container in the refrigerator for up to 2 weeks.
- Freezing: Wrap bars individually in plastic wrap and freeze for up to 3 months. Thaw in the fridge before serving.
Fun fact: The flavors deepen over time, so they’re even more delicious after a day or two!
Nutritional Information & Benefits
While these bars are definitely a treat, there are a few nutritional perks:
- Calories: Approximately 150 calories per bar, depending on size.
- Protein: Peanut butter adds a nice boost of protein.
- Low Gluten Option: Easily adaptable for gluten-free diets.
This recipe is indulgent yet simple, perfect for satisfying those chocolate cravings without over-complicating your day.
Conclusion
If you’re looking for a quick, easy, and undeniably delicious dessert, these homemade crunch bars are a must-try. With just four ingredients and minimal effort, they’re perfect for any occasion. Whether you customize them with your favorite toppings or stick to the classic recipe, you’re guaranteed a tasty treat that everyone will love.
I personally adore these bars for their nostalgic vibe – they remind me of the best childhood snacks but with a homemade touch. So go ahead, whip up a batch, and let me know how they turn out! Share your variations in the comments or tag me on social media with your creations. Happy crunching!
FAQs
Can I use dark chocolate instead of milk chocolate?
Yes, dark chocolate works beautifully if you prefer a less sweet flavor. You can even mix dark and milk chocolate for a balanced taste.
What’s the best way to melt chocolate without a microwave?
You can use a double boiler on the stovetop. Simply place a heatproof bowl over simmering water and stir until the chocolate melts.
Can I make these crunch bars vegan?
Absolutely! Use dairy-free chocolate chips, vegan butter, and a plant-based nut butter like almond or cashew.
How do I prevent the bars from sticking to the pan?
Line your pan with parchment paper, leaving some overhang to make it easy to lift the bars out once they’re set.
Can I use a different cereal for this recipe?
Yes, you can experiment with puffed quinoa, cornflakes, or even crushed pretzels for a unique texture and flavor!
Pin This Recipe!

Homemade Crunch Bars Recipe Easy 4-Ingredient Treat

These homemade crunch bars are a quick and easy no-bake dessert made with just four ingredients. Perfect for satisfying sweet cravings or sharing with loved ones.
- Prep Time: 5 minutes
- Cook Time: 15 minutes
- Total Time: 20 minutes
- Yield: 16 bars 1x
- Category: Dessert
- Cuisine: American
Ingredients
- 2 cups (340g) milk chocolate chips
- 1/2 cup (125g) peanut butter
- 2 tablespoons (30g) unsalted butter
- 3 cups (75g) crispy rice cereal
Instructions
- In a microwave-safe bowl, combine milk chocolate chips, peanut butter, and unsalted butter. Microwave in 30-second intervals, stirring between each, until the mixture is smooth and fully melted. This should take about 1-2 minutes.
- Stir in crispy rice cereal, ensuring every piece is coated evenly with the chocolate mixture.
- Pour the mixture into a parchment-lined 8×8-inch baking pan. Use a spatula to spread it evenly and press it down gently to compact the bars.
- Place the pan in the refrigerator and let the bars chill for at least 1 hour, or until they are firm and set.
- Once the bars are set, lift them out of the pan using the parchment paper. Use a sharp knife to cut them into squares or rectangles. Enjoy!
Notes
[‘Don’t overheat the chocolate; use short microwave intervals and stir frequently.’, ‘Work quickly to transfer the mixture to the pan before it starts to set.’, ‘Use fresh crispy rice cereal for maximum crunch.’, ‘Customize the sweetness by adding honey or sugar if using dark chocolate.’, ‘Experiment with toppings like crushed pretzels, shredded coconut, or colorful sprinkles.’]
Nutrition
- Serving Size: 1 bar
- Calories: 150
- Sugar: 12
- Sodium: 50
- Fat: 8
- Saturated Fat: 4
- Carbohydrates: 18
- Fiber: 1
- Protein: 3
Keywords: Crunch bars, no-bake dessert, chocolate treat, easy recipe, homemade candy bars


