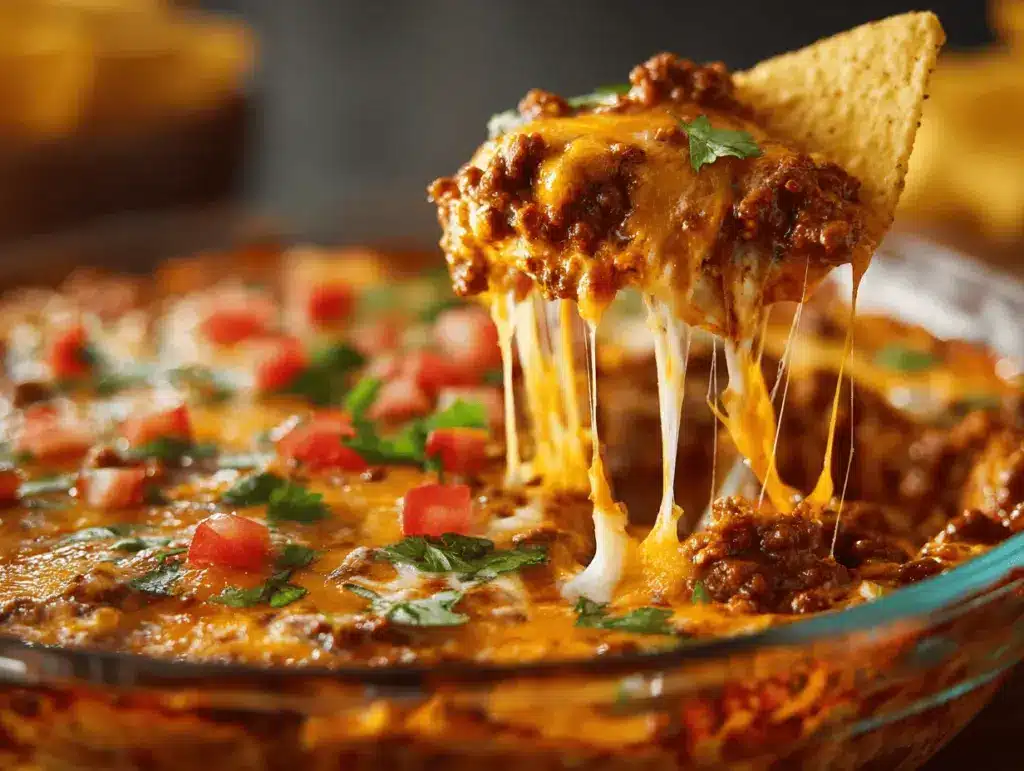
The second the smell of sizzling taco meat, bubbling cheese, and smoky spices fills my kitchen, I know it’s game day. There’s nothing that gets my friends more excited than my loaded Tex-Mex cheesy taco dip — I’m not even kidding, people practically hover around the oven waiting for it to come out. This isn’t just any dip; it’s the kind you’ll want to scoop up straight from the skillet, loaded with savory beef, zesty salsa, and ooey-gooey cheese.
I first whipped up this cheesy taco dip on a whim years ago, trying to use up leftovers before a last-minute football watch party. One bite, and I was hooked — and so was everyone else. Over countless batches (and a few accidental spicy mishaps), I’ve fine-tuned this recipe into my ultimate crowd-pleaser. Whether you’re hosting a Super Bowl bash, a family movie night, or just need a reason to eat chips for dinner, this loaded Tex-Mex cheesy taco dip is your MVP.
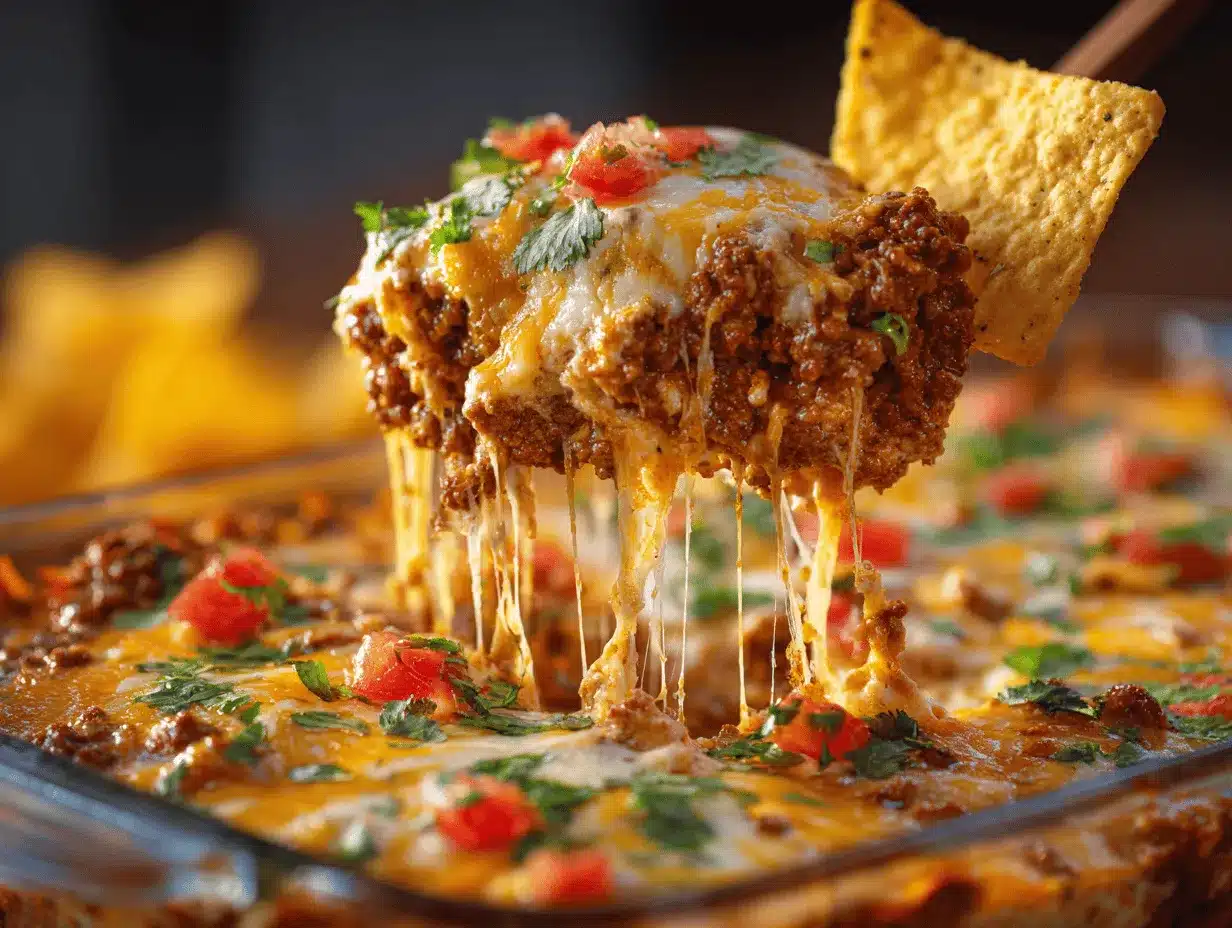
What sets this dip apart? It’s all about the layers: hearty seasoned ground beef, creamy refried beans, tangy salsa, and a golden blanket of cheese, finished with all the Tex-Mex fixings you love. Plus, it’s quick, easy, and seriously foolproof. Trust me, after making this more times than I can count, I can say with confidence you’ll never look at store-bought dip the same way again. If you’re searching for a game day appetizer that’ll disappear faster than the commercials, you’ve found it — loaded Tex-Mex cheesy taco dip is pure comfort, no matter the score.
Why You’ll Love This Loaded Tex-Mex Cheesy Taco Dip
- Quick & Easy: From skillet to table in under 30 minutes — no fancy prep, just straightforward steps. Perfect for those last-minute get-togethers or halftime snacks.
- Simple Ingredients: Nothing weird or hard to find here. Chances are, you already have most of what you need in your pantry or fridge.
- Perfect for Game Day (or Any Day): This loaded Tex-Mex cheesy taco dip is the hero of parties, potlucks, and family movie nights. It’s hearty enough to satisfy a hungry crowd but easy enough to whip up on a random Tuesday.
- Crowd-Pleaser: Every time I make this, there’s not a single scoop left in the dish. Even the pickiest eaters (and my neighbor’s kids, who claim to hate beans) can’t resist it.
- Unbelievably Delicious: Creamy, cheesy, perfectly seasoned, and packed with all the Tex-Mex flavors you crave. Layered dips can sometimes turn out bland, but not this one — every bite is loaded with flavor.
Here’s the real difference: I blend the taco seasoning right into the beef, then layer it over warm refried beans for extra comfort. Using a combo of melty cheddar and Monterey Jack gives the best cheesy pull (I’ve experimented with dozens of cheese blends — this combo nails it). And the best part? The topping bar — you get to pile on fresh pico, scallions, jalapeños, or whatever you love. It’s infinitely customizable.
This isn’t just a dip. It’s a guaranteed good time, the kind of dish that makes everyone linger around the table just a little longer. If you want something that feels homemade, a little nostalgic, and totally crave-worthy, this loaded Tex-Mex cheesy taco dip is it. No stress, no complicated steps — just big, bold flavor that brings people together. That’s why it’s my go-to for every game day, every time.
What Ingredients You Will Need
This recipe brings together simple, everyday ingredients to create a dip that tastes like you spent all afternoon in the kitchen. Most of these are pantry staples — and if you’re missing something, there’s an easy swap. Here’s what you’ll need for your irresistible loaded Tex-Mex cheesy taco dip:
- For the meat layer:
- 1 pound (450g) ground beef (I prefer 85% lean — juicy, but not greasy)
- 1 packet (1 oz/28g) taco seasoning (or homemade, if you have it)
- 1/4 cup (60ml) water (helps the seasoning soak in)
- For the creamy base:
- 1 (15 oz/425g) can refried beans (for that silky, creamy layer)
- 1/2 cup (120g) sour cream (adds tang and keeps things rich)
- 1/2 cup (120g) cream cheese, softened (makes the beans extra smooth)
- For the Tex-Mex kick:
- 1 cup (240g) salsa (chunky or smooth — your choice, but drain excess liquid if it’s super watery)
- 1 (4 oz/113g) can diced green chilies, drained (adds flavor without too much heat)
- For the cheesy layer:
- 1 cup (110g) shredded cheddar cheese (sharp or mild, your call)
- 1 cup (110g) shredded Monterey Jack cheese (melts beautifully)
- For topping (optional, but recommended):
- Chopped fresh cilantro
- Sliced green onions
- Sliced jalapeños (fresh or pickled)
- Diced tomatoes or pico de gallo
- Sliced black olives
- Shredded lettuce (for taco salad vibes!)
- Extra sour cream or guacamole
Ingredient notes & swaps:
- Ground beef: Try ground turkey or chicken for a lighter dip. For a vegetarian version, use plant-based “meat” crumbles or extra beans.
- Refried beans: Black bean or pinto bean refried style works. You can use homemade, too — sometimes I mash up canned black beans with a splash of lime.
- Cheese: Pepper Jack, Colby Jack, or a Mexican cheese blend all melt well. Go for what you love!
- Sour cream & cream cheese: Swap with Greek yogurt or dairy-free alternatives if needed.
- Salsa: Roasted tomato salsa, salsa verde, or even corn salsa for a fun twist.
Pro tip: I usually grab the store brand for most ingredients — but for cheese, splurge on a block and shred it yourself. It melts so much better, promise.
Equipment Needed
You don’t need a fancy kitchen or a ton of gadgets for this loaded Tex-Mex cheesy taco dip. Here’s what I use every time (and a few budget-friendly swaps if you don’t have everything):
- Oven-safe skillet or baking dish: A 10- or 12-inch cast-iron skillet is my go-to for presentation and heat retention (keeps the dip warm longer). No skillet? A 9×13-inch (23x33cm) glass or ceramic baking dish works great, too.
- Large non-stick skillet or sauté pan: For browning the beef. If you have only one skillet, just wipe it out between steps.
- Mixing bowls: For combining the creamy base and toppings.
- Wooden spoon or spatula: For stirring — I’ve snapped a plastic spatula once on thick dips, so stick with something sturdy.
- Cheese grater: If you’re shredding cheese yourself (highly recommended for best meltiness — pre-shredded cheese can be clumpy).
- Measuring cups and spoons: To keep your ratios just right.
- Oven mitts: Don’t be like me and try to grab a hot skillet bare-handed. Rookie mistake — it hurts!
If you’re tight on space or on a budget, disposable aluminum pans work in a pinch, and you can even microwave the dip in a glass bowl (just adjust the time and skip the oven step). Just keep an eye on things so nothing scorches!
How to Make Loaded Tex-Mex Cheesy Taco Dip
- Preheat the oven: Set your oven to 375°F (190°C). This gives you time to prep everything else — no waiting around.
- Brown the meat: Heat your skillet over medium heat. Add 1 pound (450g) ground beef and cook, breaking it up with a wooden spoon, until browned (about 5-7 minutes). If there’s lots of grease, carefully drain most of it off (leave a little for flavor).
- Season: Sprinkle in 1 packet (1 oz/28g) taco seasoning and pour in 1/4 cup (60ml) water. Stir well and simmer for 2-3 minutes, until the liquid’s mostly gone and the beef smells irresistible. Take off the heat and set aside.
- Mix the creamy base: In a medium bowl, combine 1 can (15 oz/425g) refried beans, 1/2 cup (120g) sour cream, and 1/2 cup (120g) softened cream cheese. Beat together until smooth and creamy — lumps are fine, just aim for spreadable.
- Assemble the layers: Spread the creamy bean mixture in the bottom of your oven-safe skillet or baking dish. Top evenly with the seasoned beef.
- Add salsa and chilies: Spoon 1 cup (240g) salsa over the beef, then scatter 1 can (4 oz/113g) drained diced green chilies on top. Try not to dump in too much salsa liquid — it can make the dip watery.
- Cheese it up: Sprinkle 1 cup (110g) shredded cheddar and 1 cup (110g) shredded Monterey Jack cheese all over the top. Don’t skimp — the melty cheese is what makes people fight over the corner pieces.
- Bake: Place the skillet or dish in the preheated oven. Bake for 15-18 minutes, or until the cheese is bubbly and starting to brown at the edges. If you want a golden top, broil for 1-2 minutes at the end, watching closely (it goes from perfect to burnt in seconds — don’t walk away!).
- Finish with toppings: Let the dip cool for 5 minutes (it’s lava-hot straight from the oven, trust me). Scatter your favorite toppings over the cheese: cilantro, green onions, jalapeños, tomatoes, olives, and more.
- Serve: Scoop up with tortilla chips, pita wedges, or crunchy veggies. Watch it disappear!
Troubleshooting tips: If your dip looks greasy, let it rest a minute — the cheese will firm up a bit as it cools. If it’s watery, you probably added salsa with too much liquid; drain it next time. Forgot to soften the cream cheese? Microwave it in 10-second bursts until spreadable.
Personal tip: If I’m in a hurry, I prep everything the night before and bake it off just before guests arrive. It’s a total lifesaver!
Cooking Tips & Techniques for the Best Cheesy Taco Dip
- Cheese matters: Shred your cheese fresh off the block. Pre-shredded has anti-caking agents that keep it from melting smoothly.
- Drain excess liquid: If your salsa is super watery, strain it through a sieve for a minute or two. This keeps the whole dip from getting soupy.
- Layer smart: Always put the beans at the bottom — they create a sturdy base that holds up to scooping. Trust me, I tried reversing it once and ended up with a soggy mess.
- Don’t overbake: Once the cheese is bubbling, it’s done. Overbaking dries out the beef and makes the edges tough.
- Multi-tasking tip: While the beef browns, mix up your creamy base and prep your toppings. It makes the assembly lightning fast.
- For a crowd: Double the recipe and use a big casserole dish. I did this for a neighborhood potluck and it worked like a charm.
- Keep it hot: If you’re serving at a party, keep the dip in a warm oven (about 200°F/93°C) or transfer it to a slow cooker set on “warm.” Nobody likes cold, congealed cheese!
Personal lesson learned: Once, I forgot to drain the salsa and ended up with a soupy dip that looked more like taco soup! Always drain or use a thick salsa. And don’t be afraid to play with the spice level — add more chilies or hot salsa for extra kick, or keep it mild for kids.
Variations & Adaptations for Every Taste
The beauty of this loaded Tex-Mex cheesy taco dip is how customizable it is. Here are a few ways you can switch things up:
- Vegetarian: Skip the beef and use plant-based crumbles, cooked lentils, or just double the beans. I’ve made this for my vegetarian friends using chipotle black beans, and it’s just as hearty.
- Low-carb/keto: Ditch the beans and layer seasoned beef, salsa, and cheese instead. Serve with bell pepper strips or pork rinds for scooping.
- Spicy: Use hot taco seasoning, pepper jack cheese, and add extra jalapeños or a drizzle of hot sauce on top.
- Chicken version: Shredded rotisserie chicken (seasoned with taco spices) makes a lighter, but still super satisfying, spin.
- Allergen swaps: Dairy-free cheese and plant-based sour cream work well if you need to keep it dairy-free. Gluten-free taco seasoning is easy to find, too.
My personal favorite twist: I sometimes stir in a handful of frozen corn or black beans for extra texture and color. Or, for a smoky touch, use fire-roasted salsa and a pinch of smoked paprika in the beef.
Serving & Storage Suggestions
This loaded Tex-Mex cheesy taco dip tastes best hot and fresh out of the oven, but it’s surprisingly forgiving if you need to make it ahead or stash leftovers.
- Serving: Let it cool for a few minutes before serving (nobody wants to burn their tongue!). Serve straight from the skillet or dish with a big bowl of tortilla chips, or spoon some over warm tortillas for a DIY taco bar. It’s also great with crisp veggies like bell peppers and celery sticks.
- Beverage pairings: Cold Mexican lagers, margaritas, or even a fizzy lime soda are perfect matches. For kids, try fruit punch or limeade.
- Storage: Cover leftovers tightly and refrigerate for up to 3 days. The flavors meld together and honestly, it tastes even better on day two.
- Reheating: Warm individual portions in the microwave (about 1-2 minutes, stirring halfway) or reheat the whole dish in the oven at 350°F (175°C) until heated through (about 10 minutes). If it looks dry, splash in a little extra salsa before reheating.
- Freezing: I don’t recommend freezing — the cheese and beans can get weirdly grainy — but if you do, freeze before baking and thaw completely before reheating.
Bonus tip: Leftover dip makes an amazing nacho topping, burrito filling, or even a hearty breakfast scramble the next day. Don’t let a single scoop go to waste!
Nutritional Information & Benefits
Here’s a general idea of what you’re getting with a hearty scoop of this loaded Tex-Mex cheesy taco dip (about 1/10th of the recipe):
- Calories: ~320
- Protein: 16g
- Fat: 19g (mostly from cheese and beef – you can trim by using leaner meat and low-fat dairy)
- Carbs: 18g (mainly from beans and salsa)
Health highlights: You get a good dose of protein from the beef and cheese, plus fiber from the beans. Using reduced-fat cheese and sour cream can lighten it up, and adding veggies on top brings even more nutrition. This recipe is naturally gluten-free if you use a GF taco seasoning and serve with gluten-free chips.
Personal note: I love that this dip lets me sneak in extra protein and fiber, making it a “better for you” snack that actually fills you up. Just be mindful of allergens (dairy, gluten in some seasonings, and potential soy in some brands).
Conclusion
If you’re searching for a game day appetizer that’s easy, crowd-pleasing, and absolutely loaded with flavor, this loaded Tex-Mex cheesy taco dip is the answer. From its creamy, savory layers to that golden, melty cheese on top, there’s a reason it’s the first thing gone at every party.
What I love most is how flexible it is — you can make it spicier, lighter, or meatless, and it always turns out delicious. Plus, it’s a breeze to prep ahead, so you can actually enjoy your own party. I’ve made this recipe a hundred different ways and it always brings people together (and honestly, isn’t that what food is for?).
If you try this recipe, let me know how you make it your own! Drop a comment, share your favorite toppings, or tag me if you post it on Pinterest or Instagram. Now, go grab your chips and dig in — you won’t regret it!
Frequently Asked Questions
Can I make this loaded Tex-Mex cheesy taco dip ahead of time?
Yes! Assemble the dip (without toppings), cover, and refrigerate for up to 24 hours. When ready to serve, bake as directed, adding a few extra minutes if it’s cold from the fridge.
What can I use instead of ground beef?
Ground turkey, chicken, or plant-based crumbles all work great. You can also double the beans for a vegetarian version — I’ve done this for Meatless Monday and nobody noticed!
How can I make this dip less spicy?
Use mild taco seasoning, mild salsa, and skip the jalapeños. If you’re serving kids, start mild — you can always add hot sauce on the side for the spice lovers.
Can I freeze the cheesy taco dip?
It’s best fresh, but you can freeze the assembled (unbaked) dip. Thaw overnight in the fridge and bake as usual. The texture may change slightly, but it’ll still taste great.
What should I serve with this dip?
Tortilla chips are classic, but pita chips, crunchy veggies, or even little flour tortillas are fun. Sometimes I set out a taco salad bar and let everyone build their own plate with dip as the star.
Pin This Recipe!

Loaded Tex-Mex Cheesy Taco Dip

This loaded Tex-Mex cheesy taco dip is the ultimate game day crowd-pleaser, featuring layers of seasoned beef, creamy beans, tangy salsa, and plenty of melty cheese. Quick, easy, and customizable, it’s perfect for parties, potlucks, or any time you need a crave-worthy appetizer.
- Prep Time: 10 minutes
- Cook Time: 18 minutes
- Total Time: 28 minutes
- Yield: 10 servings 1x
- Category: Appetizer
- Cuisine: Tex-Mex
Ingredients
- 1 pound ground beef (85% lean preferred)
- 1 packet (1 oz) taco seasoning
- 1/4 cup water
- 1 (15 oz) can refried beans
- 1/2 cup sour cream
- 1/2 cup cream cheese, softened
- 1 cup salsa (drain excess liquid if watery)
- 1 (4 oz) can diced green chilies, drained
- 1 cup shredded cheddar cheese
- 1 cup shredded Monterey Jack cheese
- Chopped fresh cilantro (optional, for topping)
- Sliced green onions (optional, for topping)
- Sliced jalapeños, fresh or pickled (optional, for topping)
- Diced tomatoes or pico de gallo (optional, for topping)
- Sliced black olives (optional, for topping)
- Shredded lettuce (optional, for topping)
- Extra sour cream or guacamole (optional, for topping)
Instructions
- Preheat the oven to 375°F (190°C).
- Heat a large skillet over medium heat. Add ground beef and cook, breaking it up, until browned (about 5-7 minutes). Drain excess grease, leaving a little for flavor.
- Add taco seasoning and water to the beef. Stir well and simmer for 2-3 minutes until most of the liquid is gone. Remove from heat and set aside.
- In a medium bowl, combine refried beans, sour cream, and softened cream cheese. Mix until smooth and creamy.
- Spread the creamy bean mixture in the bottom of an oven-safe skillet or baking dish.
- Top evenly with the seasoned beef.
- Spoon salsa over the beef, then scatter diced green chilies on top. Avoid adding too much salsa liquid.
- Sprinkle shredded cheddar and Monterey Jack cheese evenly over the top.
- Bake for 15-18 minutes, or until the cheese is bubbly and starting to brown at the edges. For a golden top, broil for 1-2 minutes at the end, watching closely.
- Let the dip cool for 5 minutes. Add desired toppings such as cilantro, green onions, jalapeños, tomatoes, olives, and more.
- Serve hot with tortilla chips, pita wedges, or crunchy veggies.
Notes
For best results, shred cheese from a block for optimal melt. Drain salsa if watery to prevent a soupy dip. Customize with your favorite toppings and adjust spice level as desired. Can be assembled ahead and baked before serving. For a vegetarian version, use plant-based crumbles or double the beans.
Nutrition
- Serving Size: About 1/10th of the recipe
- Calories: 320
- Sugar: 3
- Sodium: 800
- Fat: 19
- Saturated Fat: 9
- Carbohydrates: 18
- Fiber: 3
- Protein: 16
Keywords: taco dip, cheesy dip, Tex-Mex appetizer, game day dip, party dip, crowd-pleaser, beef dip, layered dip, skillet dip, Super Bowl recipe