There’s something magical about the sweet, smoky aroma of maple bacon wafting through the kitchen. The very first time I made maple bacon donut bars, I was instantly hooked – and honestly, so was my entire family. I’d seen maple bacon donuts in trendy coffee shops, but I wanted to make something a little more approachable (and way less fussy) for home bakers. That’s how these maple bacon donut bars became a household favorite!
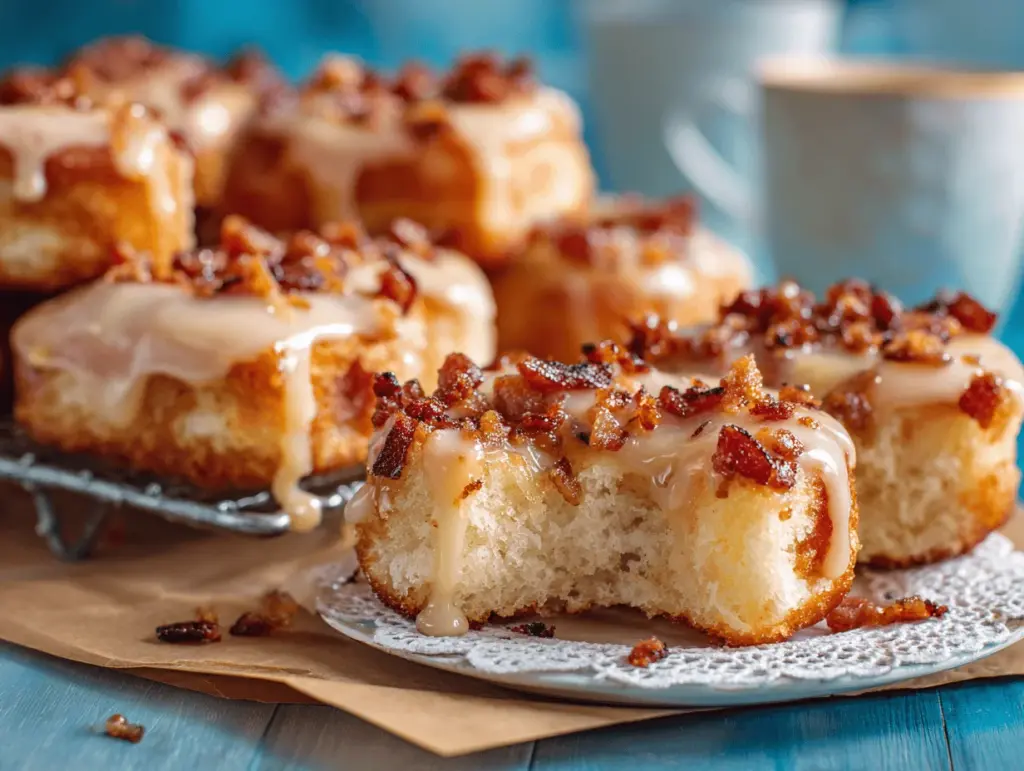
I’ll never forget the look on my friend’s face when she took her first bite – eyes closed, a big grin, and just a little maple glaze on her nose. That’s the kind of reaction you can expect from these maple bacon donut bars. Loaded with rich maple flavor, a soft, cake-like base, and plenty of crispy bacon, these bars walk that perfect line between breakfast treat and indulgent dessert. They’re a total crowd-pleaser for brunches, holiday mornings, or whenever you’re craving something a little extra special.
What I love most is how easy this maple dessert recipe is. You don’t need any fancy donut pans or a deep fryer – just a simple baking dish and your favorite spatula. Over the years, I’ve tweaked and tested this recipe more times than I can count, making sure each batch comes out perfectly soft, fluffy, and bursting with maple goodness. If you love donuts but want something a little more fuss-free, these maple bacon donut bars are about to become your new favorite treat. Let’s get baking!
Why You’ll Love This Recipe
- Quick & Easy: These maple bacon donut bars come together in under an hour, no frying required. Perfect for those spontaneous sweet cravings or last-minute brunch plans.
- Simple Ingredients: You probably have everything you need in your pantry – no hunting for hard-to-find items. Maple syrup, bacon, and basic baking staples are all it takes.
- Perfect for Any Occasion: They’re a hit at brunches, potlucks, showers, and even birthday parties (trust me, adults love them as much as kids!).
- Crowd-Pleaser: The combination of salty, crispy bacon with sweet, rich maple glaze is always a winner. I’ve never seen leftovers last more than a day!
- Unbelievably Delicious: The texture is soft and moist, almost like a coffee cake, but with that unmistakable donut flavor. The salty bacon on top? Next-level.
After testing this recipe with different types of bacon and tweaking the glaze for maximum maple punch, I can honestly say these bars are better than anything you’ll find at a bakery. Blending the maple syrup right into the batter and the glaze gives every bite that deep, caramel-y flavor you crave. Plus, you don’t have to fuss with yeast, rolling dough, or splattering oil – just mix, bake, and enjoy.
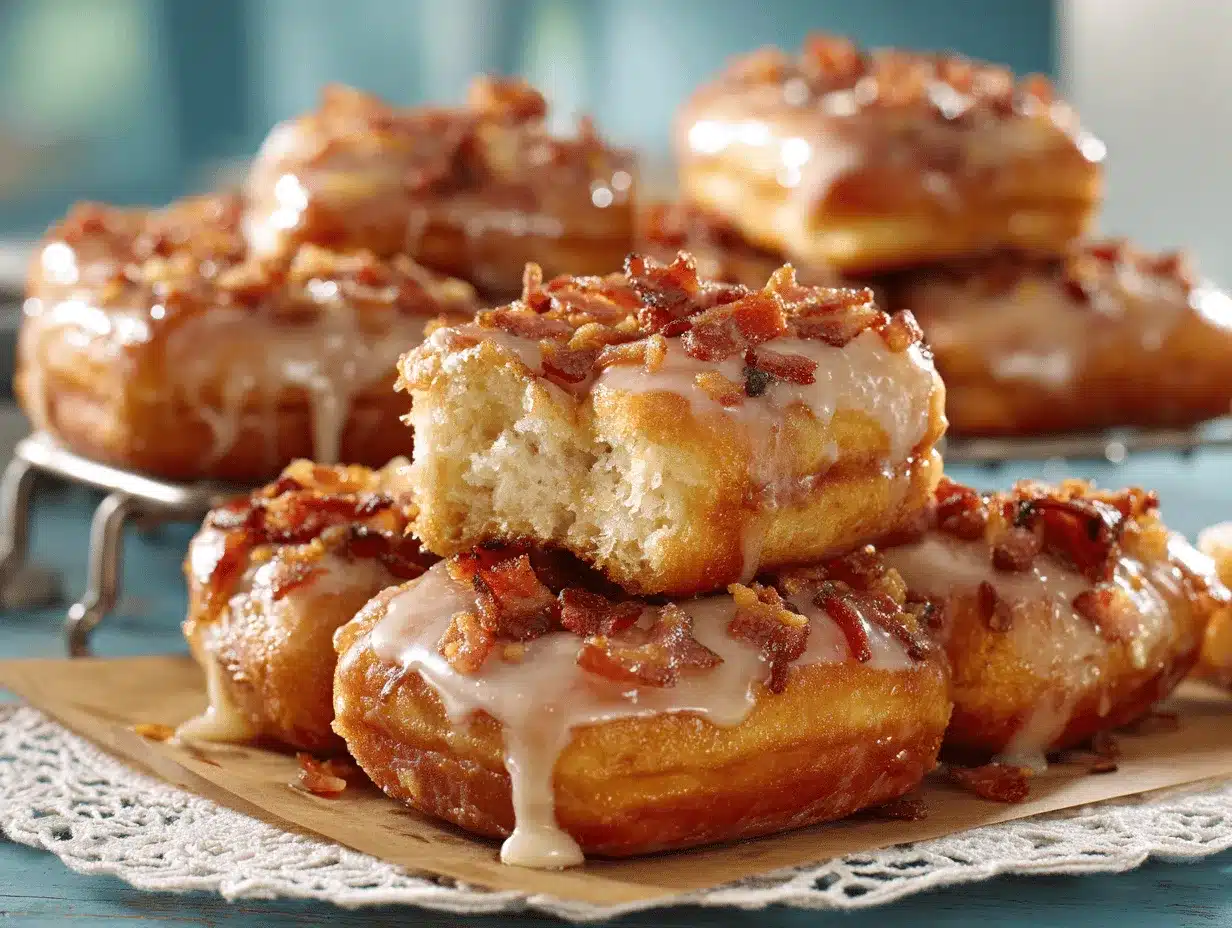
What really sets this maple bacon donut bars recipe apart is the balance. The sweetness of the glaze is perfectly offset by the savory bacon, and the bars themselves are sturdy enough to pick up but soft enough to melt in your mouth. It’s comfort food at its best – fun, nostalgic, and just a little bit unexpected. You’ll want to bake these bars on repeat, whether you’re celebrating or just need a pick-me-up on a rainy afternoon.
What Ingredients You Will Need
This recipe uses simple, familiar ingredients that come together for a bold, bakery-worthy flavor. Most of these are pantry staples, but don’t be afraid to swap or tweak based on what you have!
- For the Donut Bar Base:
- All-purpose flour (2 cups / 250g) – gives the bars structure and softness
- Granulated sugar (3/4 cup / 150g) – just enough for sweetness without overpowering the maple
- Baking powder (2 tsp / 8g) – helps the bars rise and stay fluffy
- Baking soda (1/4 tsp / 1g) – for a bit of extra lift
- Salt (1/2 tsp / 3g) – balances the sweetness and enhances flavor
- Unsalted butter, melted (1/2 cup / 115g) – adds richness and moisture (use a quality butter if you can!)
- Large eggs (2, room temperature) – binds everything together
- Whole milk (1/2 cup / 120ml) – makes the bars tender; you can use almond milk or oat milk if needed
- Pure maple syrup (1/3 cup / 80ml) – for that unmistakable maple flavor (use Grade A dark if possible)
- Vanilla extract (1 tsp / 5ml) – rounds out the flavors
- For the Maple Glaze:
- Powdered sugar (1 1/2 cups / 180g) – makes the glaze smooth and sweet
- Pure maple syrup (3 tbsp / 45ml) – more maple flavor, obviously!
- Milk (2-3 tbsp / 30-45ml) – thins the glaze to a pourable consistency
- Vanilla extract (1/2 tsp / 2.5ml) – a tiny splash for depth
- Pinch of salt – optional, but helps balance the sweetness
- For the Bacon Topping:
- Thick-cut bacon (5-6 slices, cooked crispy and chopped) – the star of the show! Applewood smoked is my go-to, but any favorite works
- Extra maple syrup (1 tbsp / 15ml, optional) – for brushing the bacon if you want added shine and flavor
Substitution Tips: Use gluten-free flour blend for a celiac-friendly version (I’ve had good luck with Bob’s Red Mill 1-to-1). Turkey bacon works if you’re avoiding pork, just cook until crisp. Want it dairy free? Use a vegan butter and plant milk. You can even try coconut sugar in place of granulated sugar for a deeper flavor.
Pro tip: Always use real maple syrup here – the pancake syrup stuff just doesn’t have the same magic!
Equipment Needed
- 9×13-inch baking pan (23x33cm) – for perfectly thick bars; a metal pan gives a slightly crisper edge, but glass works too
- Mixing bowls – at least two, one for wet and one for dry ingredients
- Whisk and sturdy spatula – for mixing batter and glaze
- Wire rack – for cooling and glazing the bars
- Sharp knife – for chopping bacon (and for cutting the bars, if you want those perfect edges)
- Parchment paper (optional) – makes removing the bars a breeze, especially if your pan is prone to sticking
If you don’t have a 9×13 pan, you can use two 8×8 pans or even a rimmed quarter sheet tray (just watch the baking time). I’ve even used a muffin tin in a pinch – the bars turn into adorable donut muffins! For best results, keep your whisk and spatula clean between steps. If you’re using a glass pan, reduce the oven temp by 25°F (about 15°C) to prevent over-browning.
My favorite budget hack: line the pan with parchment and leave a little overhang for easy lifting. Less mess, less stress!
Preparation Method
- Preheat and Prep:
Preheat your oven to 350°F (175°C). Grease your 9×13-inch (23x33cm) pan with butter or nonstick spray (or line with parchment). This little prep step saves you a headache later! - Cook the Bacon:
Lay 5-6 slices of thick-cut bacon on a lined baking sheet. Bake in the preheating oven for about 18-22 minutes, or until crispy. Drain on paper towels and chop once cooled. If you want extra maple kick, brush with a little maple syrup during the last few minutes of baking. Set aside. - Mix the Dry Ingredients:
In a large bowl, whisk together 2 cups (250g) flour, 3/4 cup (150g) sugar, 2 tsp (8g) baking powder, 1/4 tsp (1g) baking soda, and 1/2 tsp (3g) salt. Whisking helps prevent clumps and makes for a lighter bar. - Combine the Wet Ingredients:
In another bowl, whisk together 1/2 cup (115g) melted butter (cooled slightly), 2 large eggs, 1/2 cup (120ml) milk, 1/3 cup (80ml) pure maple syrup, and 1 tsp (5ml) vanilla extract. Make sure your eggs and milk are at room temperature – it helps everything blend smoothly and prevents curdling. - Make the Batter:
Pour the wet ingredients into the dry ingredients. Gently fold with a spatula until just combined – don’t overmix! The batter should be thick but smooth. If you see a few tiny lumps, that’s totally fine. Overmixing can make the bars tough, so less is more here. - Spread and Bake:
Spread the batter evenly into your prepared pan. Bake for 22-27 minutes, or until a toothpick inserted in the center comes out clean or with a few moist crumbs. The top should be lightly golden and spring back when touched. - Cool:
Let the bars cool in the pan for about 10 minutes, then lift them out using the parchment (if you used it) and transfer to a wire rack. Cool completely before glazing. Warm bars will cause the glaze to run right off – I learned this the hard way! - Make the Maple Glaze:
In a bowl, whisk together 1 1/2 cups (180g) powdered sugar, 3 tbsp (45ml) maple syrup, 2-3 tbsp (30-45ml) milk, 1/2 tsp (2.5ml) vanilla, and a pinch of salt. You want a thick but pourable glaze – add milk a little at a time until it’s just right. - Glaze and Top:
Drizzle or pour the glaze over the cooled bars. While the glaze is still wet, sprinkle the chopped bacon all over the top. For a little sparkle, you can drizzle with extra maple syrup too. - Slice and Serve:
Let the glaze set for at least 20 minutes before slicing into bars. For the cleanest cuts, wipe your knife between slices. Now, dig in!
If your glaze is too thick, add a splash of milk. Too thin? A bit more powdered sugar does the trick! If your bars seem dry, double-check your oven temp and make sure you’re not overbaking – a few minutes makes a big difference. And don’t forget to taste a bit of bacon before it goes on the bars… for quality control, of course!
Cooking Tips & Techniques
- Bacon Matters: Use thick-cut bacon for the best texture. Thin bacon will get lost in the glaze and doesn’t have that satisfying crunch.
- Don’t Overmix: This is a classic pitfall with almost any quick bread or donut bar. Stir just until the flour disappears – trust me, I’ve made dense bars before and it’s never as fun.
- Glaze Consistency: The glaze should be thick enough to coat the back of a spoon but still run off in ribbons. If it’s too thin, the bacon will slide right off. Too thick, and it won’t spread nicely.
- Baking Time: Every oven runs a little differently. Start checking for doneness at the 22-minute mark. A toothpick with a few moist crumbs is perfect.
- Multitasking: While the bars bake, cook your bacon. This saves time and keeps your kitchen from getting too hot (especially helpful in summer!).
- Flavor Intensity: For an even deeper maple flavor, use a dark or robust maple syrup. The lighter stuff is fine, but the dark syrup really shines through.
Once, I forgot to let the bars cool completely before glazing… total mess. Now, I always set a timer and use that time to chop the bacon or clean up. If you want super-crispy bacon, bake it on a rack so the fat drips away. And if you’re ever short on time, use pre-cooked bacon – it’s not quite as good, but in a pinch it totally works.
Consistency is key! Use a kitchen scale for the flour and sugar if you have one – it really helps with repeatable results. And don’t be shy about the bacon – more is more, right?
Variations & Adaptations
- Gluten-Free: Substitute your favorite gluten-free flour blend (like Bob’s Red Mill 1-to-1). I’ve tested this, and the bars turn out just as soft and delicious.
- Maple Pecan Donut Bars: Not a bacon fan? Swap the bacon for toasted chopped pecans. The maple-pecan combo is classic and just as satisfying.
- Vegan-Friendly: Use a plant-based butter, dairy-free milk, and skip the bacon. Top with coconut bacon or candied walnuts for crunch.
- Seasonal Twist: In fall, add 1 tsp cinnamon and 1/4 tsp nutmeg to the batter for a cozy vibe. Or, top with dried cranberries along with the bacon for a sweet-tart pop.
- Different Pan Sizes: Make donut “bites” by baking in a mini muffin tin – just reduce baking time to about 12-15 minutes.
- Allergen Swaps: Nut allergy? Skip the nuts and stick with bacon or seeds. Dairy allergy? Use oat or almond milk, and a dairy-free butter substitute.
I once made these bars with coconut sugar and coconut milk for a friend who can’t have dairy – the bars had a lovely caramel undertone! Don’t be afraid to play with flavors and toppings – that’s how I ended up with the maple bacon combo in the first place.
Serving & Storage Suggestions
These maple bacon donut bars are best served at room temperature or slightly warm. For a bakery-style look, slice into rectangles and stack them up on a pretty platter. They’re great with a strong cup of coffee, a cold glass of milk, or even a maple latte if you’re feeling fancy.
If you want to get creative, top each bar with an extra drizzle of maple syrup or a dusting of powdered sugar just before serving. For brunch buffets, cut the bars into bite-sized squares and serve with toothpicks for easy grabbing.
Store leftovers in an airtight container at room temperature for up to 2 days. If you need to keep them longer, refrigerate for up to 5 days – just know that the bacon may lose a bit of its crispness. For best results, reheat individual bars in the microwave for 10-15 seconds or in a low oven (300°F/150°C) for about 5 minutes.
You can also freeze the bars (unglazed) for up to 2 months. Thaw overnight in the fridge, glaze and top with fresh bacon before serving. I actually think the maple flavor gets even better after a day or two!
Nutritional Information & Benefits
Each maple bacon donut bar (1 of 16) is roughly:
- Calories: 220
- Fat: 9g
- Carbohydrates: 32g
- Protein: 4g
- Sugar: 17g
Maple syrup is a natural sweetener that brings trace minerals like zinc and manganese, while bacon adds a dose of protein and that irresistible savory crunch. If you use whole milk and real butter, you’re also getting a little calcium and vitamin D.
This recipe isn’t low-calorie, but it’s definitely a treat worth savoring. For gluten-free or dairy-free diets, swap in the alternatives as noted above. Contains eggs, milk, and wheat; use care with allergens. When I’m craving something sweet but want to avoid fried donuts, these bars totally hit the spot – a little indulgence, a lot of happiness.
Conclusion
If you’re on the hunt for a dessert that’s easy, fun, and totally unforgettable, these maple bacon donut bars are the answer. They’re perfect for sharing, but honestly, I’ve caught myself sneaking a square or two for breakfast (don’t judge!). It’s the kind of recipe that brings people together – laughter, sticky fingers, and all.
Feel free to play with the flavors and toppings to make these bars your own. Whether you go classic with bacon or try something new like maple pecans, you’ll have a winner on your hands. I make these bars for family get-togethers, lazy weekends, and whenever I need a little pick-me-up. Every time, it feels like a warm hug in dessert form.
Give this maple bacon donut bars recipe a try and let me know what you think! Share your twists, leave a comment, or tag me with your creations. Happy baking and don’t forget – life is sweeter with a little maple and bacon!
FAQs
Can I make maple bacon donut bars ahead of time?
Yes! Bake the bars and store them (unglazed) for up to 2 days. Glaze and add bacon just before serving for the best texture.
What’s the best way to keep bacon crispy on the bars?
Use thick-cut bacon, cook until extra-crispy, and add it while the glaze is wet so it sticks. If you plan to store bars, keep bacon separate and add just before eating.
Can I use pancake syrup instead of real maple syrup?
You can, but the flavor won’t be as rich or authentic. For true maple flavor, always use real maple syrup.
How do I make these bars gluten-free?
Swap the all-purpose flour with a 1-to-1 gluten-free blend. I like Bob’s Red Mill – it works great and keeps the bars soft and moist.
Can I freeze maple bacon donut bars?
Absolutely! Freeze unglazed bars for up to 2 months. Thaw overnight, then glaze and top with fresh bacon for best results.
Pin This Recipe!
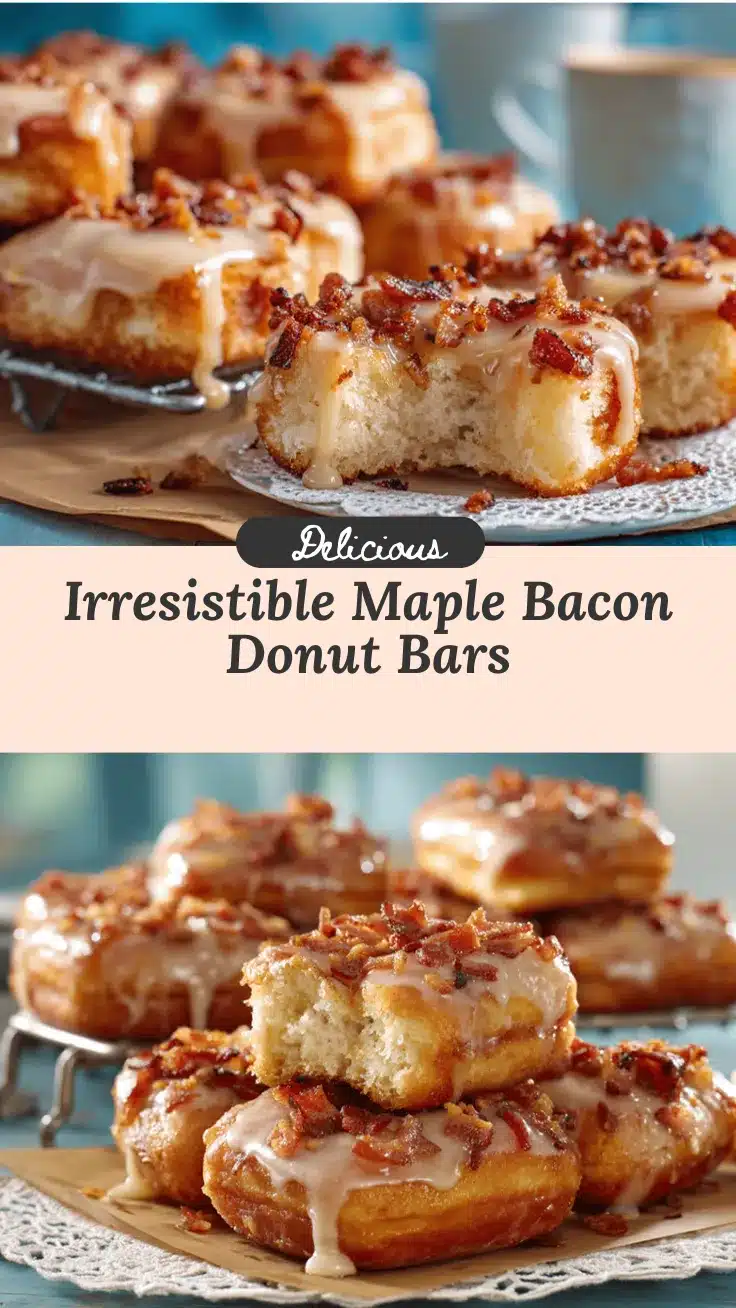
Maple Bacon Donut Bars

These Maple Bacon Donut Bars combine a soft, cake-like base with rich maple flavor and crispy bacon for a sweet and salty treat. Easy to make at home, they’re perfect for brunch, dessert, or any special occasion.
- Prep Time: 20 minutes
- Cook Time: 27 minutes
- Total Time: 47 minutes
- Yield: 16 bars 1x
- Category: Dessert
- Cuisine: American
Ingredients
- 2 cups all-purpose flour
- 3/4 cup granulated sugar
- 2 teaspoons baking powder
- 1/4 teaspoon baking soda
- 1/2 teaspoon salt
- 1/2 cup unsalted butter, melted
- 2 large eggs, room temperature
- 1/2 cup whole milk
- 1/3 cup pure maple syrup
- 1 teaspoon vanilla extract
- 1 1/2 cups powdered sugar
- 3 tablespoons pure maple syrup (for glaze)
- 2–3 tablespoons milk (for glaze)
- 1/2 teaspoon vanilla extract (for glaze)
- Pinch of salt (for glaze, optional)
- 5–6 slices thick-cut bacon, cooked crispy and chopped
- 1 tablespoon extra maple syrup (optional, for brushing bacon)
Instructions
- Preheat oven to 350°F (175°C). Grease a 9×13-inch baking pan or line with parchment paper.
- Lay bacon slices on a lined baking sheet and bake for 18-22 minutes until crispy. Drain, chop, and set aside. Optionally, brush with maple syrup during the last few minutes of baking.
- In a large bowl, whisk together flour, sugar, baking powder, baking soda, and salt.
- In another bowl, whisk together melted butter, eggs, milk, maple syrup, and vanilla extract.
- Pour wet ingredients into dry ingredients and gently fold with a spatula until just combined. Do not overmix.
- Spread batter evenly into prepared pan. Bake for 22-27 minutes, or until a toothpick inserted in the center comes out clean or with a few moist crumbs.
- Let bars cool in the pan for 10 minutes, then lift out and transfer to a wire rack to cool completely.
- For the glaze, whisk together powdered sugar, maple syrup, milk, vanilla, and a pinch of salt until thick but pourable.
- Drizzle or pour glaze over cooled bars. While glaze is wet, sprinkle chopped bacon on top. Optionally, drizzle with extra maple syrup.
- Let glaze set for at least 20 minutes before slicing into bars. Serve and enjoy.
Notes
Use thick-cut bacon for best texture. Do not overmix the batter to keep bars soft. Let bars cool completely before glazing. For gluten-free, use a 1-to-1 gluten-free flour blend. For dairy-free, use plant-based butter and milk. Bars can be frozen unglazed for up to 2 months.
Nutrition
- Serving Size: 1 bar (1/16 of recipe)
- Calories: 220
- Sugar: 17
- Fat: 9
- Carbohydrates: 32
- Protein: 4
Keywords: maple bacon donut bars, maple bacon dessert, easy donut bars, brunch bars, homemade donut bars, maple glaze, bacon dessert, breakfast treat


