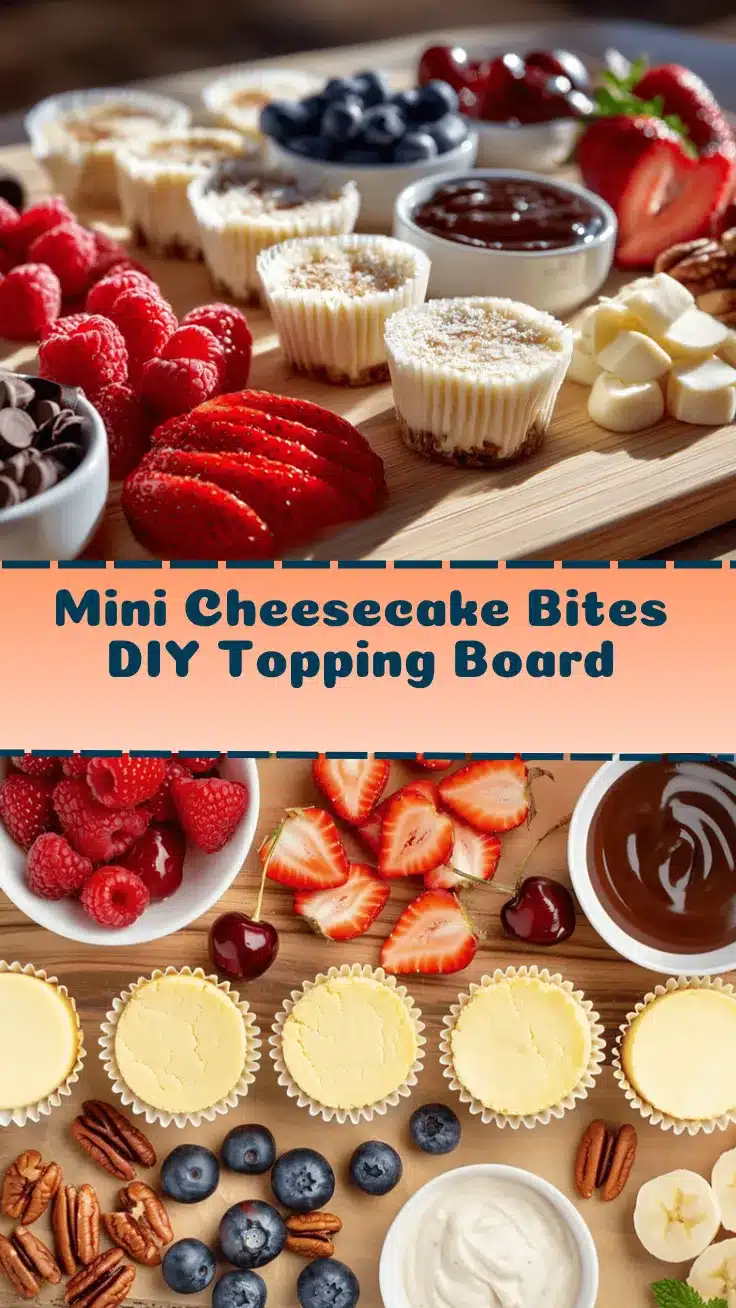
Okay, imagine this: you walk into a party and the first thing you see is a colorful, overflowing board loaded with mini cheesecake bites and bowls of crazy-good toppings. It’s the kind of spread that makes you smile before you even try a bite. Honestly, I’m convinced there’s nothing more fun (or delicious!) than a mini cheesecake bites dessert board, especially when there’s a DIY topping bar to go wild with.
I first started making these mini cheesecake bites during a family movie night. We’d always fight over the last slice of cheesecake, so whipping up little individual bites felt genius! The real magic happened when I set out bowls of toppings—crushed cookies, tangy fruit, gooey caramel, you name it. Suddenly, everyone was inventing their own “best” cheesecake bite, and it turned into a full-on taste test showdown. You know, it’s the kind of food memory that makes you want to do it again and again.
This recipe for mini cheesecake bites with a DIY topping bar is my go-to for everything from birthday parties to lazy Sunday brunches. It’s simple, adaptable, and—let’s face it—impossible to resist. Plus, if you love Pinterest-worthy desserts, this board is a total showstopper. I’ve tested different crusts, played with flavors, and even made gluten-free versions. Each time, the smiles get bigger, and the bites disappear faster. So get ready, because these mini cheesecake bites aren’t just dessert—they’re an experience!
Why You’ll Love This Mini Cheesecake Bites Dessert Board
- Quick & Easy: You can prep these mini cheesecake bites in under 45 minutes, making them perfect for spontaneous gatherings or when you just need a sweet treat, fast.
- Simple Ingredients: Most of the ingredients are pantry staples or easy-to-find groceries—no need for a special trip.
- Perfect for Any Occasion: From holiday parties to summer picnics, this dessert board fits right in. It’s also a hit at potlucks or game nights!
- Crowd-Pleaser: Kids and adults both go nuts for the DIY topping bar. Everyone gets to make their own masterpiece.
- Unbelievably Delicious: Creamy cheesecake meets crunchy crust and whatever toppings you dream up. Each bite is a mini adventure.
What makes my mini cheesecake bites dessert board stand out? It’s all about the details. I mix up the crust with a blend of graham crackers and shortbread for extra flavor. The cheesecake filling is super smooth (thank you, room-temperature cream cheese and just a touch of sour cream). And the DIY topping bar—seriously, it’s a game-changer. Set out bowls of fresh berries, chocolate shavings, caramel sauce, lemon curd, and even crushed pretzels. Your guests will love experimenting, and you’ll love how easy it is to please every palate.
Honestly, I’ve tried a lot of cheesecake bite recipes, but this one nails it for texture and flavor. No more dry cheesecake or soggy crusts. Plus, you get that “wow” moment when you set the board down. Whether you’re impressing guests or just making a cozy night at home feel special, this dessert board brings everyone together—one bite at a time!
What Ingredients You Will Need
This recipe keeps things simple but packs in flavor. You’ll probably have most of the ingredients on hand, and if not, substitutes are super easy. Here’s what you’ll need for the mini cheesecake bites and the DIY topping bar:
For the Mini Cheesecake Bites:
- Cream cheese (16 oz / 450g, full-fat, room temperature)—I swear by Philadelphia for the creamiest texture.
- Sour cream (1/2 cup / 120g)—adds a little tang and keeps the filling soft.
- Granulated sugar (2/3 cup / 135g)—just enough to sweeten, not overdo it.
- Large eggs (2, room temperature)—helps everything set up nicely.
- Vanilla extract (2 tsp)—real vanilla makes a difference, but paste works too.
- Graham crackers (1 cup / 100g, finely crushed)—for the classic crust. You can swap in shortbread or Oreos for flavor twists.
- Unsalted butter (4 tbsp / 60g, melted)—binds the crust and adds richness.
- Pinch of salt—balances the sweetness. You can skip if you use salted butter.
For the DIY Topping Bar:
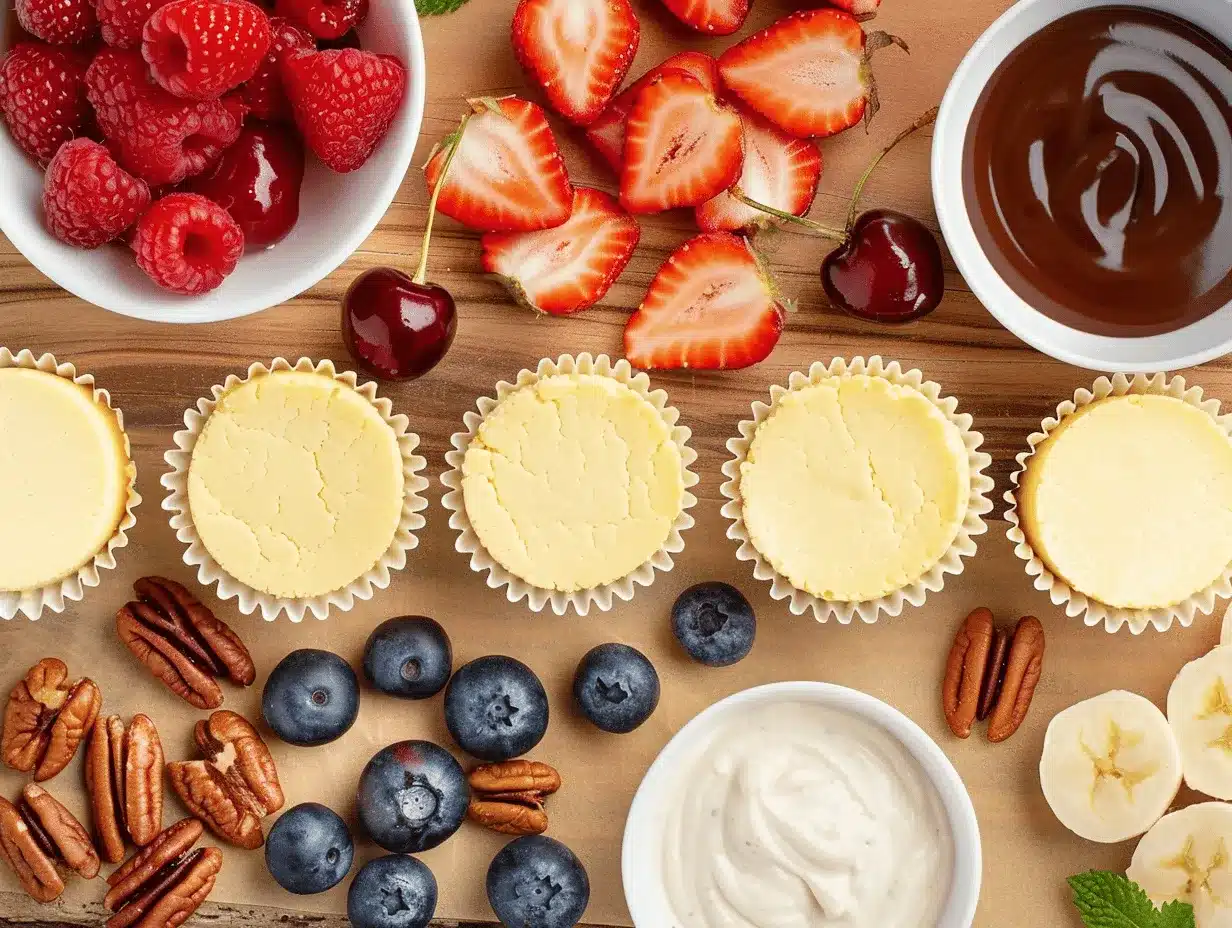
- Fresh berries (strawberries, blueberries, raspberries)—great for color and tartness.
- Chocolate chips or shavings—I like semi-sweet or dark for contrast.
- Caramel sauce—store-bought or homemade. Add a pinch of sea salt for extra wow.
- Lemon curd—adds zing (seriously, this is underrated on cheesecake).
- Crushed cookies (Oreos, graham crackers, vanilla wafers)—texture heaven.
- Chopped nuts (pecans, walnuts, almonds)—for crunch and flavor.
- Whipped cream—light and fluffy for topping.
- Fruit preserves (apricot, raspberry, cherry)—sweet and glossy.
- Mini marshmallows—because why not?
- Shredded coconut—toasted or plain.
- Crushed pretzels—salty-sweet combo that’s always a hit.
If you’re gluten-free, swap the graham crackers for almond flour and skip cookies in the topping bar. Dairy-free? Use vegan cream cheese and coconut yogurt. I’ve tested these swaps, and they work! Honestly, the only rule is to have fun building your board.
Equipment Needed
- Mini muffin tin (24-cup)—essential for bite-sized cheesecakes. Silicone trays work too (just easier to pop out).
- Parchment paper liners—prevents sticking and makes serving super easy.
- Food processor—for crushing graham crackers. A zip-top bag and rolling pin also do the trick.
- Mixing bowls—at least two: one for crust, one for filling.
- Hand mixer or stand mixer—for a silky-smooth cheesecake batter. I’ve tried both, and honestly, a hand mixer is easier to clean.
- Measuring cups and spoons—precision matters for cheesecake.
- Rubber spatula—scrapes every last bit of filling (no waste!).
- Cooling rack—helps bites set faster.
- Serving board or large platter—for the Pinterest-perfect presentation.
- Small bowls or ramekins—to hold all those fun toppings.
If you don’t have a mini muffin tin, you can use regular muffin tins and just make bigger bites (I’ve done this—works great for heartier appetites!). For food processors, I use mine for everything, but a rolling pin and bag is budget-friendly and does the job. And don’t forget: parchment liners = less mess, more fun.
Preparation Method
- Preheat your oven to 325°F (160°C). Line a 24-cup mini muffin tin with parchment or paper liners. This prevents sticking and makes serving easy.
- Make the crust: In a mixing bowl, combine 1 cup (100g) crushed graham crackers, 4 tbsp (60g) melted unsalted butter, and a pinch of salt. Mix until it looks like wet sand. Spoon about 1 tsp of crust mixture into each liner and press down firmly (the bottom of a shot glass works great!). Bake for 5 minutes, then set aside to cool.
- Prepare the filling: In a large bowl, beat 16 oz (450g) room-temp cream cheese until smooth (about 2 minutes). Add 2/3 cup (135g) granulated sugar and beat for another minute—scrape the bowl! Mix in 1/2 cup (120g) sour cream, 2 eggs (one at a time), and 2 tsp vanilla extract. Beat until just combined; don’t overmix or you’ll get cracks.
- Fill the cups: Spoon cheesecake batter evenly into the cooled crusts, filling each almost to the top (about 1.5 tbsp per bite). Tap the pan gently to settle the filling.
- Bake: Place the tin in the oven and bake for 15-18 minutes. The tops should look set but still jiggle slightly in the center. If they puff up too much, don’t worry—they’ll settle as they cool.
- Cool: Remove from oven and let cool in the tin for 10 minutes. Transfer bites to a cooling rack and let them come to room temperature, then chill in the fridge for at least 1 hour (overnight is even better for flavor!).
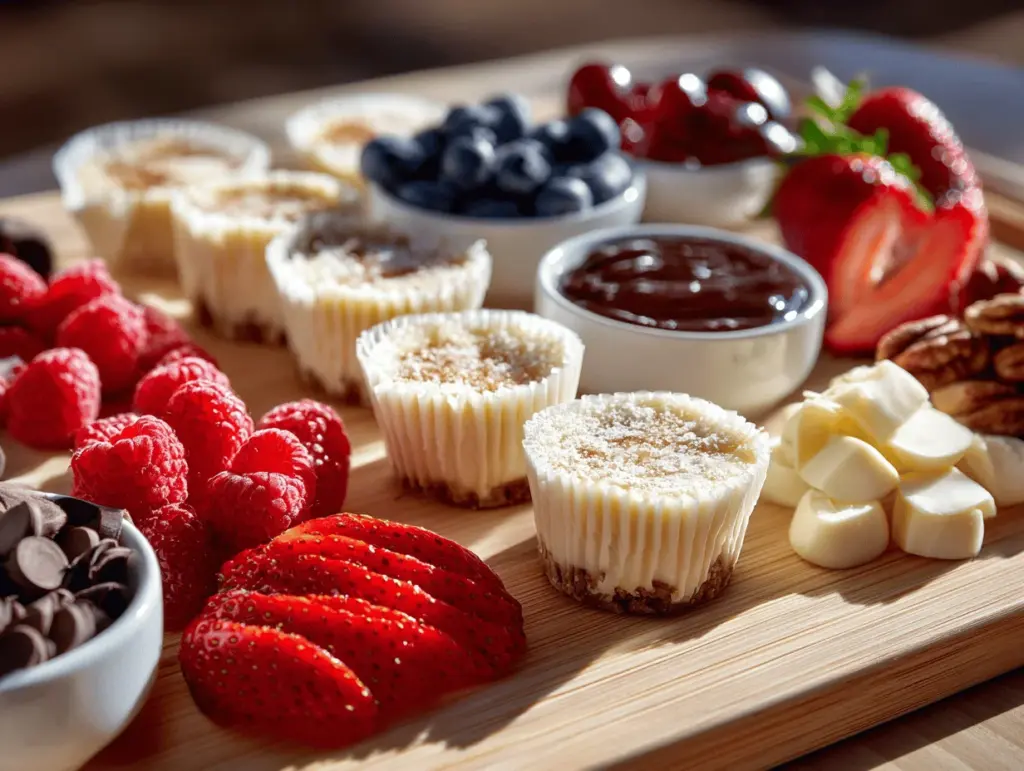
- Unmold and arrange: Gently peel off liners and place cheesecake bites on a serving board or platter. Arrange them in a fun pattern—rainbow, spiral, whatever you like.
- Set up the DIY topping bar: Spoon toppings into small bowls. Include spoons or tongs for easy serving. Place the bowls around the cheesecake bites so guests can grab, top, and enjoy.
Troubleshooting: If your crust crumbles, it probably needed more butter. If the tops crack, don’t panic—just cover with toppings! For super-smooth cheesecake, always use room-temp ingredients (trust me, I learned this the hard way). And if bites stick, running a small knife around the edge helps.
Personal tip: I prep the crust the night before, then whip up the filling in the morning. It makes party day so much less hectic. Also, don’t rush the chilling step! Cold, set cheesecake is what gives that classic texture.
Cooking Tips & Techniques
Here are a few pro tips for mini cheesecake bites that I’ve picked up over many batches (and a couple kitchen mishaps):
- Room-temperature everything: Cold cream cheese leads to lumps, which means sad, grainy bites. Take your time and let ingredients warm up.
- Don’t overbeat: If you whip the filling too much, it traps air and cracks the tops. Mix just until smooth, then stop.
- Use parchment liners: Regular paper liners sometimes stick, while parchment peels right off. Makes a huge difference!
- Cool completely before chilling: Putting hot cheesecake in the fridge makes condensation, and that means soggy crusts. Patience pays off.
- Bake in the center rack: It’s the sweet spot for even cooking. If you bake too close to the top, bites brown too fast.
- Topping bar strategy: Put “wet” toppings (like caramel or fruit preserves) in smaller bowls to keep the board neat. Dry toppings (cookies, nuts) can go in piles for easy grabbing.
I’ve definitely had a few fails—like the time I rushed chilling and ended up with mushy bites. Or when I forgot liners and had to scrape cheesecake out of the tin (not pretty, but still tasty). The best lesson? Slow down, enjoy the process, and don’t sweat the small stuff. Cheesecake bites forgive a lot of mistakes, especially when there’s a mountain of toppings to hide them!
Variations & Adaptations
- Gluten-free: Swap graham crackers for almond flour or gluten-free cookies. I’ve used almond meal and it gives a lovely nutty flavor.
- Dairy-free: Use vegan cream cheese and coconut yogurt. The texture is a little different (softer), but still delicious. For a vegan crust, use coconut oil instead of butter.
- Seasonal flavors: Mix pumpkin puree and a dash of cinnamon into the filling for autumn, or swirl in lemon zest for spring. Berry purees work for summer bites—so pretty!
- Chocolate lovers: Add 2 tbsp cocoa powder to the filling, or use crushed Oreos for the crust. Top with mini chocolate chips and a drizzle of ganache.
- Nut-free: Skip nuts in toppings, and use seed-based alternatives like crushed sunflower seeds for crunch.
One time, I did a “breakfast cheesecake board” for a brunch—think granola, fresh fruit, and a dollop of Greek yogurt. Everyone loved building their own, and it felt kinda fancy. You can also bake the bites in silicone molds for cute shapes, or go big and make “jumbo” cheesecake muffins for hungry crowds. The point is, you can totally make this your own!
Serving & Storage Suggestions
Serve mini cheesecake bites chilled, straight from the fridge. Arrange them on a pretty wooden board or a bright platter for that Pinterest-worthy look. Scatter toppings in little bowls and let guests dig in—trust me, the build-your-own part is half the fun!
Pair with coffee, sparkling lemonade, or even a dessert wine for a grown-up twist. For parties, I usually set out extra napkins (things get a little messy when the topping creativity kicks in!).
To store, keep bites in an airtight container in the refrigerator for up to 4 days. They freeze beautifully, too—just wrap tightly and thaw in the fridge overnight. If you want to prep ahead, make the cheesecake bites and toppings separately; assemble everything on the board right before serving. Reheat (if needed) by letting them come to room temperature—never microwave, or the texture gets weird.
And here’s a secret: the flavors actually get better after a day. The crust softens just enough, and the filling gets richer. So don’t be afraid to make them ahead and stash them for later!
Nutritional Information & Benefits
Each mini cheesecake bite (without toppings) is about 90 calories, with 6g fat, 8g carbs, and 2g protein. Of course, toppings change things—berries add vitamin C and fiber, nuts give you healthy fats, and caramel…well, that’s just delicious.
Cheesecake bites can fit into gluten-free or low-carb diets with the right swaps. They’re naturally portion-controlled, so you can enjoy a sweet treat without going overboard. Major allergens include dairy, eggs, and gluten (unless you use substitutes).
I love these as a “special occasion” dessert that doesn’t wreck your wellness goals. Portion control and customizable toppings mean everyone gets what they want—no guilt, just joy!
Conclusion
If you want a dessert that’s fun, beautiful, and totally delicious, this mini cheesecake bites dessert board with a DIY topping bar is it. It’s easy enough for beginners, impressive enough for guests, and flexible enough to suit every taste or dietary need.
Mix up the toppings, swap out the crust, or go wild with your own flavor ideas. I truly love how this recipe brings people together—there’s something special about sharing bites and trading topping combos. So grab your muffin tin, gather your favorite treats, and give this board a try!
If you make these, I’d love to hear your topping ideas or see your photos in the comments. Share with your friends, pin to Pinterest, or tag me if you create your own version—I can’t wait to see how you make it yours. Happy baking!
Frequently Asked Questions
How far in advance can I make mini cheesecake bites?
You can make them up to 2 days ahead and store in the fridge. They even taste better after chilling overnight!
Can I freeze mini cheesecake bites?
Absolutely! Wrap them tightly in plastic wrap and freeze for up to a month. Thaw overnight in the refrigerator before serving.
What’s the best way to get cheesecake bites out of the muffin tin?
Use parchment liners and let them cool completely. If they stick, run a small knife around the edge—works every time.
Can I use low-fat cream cheese?
You can, but the texture will be less creamy and a little firmer. Full-fat cream cheese gives the classic, rich result.
What are some fun topping ideas for the DIY bar?
Try crushed cookies, caramel sauce, lemon curd, fresh berries, mini marshmallows, or even spicy candied nuts. Mix and match for endless fun!
Pin This Recipe!
Mini Cheesecake Bites Dessert Board: Easy DIY Topping Bar Ideas

These mini cheesecake bites are creamy, delicious, and perfect for parties or gatherings. Serve them on a dessert board with a DIY topping bar so everyone can customize their own bite-sized treat.
- Prep Time: 20 minutes
- Cook Time: 20 minutes
- Total Time: 1 hour 40 minutes (includes chilling)
- Yield: 24 mini cheesecake bites 1x
- Category: Dessert
- Cuisine: American
Ingredients
- 16 oz full-fat cream cheese, room temperature
- 1/2 cup sour cream
- 2/3 cup granulated sugar
- 2 large eggs, room temperature
- 2 tsp vanilla extract
- 1 cup graham crackers, finely crushed (about 8 sheets)
- 4 tbsp unsalted butter, melted
- Pinch of salt
- Fresh berries (strawberries, blueberries, raspberries)
- Chocolate chips or shavings
- Caramel sauce
- Lemon curd
- Crushed cookies (Oreos, graham crackers, vanilla wafers)
- Chopped nuts (pecans, walnuts, almonds)
- Whipped cream
- Fruit preserves (apricot, raspberry, cherry)
- Mini marshmallows
- Shredded coconut
- Crushed pretzels
Instructions
- Preheat oven to 325°F (160°C). Line a 24-cup mini muffin tin with parchment or paper liners.
- In a mixing bowl, combine crushed graham crackers, melted butter, and a pinch of salt. Mix until it resembles wet sand.
- Spoon about 1 tsp of crust mixture into each liner and press down firmly. Bake for 5 minutes, then set aside to cool.
- In a large bowl, beat cream cheese until smooth (about 2 minutes). Add sugar and beat for another minute, scraping the bowl.
- Mix in sour cream, then add eggs one at a time, and vanilla extract. Beat until just combined; do not overmix.
- Spoon cheesecake batter evenly into cooled crusts, filling each almost to the top (about 1.5 tbsp per bite). Tap pan gently to settle.
- Bake for 15-18 minutes, until tops look set but still jiggle slightly in the center.
- Remove from oven and let cool in the tin for 10 minutes. Transfer bites to a cooling rack and let come to room temperature, then chill in the fridge for at least 1 hour.
- Gently peel off liners and arrange cheesecake bites on a serving board or platter.
- Set up the DIY topping bar by spooning toppings into small bowls and placing them around the cheesecake bites for guests to customize.
Notes
Use room-temperature ingredients for a smooth filling. Do not overmix the batter to avoid cracks. Parchment liners make unmolding easy. Chill bites thoroughly for best texture. Swap crust or toppings for gluten-free or dairy-free adaptations. Make ahead and store in the fridge or freezer.
Nutrition
- Serving Size: 1 mini cheesecake bite
- Calories: 90
- Sugar: 6
- Sodium: 70
- Fat: 6
- Saturated Fat: 3.5
- Carbohydrates: 8
- Fiber: 0.3
- Protein: 2
Keywords: mini cheesecake bites, dessert board, DIY topping bar, party dessert, cheesecake recipe, bite-sized dessert, easy cheesecake, customizable dessert, holiday dessert, brunch dessert