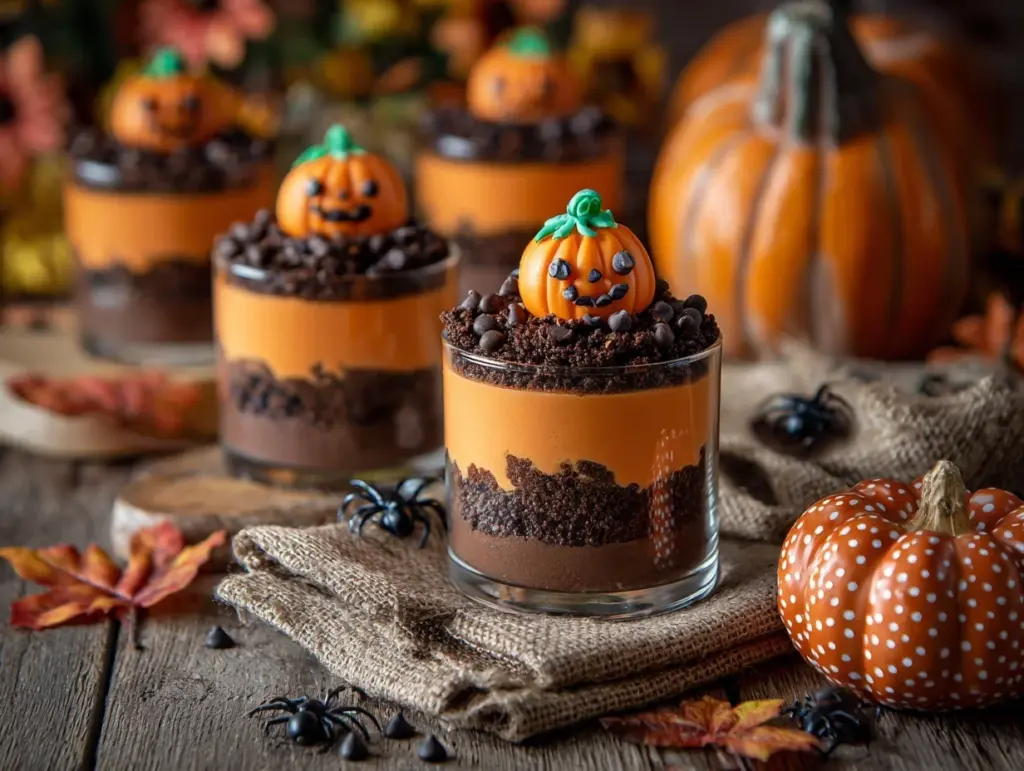
There’s something magical about Halloween treats that combine spooky vibes with pure whimsy. These whimsical spooky pumpkin patch dirt cups are everything you want for a Halloween party: fun, delicious, and easy to make! Picture layers of creamy pudding, crumbled chocolate cookies that resemble dirt, and adorable candy pumpkins – it’s like crafting edible art.
I first made these dirt cups for my kids’ Halloween party, and let me tell you, they couldn’t get enough. Watching them giggle as they dug into their “dirt” was the highlight of the event. Plus, the recipe is so versatile that you can tweak it to suit your creativity or dietary needs. Whether you’re hosting a spooky bash or just want a fun dessert to enjoy after a night of trick-or-treating, these pumpkin dirt cups are bound to be the star of your Halloween table.
Let’s grab our ingredients, roll up our sleeves, and bring these whimsical spooky pumpkin patch dirt cups to life!
Why You’ll Love This Recipe
- Quick & Simple: You’ll only need about 20 minutes to assemble these fun treats. No baking required!
- Kid-Friendly: It’s like dessert meets arts-and-crafts. Let the kids help with assembling their own spooky creations!
- Perfect for Parties: These are individual-sized desserts, making them great for serving at Halloween gatherings.
- Customizable: You can switch up the candy decorations, pudding flavors, or even use gluten-free cookies for dietary needs.
- Irresistibly Delicious: Between the creamy pudding, crunchy cookie dirt, and sweet candy pumpkins, every bite is a perfect mix of textures and flavors.
What makes these dirt cups special is how playful they look while still being incredibly easy to make. You don’t need fancy kitchen skills, just a sense of fun and a love for Halloween! Plus, you can make them ahead of time, so you’re not rushing around on party day.
What Ingredients You Will Need
This recipe uses simple ingredients that come together to create an adorable Halloween treat. Here’s what you’ll need:
- Chocolate Pudding: 3 cups, prepared from instant pudding mix or store-bought (choose your favorite brand).
- Chocolate Sandwich Cookies: 1 package, crushed into fine crumbs (like Oreo cookies).
- Candy Pumpkins: A handful of candy pumpkins to create your pumpkin patch (look for brands like Brach’s).
- Whipped Cream: 1 cup, for layering and optional topping.
- Green Sprinkles: For the “grass” effect around your pumpkins.
- Halloween Decorations (Optional): Gummy worms, candy bats, or spooky toppers to enhance the theme.
Feel free to swap out ingredients based on your preferences. For example, you can use vanilla pudding dyed orange with food coloring for an extra Halloween vibe or opt for gluten-free cookies for allergy-friendly dirt cups.
Equipment Needed
You don’t need much for this recipe, but here’s what will make the process a breeze:
- Small Serving Cups: Clear plastic or glass cups work best to showcase the layers.
- Food Processor: For crushing the cookies quickly (or use a rolling pin and a zip-top bag).
- Mixing Bowls: For preparing your pudding and whipped cream layers.
- Spoons: For layering and smoothing the pudding and cookie crumbs.
If you don’t have a food processor, crushing the cookies with a rolling pin works just fine – it’s a little extra effort but totally doable. And if you’re making these for a party, disposable cups are great for easy cleanup!
Preparation Method

- Prepare the pudding: If using instant pudding, follow the package instructions to make 3 cups. Chill the pudding in the fridge for 10-15 minutes to set.
- Crush the cookies: Place the chocolate sandwich cookies in a food processor and pulse until they resemble fine dirt crumbs. Alternatively, put them in a zip-top bag and crush them with a rolling pin.
- Assemble the cups: Start by adding a layer of chocolate pudding to the bottom of each serving cup (about 1/3 full).
- Add a layer of cookie crumbs: Sprinkle a generous layer of crushed cookies over the pudding to create the “dirt.”
- Repeat layers: Add another layer of pudding followed by more cookie crumbs. Smooth each layer with a spoon for even distribution.
- Decorate the pumpkin patch: Place candy pumpkins on top of the final cookie layer, pressing them gently into the crumbs. Add green sprinkles around the pumpkins to mimic grass.
- Optional spooky touches: Add gummy worms or candy bats for extra Halloween flair.
- Chill and serve: Place the cups in the fridge for at least 30 minutes before serving to let the flavors meld together. Serve chilled and enjoy!
These whimsical dirt cups come together so easily, you’ll feel like a pro Halloween dessert decorator in no time!
Cooking Tips & Techniques
- Consistency counts: Crush the cookies finely for a realistic dirt look. Larger crumbs can make layering tricky.
- Layer evenly: Use a spoon to smooth each pudding layer for a clean and polished look in the clear cups.
- Make ahead: Assemble the cups a few hours before your event, but wait to add the candy pumpkins until just before serving to keep them looking fresh.
- Personalize the patches: Add name tags or themed toppers to each cup for individual servings with flair.
- Keep it chilled: These dirt cups taste best when served cold, so be sure to refrigerate them until party time.
I’ve had moments where I rushed the cookie crushing and ended up with uneven layers, but trust me – taking a few extra minutes for smooth pudding and fine crumbs makes all the difference visually and taste-wise!
Variations & Adaptations
- Gluten-Free Option: Use gluten-free chocolate cookies and check your pudding for gluten-free labeling.
- Dairy-Free Adaptation: Swap regular pudding for a dairy-free option (like almond or coconut-based pudding) and use whipped coconut cream instead of whipped cream.
- Seasonal Twist: Add candy corn or ghost-shaped marshmallows for a fun variation.
- Flavor Customization: Try butterscotch pudding for a caramel-like flavor or add a pinch of cinnamon to the cookie crumbs for a seasonal spice kick.
Last year, I tried a variation with pumpkin spice pudding, and it was a huge hit! It added an extra layer of fall flavor that paired beautifully with the chocolate “dirt.”
Serving & Storage Suggestions
These dirt cups are best served chilled, straight from the fridge. Here’s how to make the most of them:
- Serving temperature: Keep them cold for the best texture and flavor.
- Presentation tips: Arrange the cups on a themed Halloween platter or add spooky labels for an extra festive touch.
- Storage instructions: Cover the cups with plastic wrap and store them in the refrigerator for up to 2 days. Avoid freezing, as the pudding texture can change.
- Reheating: No reheating needed – just pull them out of the fridge and serve!
Pro tip: The flavors develop slightly overnight, so making these the day before your event gives them time to taste even better.
Nutritional Information & Benefits
While these whimsical dirt cups are a treat, here’s a rough estimate of the nutritional values per serving (based on standard ingredients):
- Calories: Approximately 250-300 per cup
- Protein: 2-4 grams
- Fat: 10-12 grams
- Carbohydrates: 35-40 grams
Chocolate pudding provides calcium, while the candy decorations are pure fun. Allergens to watch for include dairy, gluten, and possible nut cross-contamination in candy brands, so adjust accordingly.
Conclusion
These whimsical spooky pumpkin patch dirt cups are the perfect Halloween dessert to bring a smile to everyone’s face. They’re fun to make, endlessly customizable, and taste as delightful as they look. Whether you’re hosting a party or enjoying a quiet Halloween night, this recipe will add a touch of magic to your celebration.
Give this recipe a try, and let your creativity shine! Don’t forget to share your spooky creations in the comments below – I’d love to see how you customize your pumpkin patches. Happy Halloween, and enjoy every bite of these adorable treats!
FAQs
Can I make dirt cups ahead of time?
Yes! You can assemble the cups up to a day in advance, but add the candy pumpkins and decorations just before serving for the freshest look.
What if I don’t have candy pumpkins?
Try substituting with candy corn, gummy pumpkins, or even orange jelly beans for a similar effect.
How do I crush cookies without a food processor?
Place the cookies in a zip-top bag and use a rolling pin to crush them into fine crumbs. It works perfectly!
Can I use homemade pudding instead of instant?
Absolutely! Homemade pudding adds a rich, creamy taste, but instant pudding is quicker and easier for busy days.
Are dirt cups suitable for kids with allergies?
You can adapt this recipe using gluten-free cookies, dairy-free pudding, and allergy-friendly candy options for kids with dietary restrictions.
Pin This Recipe!
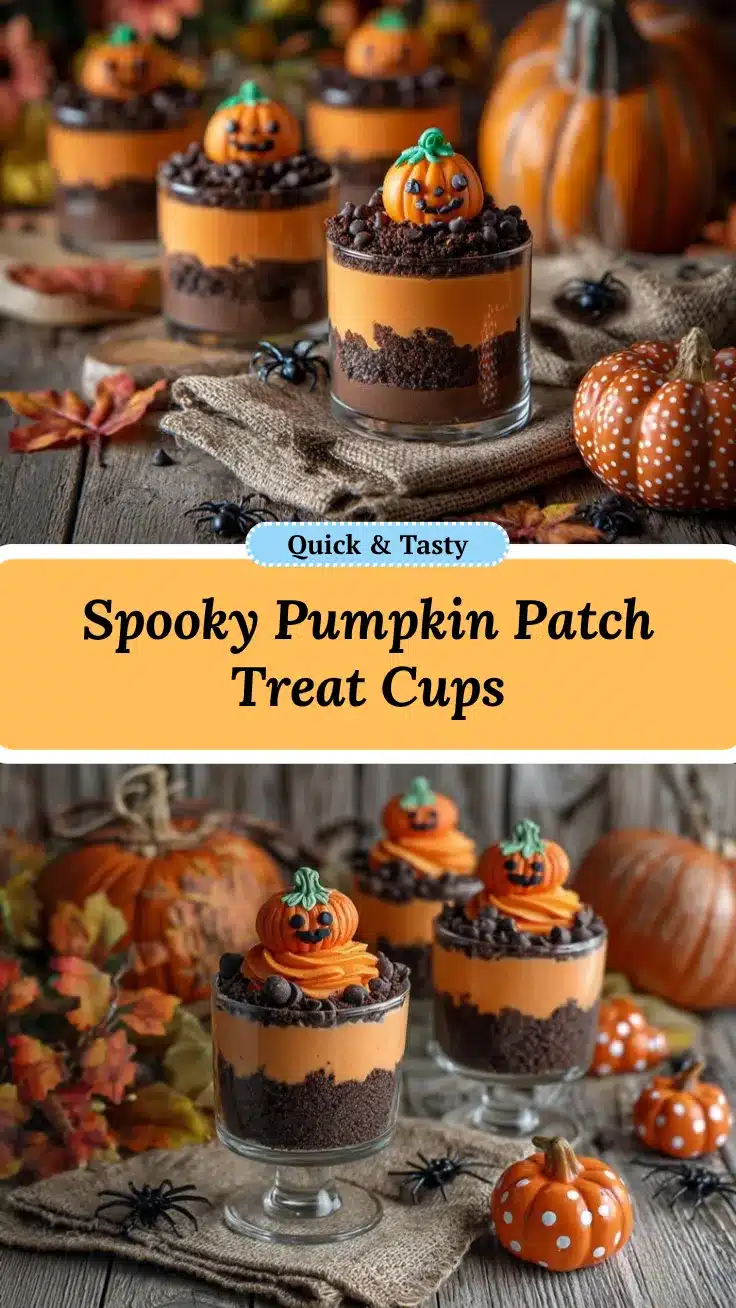
Whimsical Spooky Pumpkin Dirt Cups

These whimsical spooky pumpkin patch dirt cups are a fun, delicious, and easy-to-make Halloween treat featuring layers of creamy pudding, crumbled chocolate cookies, and candy pumpkins.
- Prep Time: 20 minutes
- Cook Time: 0 minutes
- Total Time: 20 minutes
- Yield: 6 servings 1x
- Category: Dessert
- Cuisine: American
Ingredients
- 3 cups chocolate pudding (prepared from instant pudding mix or store-bought)
- 1 package chocolate sandwich cookies (crushed into fine crumbs)
- A handful of candy pumpkins
- 1 cup whipped cream
- Green sprinkles
- Optional Halloween decorations: gummy worms, candy bats, or spooky toppers
Instructions
- Prepare the pudding: Follow the package instructions to make 3 cups of instant pudding. Chill in the fridge for 10-15 minutes to set.
- Crush the cookies: Place chocolate sandwich cookies in a food processor and pulse until they resemble fine dirt crumbs. Alternatively, use a zip-top bag and rolling pin to crush them.
- Assemble the cups: Add a layer of chocolate pudding to the bottom of each serving cup (about 1/3 full).
- Add a layer of cookie crumbs: Sprinkle a generous layer of crushed cookies over the pudding to create the ‘dirt.’
- Repeat layers: Add another layer of pudding followed by more cookie crumbs. Smooth each layer with a spoon for even distribution.
- Decorate the pumpkin patch: Place candy pumpkins on top of the final cookie layer, pressing them gently into the crumbs. Add green sprinkles around the pumpkins to mimic grass.
- Optional spooky touches: Add gummy worms or candy bats for extra Halloween flair.
- Chill and serve: Place the cups in the fridge for at least 30 minutes before serving to let the flavors meld together. Serve chilled and enjoy!
Notes
[‘Crush cookies finely for a realistic dirt look.’, ‘Smooth pudding layers evenly for a polished appearance.’, ‘Assemble cups a few hours before serving, but add candy pumpkins just before serving for freshness.’, ‘Personalize cups with name tags or themed toppers for individual servings.’, ‘Keep cups chilled until serving for the best texture and flavor.’]
Nutrition
- Serving Size: 1 cup
- Calories: 250300
- Fat: 1012
- Carbohydrates: 3540
- Protein: 24
Keywords: Halloween dessert, dirt cups, pumpkin patch, spooky treats, kid-friendly recipe


