Introduction
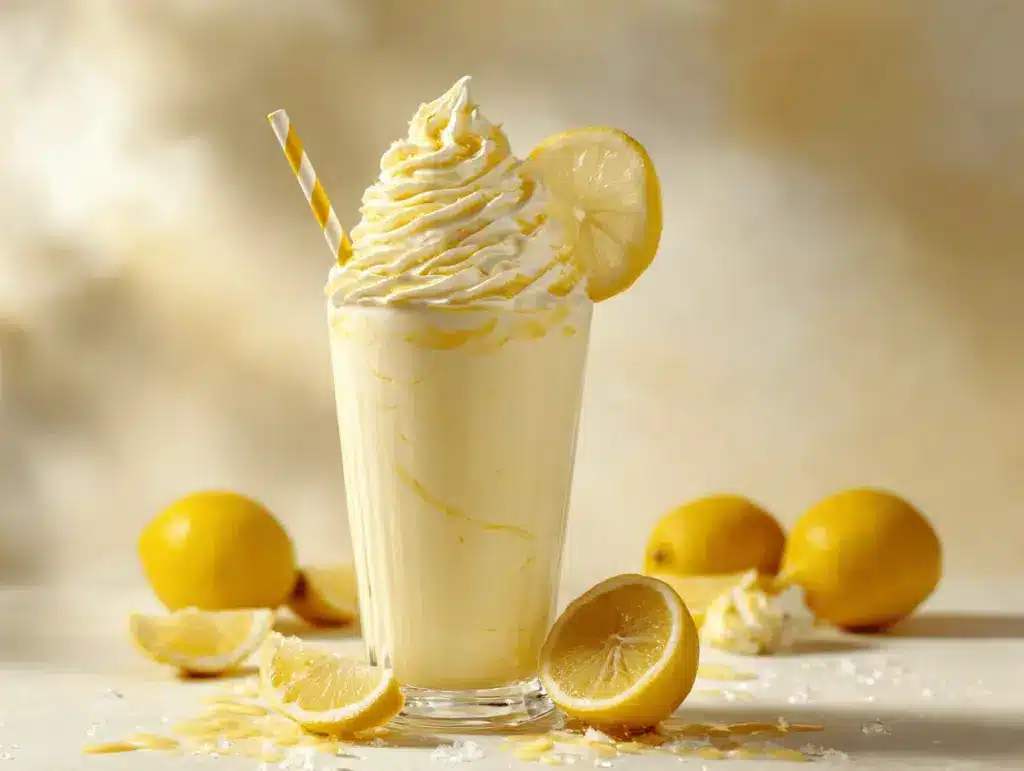
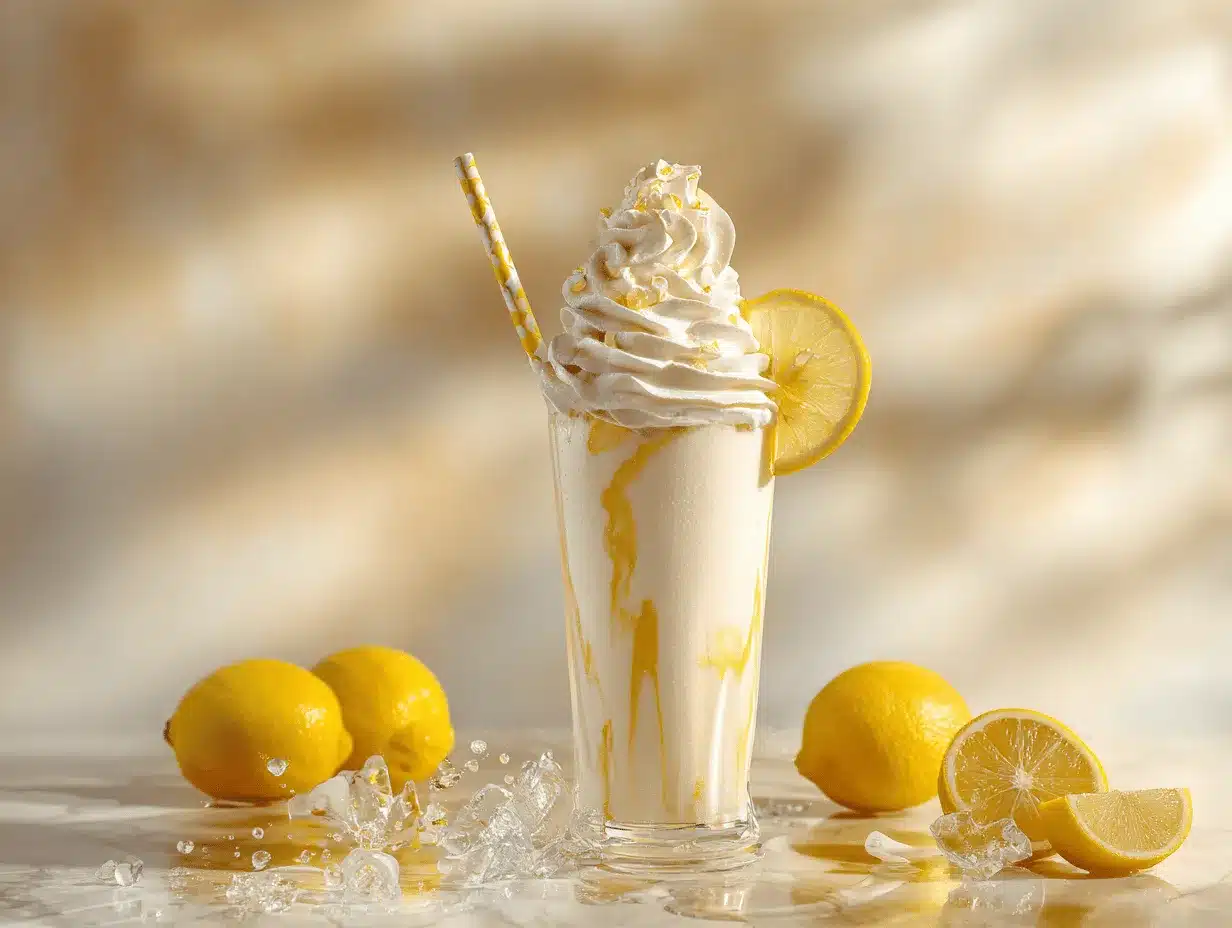
The sharp zing of fresh lemon mixed with creamy cheesecake, all swirled into a frosty, whipped milkshake—yeah, it’s as wild and wonderful as it sounds. I first stumbled on this whipped lemonade cheesecake milkshake idea during a heatwave, when lemonade felt too plain and ice cream was, well, a little heavy. So I started playing around in my blender, tossing in cream cheese, lemonade, and just enough vanilla ice cream to make things decadent but not overwhelming. The first sip was pure summer magic—bright, tangy, creamy, and cold enough to make you forget the sun for a minute.
Honestly, whipped lemonade has been making waves on social lately, but adding the cheesecake twist? That’s my personal secret for transforming a simple drink into a dessert you can slurp with a straw. It’s become my go-to recipe for backyard barbecues and lazy afternoons, especially when friends drop by unexpectedly (let’s face it, everyone wants something cold and sweet when it’s hot outside). Kids love it, adults get that little nostalgic thrill, and nobody can resist the creamy, tart combo.
This whipped lemonade cheesecake milkshake is a dream for busy families, high-protein snackers, and anyone craving a quick, fun treat. If you’re after a refreshing summer drink that’s easy to whip up, packs bold flavor, and looks gorgeous in a mason jar, this recipe is for you. I’ve tested it every which way—dairy-free, extra tart, loaded with toppings—and it never disappoints. Trust me, you’ll want to save this for every sunny day.
Why You’ll Love This Recipe
You know that feeling when you sip something so cold and creamy that it makes your whole body sigh with relief? That’s exactly what you get here, plus a punch of lemon and the dreamy richness of cheesecake. I’ve experimented with countless milkshake recipes over the years, but this one is a total standout. Here’s what makes this whipped lemonade cheesecake milkshake special:
- Quick & Easy: Ready in under 10 minutes—perfect for spontaneous cravings or last-minute get-togethers.
- Simple Ingredients: No fancy stuff, just fridge and pantry staples like cream cheese, lemons, and ice cream.
- Perfect for Parties: Ideal for summer BBQs, poolside lounging, or a sweet after-dinner treat.
- Crowd-Pleaser: Everyone (even picky kids!) loves this—my family always requests seconds.
- Unbelievably Delicious: The tangy lemonade and velvety cheesecake flavors are balanced just right, making each sip addictive.
What sets this recipe apart is the blending technique—I whip the cream cheese with lemon juice first to make it super smooth, then blend with ice cream so there are no lumps (trust me, nobody wants chunky milkshake). The flavor is big, bold, and incredibly refreshing. This isn’t just a drink—it’s a full-on dessert experience, but lighter and easier than baking a whole cheesecake.
Honestly, I love how customizable it is. You can dial up the lemon for extra tartness, use low-fat ingredients for a lighter treat, or go all-in with extra whipped cream and cookie crumbles. The flexibility means you can make it your own, and that’s half the fun. Every time I serve this, it’s gone in minutes, and someone always asks for the recipe. It’s that good.
What Ingredients You Will Need
This whipped lemonade cheesecake milkshake recipe is all about those simple, punchy ingredients that work together to create something truly memorable. Here’s what you’ll need—most of it’s probably already in your kitchen. I’ve grouped them for easy reference and included a few personal tips and swaps below:
- For the Milkshake Base:
- Full-fat cream cheese (4 oz / 115 g, room temperature—trust me, it blends smoother this way)
- Lemon juice (1/4 cup / 60 ml, freshly squeezed for best flavor)
- Lemon zest (from 1 lemon—adds extra zing)
- Sweetened condensed milk (2 tbsp / 30 ml, for richness and sweetness; can swap with honey or agave)
- Vanilla ice cream (2 cups / 300 g, slightly softened—any brand works, but I like [Ben & Jerry’s] for texture)
- Whole milk (1/2 cup / 120 ml, or use almond/soy milk for dairy-free option)
- Ice cubes (1 cup / 120 g, helps achieve that whipped texture)
- For Topping & Garnish:
- Whipped cream (store-bought or homemade—homemade holds up better, especially on hot days)
- Lemon slices or wheels (for garnish)
- Graham cracker crumbs (1/4 cup / 25 g, optional but so good—adds that cheesecake crust flair)
- White chocolate shavings (optional for a fancy finish)
Ingredient Tips: Use small, firm lemons for juicing—they’re usually juicier. If you want a lighter milkshake, swap vanilla ice cream for frozen yogurt or a low-fat version. Dairy-free? Go with coconut milk ice cream and vegan cream cheese, easy peasy. And if you’re out of sweetened condensed milk, a splash of maple syrup totally works (I’ve done it in a pinch, no complaints from anyone!).
For extra lemon flavor, add a couple drops of lemon extract. For less sugar, reduce the ice cream and bump up the milk. It’s flexible, forgiving, and fun to play with—just how summer recipes should be.
Equipment Needed
I’m all about recipes that don’t require a ton of gadgets. Here’s what you’ll need to whip up this whipped lemonade cheesecake milkshake:
- Blender: A high-speed blender works best for smooth texture, but even a basic one will do. I’ve used my old blender for years and it still makes killer milkshakes.
- Measuring cups and spoons: Precision helps balance the lemon and cheesecake flavors, so don’t eyeball too much.
- Zester or microplane: For getting that fine lemon zest—if you don’t have one, use the smallest holes on a box grater.
- Spatula: Handy for scraping cream cheese and ice cream out of the blender.
- Mason jars or tall glasses: Presentation is half the fun! Any large glass works.
- Optional: Electric hand mixer for whipping cream, though you can use store-bought or whisk it by hand.
If you don’t have a blender, you can use a food processor, though the texture might be a bit different—still tasty. For budget-friendly options, I’ve used secondhand blenders and dollar-store spatulas, and honestly, they work just fine. Just give your blender a good rinse after use, especially with dairy, to keep it running smoothly.
Preparation Method
- Prep Your Ingredients: Set cream cheese out to soften (about 15 minutes). Zest and juice your lemon. Measure out all ingredients before starting—keeps things stress-free.
- Blend Lemon & Cream Cheese: In your blender, combine softened cream cheese, lemon juice, and lemon zest. Blend on medium for 30 seconds until silky and smooth. No lumps means no surprise bites!
- Add Sweetener: Pour in sweetened condensed milk (or honey/agave). Pulse for another 15 seconds to combine. Taste—if you want it sweeter or tangier, adjust now before adding ice cream.
- Load the Blender: Add vanilla ice cream, milk, and ice cubes. Blend on high for 1 minute. The mixture should be thick, creamy, and light yellow—if it’s too thick, splash in a bit more milk. If too thin, toss in extra ice cream or ice cubes.
- Troubleshooting: If you see bits of cream cheese, blend another 30 seconds. If the blender stalls, pause and stir with a spatula, then resume. (I’ve had to do this more times than I can count!)
- Check Consistency: The milkshake should be pourable but thick enough to mound on a spoon. If you want a “whipped” texture, blend for an extra 20 seconds at high speed—this adds air and makes it frothy.
- Pour & Garnish: Pour into chilled mason jars or glasses. Top with whipped cream, sprinkle graham cracker crumbs, and add a lemon wheel or white chocolate shavings if you’re feeling fancy.
- Serve Immediately: This milkshake is best enjoyed right away, while it’s super cold and creamy. (I’ve tried storing leftovers, but the texture changes—see storage tips below.)
Prep Notes: For a crowd, double or triple the recipe, but blend in batches if your blender is small. If you’re making ahead, blend everything except ice cubes and add them just before serving for maximum fluffiness. And use fresh lemons—bottled juice doesn’t have the same punch.
Cooking Tips & Techniques
Getting the perfect whipped lemonade cheesecake milkshake is all about the right balance and blend. Here are some tried-and-true tips from my kitchen:
- Blend in stages: Always blend cream cheese and lemon juice first. This avoids gritty chunks later on—I learned that lesson after several chunky milkshake mishaps!
- Use softened cream cheese: Cold cream cheese won’t blend smoothly and can leave lumps.
- Don’t over-blend ice cream: Blend just until smooth. Over-blending can make the milkshake runny, especially on hot days.
- Adjust sweetness and tartness: Taste as you go. Lemons can vary in sourness, and ice cream brands differ in sweetness.
- Chill your glasses: Pop mason jars or glasses in the freezer for 10 minutes before serving. It keeps the milkshake cold longer and looks cool (literally!) on Instagram and Pinterest.
- Multitasking: While the cream cheese softens, zest and juice your lemons. It’ll save you a few precious minutes.
- Consistency tips: Too thick? Add milk, a tablespoon at a time. Too thin? More ice cream or a handful of ice cubes will fix it.
- Personal fail: I once used low-fat cream cheese and the milkshake tasted flat. Full-fat always wins for flavor and texture.
Final tip: Don’t skip the toppings. Graham cracker crumbs and whipped cream really make this milkshake taste like cheesecake in a glass. It’s worth the extra step, I promise.
Variations & Adaptations
One of the best things about whipped lemonade cheesecake milkshake is how easy it is to change up for different tastes, diets, or seasons. Here are my favorite ways to mix it up:
- Dairy-Free: Use vegan cream cheese, coconut milk ice cream, and almond or oat milk. The flavor is just as good, with a subtle coconut twist (I’ve made this for my lactose-intolerant nephew, and he loved it).
- Berry Lemonade: Toss in 1/2 cup (75 g) fresh or frozen raspberries or strawberries for a pretty pink color and extra fruity tang.
- Low-Sugar: Choose sugar-free ice cream and swap condensed milk for stevia or monk fruit syrup. It’s lighter but still creamy.
- Extra Tart: Add an extra tablespoon of lemon juice or a dash of citric acid if you really want your taste buds to pucker.
- Gluten-Free: Skip the graham cracker crumbs or use GF cookies for the topping.
- Frozen Method: Freeze the blended milkshake in popsicle molds for a fun, grab-and-go treat.
Personally, I love the berry version in late summer and the dairy-free swap when I’m serving a crowd with mixed dietary needs. It’s super easy to adjust—just keep the basic lemon-cheesecake combo and play with the rest!
Serving & Storage Suggestions
This whipped lemonade cheesecake milkshake absolutely shines when served ice-cold in a frosty glass. Here’s how I like to present and store it:
- Serving Temperature: Ice cold is best. Chill your glasses in advance and top with whipped cream just before serving.
- Presentation: Mason jars or tall glasses work perfectly for that Pinterest-worthy look. Add a lemon wheel, sprinkle graham cracker crumbs, and stick in a fun straw.
- Pairings: Serve with fresh fruit, lemon shortbread cookies, or a light summer salad. I love it with grilled chicken or veggie skewers at a BBQ.
- Storage: Store any leftovers (without toppings) in an airtight container in the fridge for up to 24 hours. Stir before serving, as it may separate a bit.
- Freezer: Pour leftovers into popsicle molds for cheesecake lemonade ice pops—kids go crazy for these!
- Reheating: Don’t—this milkshake is for cold sipping only. If it’s too firm from chilling, let it sit out for a few minutes and stir.
- Flavor Development: The lemon flavor gets stronger after chilling, so you might notice a bolder taste the next day.
I’ve found this milkshake is a perfect make-ahead treat for parties—just blend, chill, and add toppings when guests arrive.
Nutritional Information & Benefits
Here’s the scoop on what’s inside one serving of whipped lemonade cheesecake milkshake (about 12 oz / 350 ml):
- Calories: Approx. 310
- Protein: 6 g (thanks to cream cheese and milk)
- Total Fat: 14 g
- Carbs: 38 g
- Sugar: 32 g
Key health benefits: Lemons are loaded with vitamin C, which boosts immunity and adds a fresh flavor, while cream cheese brings a little protein and calcium. If you go with dairy-free swaps, you’ll cut some saturated fat and calories, too. Remember, there’s dairy and gluten if you use regular cream cheese and graham crackers, so check for allergies. Personally, I see this milkshake as a fun treat—not an everyday snack—but it’s way lighter than a slice of cheesecake and far more refreshing!
Conclusion
So, if you’re searching for a summer drink that’s both fun and unforgettable, this whipped lemonade cheesecake milkshake is it. It blends the best parts of lemonade, ice cream, and cheesecake into one frosty, tangy, creamy treat. I love it because it’s fast, flexible, and always a hit with friends and family—plus, you can tweak it to fit any taste or dietary need.
Make it your own! Try different toppings, dairy-free swaps, or add extra lemon for a bigger zing. I’m always amazed at how this recipe gets people excited to try something new (and they always come back for more). Honestly, I hope you love it as much as I do.
If you give this whipped lemonade cheesecake milkshake a try, let me know in the comments! Share your tweaks, tag me on social, or pass the recipe along to anyone who needs a little summer magic. Cheers to cold drinks, sunny days, and recipes that make you smile!
FAQs
Can I make whipped lemonade cheesecake milkshake dairy-free?
Yes! Use vegan cream cheese, coconut milk ice cream, and almond or oat milk. The flavor is a little different, but still delicious and creamy.
How do I get the milkshake super thick and frothy?
Blend the ice cubes and ice cream last, and use slightly softened ice cream. If it’s too thin, add more ice cream or a bit less milk.
Can I use bottled lemon juice instead of fresh?
You can, but fresh lemon juice gives a brighter flavor. Bottled juice works in a pinch, just add a bit of extra zest for punch.
How far in advance can I make this milkshake?
Blend up to 24 hours in advance and keep in the fridge (without toppings). Stir before serving and add toppings fresh.
What toppings go best with whipped lemonade cheesecake milkshake?
Whipped cream, graham cracker crumbs, lemon wheels, and white chocolate shavings are my favorites. You can also add fresh berries or cookie pieces for extra fun!
Pin This Recipe!
Whipped Lemonade Cheesecake Milkshake

A frosty, tangy, and creamy milkshake that blends the zing of fresh lemon with the richness of cheesecake and vanilla ice cream. This easy summer drink is a refreshing treat perfect for parties, BBQs, or any hot day.
- Prep Time: 10 minutes
- Cook Time: 0 minutes
- Total Time: 10 minutes
- Yield: 2 servings 1x
- Category: Beverage
- Cuisine: American
Ingredients
- 4 oz (115 g) full-fat cream cheese, room temperature
- 1/4 cup (60 ml) freshly squeezed lemon juice
- Zest from 1 lemon
- 2 tbsp (30 ml) sweetened condensed milk (or honey/agave as substitute)
- 2 cups (300 g) vanilla ice cream, slightly softened
- 1/2 cup (120 ml) whole milk (or almond/soy milk for dairy-free)
- 1 cup (120 g) ice cubes
- Whipped cream, for topping
- Lemon slices or wheels, for garnish
- 1/4 cup (25 g) graham cracker crumbs, for topping (optional)
- White chocolate shavings, for garnish (optional)
Instructions
- Set cream cheese out to soften for about 15 minutes. Zest and juice your lemon. Measure out all ingredients before starting.
- In a blender, combine softened cream cheese, lemon juice, and lemon zest. Blend on medium for 30 seconds until smooth.
- Add sweetened condensed milk (or honey/agave) and pulse for another 15 seconds to combine. Taste and adjust sweetness or tartness if desired.
- Add vanilla ice cream, milk, and ice cubes to the blender. Blend on high for 1 minute until thick and creamy. Adjust consistency by adding more milk (if too thick) or more ice cream/ice cubes (if too thin).
- If there are bits of cream cheese, blend for another 30 seconds. If the blender stalls, pause and stir with a spatula, then resume blending.
- For a whipped, frothy texture, blend for an extra 20 seconds at high speed.
- Pour the milkshake into chilled mason jars or glasses.
- Top with whipped cream, sprinkle with graham cracker crumbs, and garnish with a lemon wheel or white chocolate shavings if desired.
- Serve immediately while cold and creamy.
Notes
For best results, use full-fat cream cheese and fresh lemon juice. Chill glasses before serving for extra frosty presentation. Adjust sweetness and tartness to taste. For dairy-free, use vegan cream cheese, coconut milk ice cream, and almond or oat milk. Skip graham cracker crumbs or use gluten-free cookies for a gluten-free version. Milkshake is best served immediately; leftovers can be stored in the fridge for up to 24 hours but may separate—stir before serving.
Nutrition
- Serving Size: About 12 oz (350 ml) per serving
- Calories: 310
- Sugar: 32
- Sodium: 180
- Fat: 14
- Saturated Fat: 8
- Carbohydrates: 38
- Protein: 6
Keywords: whipped lemonade, cheesecake milkshake, summer drink, lemon milkshake, easy milkshake, refreshing dessert, party drink, creamy lemonade, no bake dessert, frozen drink


