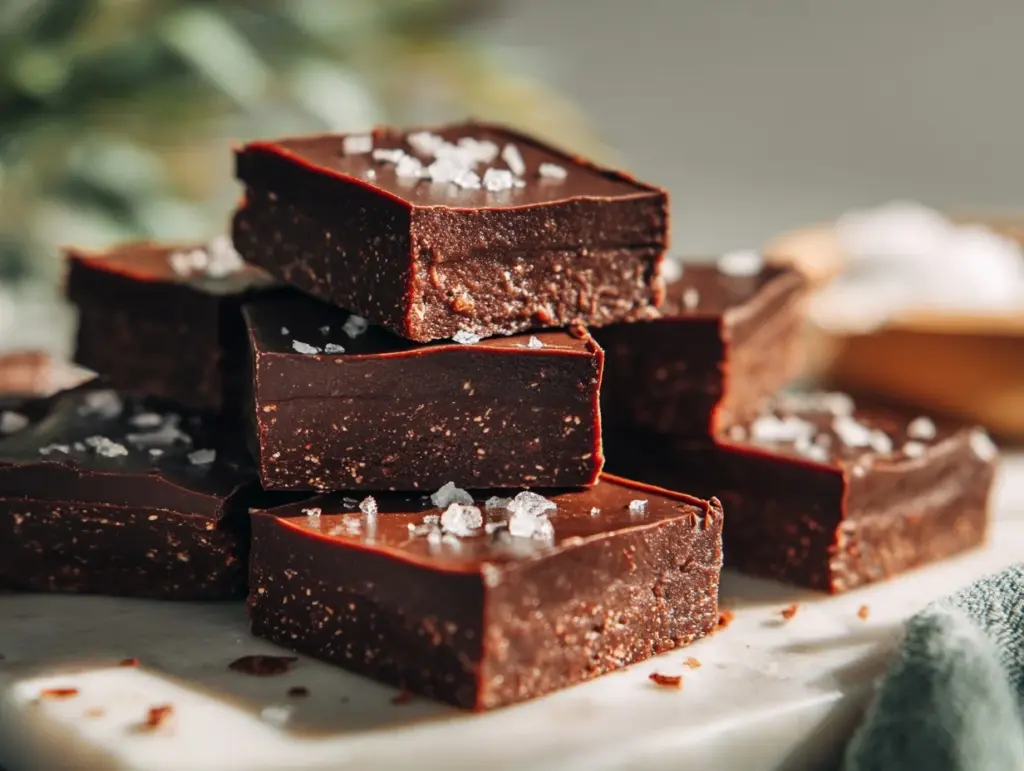
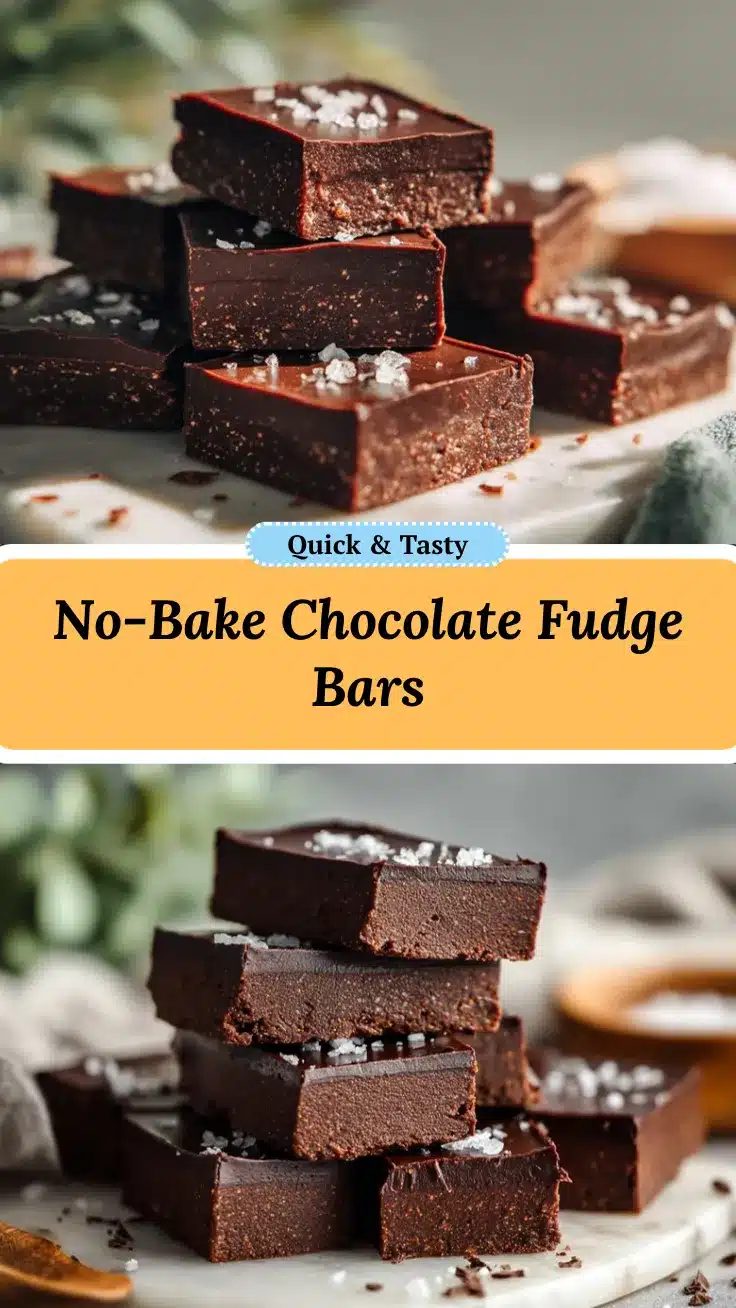
The rich, chocolatey flavor of these no-bake protein bars is downright irresistible. Imagine biting into soft, fudgy goodness packed with protein and just the right touch of sweetness—without even turning on your oven. These bars have been my go-to for busy mornings, post-workout snacks, and those moments when I need a chocolate fix but want to keep it healthy. They’re easy to whip up, require minimal ingredients, and taste like a decadent dessert disguised as a nutritious treat. Trust me, this recipe will become a staple in your snack rotation.
I first started making these bars during a hectic week when I needed something quick and satisfying to keep me fueled. After experimenting with different combinations of ingredients, I landed on this perfect mix of creamy nut butter, rich cocoa powder, and protein powder. Whether you’re a fitness enthusiast or just someone who loves chocolate, these no-bake chocolate fudge protein bars are bound to win you over.
Why You’ll Love This Recipe
- Quick and Easy: These bars come together in under 15 minutes, making them perfect for busy schedules.
- No Oven Required: Save time and keep your kitchen cool—ideal for summer or lazy days.
- Healthy and Nutritious: Packed with protein, healthy fats, and natural sweetness, these bars are a guilt-free treat.
- Customizable: You can tweak the flavor based on your preferences, add mix-ins like nuts or dried fruit, or even make them vegan.
- Kid-Friendly: A great snack for little ones who love chocolate but need more wholesome options.
- Meal Prep Hero: Make them ahead of time for a week’s worth of snacking or grab-and-go breakfast options.
What truly sets this recipe apart is its simplicity paired with indulgent flavor. The combination of cocoa powder and nut butter gives it a rich, fudge-like texture, while the protein powder makes it a powerhouse snack. It’s like eating dessert but with benefits.
What Ingredients You Will Need
This recipe uses straightforward, wholesome ingredients that are easy to find and even easier to work with. Here’s what you’ll need:
- Nut Butter: Choose creamy almond butter, peanut butter, or sunflower seed butter (for a nut-free option).
- Protein Powder: Use your favorite flavor—chocolate works best for a rich taste, but vanilla is a great alternative.
- Cocoa Powder: Unsweetened cocoa powder adds the perfect chocolatey depth.
- Honey or Maple Syrup: Natural sweeteners to balance the chocolate flavor—use maple syrup for a vegan option.
- Oats: Rolled oats or quick oats for texture and added fiber.
- Dark Chocolate Chips: Optional, but highly recommended for extra indulgence.
- Sea Salt: A pinch enhances the flavors and balances the sweetness.
Optional mix-ins include chopped nuts, shredded coconut, or dried fruit for added texture and flavor. Feel free to get creative!
Equipment Needed
You don’t need fancy gadgets to make these protein bars. Here’s what you’ll need:
- Mixing Bowl: Use a medium-sized bowl for combining the ingredients.
- Spatula: A sturdy spatula works best for mixing and smoothing the batter into the pan.
- 8×8 Baking Pan: Perfect for shaping the bars—line it with parchment paper for easy removal.
- Measuring Cups and Spoons: Precision is key to getting the right texture.
- Refrigerator: To set the bars properly before slicing.
Don’t have a baking pan? Use a loaf pan or even a plastic container lined with parchment paper—it works just as well.
Preparation Method

- Prepare Your Pan: Line an 8×8-inch baking pan with parchment paper, leaving some overhang for easy removal later.
- Combine Dry Ingredients: In a mixing bowl, stir together the protein powder, cocoa powder, and oats until well combined.
- Mix Wet Ingredients: Add the nut butter and honey (or maple syrup) to the dry mixture. Stir until a thick, sticky dough forms. If the mixture feels too dry, add a tablespoon of water or milk at a time until it holds together.
- Fold in Chocolate Chips: If using, gently fold the dark chocolate chips into the dough for bursts of chocolate goodness.
- Press into Pan: Transfer the mixture to the prepared pan and press it down evenly using a spatula or your hands. Make sure to smooth out the top.
- Chill: Place the pan in the refrigerator for at least 1 hour, or until the bars are firm and easy to slice.
- Slice and Serve: Once set, use the parchment paper to lift the bars out of the pan. Slice into squares or rectangles and enjoy!
Pro Tip: If the mixture is too sticky to press into the pan, lightly wet your hands with water or spray them with cooking spray for easier handling.
Cooking Tips & Techniques
- Choose Your Protein Wisely: Opt for a high-quality protein powder with a flavor you love, as it affects the overall taste.
- Adjust Sweetness: Taste the mixture before pressing it into the pan—add more honey or maple syrup if you prefer sweeter bars.
- Don’t Overdo the Liquid: Adding too much water or milk will make the bars too soft and difficult to set properly.
- Mix Thoroughly: Ensure all the ingredients are well combined for consistent flavor and texture in every bite.
- Refrigerate for Slicing Ease: The longer you chill the bars, the easier they are to slice cleanly.
These tips ensure consistency and delicious results every time you make these no-bake chocolate fudge protein bars.
Variations & Adaptations
- Vegan Option: Use maple syrup instead of honey and plant-based protein powder for a vegan-friendly version.
- Nut-Free: Swap almond or peanut butter for sunflower seed butter, and skip the nuts in the mix-ins.
- Low-Carb: Replace oats with almond flour or coconut flour for a lower-carb option.
- Seasonal Twist: Add dried cranberries or pumpkin seeds for a festive flavor.
- Extra Crunch: Fold in chopped almonds, walnuts, or even puffed rice for added texture.
Personally, I love adding a sprinkle of flaky sea salt on top for a sweet and salty combo that’s utterly addictive.
Serving & Storage Suggestions
These bars are best enjoyed chilled directly from the fridge, but they also hold up well at room temperature for a few hours—perfect for lunchboxes or road trips. Pair them with a cup of coffee, tea, or a post-workout smoothie for a satisfying snack.
To store:
- Refrigerator: Keep the bars in an airtight container for up to 1 week.
- Freezer: Freeze them for up to 3 months. Wrap individual bars in plastic wrap for easy grab-and-go options.
To reheat or thaw frozen bars, let them sit at room temperature for about 10 minutes. The flavors deepen over time, so they taste even better after a day or two!
Nutritional Information & Benefits
Each bar is packed with protein, healthy fats, and fiber to keep you energized and satisfied. Here’s an approximate breakdown per serving:
- Calories: 200-250
- Protein: 10-15g
- Fat: 10-12g
- Carbohydrates: 15-20g
The combination of oats and nut butter provides sustained energy, while cocoa powder offers antioxidants. These bars are gluten-free (if using certified oats) and can be made vegan with simple swaps. Plus, they’re free from artificial sweeteners and preservatives!
Conclusion
If you’re looking for a snack that’s healthy, indulgent, and ridiculously easy to make, these no-bake chocolate fudge protein bars are the answer. They’re versatile, packed with flavor, and perfect for your meal prep routine or spontaneous cravings. I love how they feel like a treat but fuel my body with nutrients, and I know you’ll feel the same.
Give this recipe a try and let me know how you customize it to make it your own! Drop a comment below or share your creations with me. Happy snacking!
FAQs
Can I use whey protein powder?
Yes! Whey protein works well, but you may need to adjust the liquid slightly as it tends to absorb less than plant-based powders.
Are these bars gluten-free?
They can be if you use certified gluten-free oats. Always check your ingredient labels to ensure compliance.
Can I skip the chocolate chips?
Absolutely! The bars are still delicious without them, though they add a nice texture and extra chocolate flavor.
How long do these bars last?
In the fridge, they stay fresh for up to a week. In the freezer, they can last for three months.
What’s the best way to slice the bars?
Use a sharp knife and slice them while they’re cold for clean, even cuts.
Pin This Recipe!
No-Bake Chocolate Fudge Protein Bars

These no-bake protein bars are rich, chocolatey, and packed with protein, making them a perfect healthy snack or post-workout treat.
- Prep Time: 15 minutes
- Cook Time: 0 minutes
- Total Time: 1 hour 15 minutes
- Yield: 8 servings 1x
- Category: Snack
- Cuisine: American
Ingredients
- 1 cup creamy almond butter, peanut butter, or sunflower seed butter
- 1 cup protein powder (chocolate or vanilla)
- 1/4 cup unsweetened cocoa powder
- 1/4 cup honey or maple syrup
- 1 cup rolled oats or quick oats
- 1/4 cup dark chocolate chips (optional)
- Pinch of sea salt
Instructions
- Line an 8×8-inch baking pan with parchment paper, leaving some overhang for easy removal later.
- In a mixing bowl, stir together the protein powder, cocoa powder, and oats until well combined.
- Add the nut butter and honey (or maple syrup) to the dry mixture. Stir until a thick, sticky dough forms. If the mixture feels too dry, add a tablespoon of water or milk at a time until it holds together.
- If using, gently fold the dark chocolate chips into the dough.
- Transfer the mixture to the prepared pan and press it down evenly using a spatula or your hands. Smooth out the top.
- Place the pan in the refrigerator for at least 1 hour, or until the bars are firm and easy to slice.
- Once set, use the parchment paper to lift the bars out of the pan. Slice into squares or rectangles and enjoy!
Notes
Taste the mixture before pressing it into the pan to adjust sweetness. Wet your hands or use cooking spray if the mixture is too sticky to handle.
Nutrition
- Serving Size: 1 bar
- Calories: 200250
- Fat: 1012
- Carbohydrates: 1520
- Protein: 1015
Keywords: no-bake, chocolate, protein bars, healthy snack, gluten-free, vegan option


